Sometimes breaking something makes it better. I learn this lesson over and over, working on dollhouses.

One short day after posting about the front door pediment I made for the Victorianna, I destroyed it. I was checking to see how it fit into the hole I cut into the siding, and pressed on the center piece too hard. The only points of contact were where the spokes touched the arch — not very secure.

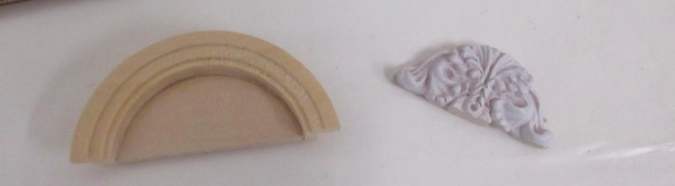
I tried to glue it back together and failed miserably. Luckily I have another $2 flea market window so I could make a new one. But first, looking at the arch I was left with, I started thinking about what else I could do with it. I dug through my stash and found this resin embellishment.

(This came on a card with a circular embellishment I’m planning to use as window trim on the Elizabeth Anne. I’ll get around to that kit when the Victorianna’s finished… someday.)
With a little trimming, I could make the embellishment fit inside the half circle of trim.

I made a back piece by tracing the half circle onto a scrap of basswood. If I’d done this in the first place, the spokes would have had some support and wouldn’t have broken off, but I’d planned to paint behind the spokes with a contrasting color and hadn’t been ready to do that yet. Oh well.

Here’s an easy way to cut basswood into a clean curve: make straight cuts around the curve, and then sand it the rest of the way.

I glued in the back piece and shaped the resin piece to fit inside.
Here’s how it looks painted. I painted the back piece before gluing in the resin piece, hoping the color on the back would help fill in the gaps, but it looks kind of sloppy.

I used a toothpick to pack crumbs of woodfiller into the cracks.

Much neater! Once I glue this in for good, I’ll go over the bottom seam with paint to fill in those dark spaces.

To be honest I’m glad it broke. I like it better this way.

In other Victorianna news, here’s how the bay window in the little girl’s room looks with baseboard added.

And the downstairs bay window with everything but the baseboard. The header is straight this time (unlike upstairs where it came out crooked), but window trim on the right is slightly higher than the other windows — which, of course, will bother me until the end of time. Sigh. But I like how it turned out otherwise!

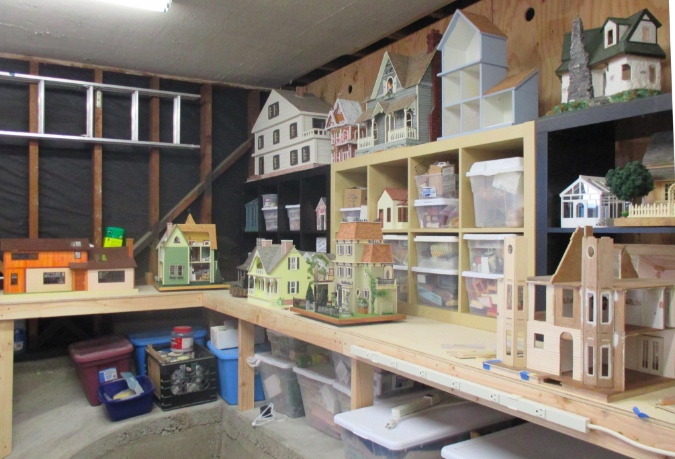
I also have a couple of new workshop photos to share. A couple of weeks after I got the new workshop all set up, a neighbor was giving away IKEA Kallax shelves for free. I hadn’t been sure if I wanted more, but you can’t argue with free! So, I got the two black ones and did a bit of rearranging. On the cube, I was able to remove two of the dividers to create wider cubbies. I would have liked to do that to a few of the cubbies on the larger units, too, but the only shelves that are removable are the horizontal ones.
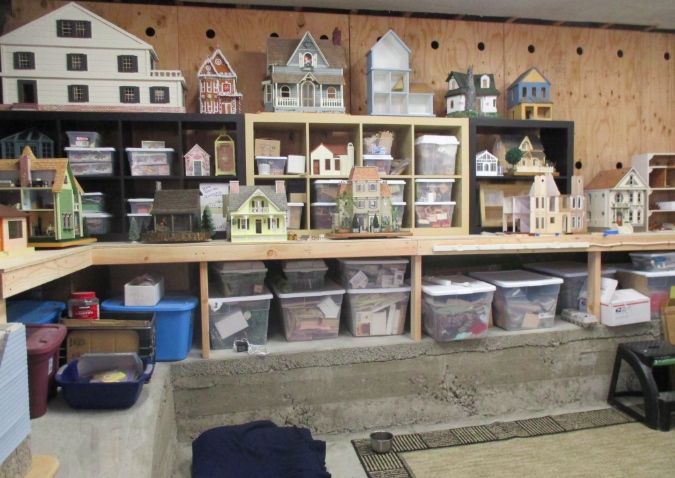
I also added a rug, which I’d been wanting to do but didn’t want to pay for. We got a few new rugs for upstairs so one that had been upstairs was demoted to the workshop. It was always kind of a crappy rug, and this way I can sit on the floor without having to sit on concrete — win win! (Note the dog bed in the corner. Rosy likes to play dollhouse with me sometimes.)
Also, Geoff extended the shelf that goes around the ledge. The Fairfield wouldn’t fit in front of the shelving units (not enough space for it to rotate), so this gives it a nice space to live. And he added a power strip to the front of the shelf.
 Emily is a freelance writer, miniaturist, and adventure game enthusiast.


Funny how accidents can sometimes provide the impetus to create something more wonderful. This time around your unfortunate accident was a lucky one and the resulting pediment is very pretty…it’s always good to get a reminder that we can create even when faced with broken bits and pieces. An impressive work space too!
Great save! It looks really nice :D