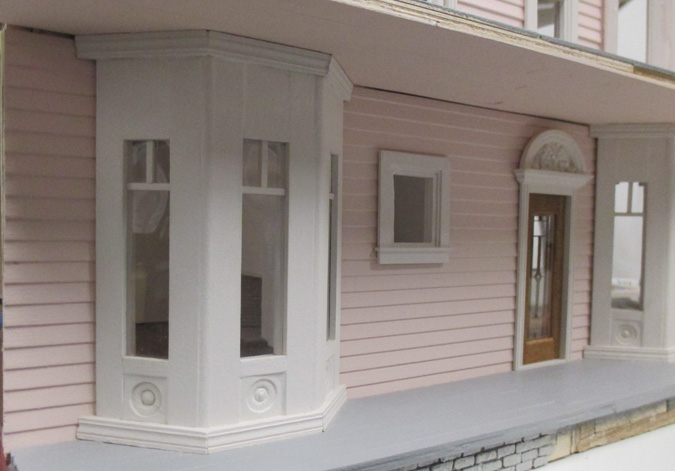
“Frilling” might not be the right word (or a word at all), but after I completed the Victorianna’s downstairs bay windows I felt like they were a little too plain. I wanted to spruce them up a bit before adding the porch trim, which will make them harder to reach.
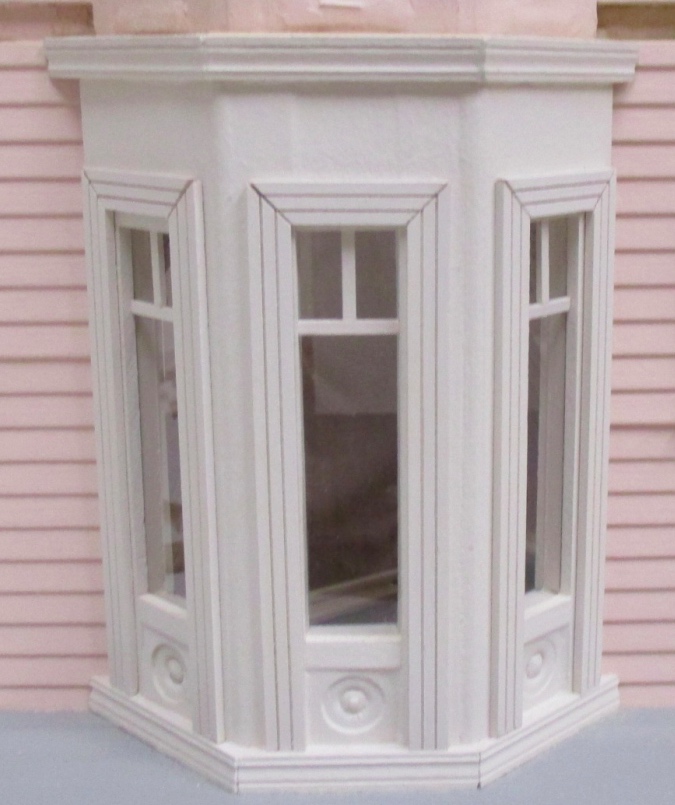
Here’s what I started with.
All the empty space above the window was bugging me. I wanted to add some sort of pediment, ideally a semi-circle to mimic the top of the door. In 1:12 scale you can buy something like that, but I couldn’t find anything similar in 1:24 scale or G scale train supplies. I was thinking about what I could cut in half — wooden checkers, for example — but everything I came up with was too big or too complicated.
I kept coming back to this semi-circle window doodad from Victorian Dollhouse Wood Works on eBay. I used these on my Queen Anne Rowhouse and didn’t necessarily want to repeat the same trim on another house, but I couldn’t find anything else that was comparable. The sticking point was that the trim is 1-1/8″ wide, and the windows are just 5/8″ wide.
After looking at a lot of pictures of bay windows for ideas, I decided to add casing around the windows. This makes the windows “pop” (as they say on HGTV), plus it adds enough width to accommodate the window doodad. As an added bonus, the left-hand window on the left bay was slightly shorter than the others, and casing that’s the same height on all the windows draws your eye away from the unevenness.
Looking at the one bay with casing compared to the one without convinced me it’s the right choice.
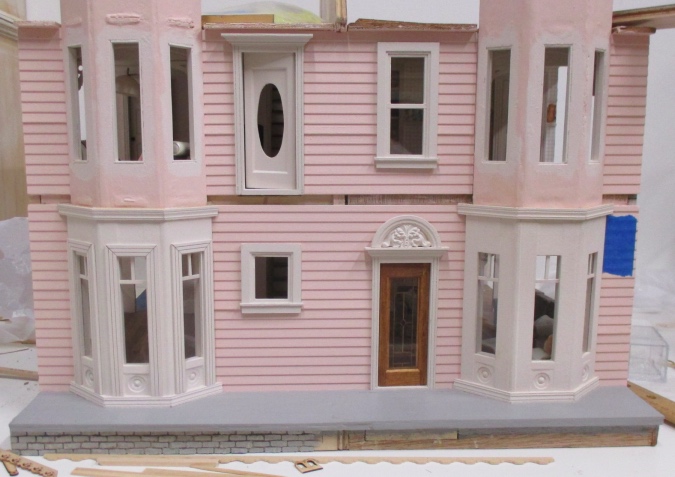
I added casing to the other bay window. When the glue was dry I filled in the cracks at the corners with wood filler, using a toothpick to scrape wood filler out of the grooves in the casing. This was much easier to do on the outside of the house than on the interior windows! Then I painted over the corners
Here’s how it looks with the over window trim pieces, plus a piece of scalloped micro trim I ordered from Heritage Laserworks.

The window doodads needed to be painted carefully, with very little paint on the brush, to keep from globbing up the cut-outs.

This wood sucks up the paint, plus I think the dark color of the charred edges got mixed into the paint. After two coats they were still looking kind of gray compared to the rest of the trim.

I did a couple more coats of paint, then glued everything on. My first reaction was that I loved the doodads, but wasn’t sure about the scalloped trim under the crown. It was hard to glue on, because the pieces behind it weren’t completely flush with each other and the crown wasn’t completely straight. And it just looked kind of sloppy and “off.”

Ignoring the nagging inner voice that was telling me to take it off, I tried painting over the scalloped trim to get rid of the seams between it and the crown. Then I stepped back and looked at it with the porch in place.
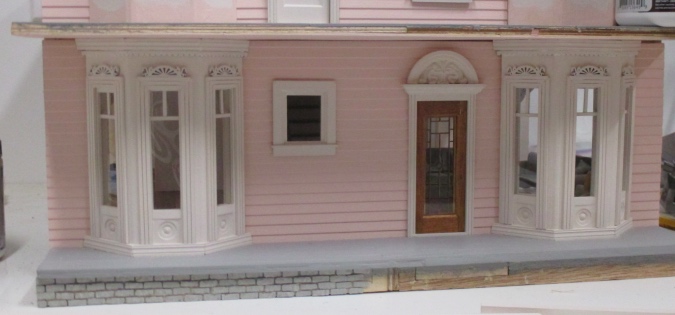
I still wasn’t happy with it, but I told myself I was being too nitpicky and walked away. (It’s tiny! It’s under the porch, in shadow! You hardly see it anyway!) Twenty minutes later I was back, pulling it off. Luckily, since it hadn’t glued on very well in the first place, it popped right off. With a little sanding I got the area under the crown smooth again and touched up the paint.

I’m satisfied with this. Next up: the porch!

 Emily is a freelance writer, miniaturist, and adventure game enthusiast.


Leave a Reply