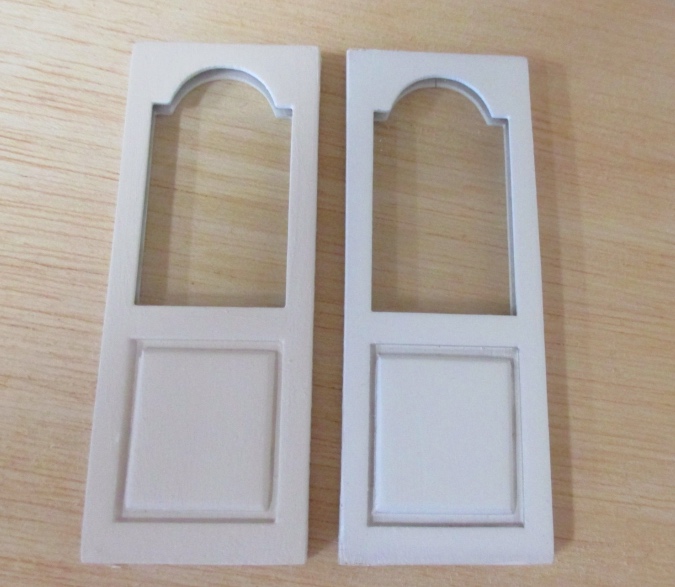
Continuing with the linen closet that only exists because I cut a piece of wallpaper badly: I painted the door and the closet Tuscan Beige, the trim color I’m using throughout the house. It looks white when there’s nothing white near it, but here you can see how different it is from the bright white that the door was originally painted.
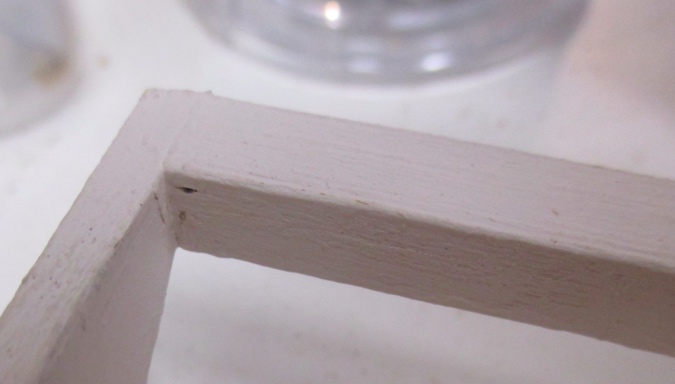
To pin hinge the door, I laid it in the frame and used the micro drill to drill a hole through the bottom of the frame and up into the door.
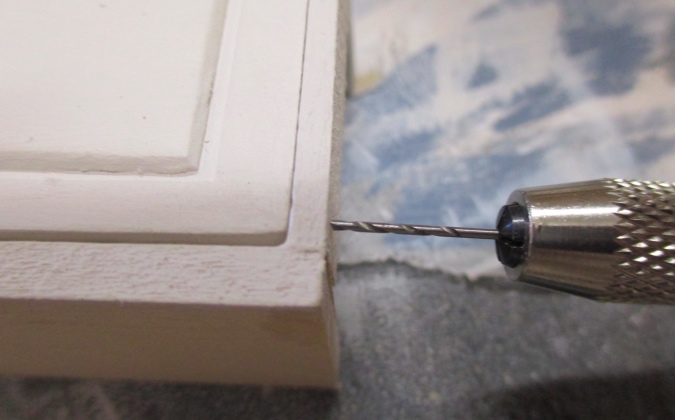
This resulted in a hole pretty close to the side and front of the door. I’m glad I drilled them both at the same time, because my instinct would have been to make the hole closer to the center.
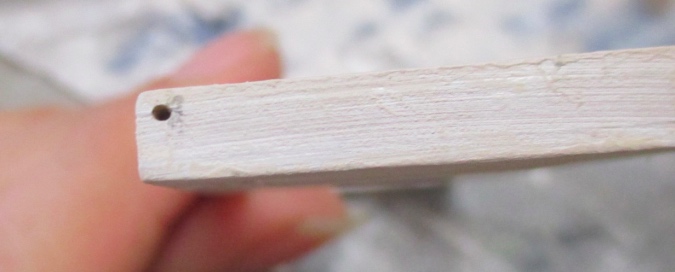
The top of the closet is much thicker than the bottom, so I couldn’t drill through the top piece the same way. Based on the location of the hole on the bottom, I drilled a hole at the top in about the same spot. Then I cut down a pin and stuck it into the hole with the pointy part sticking up.
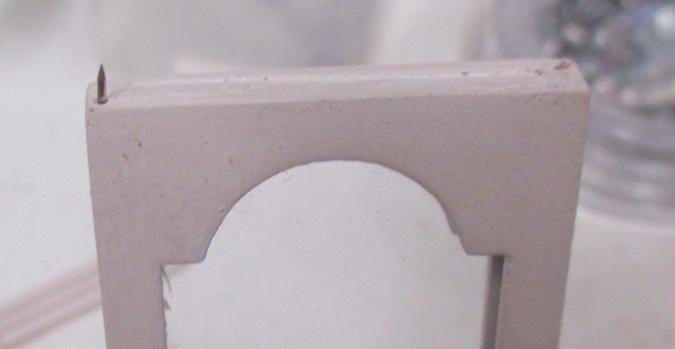
I slipped the door back into the frame, stuck in a piece of wire from the bottom to act as the hinge (to ensure the door was positioned correctly), and pushed the door upward so the pointy pin made a hole in the top of the frame.
Next I added a knob made from a cut-down pin (the other side of the pin I’d cut down for the upper hinge) and a clear seed bead. The towels inside are cut from a chenille Dollar Store washcloth. I glued them in, since the closet will be very hard to access once it’s glued into the house.
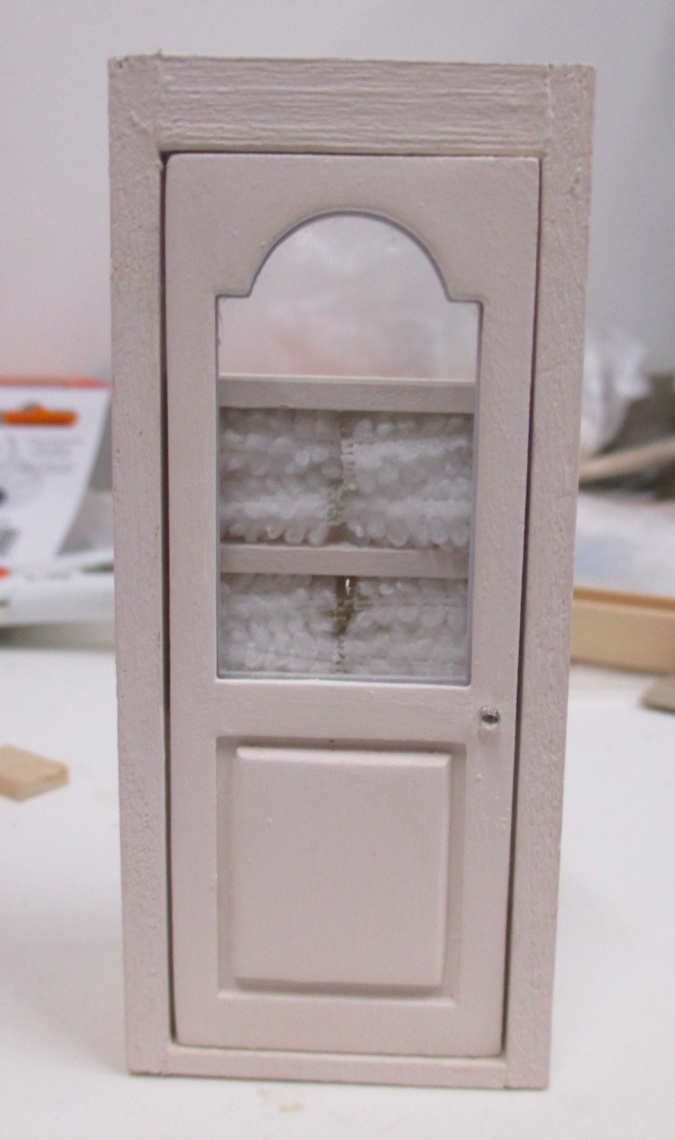
The top shelf doesn’t quite meet the ceiling, so there’s a visible gap behind the shelf. Rather than try to make the closet a perfect fit, I can hide that gap with stuff on the shelf.
I still have toilet paper rolls left over from last year’s half scale swap, but I didn’t want them to be loose on the shelf, so I made a basket to hold them.
I started with a piece of scrap wood and a strip of fabric out of my cross stitch stash. I think the fabric is waste canvas — it’s stiffer than normal evenweave, more like needlepoint canvas, but with a high thread count that seems appropriate for a 1:24 basket. After I cut the strip, I ran a bead of anti-fraying glue along the top edge to secure it.
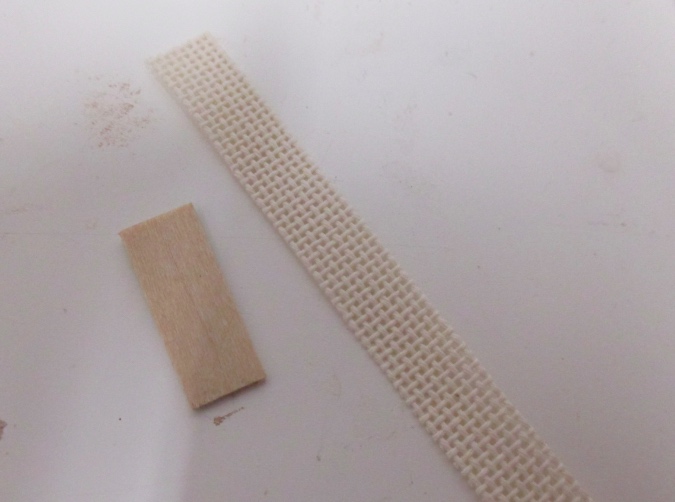
My original intent was to make a cloth lined basket as shown in this tutorial, but since the basket is so small and will be hard to see up on the shelf, I decided to skip the fabric. Instead I glued a piece of colored scrapbook paper to the strip wood bottom, in the unlikely event you can see the bottom of the basket from some angle.

Next I ran tacky glue around the edges of the bottom piece and wrapped the canvas around it. The two ends meet up in the back, with a slight overlap.

For piping around the top and bottom, I cut a piece of DMC Flower Thread, which is basically like 6-strand embroidery floss but only one strand. I don’t think this stuff is readily available — I bought a few skeins on clearance after making the sofas last summer, thinking it would work better for piping than the embroidery floss did, but this is my first time actually using it. A pastel color would have been better for this basket but I only bought it in tan and brown.

I added the Flower Thread around the top and bottom. As I suspected, the single strand works better for piping than the 6-strand floss did, and I will definitely use this if I make another sofa. If you don’t have access to Flower Thread, regular DMC floss would work fine, but it might want to unravel as you go around the edge of the basket, so keep twisting it to keep the strands tight.

The waste canvas is more flexible than wicker would be, and I don’t know how well it would hold up for a larger basket, but it gets the job done for this.

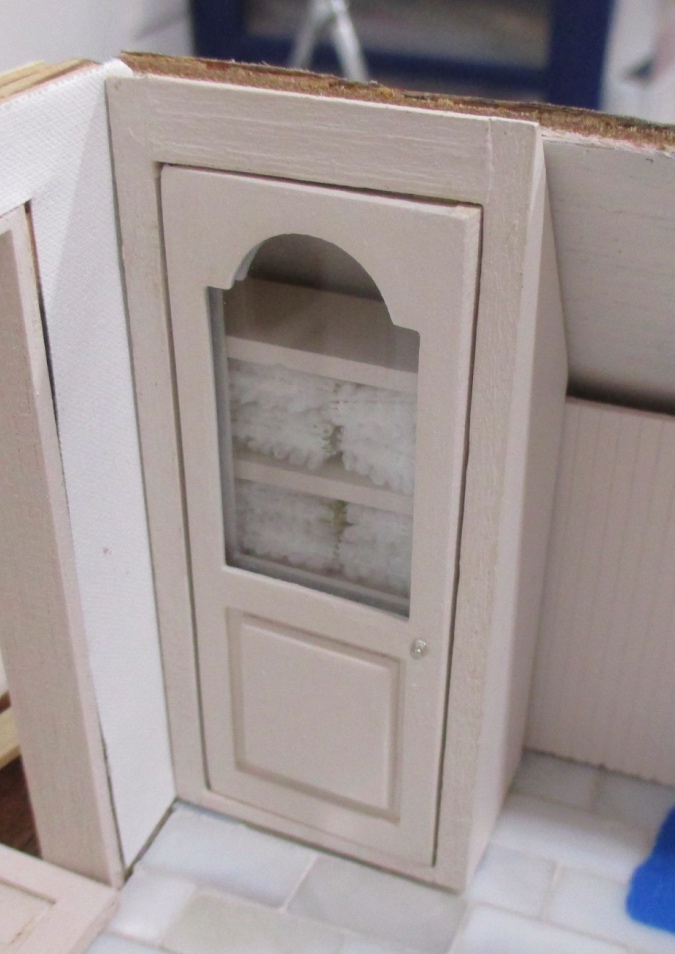
Finally I added trim around the outside of the closet. This almost wasn’t necessary – the frame looked okay without it, but the door wasn’t quite flush and the trim helps hide that. The trim doesn’t completely cover the top of the closet, but once everything is glued in that area will be covered by the molding where the wall meets the ceiling.

Here’s the finished linen closet with the vanity. The vanity will have a sidesplash where the counter meets up with the linen closet.

Once I glued in the toilet paper basket and a lotion bottle, the gap behind the shelf is totally hidden! I plan to add a hamper to the bottom of the linen closet, maybe made with the same fabric as the basket.

Now that the closet is finished, the order of operations will be to glue in the sloped ceiling, then glue in the closet, then add wallpaper to the sloped ceiling and trim at the top of the beadboard. If I can’t get the sloped part of the closet totally flush against the ceiling, it will be easy enough to cover up that gap with trim as well.

 Emily is a freelance writer, miniaturist, and adventure game enthusiast.


I love built in closets in mini houses.. So cute!