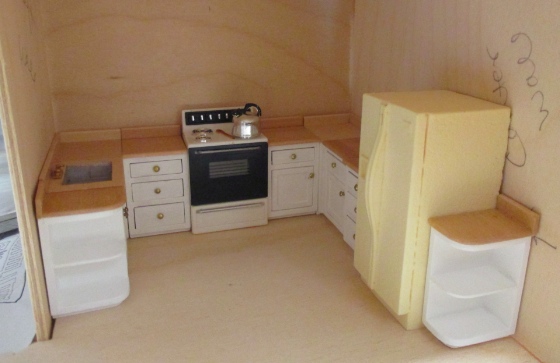
When I first started working on the Victorianna, I bought a set of kitchen cabinets from Bruce Dawson, who sold under the name bedMiniatures (he’s since retired). I planned out a U-shaped layout.
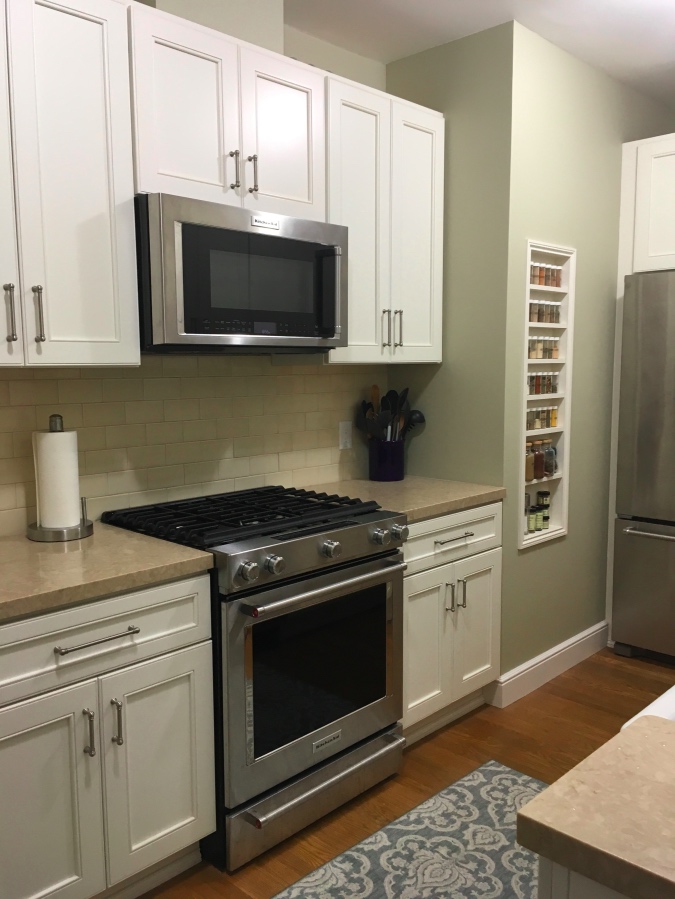
Since then, I redid the kitchen in my real house, and learned a lot about kitchens that I never knew before. For example: the upper cabinets should be 18″ inches above the countertop, or up to 20″ if you have high ceilings and can get away with it. Who knew? In my dollhouse kitchens I’ve always just eyeballed it.
(Okay, okay, *I* didn’t redo the kitchen. Geoff did most of the work. But I picked out everything that went in it!)
Now that I’ve been through that process in real life, the kitchen I’d planned for the Victorianna doesn’t look as good to me as it did before. For one thing, the upper cabinets are tiny — this kitchen has the equivalent of 10′ ceilings, but the cabinets are only 30″. (In my real kitchen, which has 9′ ceilings, we used 40″ cabinets.)
I also regretted my choice of white appliances. I’d tried chrome paint for “stainless” appliances in the Rosedale and wasn’t thrilled with how those turned out, so I thought using white here would help me avoid some angst, but they don’t pop the way stainless steel does with white cabinets. Also, while I like the stove (made from a Mini Etchers kit), the paint I used, which was supposedly “glossy white”, came out yellowish and dingy.
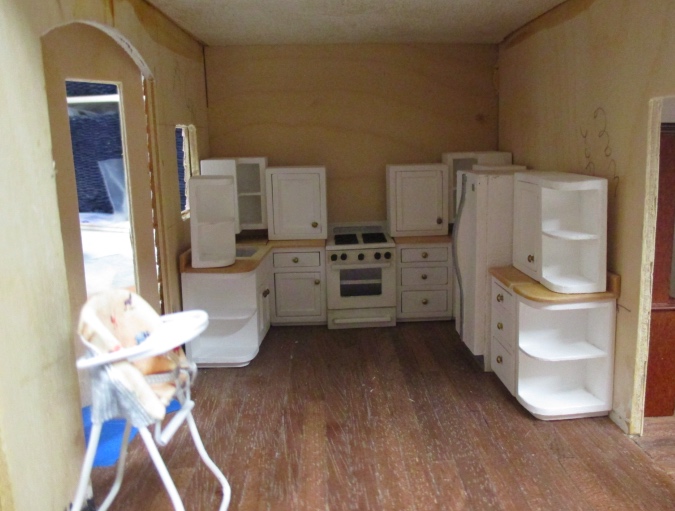
Long story short: I decided to put all of these pieces aside for some other house and scratch build the Victorianna’s kitchen cabinets instead.
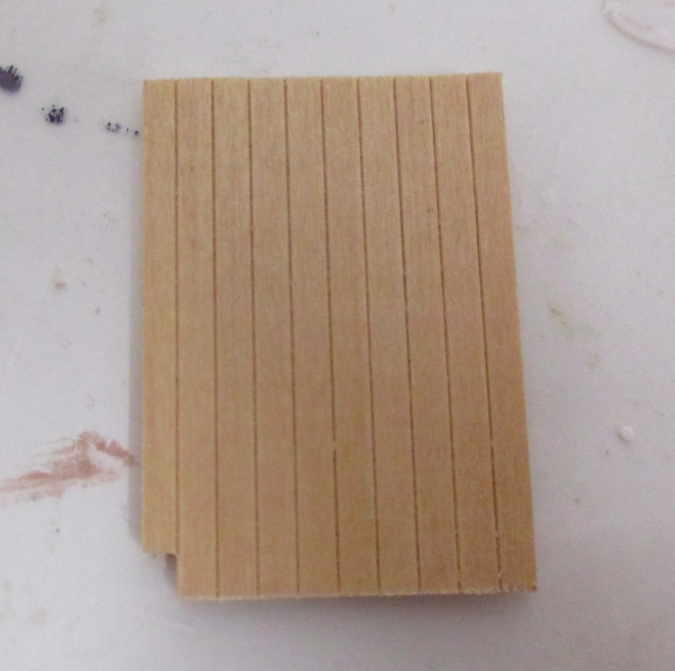
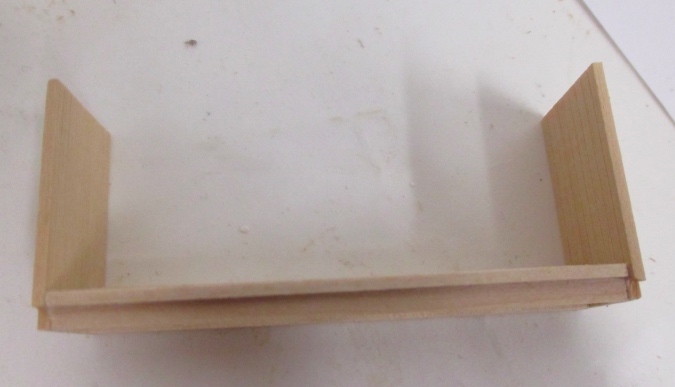
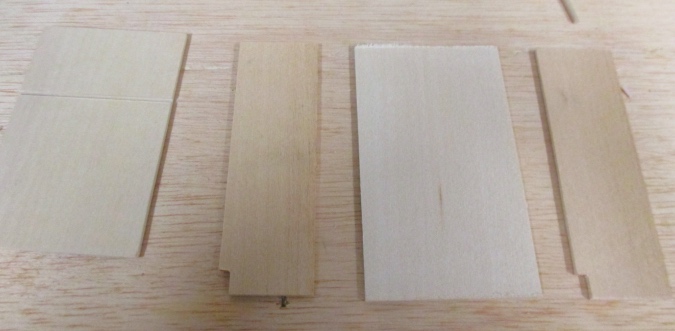
For the side and front pieces of the cabinets, I’m using this scribed wood — I have a lot of it lying around, and the scribed lines make it (relatively) easy to cut along the grain without the lines being all wavy. This will allow me to use pieces of wood that aren’t standard strip wood widths.
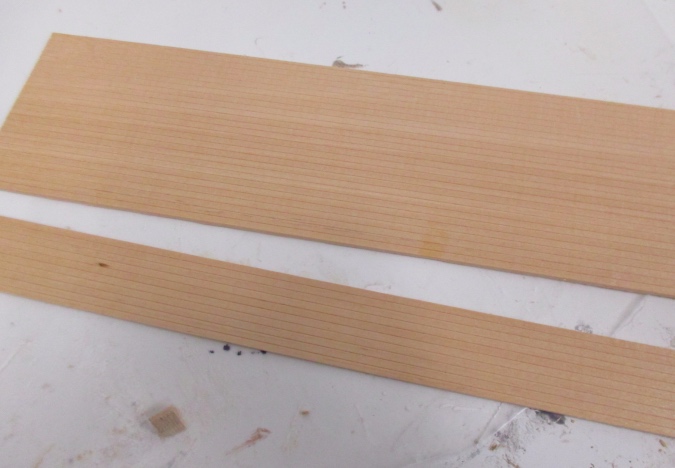
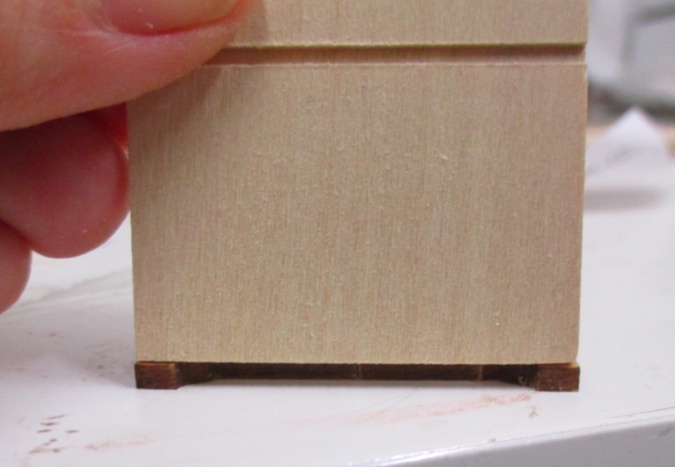
I cut side pieces using the bedMiniatures cabinets as a guide. The scribed lines made it easy to notch out the toe kick.
I started with the cabinet under the window, which will hold the sink. I glued a piece of 1/4″ square basswood along the back bottom edge.
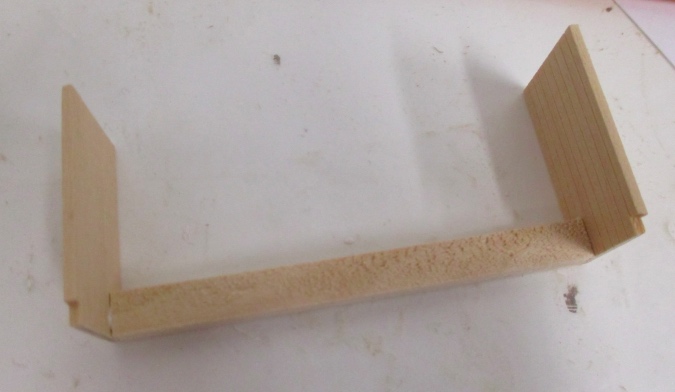
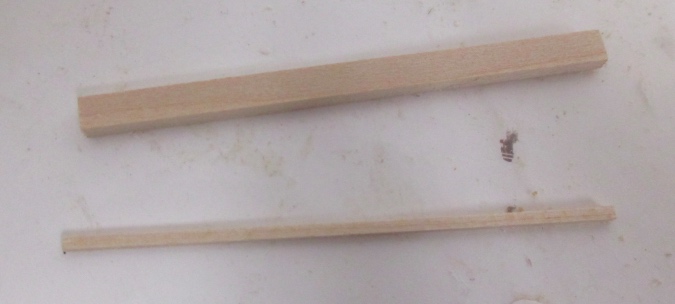
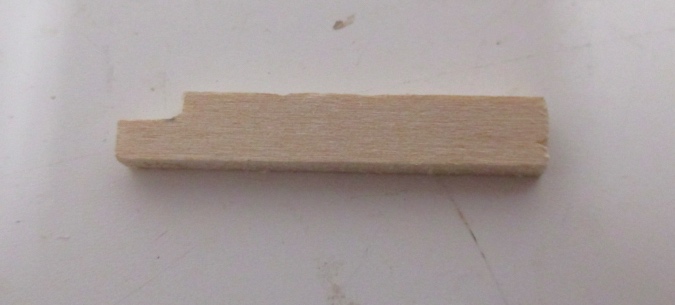
Next I made the toe kick. This is made from a back piece that’s 1/16″ taller than the toe kick area, and a 1/16″ x 1/16″ top piece.
I added another 1/4″ square support (low enough that it won’t interfere with the sink) and popped it into house to make sure it fit. (Just like my real kitchen, the Victorianna’s walls aren’t square!) The cabinet fits perfectly between the wall and the bay window trim.
Next I attached a front piece. I’ll glue on false door and drawer fronts later on.
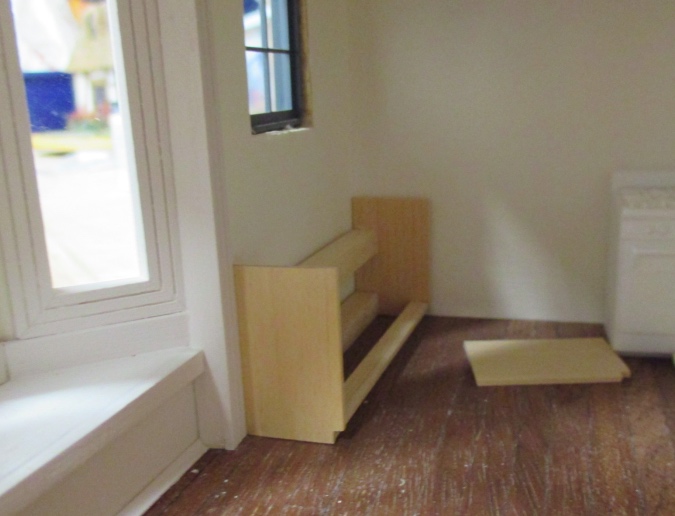
At this point I figured out how big to make the cabinets on either side of the stove so the stove will be centered on the wall. The cabinet to the left of the stove is just a side piece with three 1/4″ supports that will attach to the first cabinet.
I glued the front piece on and put the cabinets next to each other to see how they’ll look. The toe kick on the smaller cabinet it needs to be a little wider than the cabinet itself, so it will bump up against the toe kick on the bigger cabinet.

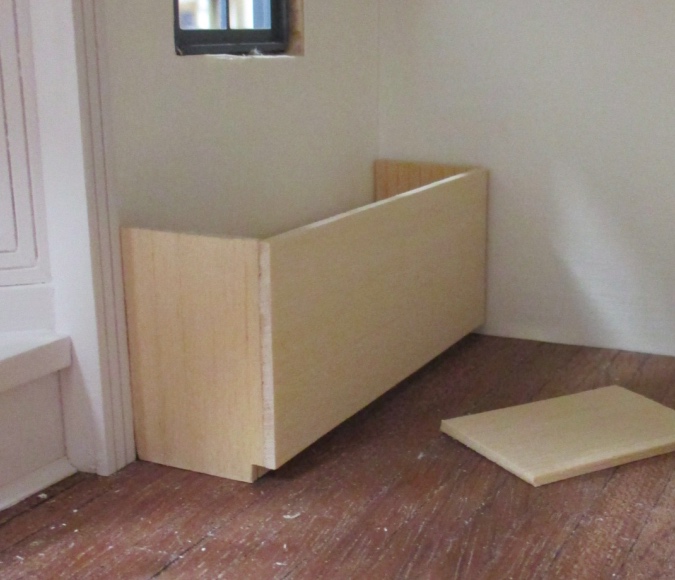
This time I glued the top piece of the toe kick to the back of the cabinet first.

Then I glued the two cabinets together.
Then I cut a back toe kick piece to the correct length. Because this piece is slightly taller than the toe kick area, I had to cut out a notch where it butts up against the bigger cabinet. (I feel like I’ve done a horrible job explaining this, so if you have no idea what I’m talking about, I apologize!)
Here’s how it looks glued together.

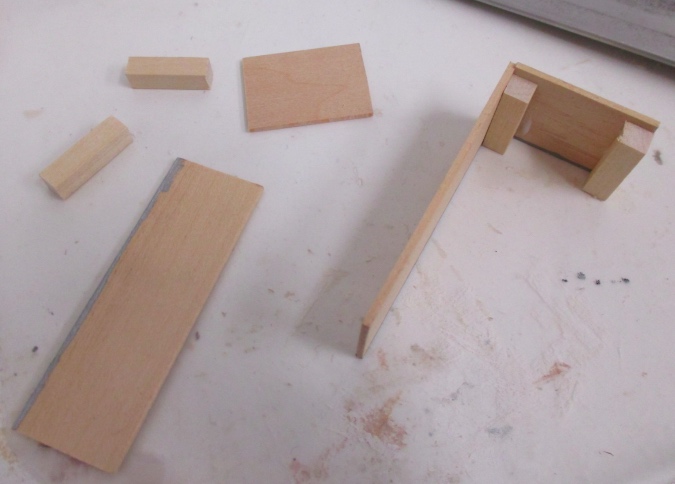
Next I built a cabinet to go to the right side of the stove. I got this stove from Shapeways — I love how modern it is, but I’m dreading painting it.
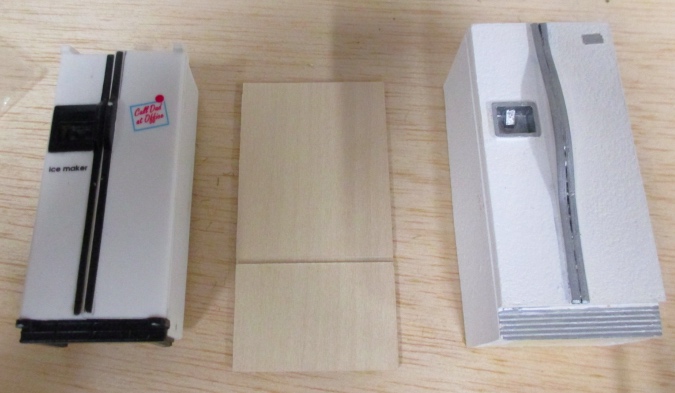
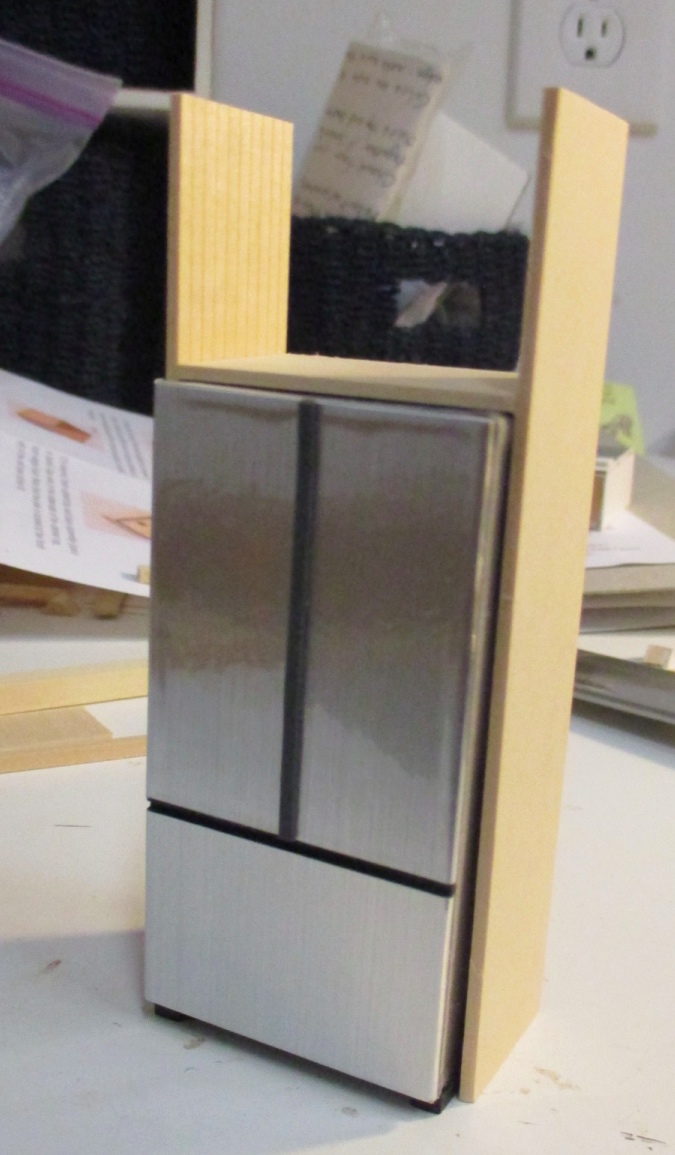
I wanted a French door fridge, but couldn’t find one in half scale, not even at Shapeways. I had this in my stash — a very basic (and out of scale) refrigerator kit. The freezer is supposed to be on top, and there’s a line routed into the wood to separate the two doors. Because it’s a bit bigger than a half scale fridge should be, I can get away with flipping it over to put the freezer at the bottom.
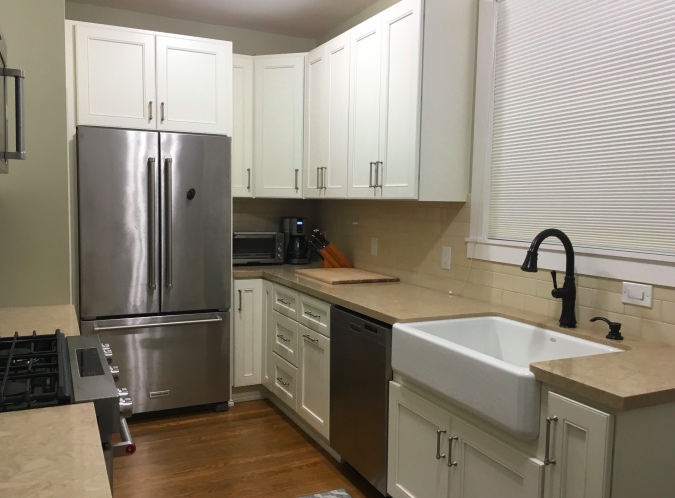
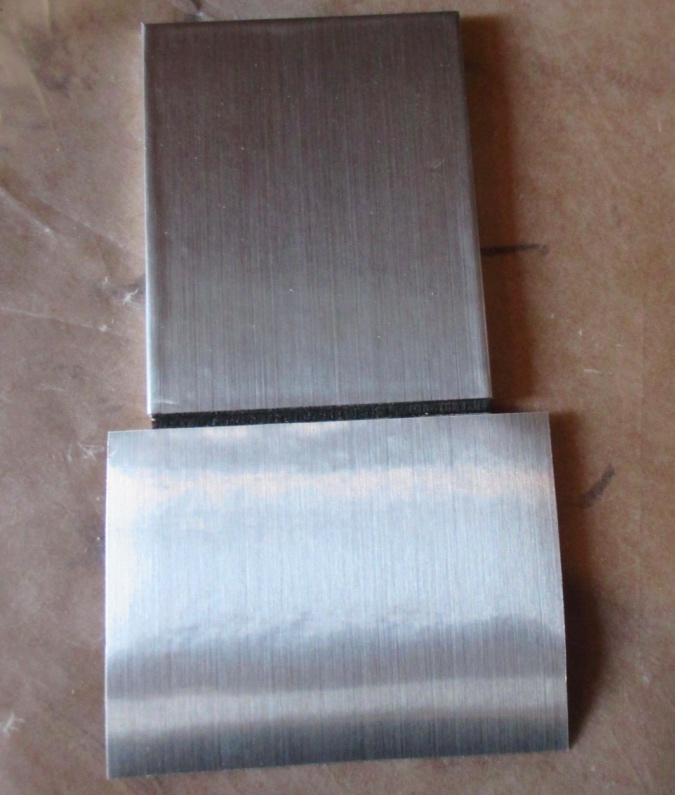
It’s also too wide — the equivalent of 43″. Here you can see how much wider it is than the resin fridge I’d planned to use. Standard fridge widths are 30″ to 36″. The only ones wider than that seem to be built-ins, which isn’t what I want. (My own refrigerator is 36″ wide.)
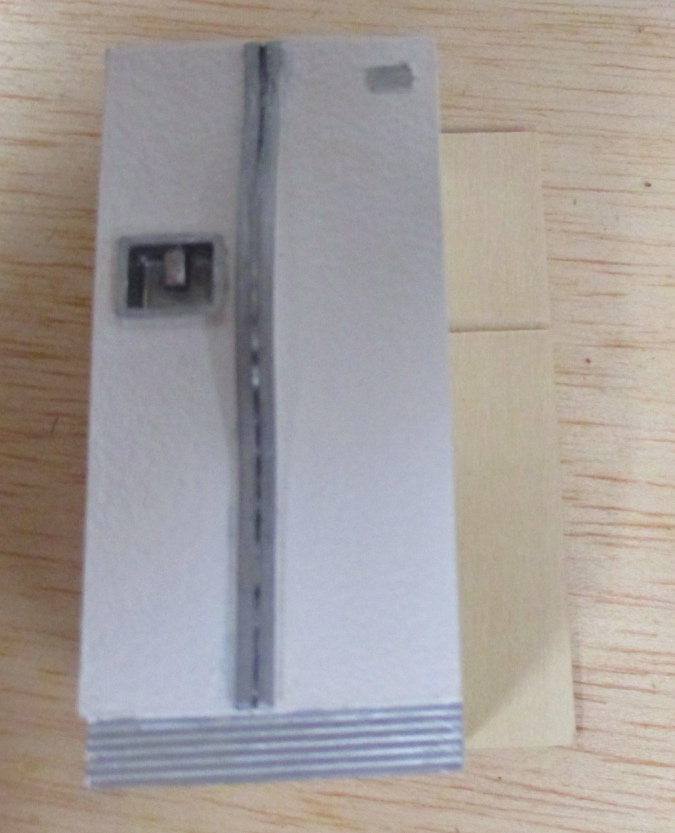
I cut down the front to 1.5″, the equivalent of 36″ in half scale. That looks much more in line with these other half scale fridges.
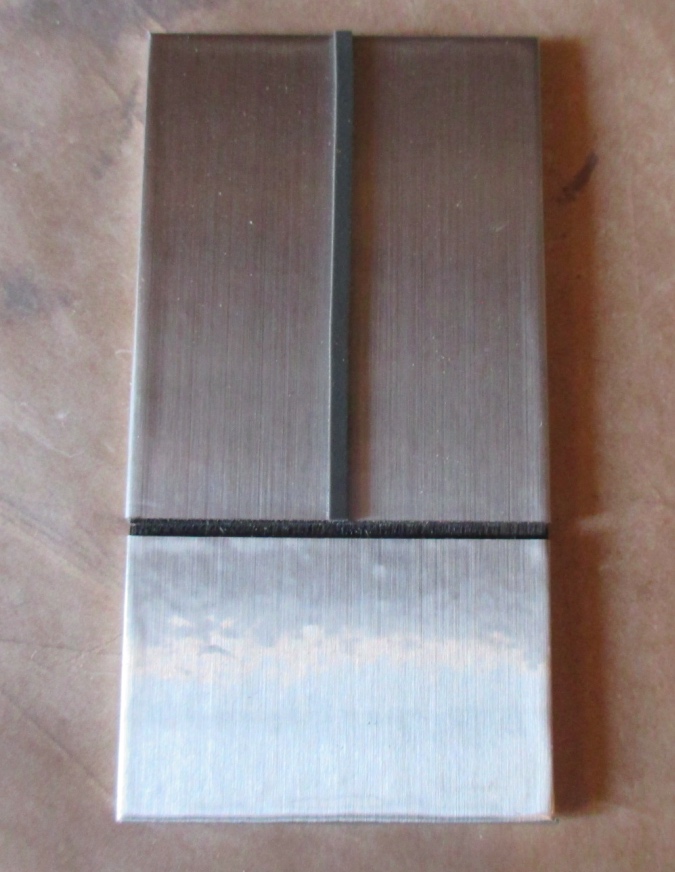
The bottom of my real refrigerator looks like this:

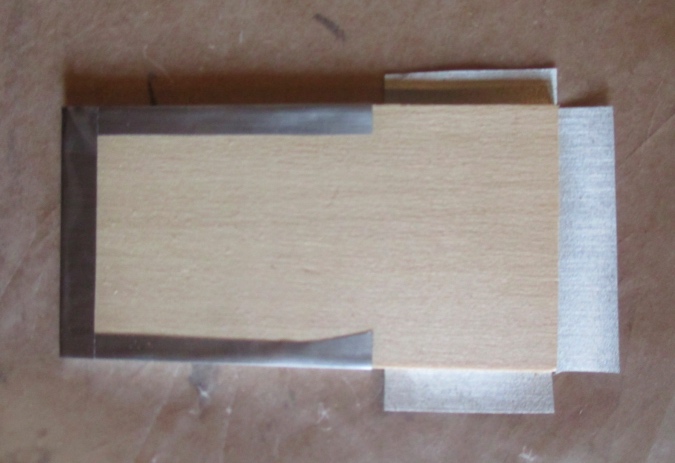
This reminded me of a piece I had laying around that I didn’t use when I built the sleigh bed kit for the little girl’s room. (I used its mate on the vanity in the master bathroom.)
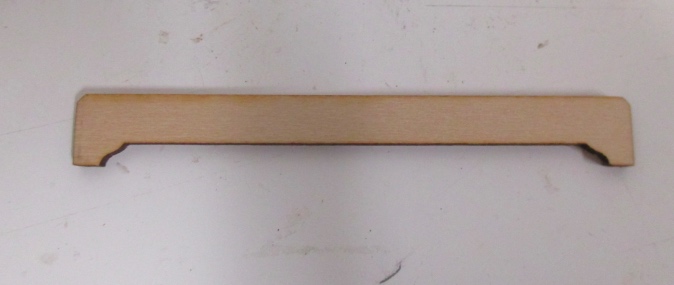
The piece was 3″ long. I cut the ends off and put them together to make a 1.5″ piece.
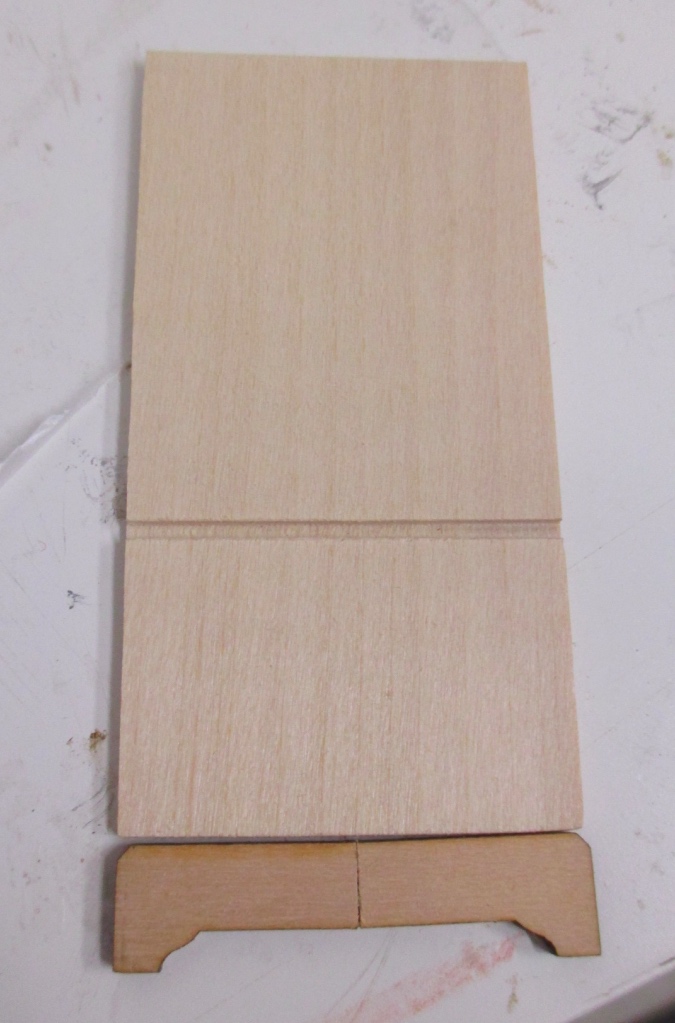
Here’s how it’ll look with the door over it.
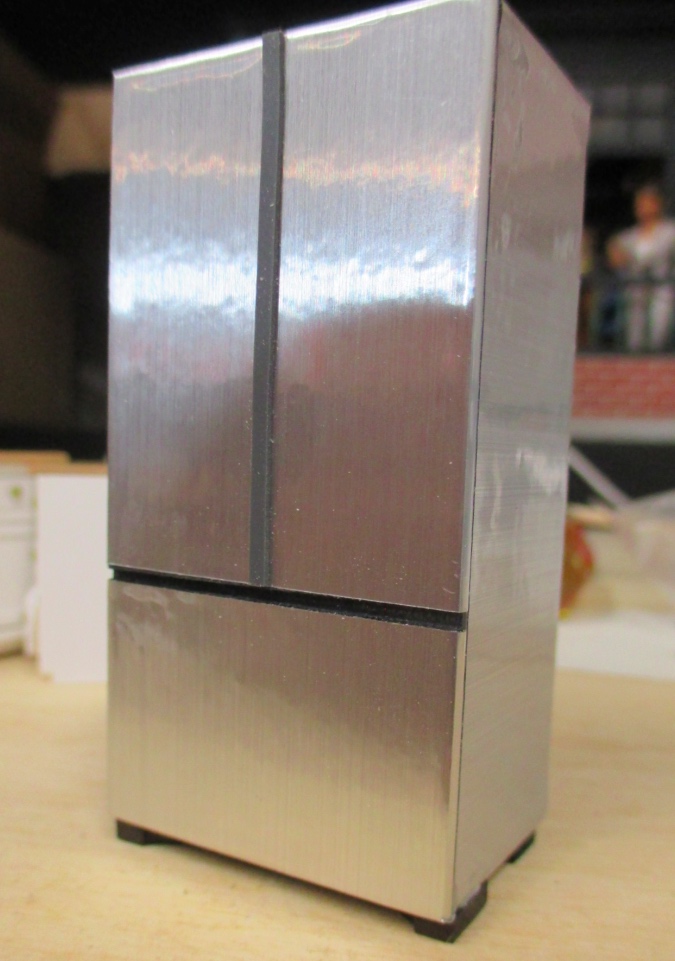
Since painting the wood didn’t work out so well in the Rosedale, I turned to the Greenleaf forum to get ideas for achieving a stainless look. Someone suggested stainless steel contact paper — this stuff is awesome! It’s shiny and has a grain like real stainless steel, but is also easy to cut, and not so sticky that it turns into a wrinkly mess when you try to put it on. Two thumbs up!

I painted the grooved area between the doors, and then applied a piece of contact paper to each door. To do this, I cut a piece slightly larger than the door, peeled off the paper, and stuck it on, flattening out the air pockets the best I could.
Then I flipped it over, cut notches to accommodate the corners, and folded the edges down over the back of the door.
I love it! So shiny!

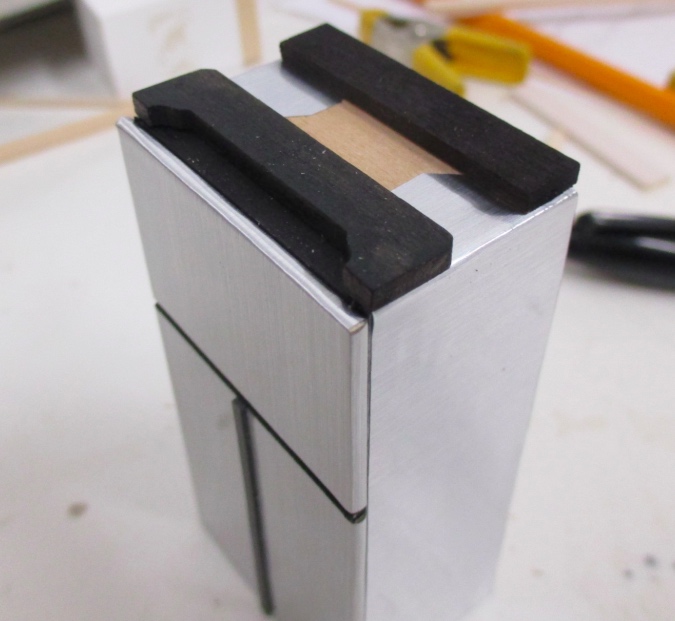
I tried using Gallery Glass lead line tape to differentiate the two doors. It was a valiant attempt but the tape is too wide. (It’s 1/16″, which is about the same width as the groove routed into the wood, but on my real fridge the gap between French doors is smaller than the gap between the doors and the freezer.) It also sticks up too much, calling attention to the fact that it’s on top of the doors rather than a gap between them, and it’s gray rather than black. Three strikes, you’re out.
After giving it all afternoon to grow on me, I decided I can’t live with it. Luckily it isn’t very sticky, so I should be able to peel it up without messing up the contact paper. I ordered some 1/32″ and 1/64″ tape from Amazon, hopefully one of those will look better.
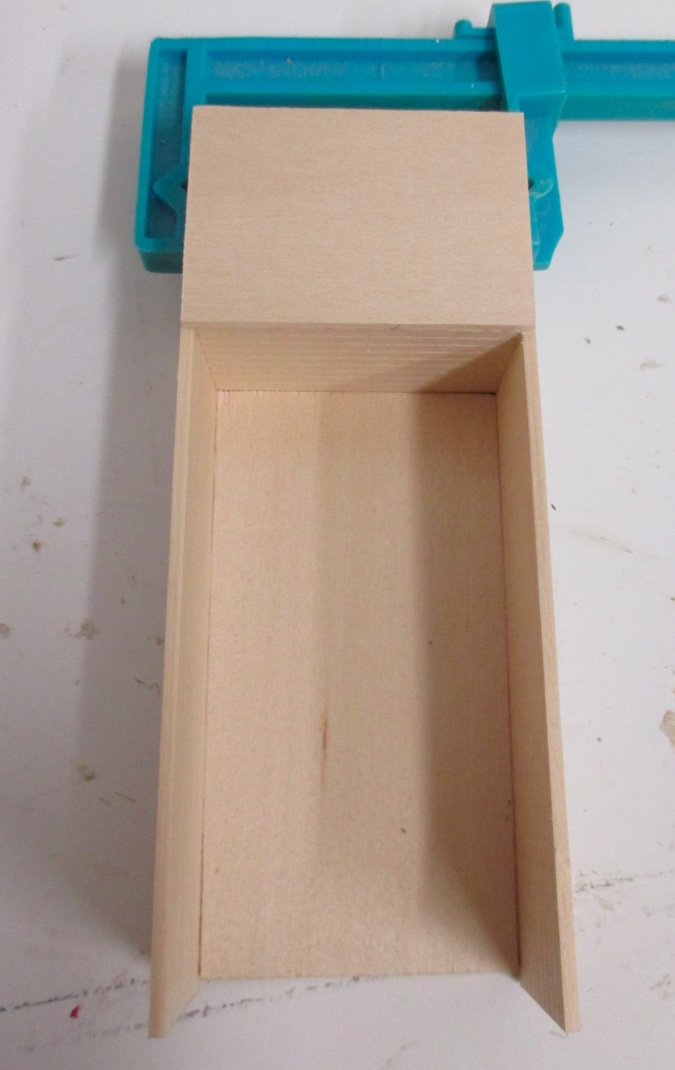
Next I built a box for the fridge, using modified pieces from the original kit and pieces of 1/4″ square wood in the corners to make it square.
I colored the front edges of the wood with a silver Sharpie before applying contact paper to the box, just in case any wood showed. (Initially I only did this on the sides, but also ended up coloring in the fronts before gluing on the front of the fridge.)
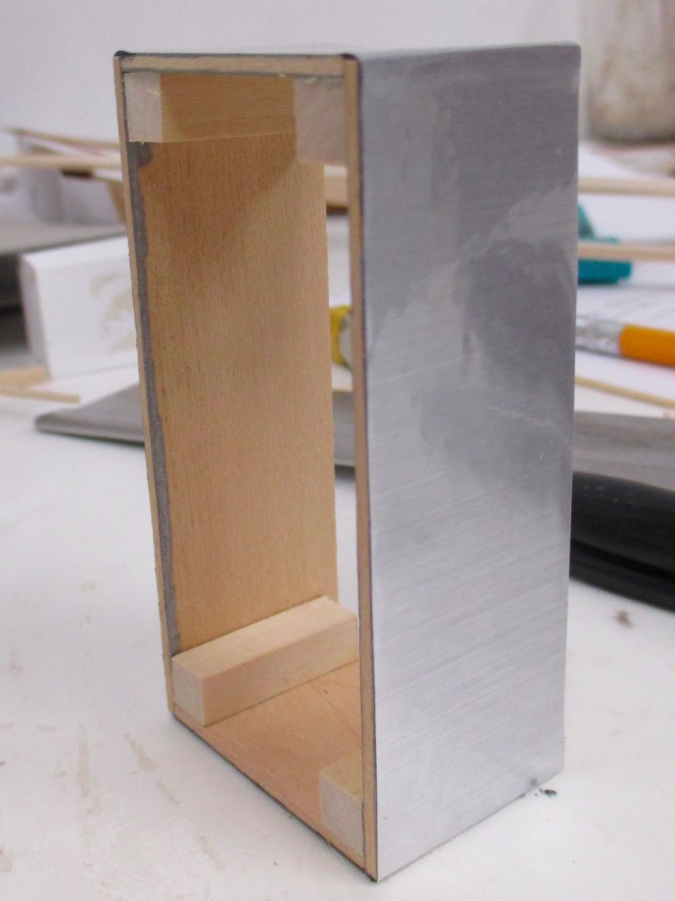
I don’t know how well the folded-over edges of the contact paper are going to stick over time, so rather than putting glue on the front edges of the box (which would have glued to the contact paper, rather than to the wood), I glued in two more 1/4″ square pieces. These overlap the folded-over parts of the contact paper, so in addition to attaching the door to the box, they’re also holding the contact paper edges down.

Finally I glued on the bottom pieces. The one at the back is what was left over after I cut up the original piece.
Hey, it’s a fridge! I’m not sure what to use for handles, I have to think about it some more.
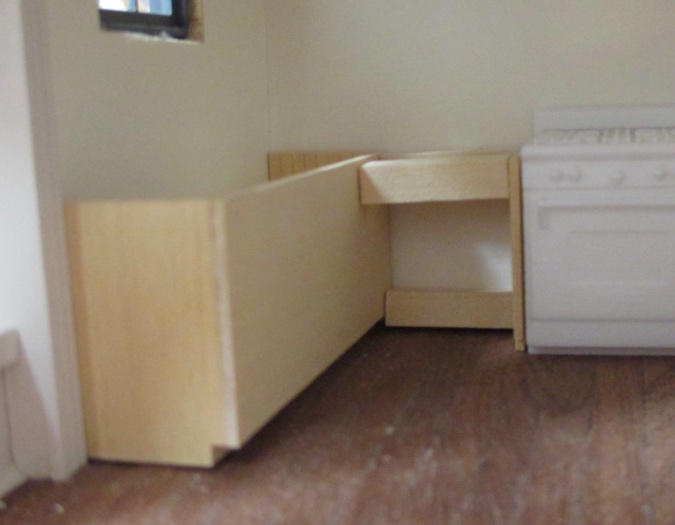
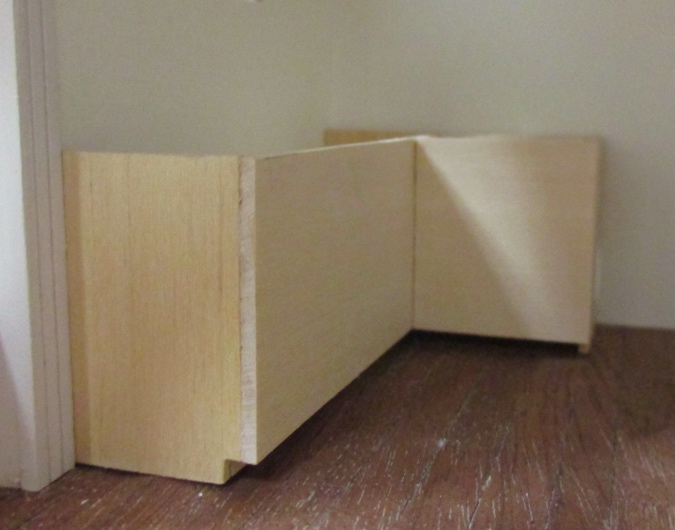
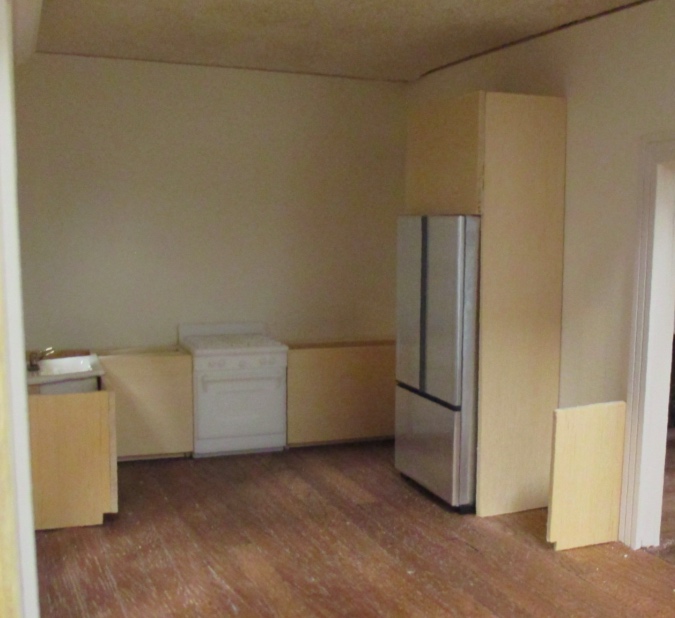
Next I built a cabinet to go around the fridge, with extra space above it for an upper cabinet.
I had to do some math here. The lower cabinets plus countertop are 1-7/16″ tall (slightly short — they should be 1.5″, or 36″, but I based the height on the height of the stovetop). The backsplash will be 13/16″ (19.5″ inches in real life). And since the ceilings are so high, I’m going to make the upper cabinets 2″ tall (48″ in real life). This means the tops of the upper cabinets will be 4.25″ from the floor, in a room with 5″ ceilings.
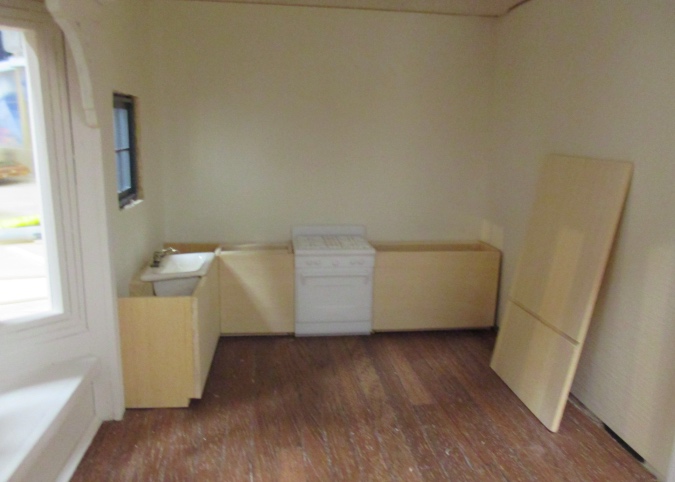
Here’s how it looks in the room. I still need to make cabinets for either side of the fridge, to complete the U shape.
 Emily is a freelance writer, miniaturist, and adventure game enthusiast.


You’re very brave to do custom cabinets! They are so not easy. But yours are looking great. The stainless steel contact paper is wonderful, I’m going to remember that trick.
The best thing about the contact paper is that one roll is more than I could possibly ever need, so it’s no problem that I wasted a bunch of it while I was figuring out the best way to do the fridge. (After posting this I had to redo it a couple of times when my attempts to attach a handle didn’t work out…)
The custom cabinets are a marked improvement over what you started with and add a realism that is impressive. Great hint to work with the stainless steel contact paper…I admire your determination to get it to look ‘just right’ with correct dimensions and realistic details.
Thanks. I just hope the end result will look as good as it does in my head. :)
Beautiful job on the kitchen. (I like your real-life kitchen, too.) Brilliant to use the scribed wood on the interior of the cabinets, as well as to use the left-over bed piece for the bottom of the fridge. The refrigerator looks very realistic with that metal contact paper. Can you spray paint the stove with stainless steel paint, then add the paint for the detail (knobs, burners, etc.)?
This comment got stuck in the spam filter, I just saw it! Sorry about that. (I hope it hasn’t happened to any others.)
Yeah, I’ll either spray paint or hand paint the stove silver, and then add the black. I’m thinking I could cut out a small piece of the glossy clear lamination material I used for the Blackbird Bar’s floor, and put it over the window area (after painting it black), so it will look like glass.
Your RL kitchen looks Lovely, both colour-wise as well as its functionality; no matter WHO did most of the building- Well Done!
As to your building a custom mini kitchen, you ALWAYS seem to know what you’re doing and your skills in space planning and construction of your little kitchen are equally as Wonderful!
The stainless steel contact paper is something I’ve used in the past yet had entirely forgotten about so I appreciate the reminder especially seeing how effectively you’ve applied it on to your custom fridge! Your built in cabinetry is turning out to be even BETTER than what you started with which is no surprise with someone whose previously removed an entire 2 story staircase, lighting and wallpaper then PERFECTLY repaired and replaced them all LIKE A BOSS! :D
Haha, thanks!