This year the Half Scale Miniatures Group‘s annual swap had two themes — Toys and Plants. I was especially excited about the toys because I have three kids’ rooms to fill up in the Victorianna. My contribution was a stacking ring toy.

I got the idea for this after stumbling across rubber jump rings on Etsy. They come in lots of different colors and sizes, but it was a challenge to find the right colors in the right sizes. The rings on these toys go in rainbow order, and each ring needs to be slightly bigger than the last.
I spent a long time looking at available sizes of jump rings (also called o-rings). Not only did I need specific sizes in specific colors, but I only needed 40-50 rings of each color and didn’t want to overpay for larger batches, or pay too much for shipping by placing orders with multiple stores. I contacted one or two stores to ask if I could get smaller quantities for a discount and they said no.
In the end I placed an order with MyELEMENTS for blue (6mm), green (5mm), black (4mm), and orange (3mm). Black was the only color I could find anywhere in the 4mm size. I also had a hard time finding 2mm rings, but another store had 1.5mm in red.
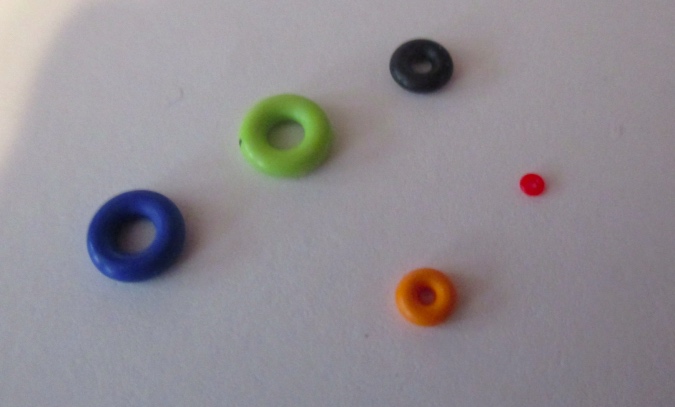
Okay, a few problems. That red ring is much too small! I took an orange ring with me to a local craft store and was able to find a red seed bead to use instead of the tiny red rings.
Also, the blue and green were supposed to be one size different, but they looked exactly the same. I put them on a rule to confirm it — the inner diameter is different, but both of these are 6mm wide.
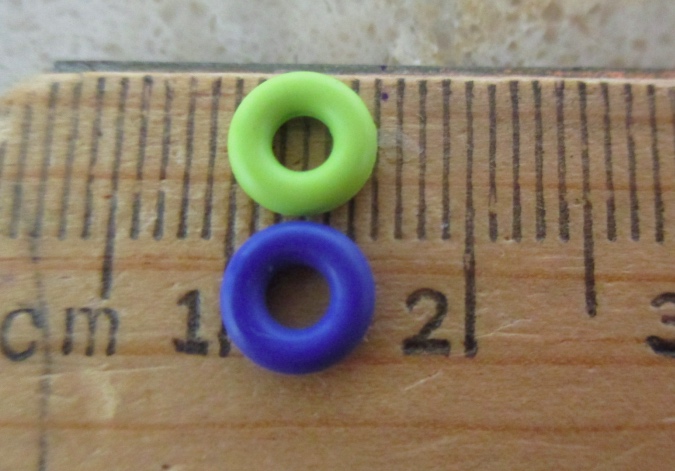
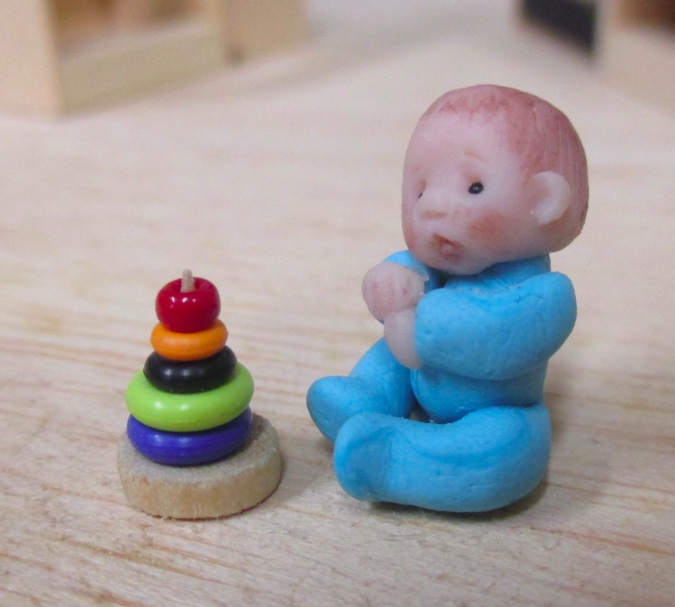
Here’s my first prototype. I wish the red ring matched the others, but since it’s the top ring, it’s okay for it to be a little different. (In fact, Melissa & Doug makes a stacking ring toy with a red ball at the top instead of a red ring.) But it’s obvious that the blue and green rings are the same width.
I emailed the store and it turned out they’d accidentally sent me 6mm green rings instead of 5mm. Replacement green rings arrived in the mail a few days later. Crisis averted!
While I was waiting for the replacements, I got to work painting the black rings, using yellow paint left over from the Gull Bay. Each ring needed 3-4 coats on each side to cover up the black.
Here’s the next prototype with a yellow ring and the correctly sized green ring. The yellow didn’t seem yellow enough.

I went back to the craft store and bought a bottle of bright yellow paint.
In between painting coats of yellow, I made the bases. I used the mini table saw to cut a 1/4″ dowel into thin slices.

Next I used the electricity pilot tool to poke a hole in the center of the disc.

Then I used my micro drill to enlarge the hole, using a bit slightly smaller in diameter than a toothpick. The pilot hole helped keep the drilled hole in the center of the disc.
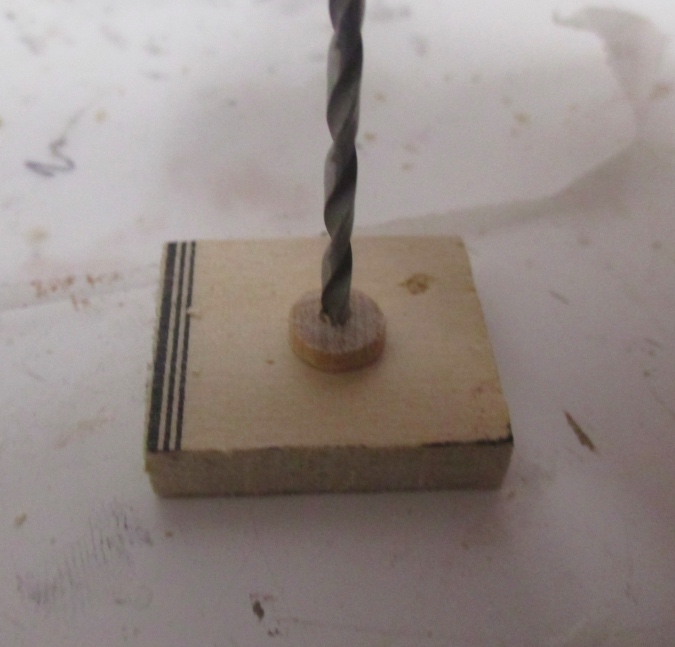
I ended up with a hole like this. Several of the discs split during the drilling process, so this step required a lot of patience!

I stuck a toothpick into the hole and added the rings. This allowed me to see how long the toothpick piece needed to be to hold all the rings. I marked the bottom with a pencil.

Then I removed the toothpick and cut it down to size.

Because the drill bit was slightly smaller than the toothpick diameter, this is a snug fit. Most of them didn’t have to be glued.

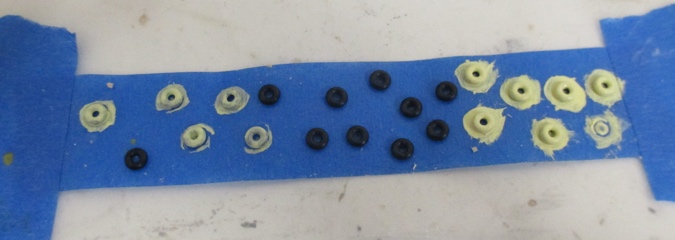
Back to the yellow rings. This was by far the longest part of the process. I painted them yellow on one side, several times, then flipped them over and painted the other size several times. Then I had to go over the edges again because I was still seeing some black through the paint. Finally I coated the painted rings with matte sealer to protect the paint, and stuck them on the ends of toothpicks to dry.

Allowing the matte sealer to dry while they were stuck on toothpicks caused the sealer to stick to the toothpicks, and the paint pulled away when I removed them. Fortunately I only ruined a few, and I’d made a few extra. After this I only let them dry for about 10 minutes on the tip of the toothpick, then moved them to a piece of wax paper to dry the rest of the way.

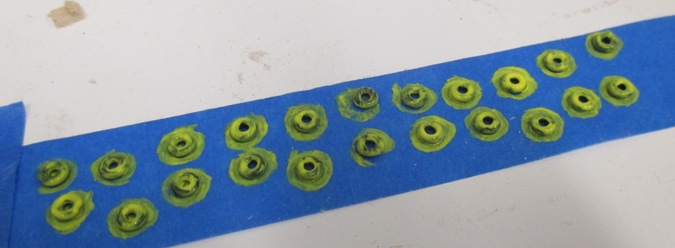
And here are all the ring toys! I had to make 36 for the swap, and I rounded up to 40 so I’d have some extras for a toy shop I want to build some day. Only the blue ring and red bead have glue on them — the blue ring is glued to the base, and the red bead to the post. The other three grip the post on their own. The finished height is approximately 7/16″.

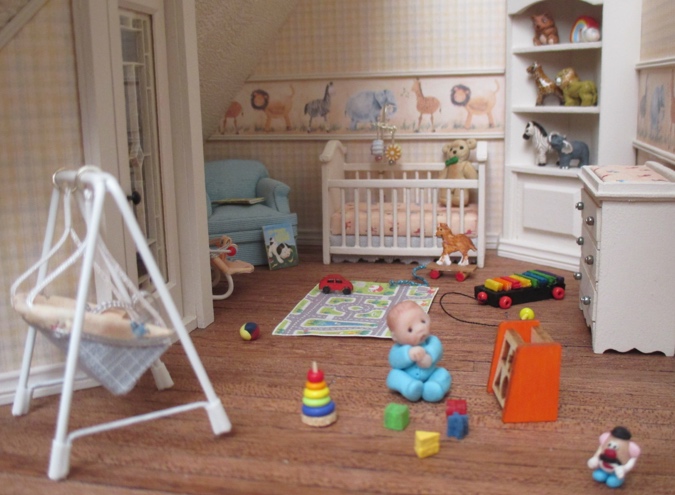
The Victorianna’s furniture is packed up right now while I finish the house, but I couldn’t resist setting up the nursery again to take a picture. Except for the animals on the shelves, all of the toys here came from the swap.
Close-up to show off two of my favorites — a block sorting toy and Mr. Potato Head.

Also this easel will be perfect in the little girl’s room.

This is only a fraction of the goodies — there were many other great toys in the swap, not to mention the plants! I’ve been participating in this swap since 2013 and I think this was the best year so far. I’ll take better pictures once the Victorianna is finished and I don’t have to worry about tiny toys getting lost.
If you didn’t participate and you want in, four swap boxes are up for auction. The proceeds go to cover shipping costs for next year’s swap. You can see all of the items and place a bid here.
 Emily is a freelance writer, miniaturist, and adventure game enthusiast.


That’s really adorable!
Thank you!
Fun post. I loved that stacking toy. The swap was really great this year. So many nice plants and toys. Seeing them in a setting is fun! Your room looks great. I have a nursery to do, too, eventually. When I do my post on the swap, I’ll link to yours.
Thanks! I’ll watch for your post.
Love all the toys! We still have the one of your old room with the hammock and the fisher price boxes. Mom
Dad sent me a picture of that a few years ago. Someday I’m going to recreate the bunk bed in half scale.
Wow! Perseverance pays off. I love that stacking toy. And the other toys from the swap are so sweet. I saw Mr. Potato Head on Instagram and couldn’t believe how tiny and detailed!
I know, so tiny! I’m scared I’ll lose him.
You certainly put a lot of work into your ring toys and I applaud you efforts as it looks exactly Right!
And I’m also excited to see it inside the nursery and how well your toy plays with some of the other lovely toys from the swap. The Mr. Potato head, the shaped blocks, the pull toys and the easel are each quite Marvellous!
Thank you! It was a lot of work, but for the most part it was fun. The yellow paint was the most tedious part.
These are amazing! And what a great tutorial. Thank you!
I always learn so much from you. I’ve been buying my tiny toys on Etsy, mostly, feeling that I am just not skilled enough to figure things out and then actually make them or making them from kits. I love the stacking toy and the idea of toy swap. I don’t think that there are any miniature groups in my area; Denver would be the closet. I love the baby boy. He is adorable. Great tutorial. The children’s rooms will be filled with wonderful treasures and they will be well entertained.
I love the stacking rings…one of my favorite Swap Items. (There were so many great things…I’ll be participating again next year!)
I love this post about your process.