
After painting my Fairfield’s fireplaces, I decided they should both be the same blue color rather than one blue and one green, so I went to the dollhouse store to pick up another blank one. I wasn’t positive that the ones in the store were exactly the same as the ones I had, so I ended up buying two — which was a good thing, because when I got them home I found that the new fireplaces are slightly smaller than the originals. (Different brand? New mold? Dunno.) Of course, since they’re back to back against the same chimney, the height difference would have been noticeable. I wanted them to match, so I started over.
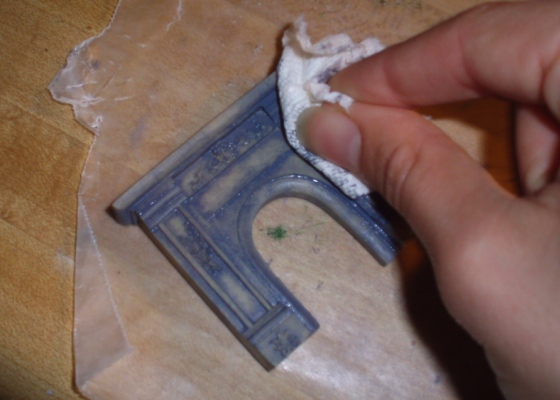
While I was at it, I figured I’d take some better pictures and do a quickie tutorial for anyone who wants to try painting one of these yourself. I started by painting small areas of the fireplace, then “sponging” off the paint with a paper towel. I did small batches rather than paint it all at once so the paint wouldn’t dry before I got a chance to sponge it off. This picture was taken after three or four paint/sponge cycles.
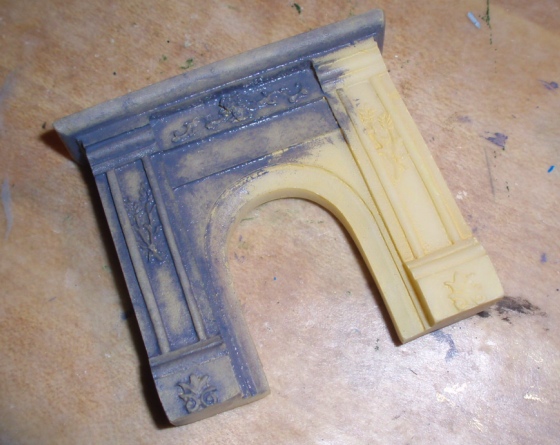
I suppose you could use an actual sponge for this, but paper towels were what I had handy!
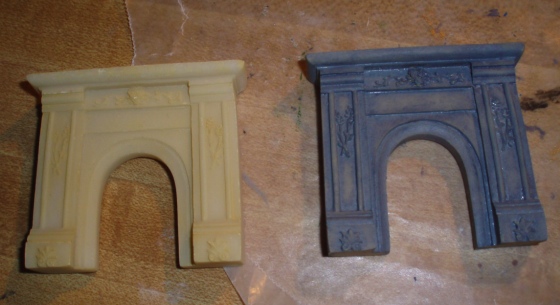
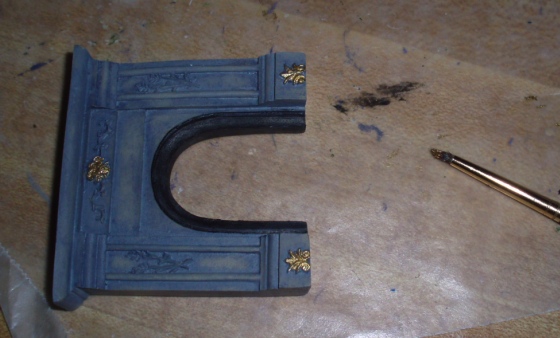
I did two coats of paint — a purplish color first, then gray on top of it — but you could also use just one coat and have more of the off-white resin show through. Here’s the fireplace after both coats, next to its naked brother.
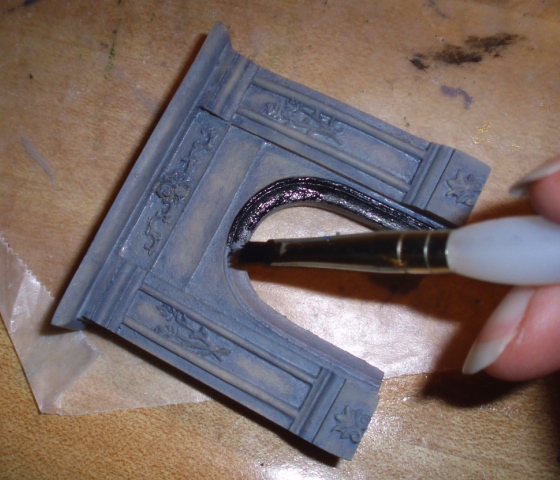
Next I did black around the opening, using a chisel brush to stay inside the lines. This I also did in batches and sponged off, but it would probably look good as solid black, too.
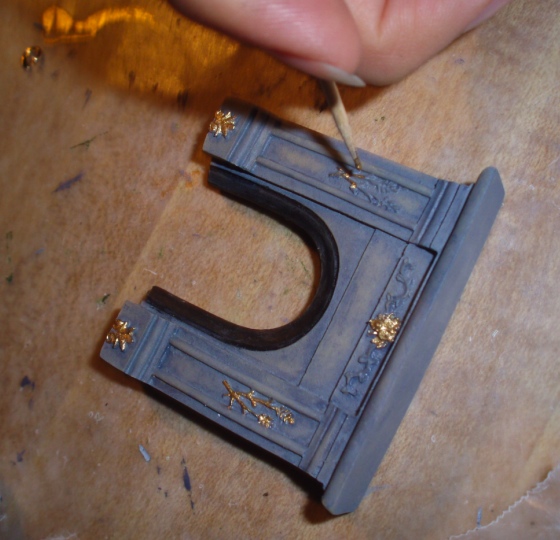
Now the gold. I painted the large embellishments with a very small paintbrush.
For the smaller details, I used the tip of a toothpick. I squirted a bead of paint onto my wax paper, barely dipped the toothpick in it, and very lightly touched it to the raised embellishments. I didn’t do the sides of these details, just the top. I did get outside the lines a little… a clean toothpick tip can be used to scrape up small amounts of paint, and bigger oopses were touched up with gray at the end.
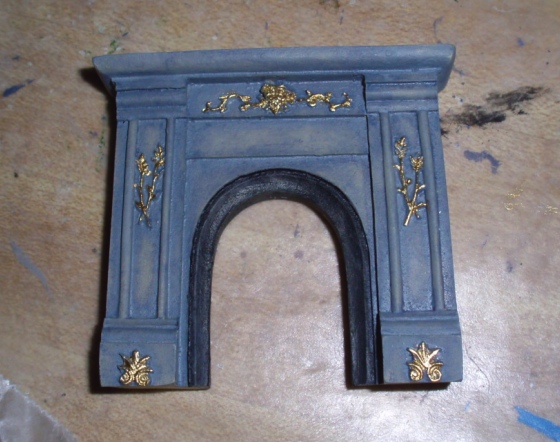
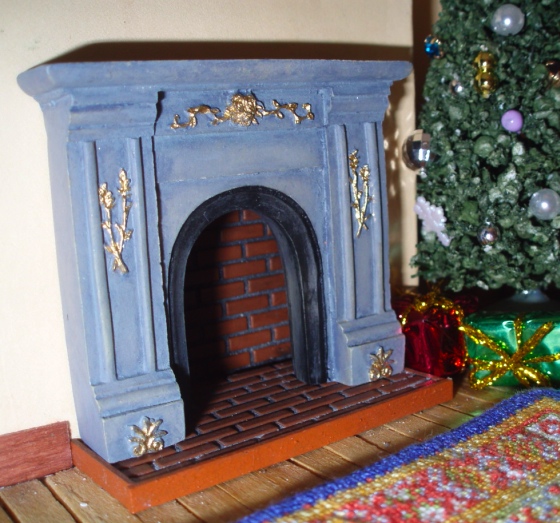
And here it is! Really not that hard!
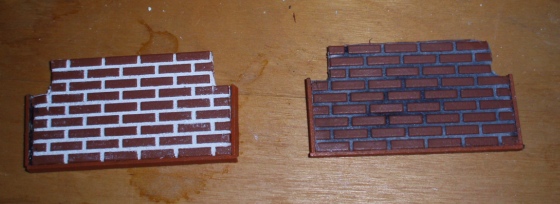
After painting the fireplaces, I worked on the bricks. I didn’t like how white and clean the grout looked, so I decided to dirty it up a bit. I watered down black paint and smeared it over the hearth with my finger, then wiped off the excess with a paper towel. It looks like soot on the grout. Here’s the before and after.
It was a bit harder to do this on the insides of the fireplaces since the house is on a base and can’t easily be moved. I managed to get in there with a paintbrush and my fingers without making too much of a mess. It came out a bit darker than the hearths but I think that’s okay, I’d kind of expect the inside of a fireplace to be dirty!
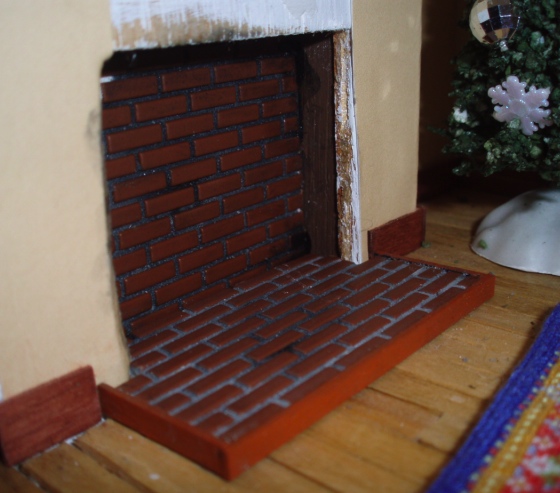
And voila! An embellished, appropriately grimy fireplace!
 Emily is a freelance writer, miniaturist, and adventure game enthusiast.


Perfect! Now some grates and a few sticks or lumps of coal and Santa will be looking for cookies and milk.
Love,
Dad
Hi, could you tell me where did you get the fireplace? thanks
I got them through my local dollhouse store, but you can find them online at Molly’s House (http://www.mollys-house.co.uk) and probably other sites, too.