Progress on the Queen Anne Rowhouse has been somewhat stymied by one disaster after another with the electricity. On October 3, I ordered eleven half scale lights from Swan House DIY for a cost of about $130. (They didn’t show up until Halloween, but that’s a story for another time.) Of these, four were Houseworks brand and the rest were Cir-Kit brand. Houseworks and Cir-Kit offer almost the exact same lights and in these cases I chose the Cir-Kit because I liked the designs a little better.

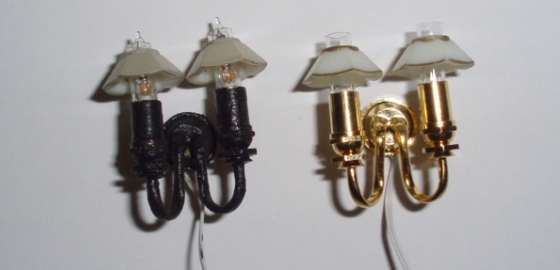
Two similar lights (Cir-Kit on the left, Houseworks on the right). I liked the base better
on the Cir-Kit light, so I picked that one.
I’m not a big fan of the shiny brass that comes on pretty much every miniature light fixture, so the first thing I did was attempt to paint them all flat black to look like cast iron. But the paint didn’t want to adhere to the shiny finish on the lights and scraped right off. After painting most of my lights this way, I scraped off all the paint (pretty easily!) and scratched up the surfaces with a nail file.
I then painted on a coat of Gesso for the paint to stick to.
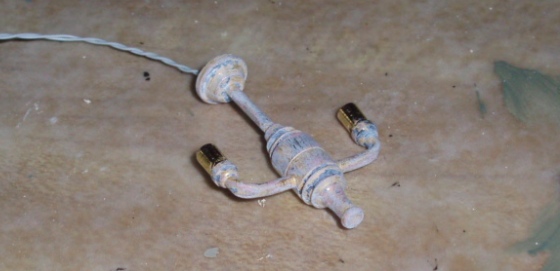
And then finally painted them black again and added a coat of matte varnish for protection. The paint still scrapes off if I’m not careful, but after devoting several hours to this process, I was ready to move on.

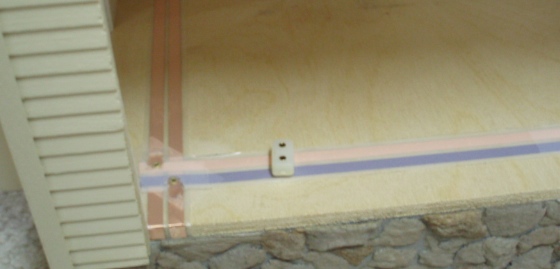
In the Fairfield, I have one ceiling light that only occasionally works. The wires are trapped under the flooring above it so there’s no way for me to check the connection or replace the light—very frustrating! To avoid this in the rowhouse, I decided to keep the wires long and pull them down to the underside of the house. This way I can at least fix it if the delicate connection between the light wires and the tapewire goes bad. I planned to do all of the wall and ceiling fixtures this way, with outlets in a couple of the upstairs rooms for plugging in lamps.

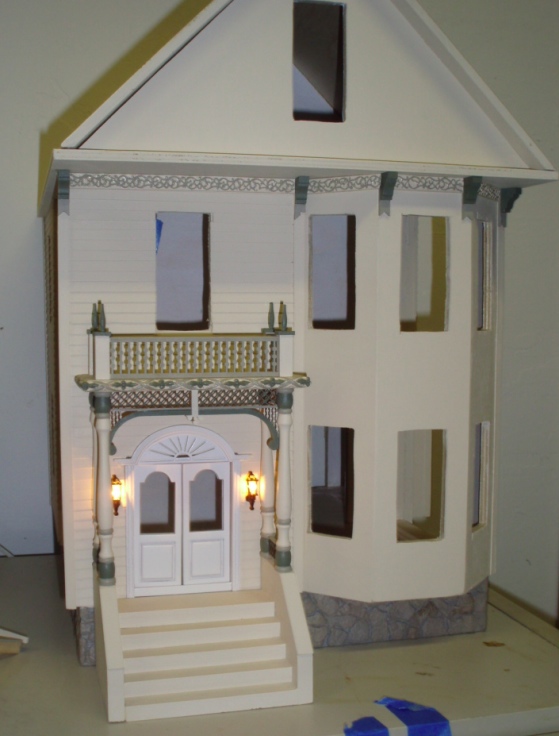
I installed the Houseworks coach lights on the front of the house with no trouble. Pretty!
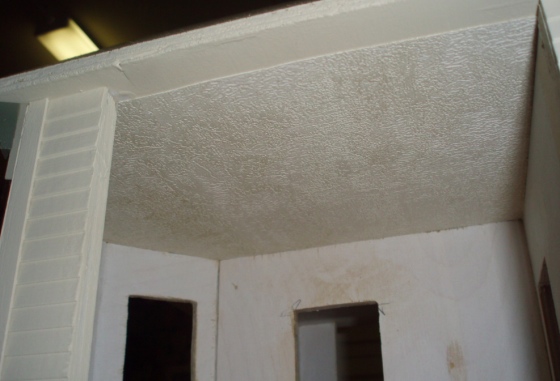
Next I added ceiling paper to all of the rooms, since the ceiling lamps need to go in over the paper.
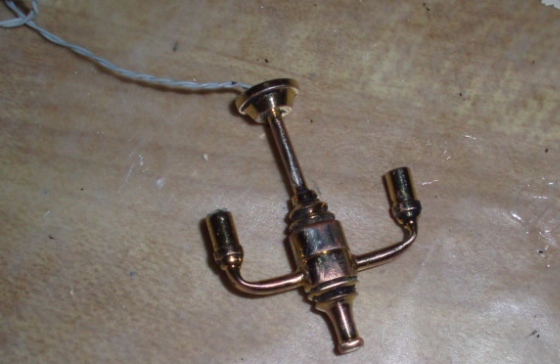
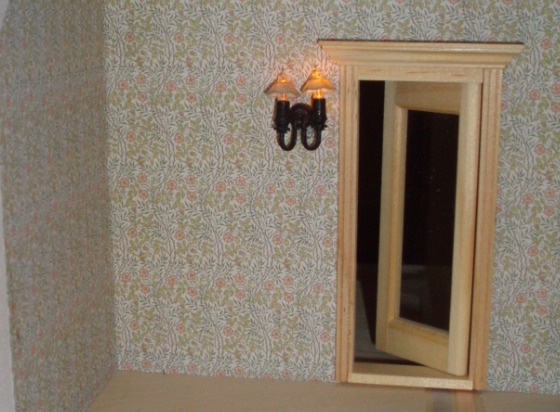
And I installed the first interior light: a Houseworks wall sconce in the hallway. Here’s my painted version next to a virgin lamp. In addition to the black paint on the fixture, I painted the shade with the Olivewood I’m using for the exterior trim, just to make it a bit less bright.
As you can see in the unpainted light on the right, the Houseworks fixtures come without the bulbs in place. On this fixture the top part easily screws off and the bi-pin bulb is inserted into two tiny holes.
Here’s the lamp in place. I printed out the wallpaper using samples from Bradbury & Bradbury.
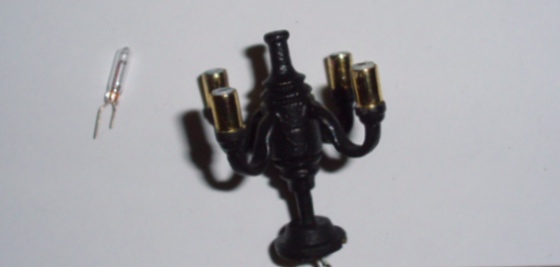
So far so good…. but here’s where things get depressing. At this point I was ready to install the Cir-Kit lights inside of the house. The Cir-Kit lights also come with removable bi-pin bulbs, but the bulbs are already installed, and the method for putting them in and taking them out is a lot less graceful. The Cir-Kit lights have just one hole and the other pin goes outside the fixture, touching the metal. (In the picture below, the short pin would get stuck into the hole and the longer pin rests against the metal tube.)
Several of the fixtures use the pressure of whatever slides over the bulb (in this case, the plastic shade) to hold the bulb in place. On this fixture, after I finished painting and put the bulbs back in, two of the shades cracked from the pressure of the wire on the outside of the fixture. Poor design!
The Cir-Kit lamps come with giant 1:12 plugs (as opposed to the Houseworks plugs, which are more to scale). I planned to snip these off so it didn’t bother me too much, but since the plugs were there and since the bulbs had been in and out of the fixtures a few times already, I figured I should test the lights before going to the trouble of installing them. I pounded a 1:12 plug into my tapewire, plugged in one of the ceiling fixtures, and turned on the juice.
I pounded a plug into the tapewire temporarily, to test the fixtures. Cue heartbreak.
And… nothing lit up, not even the three lights I’d already installed. I flipped the switch a few times, then started smelling that sickening electric smell that indicates imminent disaster and realized that the plug was super hot. The light had shorted out and the wires (which were still neatly wrapped together, just like they’d been when I removed it from the package) had melted together into a hot lump. THIS SHOULD NEVER HAPPEN!! When I tried to unwrap the melted-together wire, the coating just pulled away.

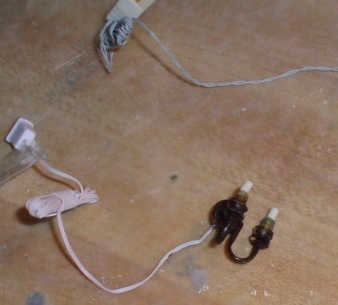 I showed it to Geoff (my electrical consultant) and he pointed out that the two coated wires on the Cir-Kit light are twisted together, as opposed to on the Houseworks lights which have two coated wires attached to each other side by side. This picture shows what I mean: the top wire is Cir-Kit and the bottom is Houseworks. (You can also see here how the long ends of the wires come bundled together. It should be fine to plug in the light like this—that’s what the coating on the outside of the wire is for!)
Geoff speculated that on the faulty light, the coating had rubbed off somewhere and the twisted wires were touching, causing the short. So, to use this light I would now need to cut off the mangled wire and replace it with new wire. But the fact that it had happened at all really concerned me. Now that we looked at them, the twisted wires on the Cir-Kit lights seemed flimsy and I had no reason to believe this wouldn’t happen again. If it did after the lights were installed and the wires hidden behind wallpaper, that would be a disaster.
I plugged in the rest of the Cir-Kit lights (unwrapping the bunched up wires first!) and was disappointed by the outcome. Because of how the bulbs stick into just one hole instead of two, they’re wiggly and some wouldn’t light up without jiggling. On one of the lights, the hole for the pin was too big and the bulb fell right out; I couldn’t figure out any way to secure it.
After what happened with my Fairfield, I didn’t want to install these questionable lights and end up with electricity that worked sporadically or not at all. But since I’d already spent all this money on fixtures and all this time painting them—plus I’d already installed the coach lights and the one hall light—I also didn’t want to throw in the towel on electrifying the house. It took a few weeks to reach the decision that I should “make it right” (as Mike Holmes would say). Yesterday I ordered a new set of Houseworks lights for the rest of the house, at the cost of another hundred dollars. As for the Cir-Kit lights, I guess I’ll snip off the wires and use them in a non-electrified house someday.
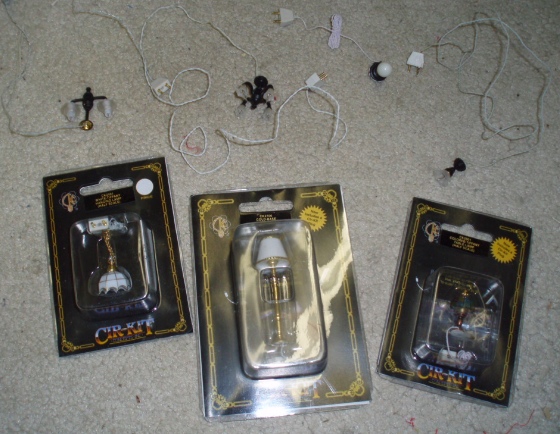
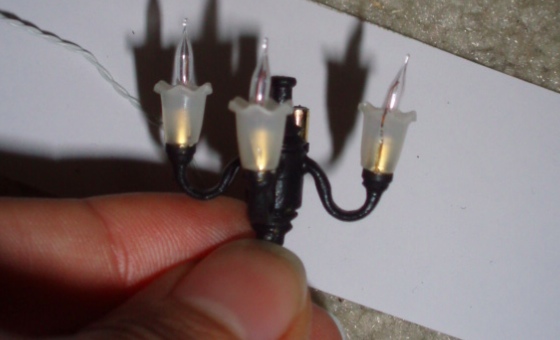
The lights that failed me. The bottom three are still in the packages, so I could theoretically sell or trade them away, but I’d feel bad trying to pawn them off on an unsuspecting person…
Electrifying a dollhouse can be expensive and time consuming, and in my recent builds I haven’t bothered with it. In this case, I only electrified the house because it came with tapewire installed, and it seemed like a waste not to take advantage of that. (Joke’s on me: during this whole process I discovered that the tapewire connection between the first and second floors doesn’t work and I’m going to have to redo that as well!) But if I had known then what I know about Cir-Kit half scale lights, I definitely would have bought the Houseworks brand in the first place. And if I’d known this was going to result in such drama, I might have decided to skip electricity altogether.
 Emily is a freelance writer, miniaturist, and adventure game enthusiast.


Oh my gosh! Wow – very informative. I remember when I did my Chantilly the first time and had horrible trouble with a chandelier – it was a Cir-Kit brand and I had problems with the bi-pins also. I ended up taking them out of the house and gave to a friend for decorative lighting. I am sorry for your frustation!!
Oh my gosh, how frustrating. I’ve shied away from electrifying after hours and dollars wasted too. I will do individual items with batteries hidden, especially for Christmas trees etc. I love the look, but they fail far too often for my liking
If it helps, I think the front door mismatched color looks a lot nicer with the lights on beside it. I’m not sure why (there must be some hidden psychological reason), but it does.
Oh, interesting! I’m probably going to replace it with a “wood color” door but figured I should wait until the entire front of the house was finished to see how it looks. Maybe by the time everything’s in, the white will grow on me. :)
You really should try the LED lights from Evans Designs. They are very inexpensive and easy to wire. You can make your own fixtures or possibly re-wire the ones you’ve purchased?
Really. It’s worth a look.
http://www.google.com/url?sa=t&rct=j&q=&esrc=s&source=web&cd=1&sqi=2&ved=0CGUQFjAA&url=http%3A%2F%2Fwww.modeltrainsoftware.com%2F&ei=76DQT6mSE-OC2AXY5_zXDA&usg=AFQjCNGyRM2wh3DedyoLCG0i_868_xd0zQ
Very Interesting! On painting gold light fixtures black–try to roughen the gold shiny surface with a fine grade sandpaper and/or steel wool. Clean surface thoroughly. Roughening the surface creates a mechanical bond for paint–this is key! Spray paint the fixture with Primer first. Then after it is dry, spray paint with flat or satin black. Be sure to do a couple of LIGHT coats. This method makes for a much smoother painted surface. Let the paint cure for a few days and the finish is very durable.
Thanks for the warning about Cir-kit lights. I have to source a 12v transformer for the lights in my Fairfield and I worry about whether the lights will work (our transformers are different from yours and are not so easy to source) – it will be really disappointing if there is a problem after all the effort I have put into electrifying it. I do use round wire instead of tape, and that is more reliable. I should have had the transformer from the start but ……
Hi April
I’ve had my share of major problems with light fixtures in the past but yours sound worse!
Bipin bulbs are a Nightmare to try and change once the fixture is in place- I hate them!
Re: painting over the shiny brass; I’ve found that using. a MATIFY-ING Top Coat nail varnish like Revlon #790, will immediately tone down the gold as well as provide a durable surface for acrylic paint to adhere to; a real time saver.