It may be the smallest room, but I left the Rowhouse’s bathroom for last. Partly because I had to get the stairs in first to pull the wire for the stairwell light through the bathroom wall, but also because I’m just not a fan of miniature bathrooms. My poor neglected Rosedale has two empty bathrooms keeping it from being completely finished, and my other recent houses don’t even have bathrooms. I just don’t like wasting a room on it, especially since the pickings are slim in half scale.
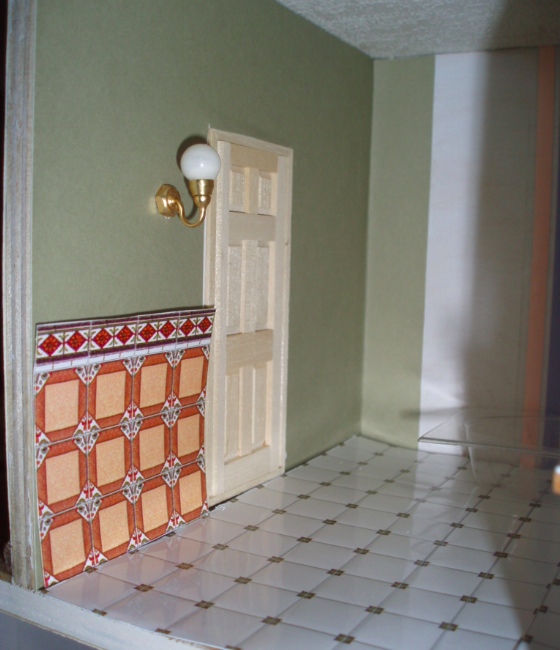
But I decided early on that the Rowhouse would have one, mainly so I could use the spa-like tub I’ve had in my stash for years (it won’t fit in the Rosedale’s tiny bathrooms!) I bought a tile sheet that’s probably meant for 1:12 scale but works okay in half scale. Each tile is half an inch square, which would make it 12×12 tile in real life.
I separated the white tiles from the border at the top and the orange tiles at the bottom so I could use the white ones for the bathroom floor, and the orange ones for a surround around the room. The tile sheet is actually shiny cardstock embossed with lines that separate the tiles. So it’s not quite as stiff as a vinyl tile sheet would be.
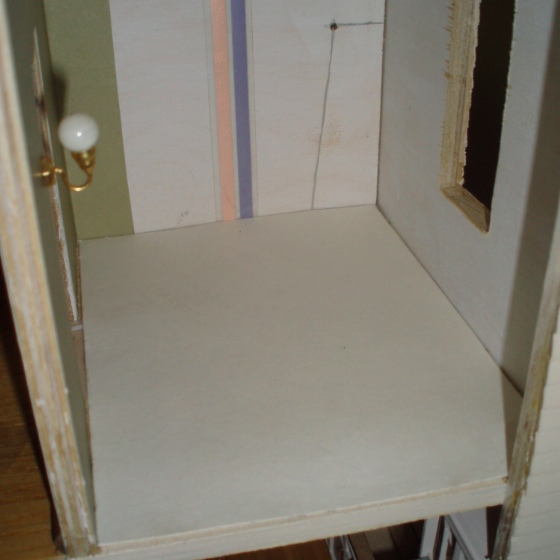
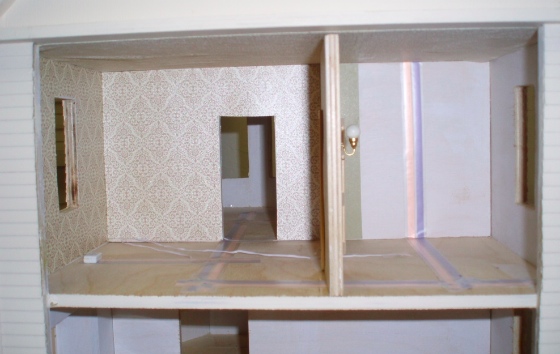
Because the bathroom floor had some tapewire and wires running across it, I lay down a piece of cardstock to make it more or less flat before gluing down the tiles.
The white part of the tile sheet is only six tiles long, so I ended up with a seam.
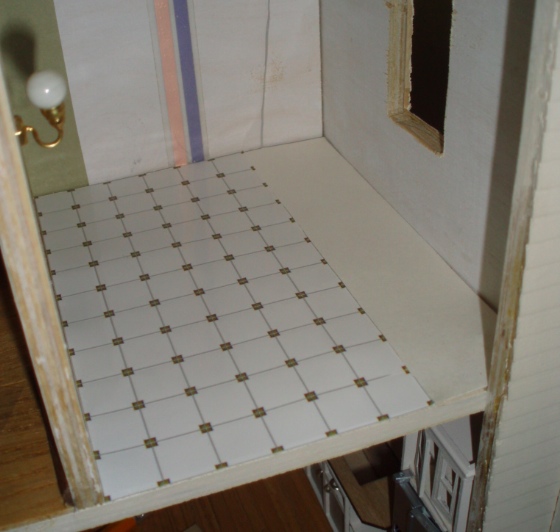
I glued in the big piece, then put the smaller piece in place and shoved it up against the wall to get a good idea of where to cut.
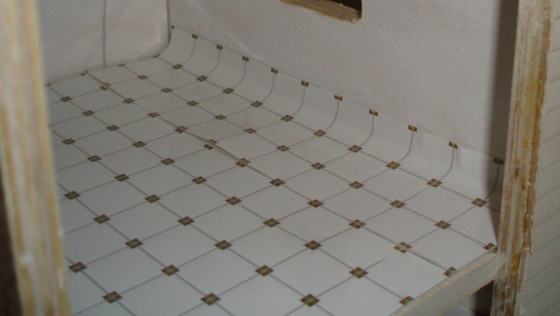
Beautiful! Oh, if only it stayed this nice. Keep reading. :/

This weekend at CHAMPS (the same show where I bought this house a year ago), I bought a funky bathroom set. I wasn’t sure where I’d use it, but it was unusual and only $6.

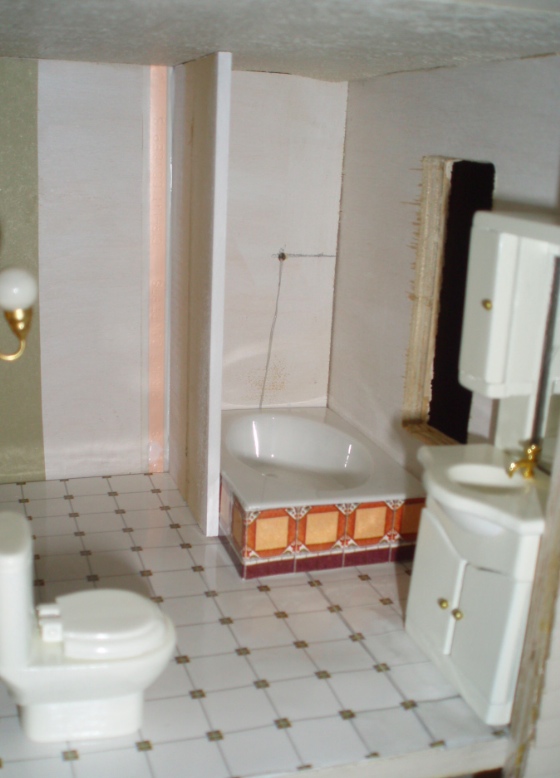
When I got it home I realized the cabinet would work perfectly in the corner of the Rowhouse’s bathroom.

(Here’s another angle, that’s impossible to see when you’re viewing the house.)
And this may sound silly, but I REALLY like this toilet. It’s so hard to find modern looking toilets in miniature, and especially in half scale. I want to add a silver push button to the top of this—ball bearing in a washer, maybe?
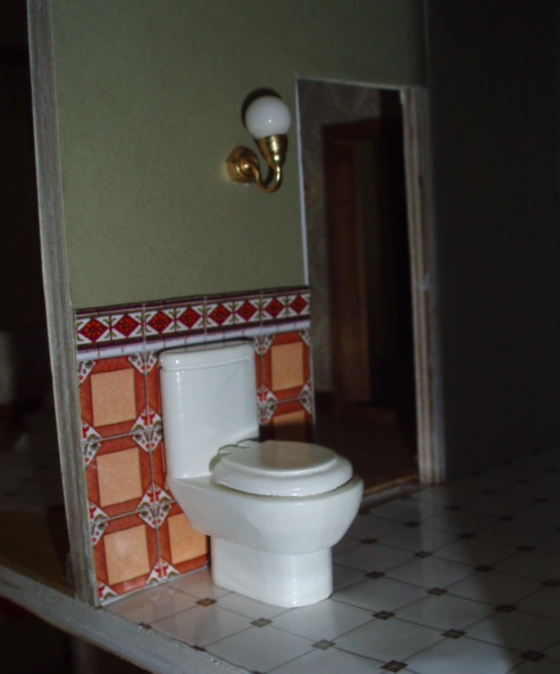
In fact, I like the toilet so much I went online bought three more of these sets. I’ll use two of the toilets in the Rosedale’s empty bathrooms and hold onto the third for a rainy day. (They’re available for sale, at least for now, here. The $6 I paid for the first set was a show special, but even at $10 the price isn’t bad.)
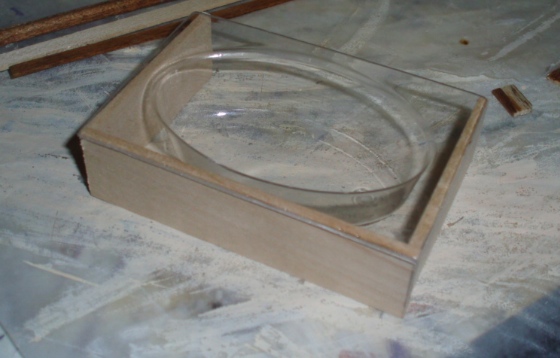
Ahem. Anyway. The tub I’ve planned all along to use in here is from Model Builder Supply. I built a frame for it from 1″ basswood.
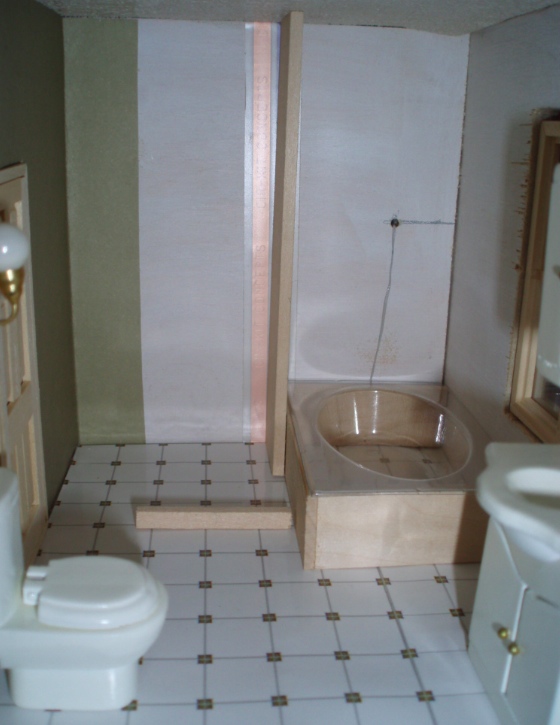
This was my original plan for the layout, with the tub and shower stall side by side. But I didn’t like how cramped the shower would be.

I tried turning the tub 90 degrees, so the shower could be twice as wide.
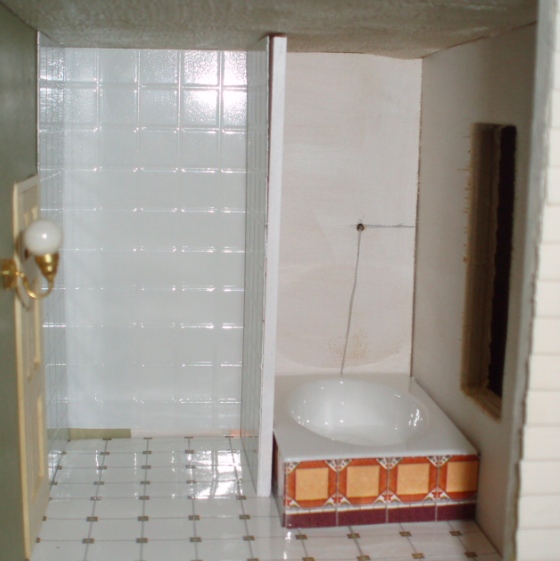
Since there’s already a lot of busy-ness going on with the floor and wall tiles, I didn’t want to add a third design into the mix for the shower. I thought about printing out a white subway tile pattern on glossy photo paper. Then I found clear plastic tile sheets in my stash. Like the other tiles in the room, they’re a half inch square.
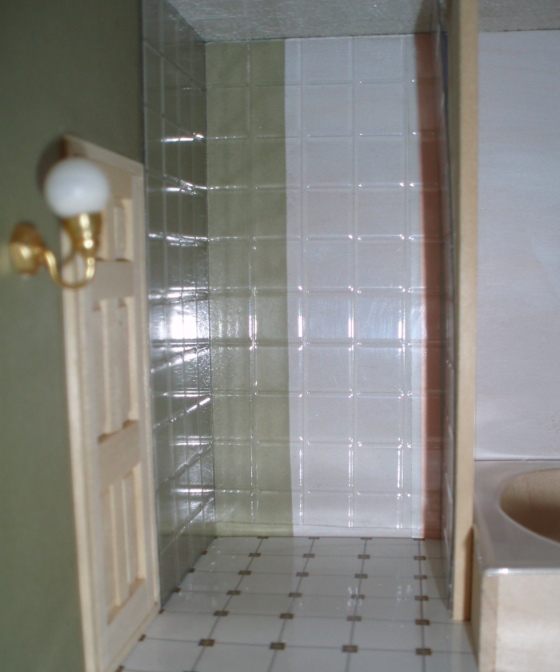
I painted the backsides white. This is after one coat—it takes three or four.

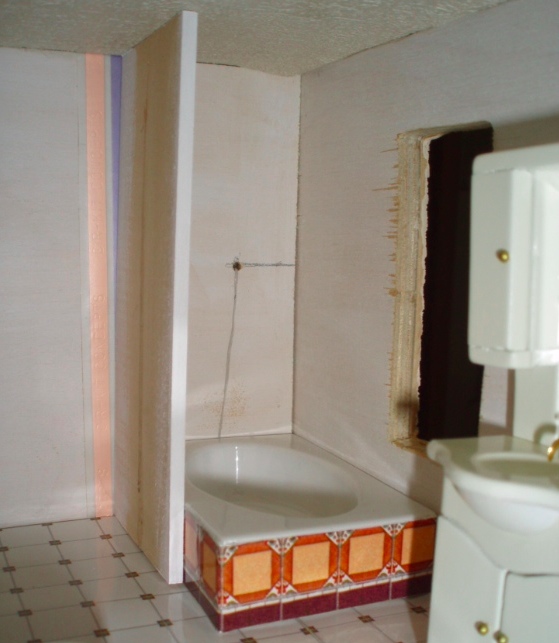
From the front, it looks like glossy tile. The bathtub is painted the same way.

To make the wall between the tub and the shower, I glued two pieces of 1″ basswood together.
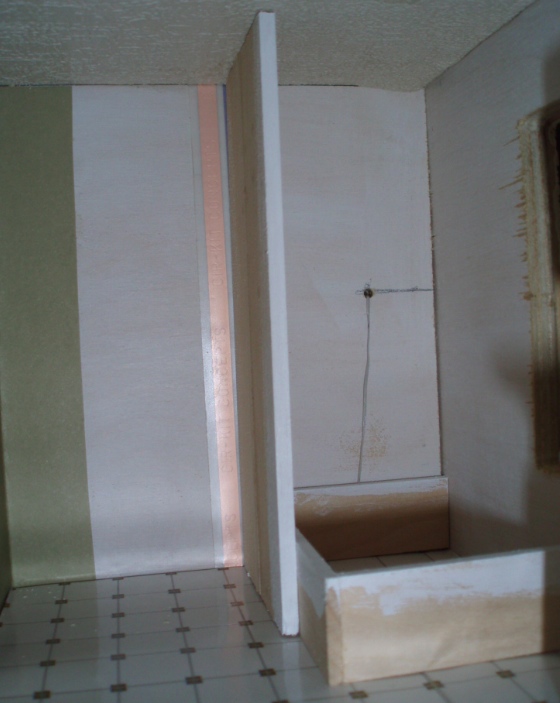
And here’s how it looks with the tub assembled.
Everything was going so well…
…then things got complicated. I noticed that the bathroom cabinet was not sitting flat on the floor. This was due to a lump under the flooring, where two pieces of tapewire were connected with big lumps of solder. The piece of cardstock I laid down wasn’t doing a good enough job making a flat surface and it was very obvious, when you looked at the bottom of the cabinet, that it was sitting on top of a lump.
I had a strip of white tiles left over, so decided to pull up the smaller section of the floor and add two cardboard “shims” on either side of the lump. It was a good idea in theory. BUT when I was holding down the new piece of tile with my finger pressed against the solder lump, the lights went out. (I’m not sure why I had the lights on in the first place, but it’s a good thing I did!) I pressed down and released a few times and the lights went on and off when I did this. “Huh,” I thought, “guess I shouldn’t do that.” And I walked away for the night.
The next day, after the flooring had dried, I turned on the lights to see if they worked. And they did. And I thought “Good, I guess yesterday was just a fluke.” And as this thought went through my head, the lights went out.
Shit.
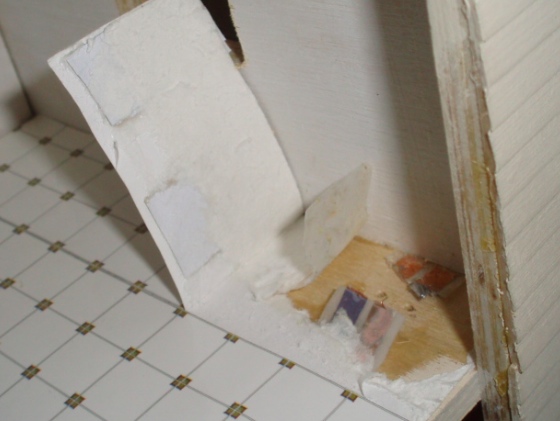
I made a decision with this house to connect all of the wires underneath the foundation so that I’d have access to these connections in case they ever needed to be fixed. Having a faulty connection trapped under flooring was exactly what I was trying to avoid. At least the bathroom wasn’t finished yet. I pried up the flooring to see what the problem was.
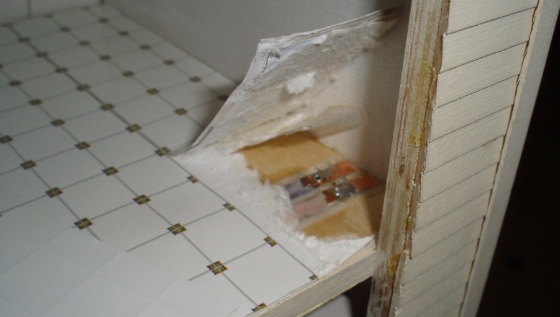
This is the junction between tape from downstairs (the copper part near the exterior wall) and another piece of tape that goes into the bedroom (the blue/pink part). With help from my electrical engineer dad (over the phone!) and Geoff’s multimeter tool, I figured out that the problem was caused by one of the soldered connections not connecting the two pieces adequately. (Well, my dad figured that out. I held the tool and told him what it said while trying not to drop the phone and/or electrocute myself.)
Because I neglected to take pictures or make a diagram of my tapewire runs, I had to pour through old blog pictures to try to figure out what the tape beyond this faulty connection was doing. All of my lights are connected on the underside of the house, with only two outlets (one in the bedroom and one in the attic) being fed by the tapewire upstairs.
I was pretty sure that the bedroom outlet was being fed only by this piece of tape. There is another tape run leading away from the outlet and into the office, but I couldn’t find any pictures that showed it connected to anything else, and I just couldn’t remember what was going on in the other rooms. So, by snipping the tape at the faulty connection I could solve the problem of all the lights going out, but I was sure I’d lose power to that outlet.
(Note that even my dad was confused at this point why the lights were going out, since the break in the connection theoretically should only have affected what was beyond it—the outlet. But the lights were going out and this solder blob was the point where the circuit broke down, so it clearly had to be fixed whatever the reason.)
My plan was to cut the tape on each side of the faulty connection, and then “leapfrog” over it by laying a new piece of tapewire over it and connecting this to the ends of the old pieces with brads. I started by slipping the nail scissors in and cutting the connection on the bedroom side of the faulty connection.

I was nervous about this. I had visions of none of the electricity working, ever again. After making the big snip, I tested the lights to make sure they still worked. They did. Whew. Then, on a whim, I plugged a light into the outlet I was positive would no longer work with this connection broken… and it worked too! LIKE MAGIC!
The fact that the outlet still worked—fed by some other tape run that I would have remembered if I’d made a diagram—made the task much simpler. Rather than having to leapfrog over the faulty connection, I just had to remove it completely. (Both to be 100% sure it wouldn’t cause problems again, and as an added bonus, to get rid of that lump in the floor that sent me down this rabbit hole in the first place.)
I pulled out the eyelets and cut the tape that had the lumpy solder on it.
Then I taped the two ends down with a piece of Scotch tape.
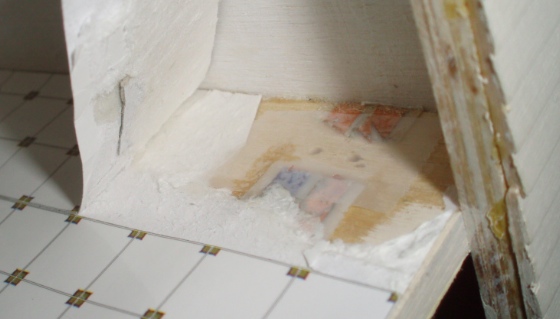
I did my best to remove the cardboard shims before gluing the flooring back down, but couldn’t get it completely flat. The patch of floor is worse for the wear, but it’ll be mostly covered up by the cabinet.

Besides, I can always hide the wrinkly part under a rug.
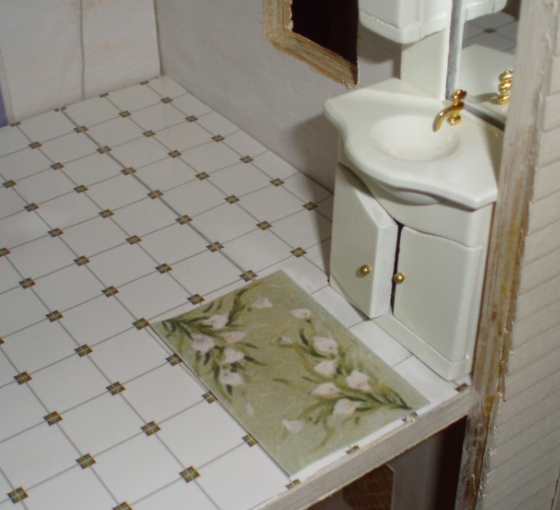
Whew. End of the day, my lights still work and my bathroom’s coming together. But at the risk of repeating myself: I’M NEVER ELECTRIFYING A DOLLHOUSE AGAIN.
(Well, until the next time.)
 Emily is a freelance writer, miniaturist, and adventure game enthusiast.


Excellent summary!!
Not to be a spoilsport but I think the wall between the tub and shower should be clear–perhaps a piece of Plexiglass. Or maybe no wall at all on that side. Assuming a glass wall/door on the front it would be like a (or is it an) European shower–open to the tub–where water splashing in would not be a problem. The tile base of the tub would be more visible, the tub would not look so claustrophobic, and the doll house people could go directly from tub to shower or vice versa without getting the floor wet. Or you could jog the front glass to meet the corner of the tub and make the tub fully accessible from the shower area–a true European style. If the window was not there I would suggest continuing the glass wall across the end of the tub but I think leaving it open is OK. Enclosing the window in the shower area (practically a room in itself) might look strange unless it had a modern seamless glass rather than a traditional double hung sash.
Dad
Another thought: Since the tub fits in the space between the door and the back wall put it there and make the shower along the wall with the window. You could have a clear or solid wall separating the shower from the end of the tub. It may be a little skinny at the tub end but it will be long and should not look too cramped. Include the window in the shower area. Tile trim on a double hung window with an appropriate waterproof curtain is not uncommon (and in this case there is no real water to deal with.) Maybe cut the corner of the shower enclosure at an angle if it protrudes too much into the door-toilet-sink walking area in the middle of the room.
Dad
Hey, where’s my first comment? The “another thought” one may not make much sense without it. When I tried to post it again the system said it was a duplicate. Hope you got it.
Oops, the first one went into Spam – not sure why, maybe “European shower” is on the blacklist!
These are great ideas, but I already started gluing my pieces in! I actually thought about the glass wall but chickened out. Your second idea was another option that I thought about. If the window weren’t there I probably would have gone with that.
The Thornhill (a future project) is HUGE and will definitely have room for a luxury bathroom. I’ve decided this one is a renovation that the people who lived in the house tackled themselves… without consulting a “bathroom guy” for advice. ;)
Or an electrician!
Funny repartee :)
Emily, I haven’t even tried electrifying a house yet (I’m slowly sidling my way up to taking that plunge), so my hat’s off to you!
BTW, I agree about 1:24 bathrooms and fixtures.