For years, I’ve been holding on to these Hallmark ornaments without anywhere to put them. They’re about 1:12 scale but look way too small when you put them with 1:12 cabinets (especially the fridge). And I love the detail, but didn’t necessarily want Christmas stuff in one of my dollhouses year round. Then there’s the fact that I mostly do half scale these days… I used to have them in my purple Arthur and they fit well there, but I unloaded that house on Craigslist last year.

I decided the best way to show them off would be a roombox, and for a kitchen theme, why not a bread box? This one caught my eye at Dollhouses, Trains, and More. At $40 on clearance it was cheaper than what I found when I searched online for real breadboxes, plus it had the window already cut in — no work for me. (It did come with a knob at the top of the front, but I removed it before taking this picture…)
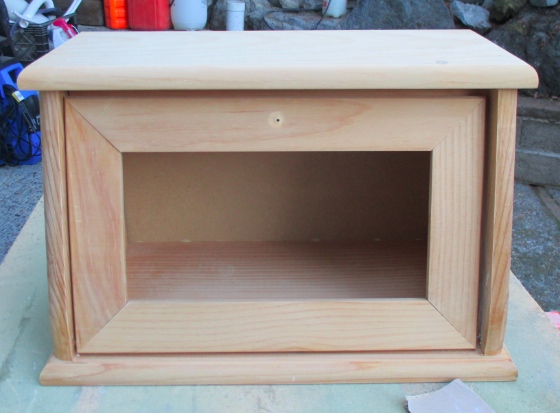
So there’s a reason this was on clearance! I didn’t realize until I got it home and removed the plexiglass insert that the glue had come loose on all the front pieces. The hinge is still holding the other three pieces (sort of) together, but the top piece came off completely.

Thinking I could surely find a way to fix it without unhinging the rest of the front piece, I went ahead and sanded the roombox with the Mouse sander, then applied two coats of Minwax tinted stain. This is a water based stain I’ve had sitting around for a while, I think the color name is “Spice”. It’s not quite as bright red as in the picture.
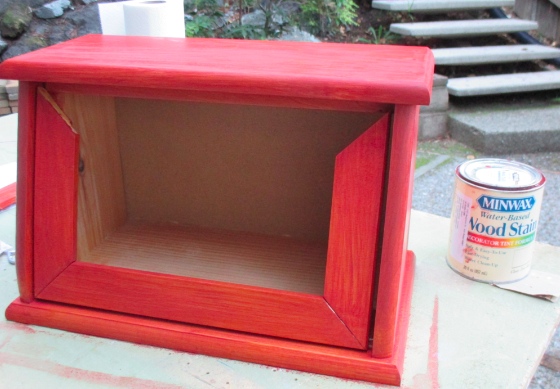
I called Geoff in for a consult and he convinced me that the proper way to fix the lid was to remove the hinges and glue it back together in a gluing jig. The angles were not quite right and he shaved off a little bit of two pieces. That piece on the right in the picture is a little warped, so he added a piece of wood on top of the jig to hold it down.

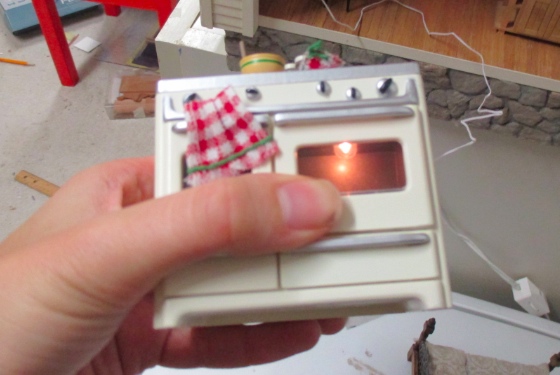
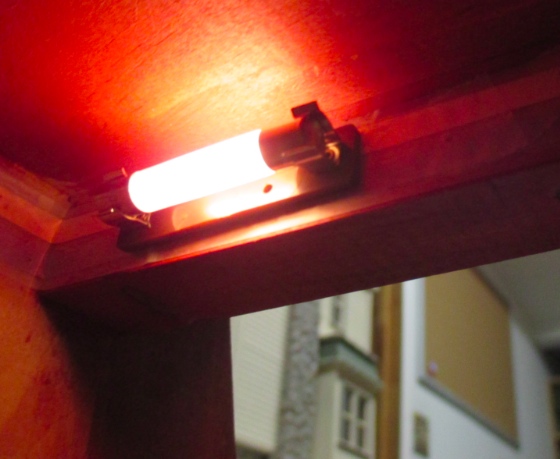
I was on the fence about whether to electrify this roombox. With the big plexiglass opening it doesn’t really need the light, and electricity and I don’t have such a good track record. But, the stove ornament has a lightbulb in it and I thought if I could get that working, it would be worth the trouble.
The ornament is supposed to plug into a string of Christmas lights, but I cut off the cord for that years ago. Here’s what’s left.
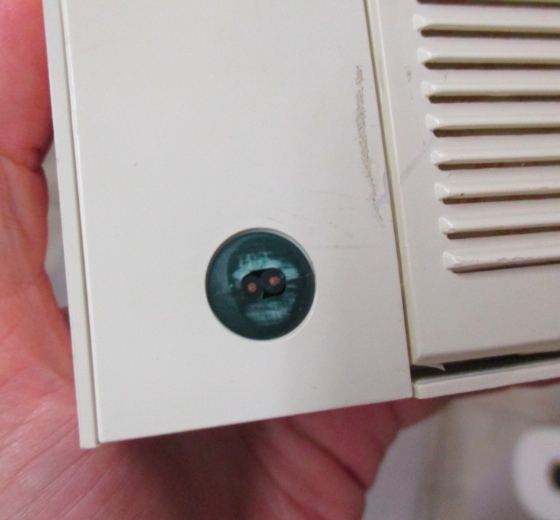
To test it, I took a plug and cord cut off from another light, stripped the wires at the end, touched them to the exposed wires on the back of the ornament, and turned on the juice. It worked!
This convinced me to go ahead with electricity. I put tape wire along the back edge of the wood piece at the top of the box, that holds the lid in place when it’s closed. It’s impossible to see this unless you stick your whole head in the roombox. I added two fluorette sockets with diffuse light bulbs that I had left over from the Gull Bay.
I’m also planning to add a couple of outlets so I can plug in the stove, and maybe also a stove hood light. (I’m tempted to splurge for this one from Reutter Porcelain, and could then add another fluorette light underneath it.) On the other side of the box, maybe a hurricane lamp to sit on the table. I want to stick with lights that plug in rather than fussing with hard wiring.
Here’s the layout so far. So far this is all stuff I had in my stash. For the walls I’m thinking a simple off-white, but the box is longer than a piece of scrapbook paper and I want to avoid seams, so I need to go to the dollhouse store and see what my options are in “real” wallpaper. The green tiles will be used as a backsplash.
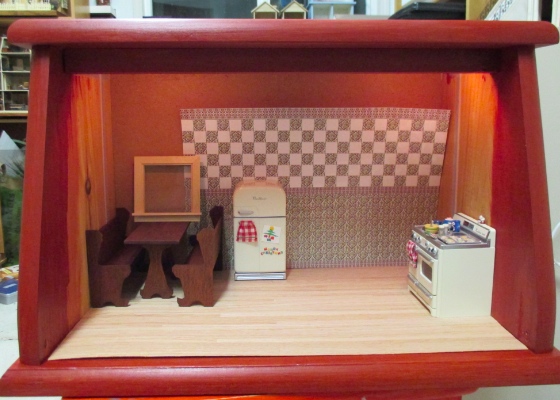
Other plans include scratch building cabinets (I’ve already started, but will save those pictures for another day) and adding a couple of windows with views into a snowy back yard, I also splurged on this gingerbread prep table which I’m going to use like a kitchen island in the center of the room.
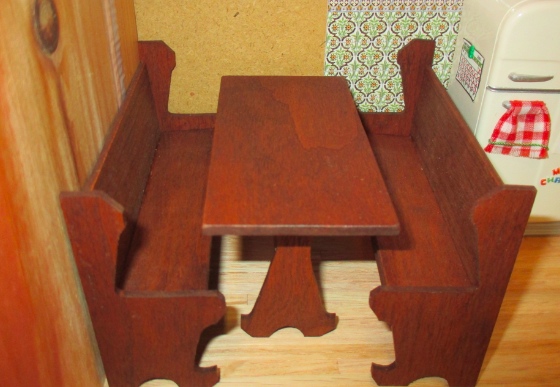
Close-up of the kitchen table and benches. These are made from a kit I got for $3 at a flea market a couple of years ago. Apparently they’re based off a pattern from an old Woman’s Day magazine. The wood is cherry and I stained it with Minwax English Chestnut.
 Emily is a freelance writer, miniaturist, and adventure game enthusiast.


You might want to add tags for “Christmas”, and “kitchen”.
Love, Dad
Eagle eye dad! Good call.
Cute ornaments and a great way to display them. It’s exciting that the stove light works!
oh I just found a picture of the bread box scene so sorry this is fantastic I love how you redid the front and the lighting GREAT JOB!!!
Thanks! :)