Momentum on the Christmas breadbox hasn’t been quite as swift as I’d hoped… first I was waiting for a Miniatures.com order to arrive, and now am waiting for a new ink cartridge for the color printer. (Way cheaper to buy it online than locally, but no instant gratification!) At least I managed to make a bit of progress on the cabinets and false wall while I’m waiting.
First of all, the lid came through its re-glue successfully! Geoff deserves all the credit for this. His gluing jig saved Christmas.
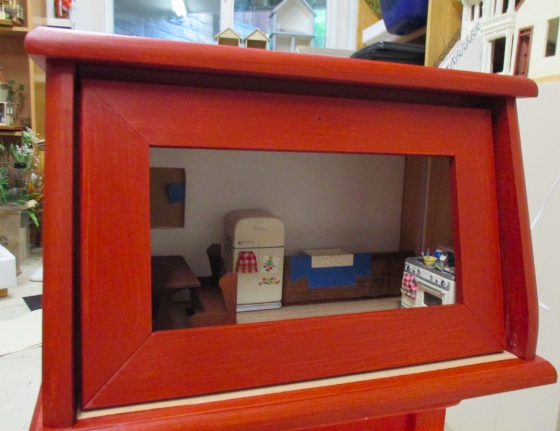
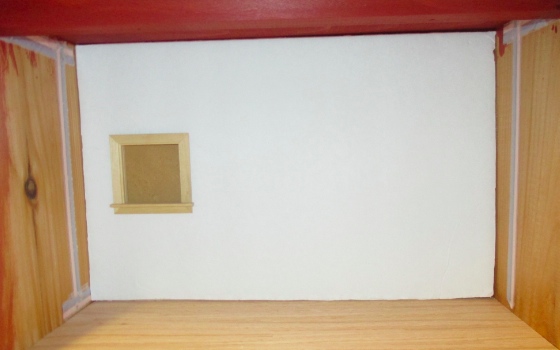
I cut this false wall from foamcore. There will be two windows — this square one over the table, and a casement window over the sink — with snowy scenes behind them. (Hence the ink cartridge I’m now waiting for.)
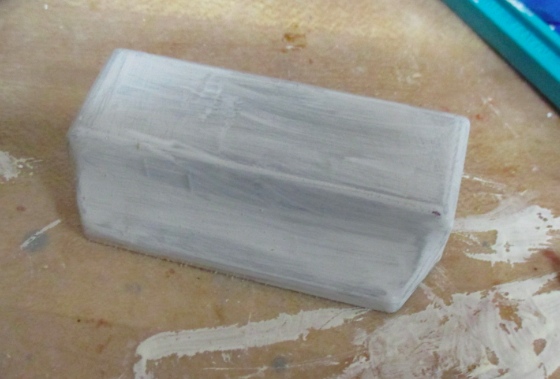
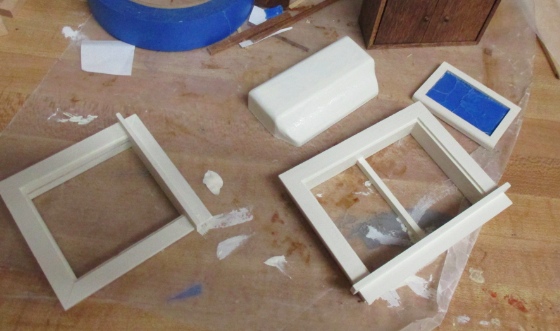
So here’s the stove hood I ordered from Miniatures.com. Now that I see it in place, it’s way too big. It looks totally out of scale, plus it gets in the way of the lid, and the yellowish color doesn’t really go with the appliances. Too bad, but I’ll save it for something else.
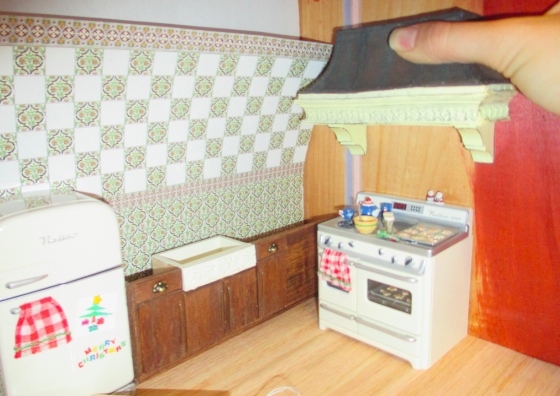
Luckily I had one of these simpler Houseworks hoods lying around. It’ll do, but it needs a cabinet over it.
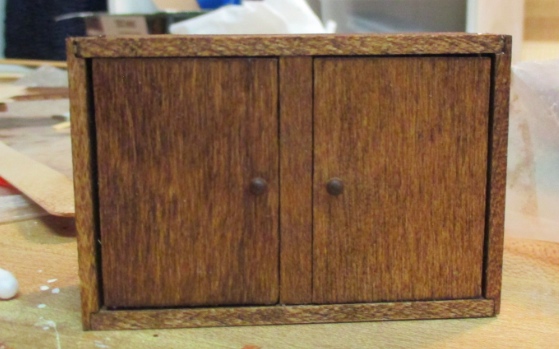
I’d been thinking I would make upper cabinets similar to the lower ones, but once I saw how much space is taken up by the casement window over the sink, I decided against it. I had this kit in my stash and the cabinet is just the right size to fit over the hood, so I decided to build this and have it be the only upper cabinet.
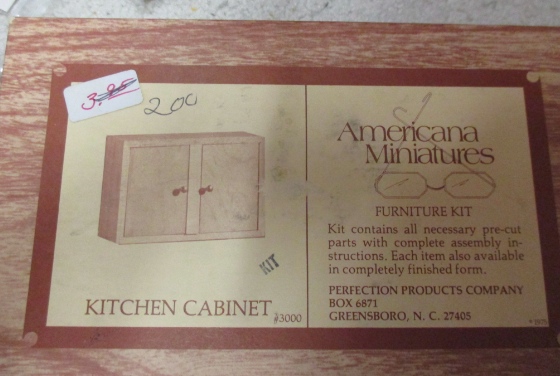
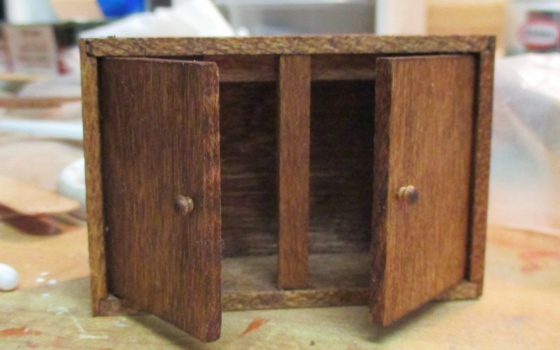
It went together very easily. Americana Miniatures is an old kit brand I’ve never tried before and I can’t complain (especially since I only paid $2 for it!). It’s of similar quality to the House of Miniatures kits.
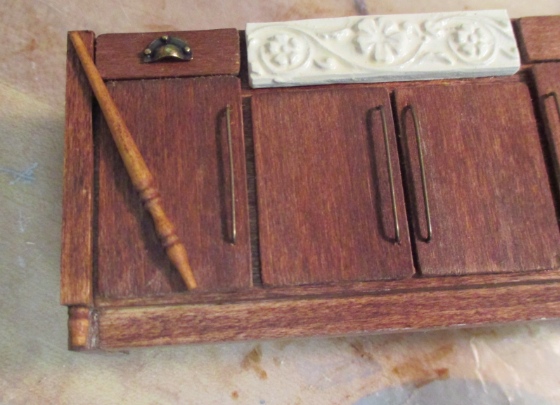
I wanted to use the same long handles I put on the lower cabinets, but the doors had holes drilled for the handles and the spacing didn’t work out. They also had holes already drilled for the pin hinges, so I didn’t want to make new doors. Hopefully the wooden knobs won’t look too inconsistent.
Since none of the kitchen appliances are shiny chrome, I decided to paint the hood off-white to go with everything else. I started by scratching up the metal with sandpaper, then did a few coats of gesso.
Then I painted the hood and the windows with Raw Cotton, the same color I used for the sink. I’m going to use this paint color on the crown molding and baseboards as well. I’ll coat the stove hood with gloss varnish before gluing it to the underside of the cabinet so it (hopefully) looks like enamel.
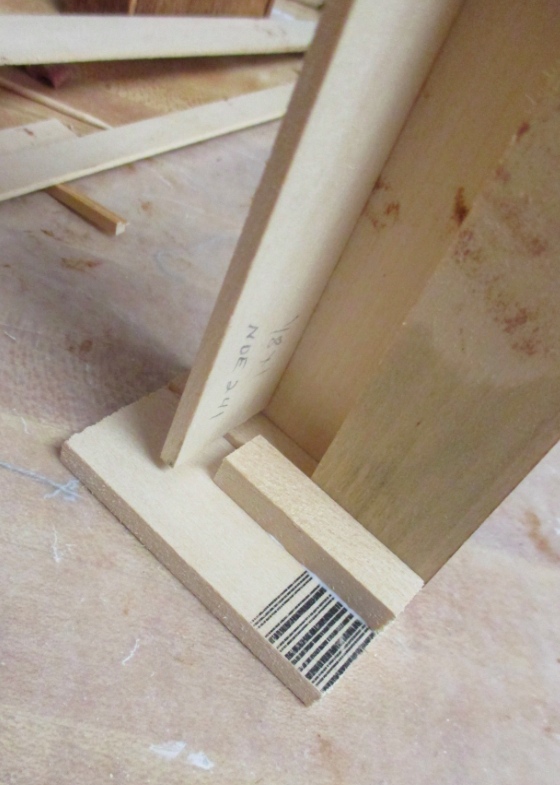
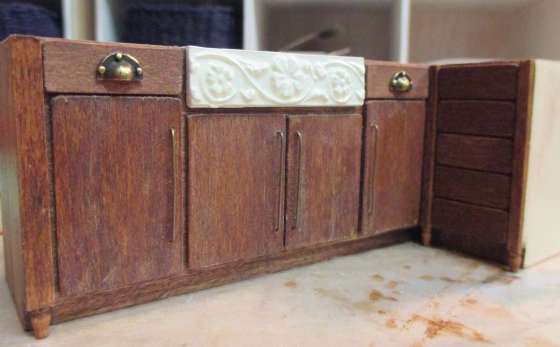
Back to the lower cabinets! I found that when I put the cabinet I’d already built in place, the open end was sliding around rather than meeting the wall at a nice right angle. To remedy this I added some scrap wood to the edge to create a surface that sits flush against the wall. (This might be TMI, but I didn’t want people who are following along to wonder where that edge magically came from if you see it in later photos…)
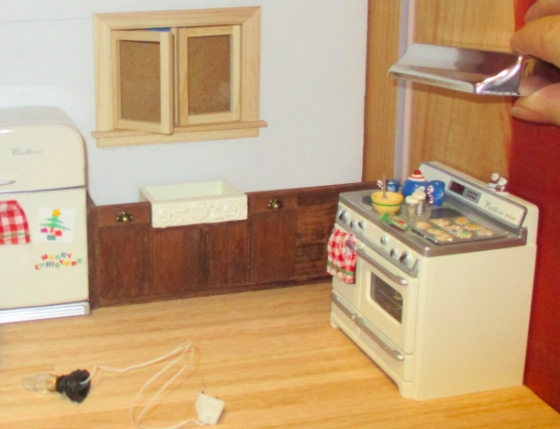
I held the upper cabinet I’d built from the kit in place above the stove to measure how far out it could be without interfering with the roombox lid, and drew a pencil line. I used this to figure out where the stove needed to sit, which dictated how wide the cabinet to the left of the stove could be. Since the lid sits at a slant, there’s more space at the bottom of the roombox than at the top, so it seemed like I could also add a cabinet to the right of the stove.
Each of these is a little over 1″ wide. The one with two sides is intended to go to the right of the stove, and the one with only one side to the left of the stove, with the open side butting up against the other cabinet unit at a 90-degree angle.
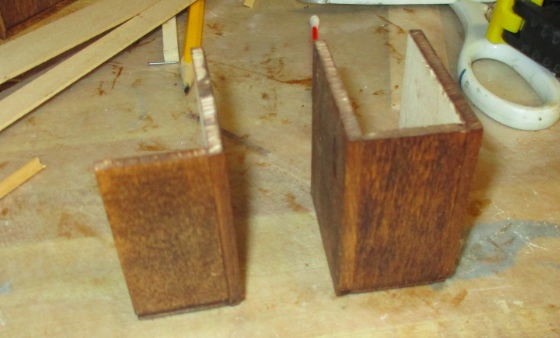
Apparently my math was off (surprise, surprise), because when I put everything together, the lid did bump into the right-hand cabinet. I was able to sand the edges of both cabinets just enough so the lid closes without bumping, but not enough to accommodate the countertop I’ll be adding. In the interest of lowering my rapidly rising blood pressure, I decided to axe the cabinet on the right.
(I liked the cabinet unit that was supposed to go on the right better than the other one, though, so I ended up tossing the one that would have gone on the left and using the one that was supposed to go on the right there instead. Again, maybe TMI, but otherwise the pictures might not make sense…)
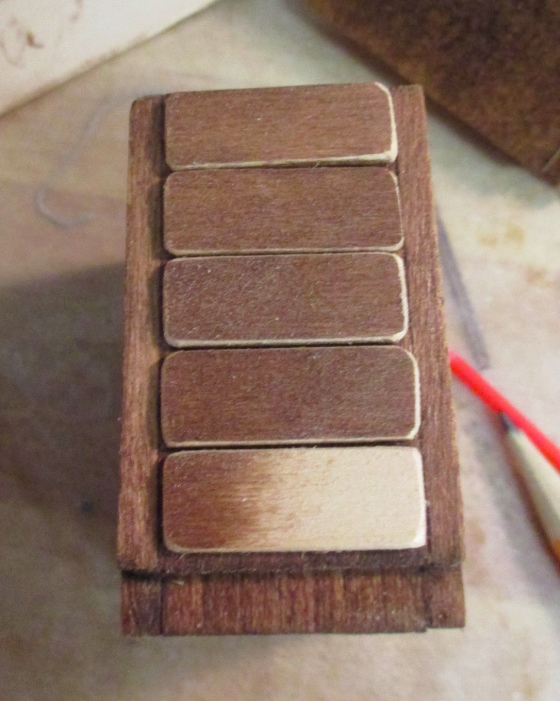
I had a bunch of those half-moon drawer pulls, so decided to put drawers on the small cabinet.
On both cabinet units, I covered up the fronts of the edge pieces with pieces of strip wood. I like how this makes the cabinets look more finished.
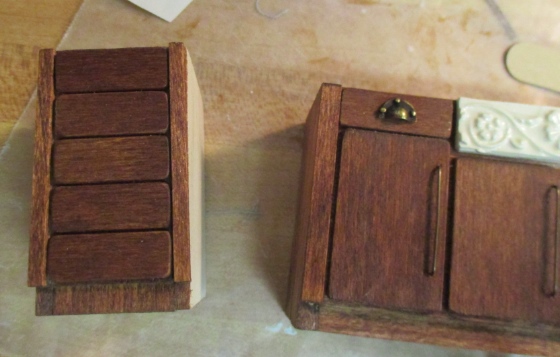
But once I saw them in place, I realized the added strip wood looked funny at the bottom — like it’s hanging in space. I looked at some pictures of real cabinets and realized that mine are in desperate need of feet.
I pawed through my stash and found some (already stained) spindles. The stain isn’t quite the same but it’s close enough. I cut off that bottom pointy portion just above the ball, then cut it down to fit the area under the cabinet (1/4″).
I think that looks much better! Almost like I planned it that way…
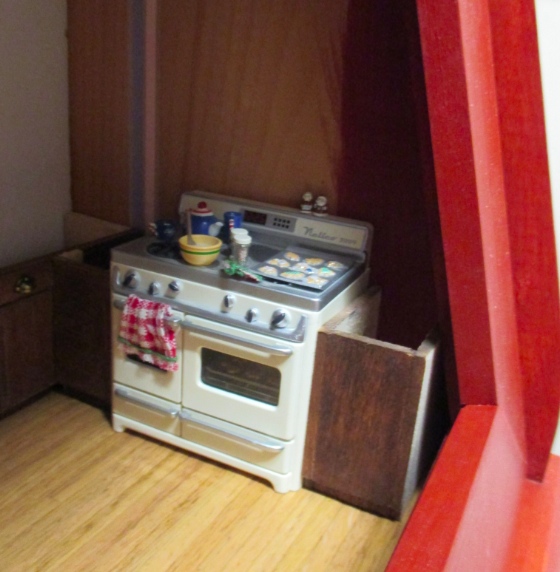
Here’s the new cabinet with all the drawer pulls.
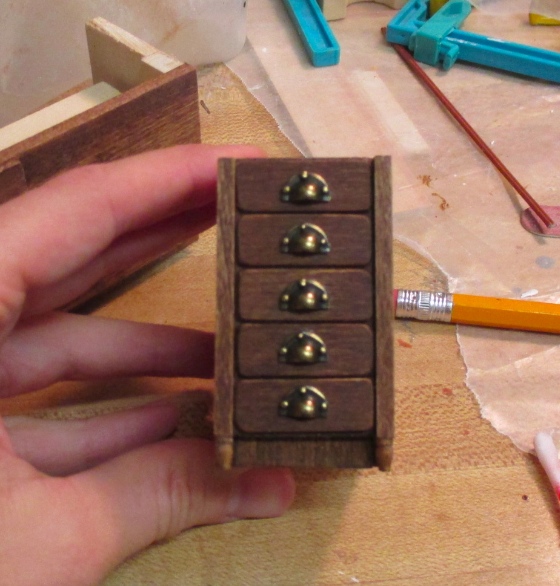
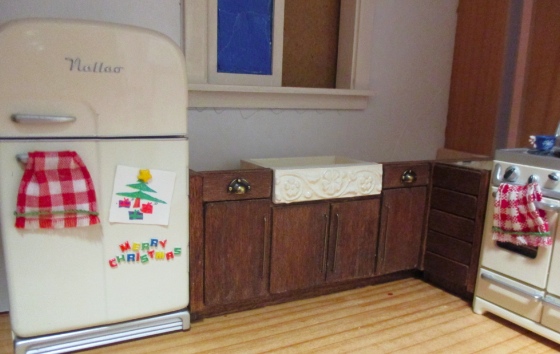
And in place. As Geoff pointed out when I showed it to him, the top drawers would bump into each other if you tried to open them. But these drawers don’t open — and kitchens don’t exist inside of breadboxes, for that matter — so I’m pretending he never said anything.
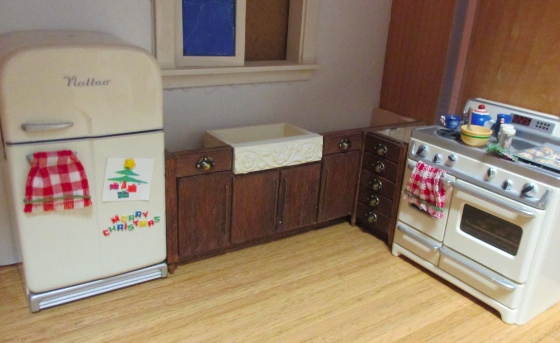
Once the printer ink I’m waiting for shows up, I’ll print the snowy graphics and glue them in, and then glue in the false wall, and *then* I can glue these two cabinet pieces together and tackle the countertop. The roombox isn’t completely square so I want to wait until the false wall is glued in before I glue the cabinets together, so I can make sure they fit properly in the corner.
 Emily is a freelance writer, miniaturist, and adventure game enthusiast.


I think it looks great, good idea to pretend men don’t say things xx