If I’m moving at a snail’s pace with the back-to-back Victorianna, it’s only because this house requires so much thinking! Once it’s put together, some spaces (like the staircase) are inaccessible, so I have to do everything I want to do there before I put the back on. But, some spaces (like the hallways that link the two sides of the house) need to be finished once both sides of the house are assembled, to avoid seams and obvious gaps where the two kits meet.
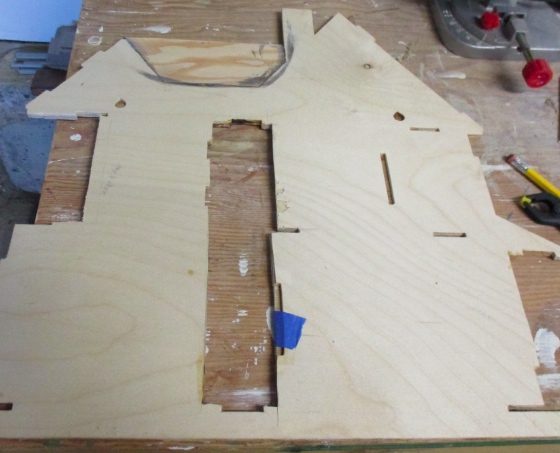
So, a lot of the time between my last post and now has been spent just trying to wrap my head around what needs to be done, in what order. Last time I closed with epoxying the piece that will allow me to alter the roof line. Here’s how it turned out. After taking it out of the jig, Geoff did some sanding to neaten up the edges where the epoxy squeezed through.
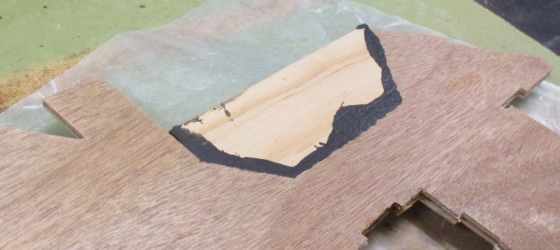
The other side, which was against a piece of wax paper, actually came out cleaner. It looks messy but the epoxy dried smooth.
Since this house is made to hang on the wall, the back piece has two holes to hang it from. In the regular plywood kit these are punch-outs so I left the pieces “punched in”, but in the birch plywood version the holes came already punched out.
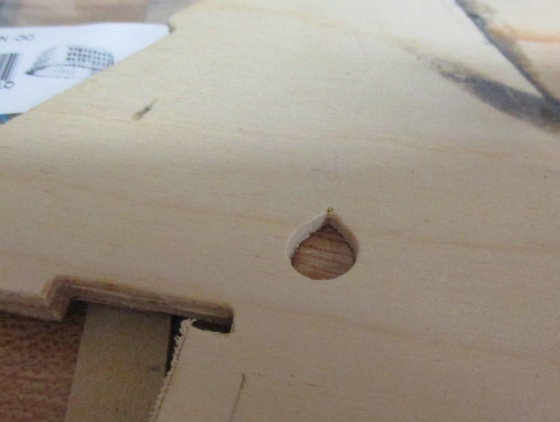
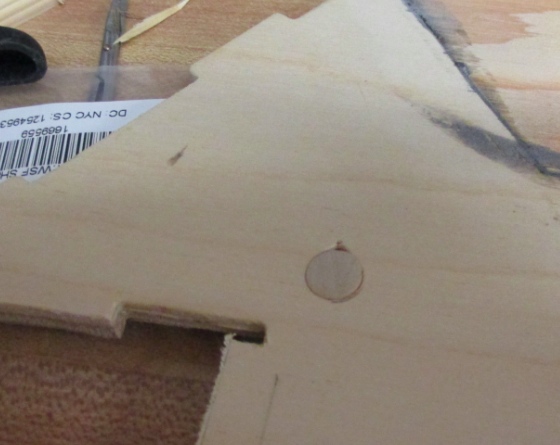
To fill the hole, I found a dowel the right size.
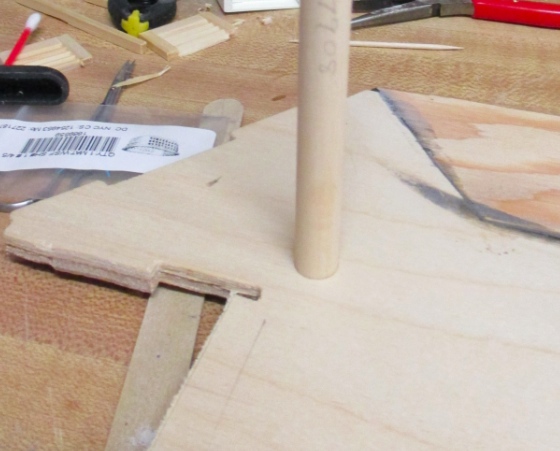
I cut off a skinny piece, glued it in, and then sanded it flat. I would have liked to do this with the other hole but some glue had squeezed through when I glued the two back pieces together and dried there, so the dowel wouldn’t fit. On that side I used wood filler (which took several coats since the hole was really too deep for wood filler).
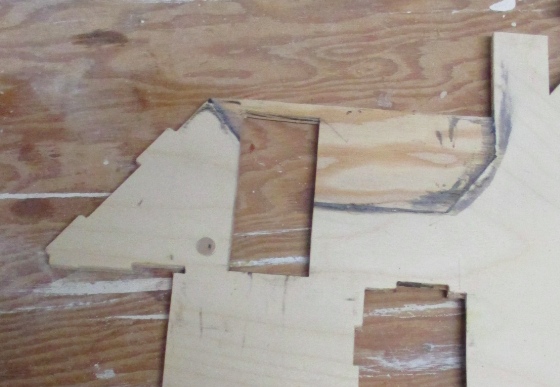
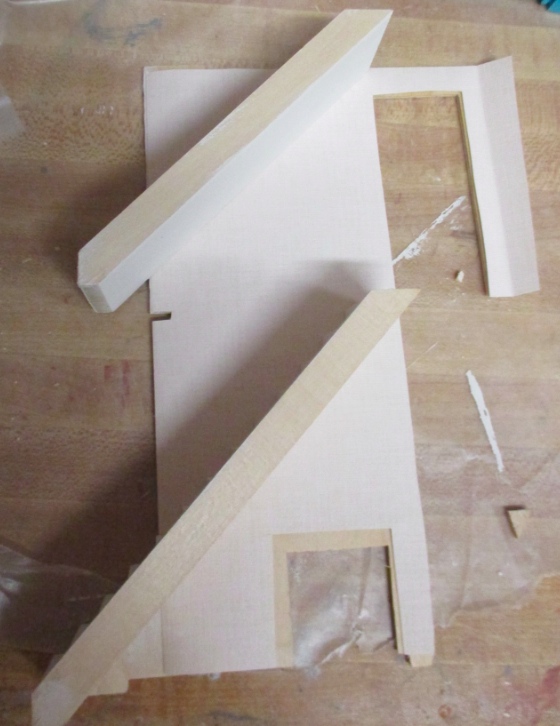
Now, time to defile my nice epoxyed-in piece by cutting it up! I wanted to connect the two sides of the third floor with a hall lined up above the hallways I cut downstairs, but that would have left the back piece with a big gap all the way up the middle and I was concerned about stability.
Instead, I decided to put a door farther to the left. This will be the master bedroom and the door leads to the master bath. I’ll probably make it a “Jack and Jill” bath with another door off the bathroom leading to the rest of the third floor on the other side of the house.

Geoff used the jigsaw again to cut the hole for me. I promised this would be the last one for a while.
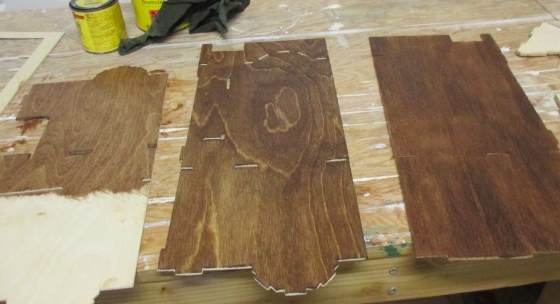
My next pre-assembly step was to stain the floors. (I always do this and then end up covering the floors anyway…)
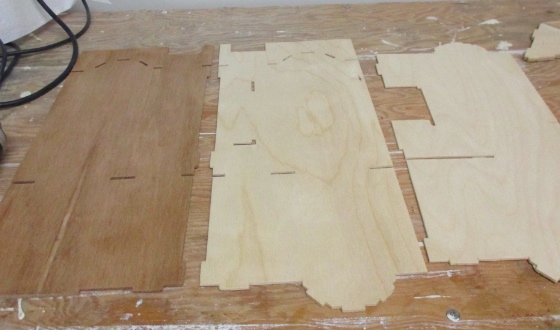
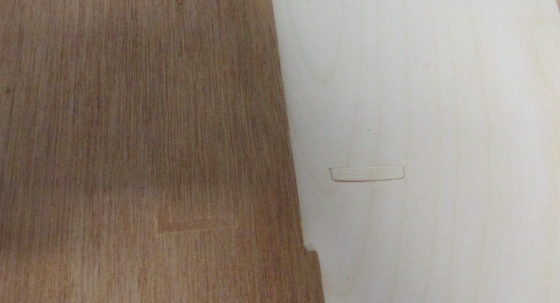
I wasn’t sure how the unpunched slots would look with stain over them. Since I’m building the regular plywood kit “inside out”, the floor is flipped over from usual and the unpunched slot is barely visible. But on the birch plywood it’s pretty obvious.
But the unpunched slots aren’t even the worst part! The birch first floor has a crazy grain in it. No way this is going to pass for a 1:24 scale floor. Okay, guess I’ll be doing what I always do and covering it up. Yesterday I bought some wood veneer off eBay that I hope to use for this.
Next, stairs. I’m using Houseworks stair kits with some modifications. I painted the risers white, and will use dark stained treads.
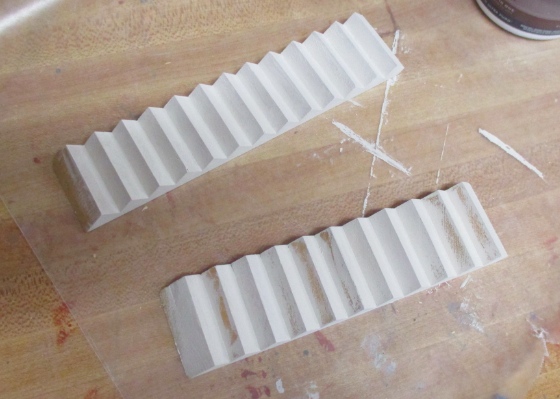
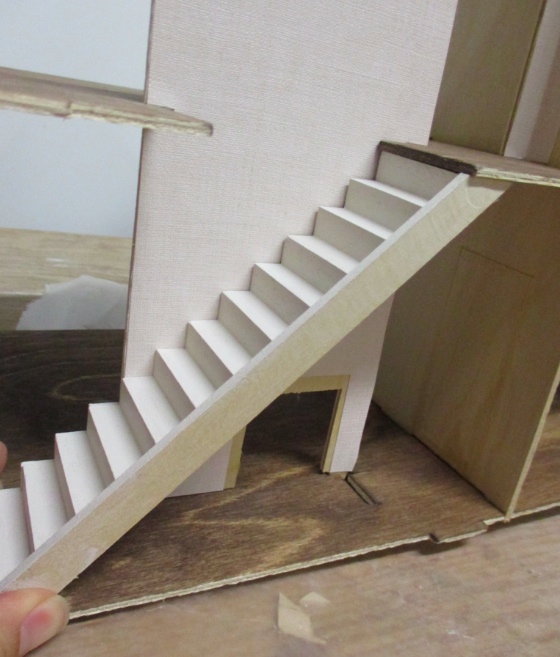
This stairway isn’t as wide as the kit stairs, so there’s a 1/8″ gap.

I glued a piece of basswood to the side of the staircase, to fill the gap. This will also serve as a baseboard, which real life stairs often have and dollhouse stairs often don’t.
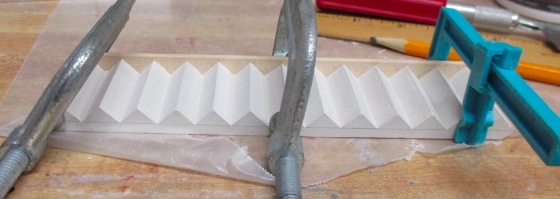
It fills the gap nicely. I could have used one half as thick and done it on both sides, but since the bottom four stairs are cut into the wall I’m planning to extend the tread over the edge of the wall, and a baseboard would have gotten in the way of that. Technically both sides should have the baseboard, but it’s going to be really hard to see that side of the stairs once everything’s assembled and I don’t think it’ll be too obvious.
I painted the baseboards and the stair-shaped part of the wall. The paint I’m using is Behr Tuscan Beige, and it will be the trim color throughout the house.

Next I cut wallpaper for the inside of the staircase wall. Walls with stairs on them are way easier to paper before the stairs are installed.
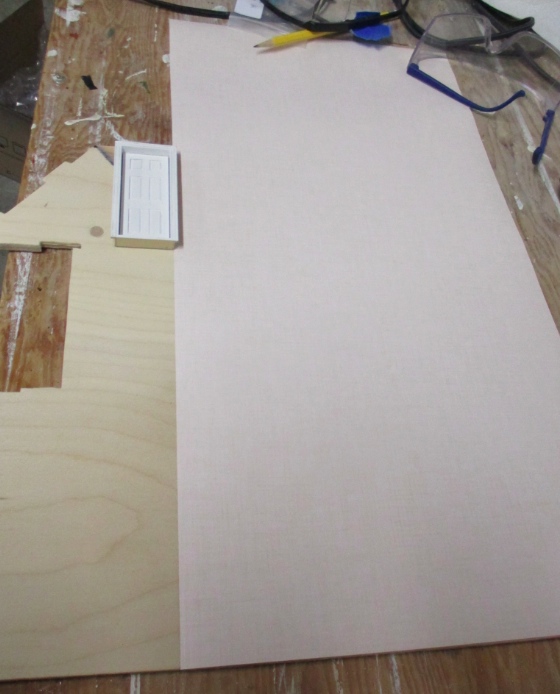
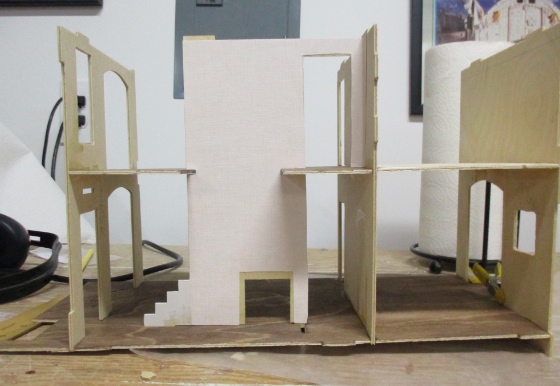
This paper is 1:12 wallpaper and the dimensions are 11×17″. I chose this so I can go up all three stories on the back wall without any seams. I used the edge of the paper as the basis for where to cut the door — there will be a small seam just above the door where another piece of wallpaper meets this, but it will be obscured or hidden completely by the door trim.
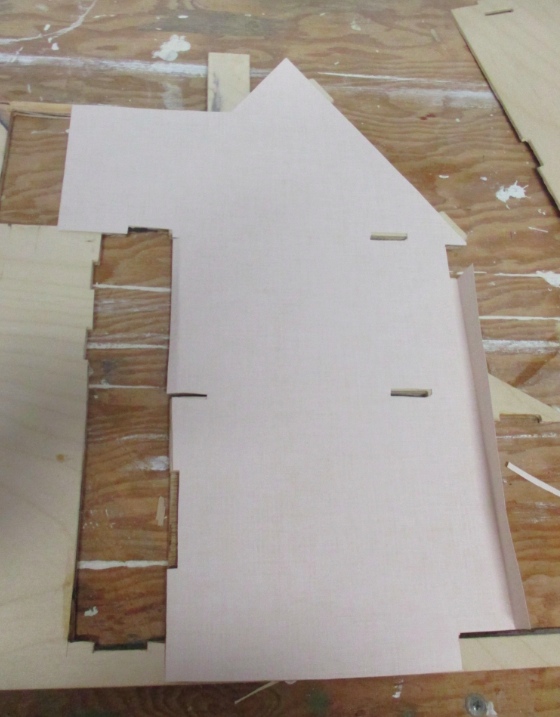
Here’s what I ended up cutting. One of the things that I’ve had to think about a lot is how the room fits together and wallpaper needs to wrap. Here, I left an extra flap that can wrap around to the perpendicular wall, so there won’t be a gap.
Before gluing these on the walls I went outside and sprayed them with matte sealer.
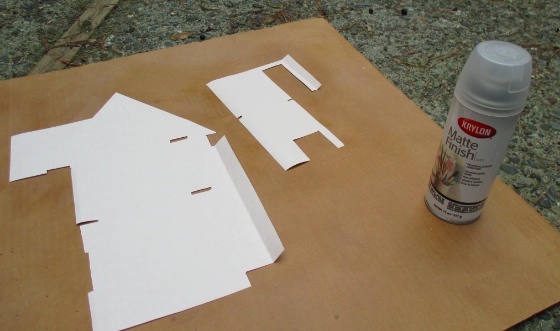
I think those are the only two walls that need to be papered before assembly, so it’s time to take out the glue! Since I’m bashing so much, I’ll probably stop paying attention to the instructions very quickly, but I at least followed Step 1. First, the center wall and fireplace wall slide into the second floor.

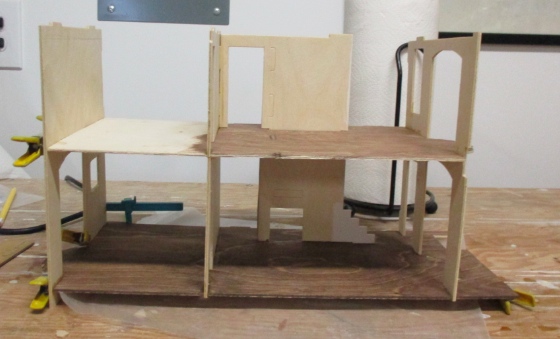
Then add the first floor and left and right walls (which are the front and back of the house). Some of my pieces are warped so I flipped the house over and put Shakespeare to good use once again. The little clamps on the protruding bay window floors are holding the bowed wall in position.
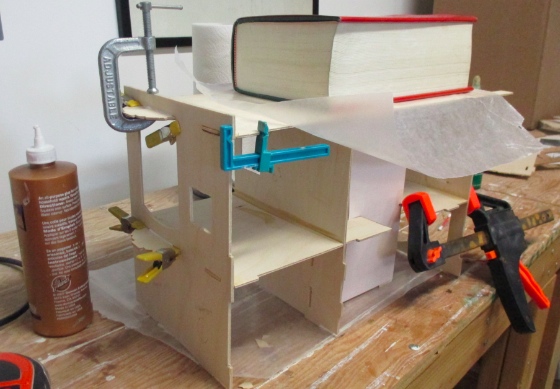
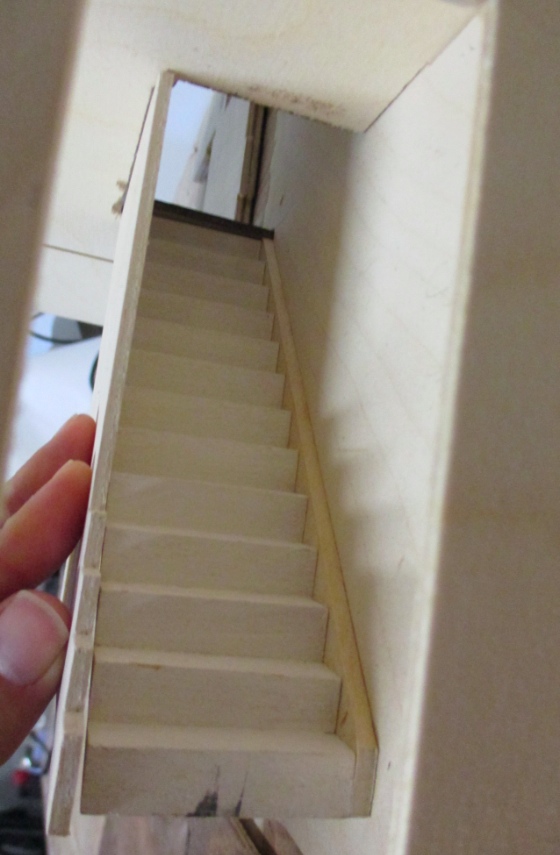
Finally, it’s starting to look like more than a pile of wood sheets!
As long as the back wall is off, I have easy access to the stairway, the inside of the fireplace, the fireplace side wall (where I want to add some kind of built-in), and the little hallway room at the top of the stairs. Once the back wall is glued on these will be next to impossible to fiddle with, so as impatient as I am to keep going, I have to make sure I get everything done in here before I move on.
And that’s what my next post will be about, starting with the stairs.
 Emily is a freelance writer, miniaturist, and adventure game enthusiast.


I like to do a base board for the stairs too – it gives a lovely finish. You are putting so much thought into this house and it is working out so well.