After my huge struggle to get the rowhouse attic wallpapered, I was disheartened when I returned to the house a few weeks later to find that the glue had discolored my white paper. I’m not sure why this happened but am willing to blame it on the fact that I printed my own wallpaper… it’s special paper meant for color ink jet printing, but maybe it just can’t stand up to the wallpaper mucilage like scrapbook paper or standard dollhouse wallpaper can. (I think I noticed some discoloration on the hallway paper, too, but the print is so busy and the room so cramped, it’s hard to tell.)

Rather than waste more of my life trying to make this paper work, I decided to get back to basics. I found two sheets of off-white scrapbook paper in my stash with a very faint cross-hatch design, and decided to use this for the upper part of the wall, with paneling covering the knee wall. I was having a hard time finding two different Victorian patterns to use in the side by side attic rooms without clashing, so this will have the added benefit of making the two rooms work better together.
I bought some 2″ wide basswood (the height of the knee walls) and trim pieces to make my own paneling. The materials cost about $10 altogether. Here’s the rough idea.

I stained the wood pieces with the Early American stain I’m using for the shingles and interior trim.

While the stain was drying, I installed a light socket in the smaller attic room. Originally I’d planned to use a ceiling fixture in here but the one I had wasn’t working (the plug the bulb fits into was faulty) and I’m tired of buying new lights!
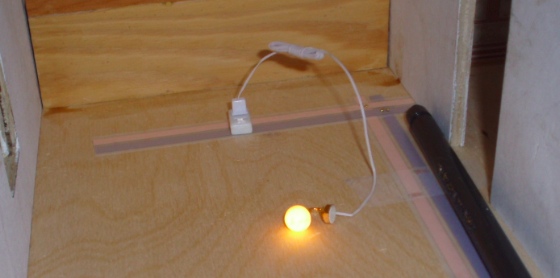
Since the outlet is not at all to scale, I positioned it so it will be covered up by the bed. This might not be the bed I end up using in here, but this is the basic idea.

I sprayed the paper with matte sealer and papered the upper halves of the walls. I only had two sheets of this paper and was afraid I’d waste a bunch of it with glue messes, but the wallpaper gods were smiling on me (or maybe the glue issues I was having before really did have something to do with my printie paper).

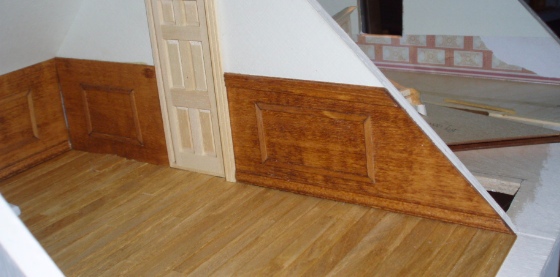
Here’s how it looks with the stained wainscot.

And here’s the larger room. I had been concerned about my (busy) wallpaper looking okay with the pool table and carpet I cross stitched, and this simpler color scheme will probably work out better, anyway.

To make panels, I cut up some small basswood strips that I originally intended to use for a border on the hardwood floors and then vetoed. These panels are roughly 1″ high by 1 1/2″ wide.
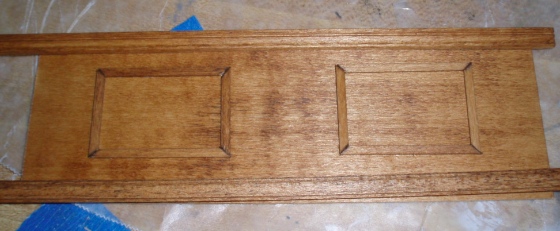
I wasn’t super precise with the spacing, but they turned out okay.

The panels on the pieces that end in a diagonal, I ended up making a bit longer, because otherwise they looked very off center. (I wanted the spacing on either side of the door/window to be the same on both sides.)

I ran out of the trim I was using to make the panels before finishing the wainscot for the bigger room, so I moved onto the hardwood floors for the smaller room. I started at the front, since I wanted the front edge to be clean (this is where the ceiling lifts up, so it’s very visible!) The back is much harder to see so I figured if I had to cut a piece of floor to fit, you wouldn’t be able to tell. Here it is about halfway done.

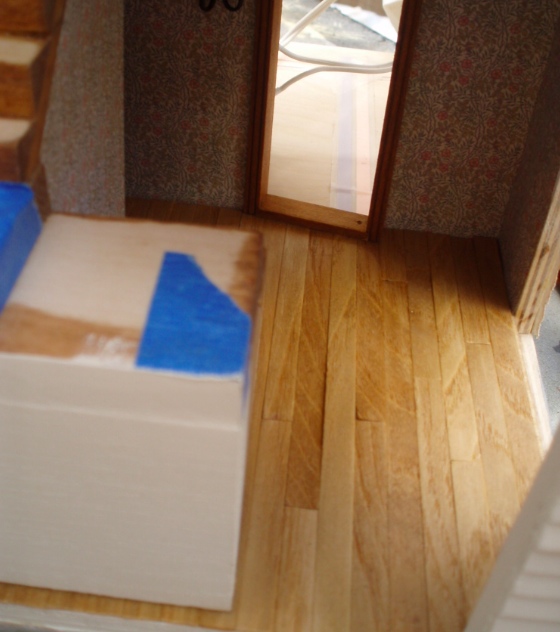
And fully done. Where the mess of tape is, I had a bit of an issue trying to get the floor to lie flat on top of some brads where two pieces of tapewire are connected. (The same thing happened in the hallway.)

Next, I added the baseboard, which is a piece of 1:12 chair molding.

So far I’ve added just this one piece of molding at the top. I want to get the window and door stained and glued in before I tackle the rest.

You can see in this picture that the wainscot doesn’t quite meet at the corners. (My knee wall wasn’t quite square to begin with…) I didn’t notice until it was too late, but I’ll do something with trim in the corners to cover it up.
And here’s a close-up of the stubborn floorboard. One corner of that little board is sticking up a bit, I’m going to try to sand it down. But in the grand scheme of things it’s not *too* noticeable…

 Emily is a freelance writer, miniaturist, and adventure game enthusiast.


Looks great. The wainscot panels worked out really nicely.
Dad