I’ve started furnishing the Little House cabin. I’ve collected several Cassidy Creations kits for this house and am also planning to scratch build some of the furniture.
I started with the “big bed” and trundle bed. Little House in the Big Woods has a couple of illustrations that part of the big bed’s headboard, but not the whole thing, so I didn’t have a good idea of how I wanted it to look. A bed seemed easy enough to scratch build, but it would need enough clearance underneath to fit a trundle bed, and that made it a little more complicated than I wanted to tackle on my own.
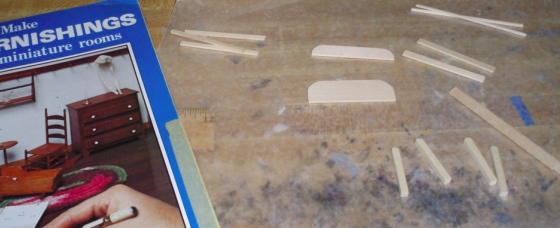
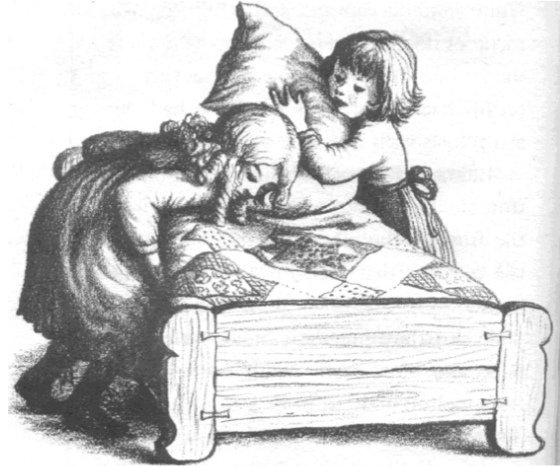
I have a very old pamphlet named How to Make Shaker Furnishings for Doll Houses or Miniature Rooms that has 1:12 patterns for a bed and a trundle bed. I adapted these to half scale. Here’s a photo out of the pamphlet, of how the finished pieces should look.

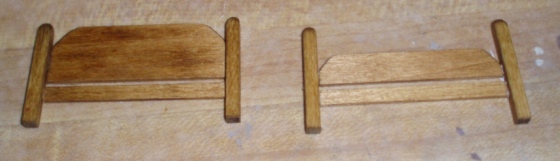
I built the big bed first. I made these out of basswood and just cut the dimensions of the pieces in half. The 1:12 plans called for wood that’s 1/16″ wide. I stuck with this width even though it technically should have been 1/32″ wide, because I was concerned that 1/32″ wood would be tough to glue.
The headboard is a bit taller than it should be (larger than half the size of the original pattern), because this was the closest I could get at the shop and I didn’t want to cut it down, but all the rest of the pieces are exactly half the length and width from the original plans.
The instructions weren’t really clear about how high up on the posts the headboard and footboard pieces should be, so I figured out how high the bottom pieces needed to be to provide clearance for the trundle bed and went from there.
Also, the instructions said to glue the pieces into the middle of the posts, but it was easier to glue them flush up against one edge, so that’s what I did. The wood is stained with Minwax Early American. The posts were shaped by cutting off the top corners with a utility knife, and then sanding them round.
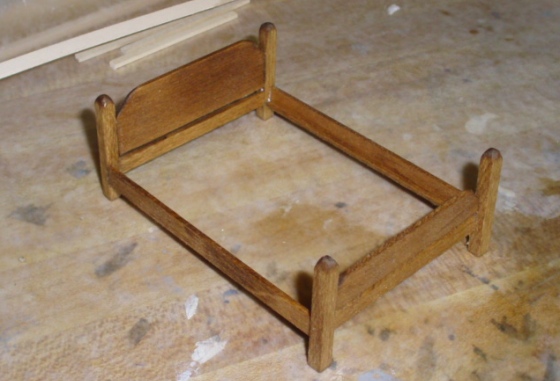
Here’s the basic bed. Initially I glued these so the flush edges of the headboard and footboard were both facing in, but I realized once I put it in the house that this looked funny where the bed was up against the wall. Since the not-flush part was facing out, there was a gap between the headboard and the wall. Luckily the glue wasn’t dry so I was able to switch it after taking this picture.
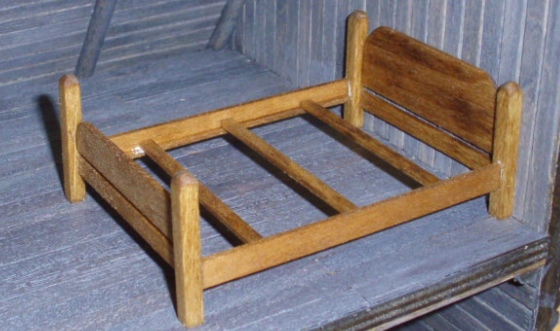
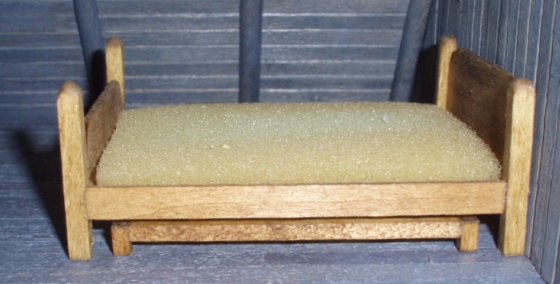
The instructions said not to stain the slats, but I thought it looked better with everything stained. Here’s the finished bed (glue still drying).
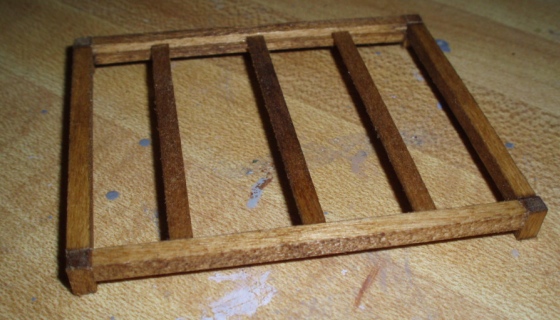
On to the trundle bed. The illustration in Little House in the Big Woods makes this look like a miniature adult bed, and I’m a little sad that my replica doesn’t look like this. But following the pattern was easier than trying to figure it out myself!
The trundle bed uses similar materials to the big bed, except that the posts are a little skinnier (and, obviously, much shorter!) Here’s the finished result.
Here’s how it looks under the bed.
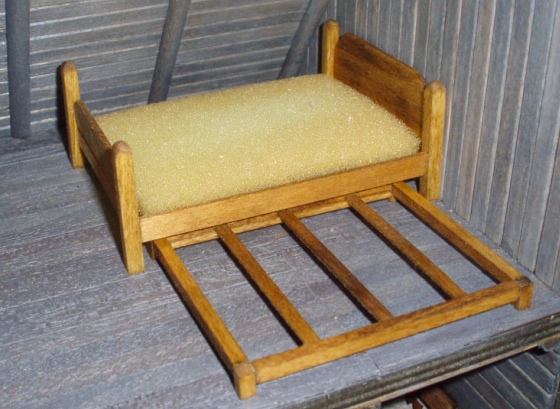
And, slid out from under the bed.
For now I just have a piece of foam on the big bed, which I will cover to make it look more like a mattress. (Or a “straw tick,” as the book would say.) I’m cross-stitching a quilt from a pattern in Miniature Embroidered Patchwork Projects. It’s stitched over one on 32-count linen and the finished size will be about 2 5/8″ by 3 3/8″.

As for the trundle bed, I’m not sure there’s enough space for a mattress and pillows. I plan to cross stitch another quilt to go on that bed and am thinking about ways to fudge the appearance of a mattress, like by gluing a piece of batting onto cardstock and then laying the quilt on top of it. If I make the quilt exactly the same size as the opening, it might look like it’s tucked in over a mattress. And if pillows won’t fit, then those can sit on the big bed until the trundle bed gets pulled out.
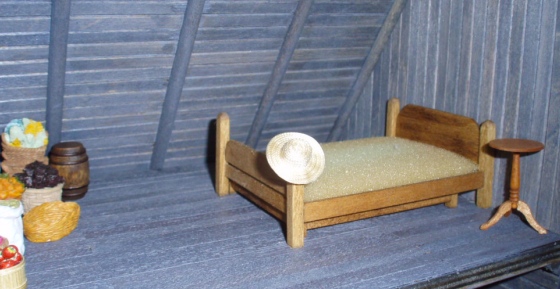
Here’s a glimpse of the two beds in place in the attic, along with a Cassidy Creations table I’d built previously. I’m still planning to make a Cassidy Creations cradle and blanket chest for this room. In Little House in the Big Woods, the bedroom is a second room downstairs and the attic was just used for storage, but that never would have worked in this tiny cabin. But as you can see on the left, I’m still going to use part of the attic for food storage. I’ll hang a sheet there to separate the space into two rooms.
Moving downstairs, the next piece I worked on was the Boston rocker. I spent a long time looking for a rocking chair that would work in this cabin. I’d seen a few from Town Square Miniatures, but they looked clunky and only came as part of a furniture set. I checked out several kit options but none struck my fancy.
Then I vaguely remembered that the Shenandoah Miniatures Colonial Collection used to be available in half scale… Hobby Builders Supply carried the pieces years ago, long before I got into half scale. I was pretty sure a rocking chair was among the pieces but couldn’t find them for sale anywhere. I posted about it on the Yahoo half scale group, and in addition to many helpful responses from people who remembered the half scale pieces, I got an email from a lady who had the rocking chair in her stash and generously offered to send it to me.
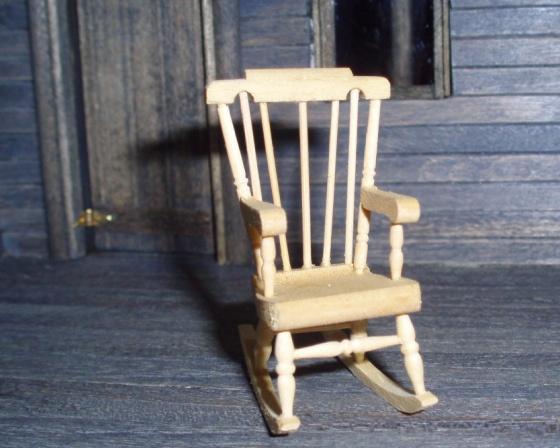
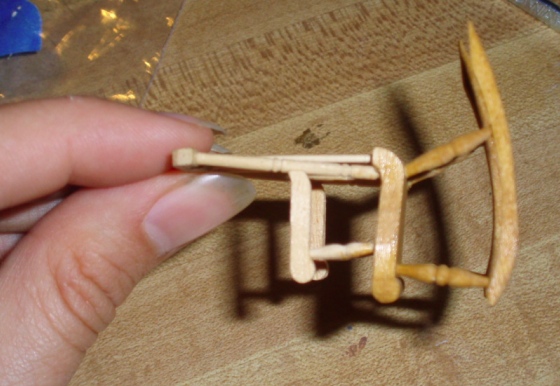
The Shenandoah rocking chair has gorgeous detail and looks perfect in the cabin. It came unfinished.
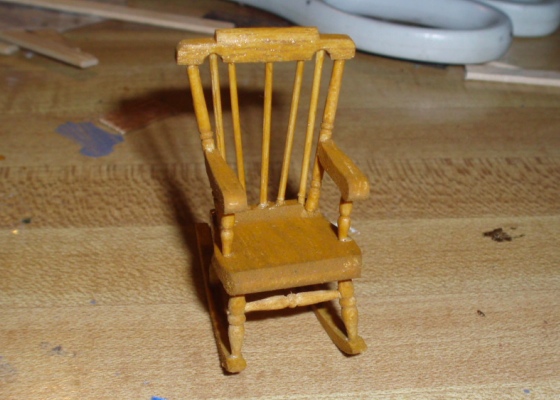
I stained it with Minwax English Oak, which is a water-based stain. Since the piece was preassembled, I thought there might be glue spots that would stand out after staining, and this seems less obvious with the water-based stain than with oil-based. Here it is with the bottom part stained and the top part still raw, so you can see the difference in color.
And fully stained. It’s a really nice little rocking chair!
And here’s a sneak peek at the main room. The table is one I’ve had for many years, that I originally planned to put in the Fairfield. It’s built from an SDK Miniatures kit but I enlarged the top piece to give it a slight overhang. (Also, now that I look at it, it seems to have a crooked leg…) The scratch-built ladderback chair, which came out of my Fairfield, is temporary; I’m planning to make two like that (but darker) for Ma and Pa to sit on, and also a bench to run along the long end of the table for the kids.
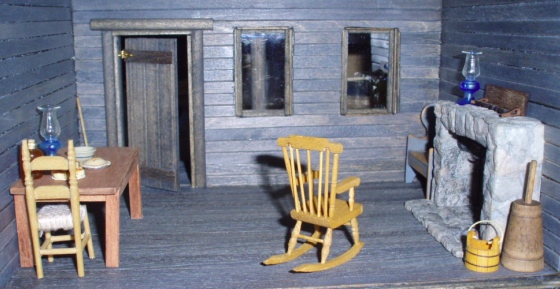
I’ll also be building Pa’s gun-and-trap-cleaning bench to go under the windows (also a Cassidy Creations kit), and will set up a “kitchen area” with pots and pans, etc. in the corner next to the fireplace. (Right now there’s a little settle hidden back there but I don’t think it’ll stay.) And there are some other accessories waiting to be scattered around. I’ll post more pics when it’s all finished.
 Emily is a freelance writer, miniaturist, and adventure game enthusiast.


I just read all of your posts and really enjoyed following this build! Well done! I can’t wait to see the entire project finished (if we can ever actually finish a dollhouse). Very wonderful !