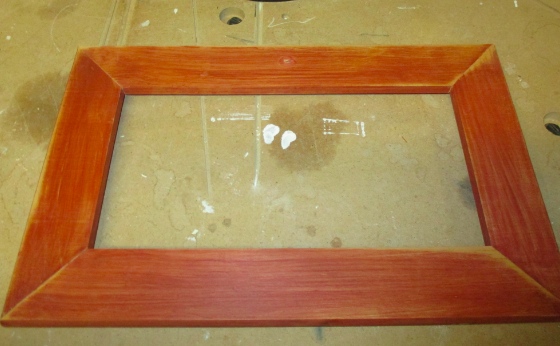
After my first post about the breadbox roombox I kinda stopped talking about the broken lid. Surely all of my readers are dying to know what happened to it, so here you go! When we last saw the roombox lid, it was sitting snugly in a gluing jig. The corners weren’t quite right and Geoff fixed them for me with power tools. We glued the pieces back together with wood glue.

When the glue had dried, he took it out of the jig and sanded it for me with the mouse sander to make it (and especially the joints) nice and smooth.
I then went over it with another coat of stain.
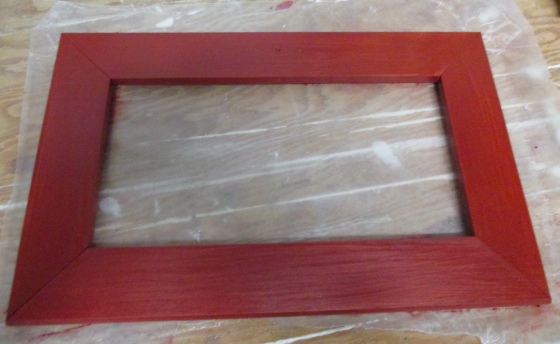
The 45-degree angles weren’t perfect, so the seams at the corners were kind of obvious. I tried filling them with sawdust, but when I brushed on the stain it all stick to the brush and came out.

Luckily this is water based stain and, unlike oil based stain, it takes to wood filler. So I filled the seams with woodfiller and stained over them, and now the corners are cleaner. (In the pic below, one of those seams hasn’t been filled yet…)
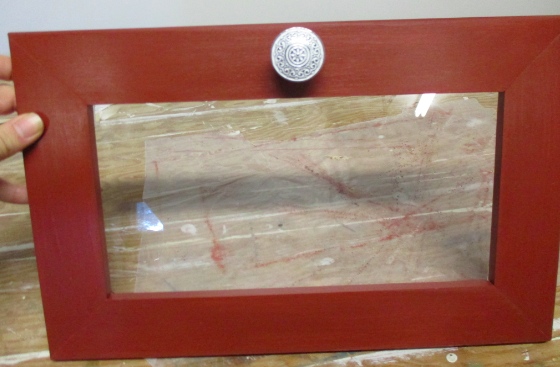
Time to put the plexiglass back in! The piece that came with the roombox was scratched up, so I went to the local Tap Plastics to buy a new one. The acrylic I got is a tad thicker than what came with the roombox, and they cut it to size for me, for a grand total of $2.19. I was nervous about getting goop on the front of the plexi, so Geoff glued it for me using clear Lexel silicone caulk adhesive.
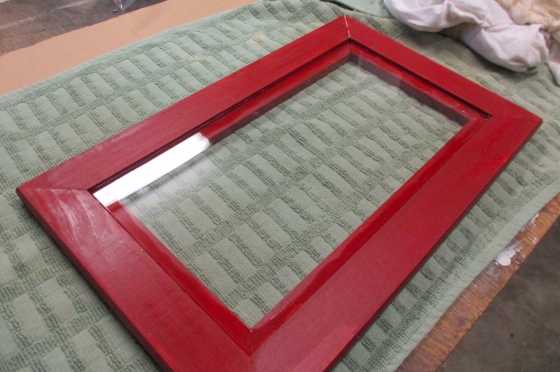
(The guy at Tap Plastics recommended gluing with E6000, and I actually bought some, but it wasn’t the crafter’s variety so it didn’t have a fine tip. Geoff had already purchased the Lexel, which he was familiar with from building a life sized airplane. The E6000 might have been a better choice, but because we already had this stuff and it had a pointed tip, we ended up using it. But it had the potential to spooge all over the place, which is why I had him do the gluing!)
Finally, here’s what Geoff rigged up to hinge the lid. Originally it was hinged with nails, which might have had something to do with why the lid fell apart in the first place. He was nervous about messing too much with our newly glued joints, and didn’t want to drill a bigger hole in the lid or drive a hinge in any farther than necessary. So instead of nails or screws he made this by cutting and bending a hinge pin he had lying around in his leftover airplane parts.
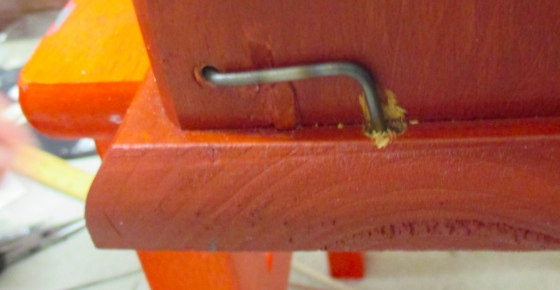
One end sticks through the hole in the breadbox and into the hole in the side of the lid. The other end pokes down into a hole drilled in the base of the roombox, which keeps the hinge from moving around when the lid is opened and closed. If I want to remove the lid, I just pop the ends of the hinges out of the drilled holes and pull them out. (I do plan to stain the raw wood here, just haven’t gotten around to it!)
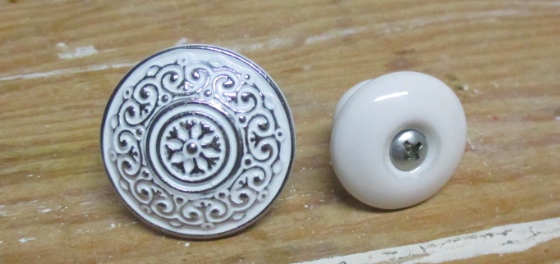
The last thing to do was replace the knob. The one on the right came with the roombox — very plain, and I didn’t like how the screw was visible from the front. I ordered the replacement knob on the left off Etsy.
The original knob hole was a bit higher than center and this is even more obvious with the bigger knob.
But, since there’s some additional space over the top of the lid where it rests against the “beam”, the knob is more or less centered between the top of the breadbox and the top of the plexiglass.
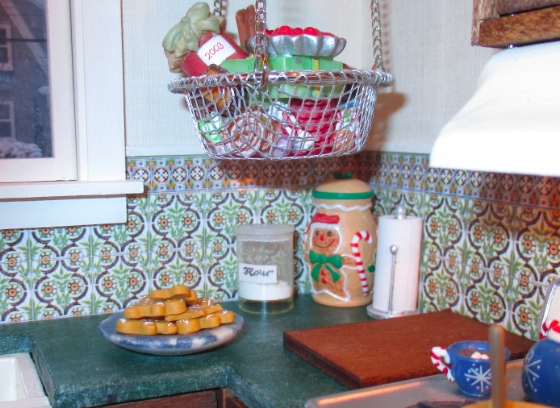
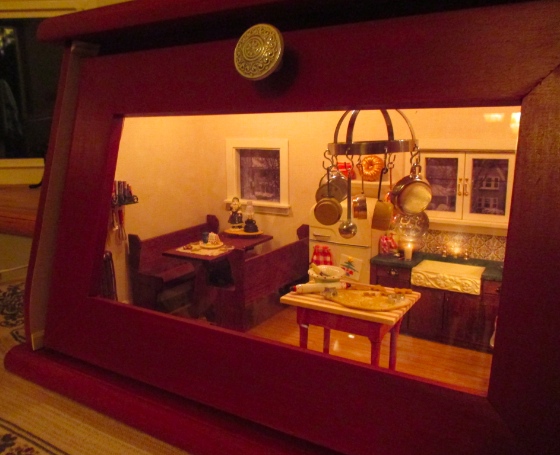
Did you notice a new accessory in the photo above? This little cookie jar is another Hallmark miniature ornament I snagged off eBay. At over 1″ it’s a tad big, but I don’t think it looks *too* big tucked in the corner.
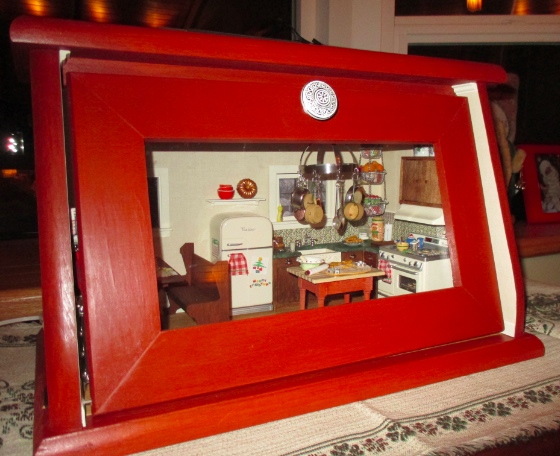
Between the plexiglass and the metallic finish on the knob and all the lights in my dining room, it’s hard to get a photo without glare, but here’s a decent one with the roombox partially lit up. (I unplugged the hurricane lamp before taking this, just too bright!) The Folk Art Christmas cross stitch patterns I ordered have arrived, and at some point before next Christmas I’ll stitch one of those designs to go on the bare wall over the table.
 Emily is a freelance writer, miniaturist, and adventure game enthusiast.


There’s no such thing as too big a cookie jar! :-) It’s really coming together, good job!
It all looks so cozy and warm. You did a fantastic job.
WarpSpeed beat me to it! Remember the cookie jar your grandmother had–the big black one with flowers on it.
i love it…..now i just have to find a wooden bread box and get starter………
in addition to the fabulousness of the topic, the quality of the writing is so impressive throughout this blog…I was indeed, on the edge of my seat to know what had become of the lid (I really was!)…so a heartfelt Thank You is due not only for the contribution and inspiration to Art, but Also to Literature! …but all the tips on where to find this awesome stuff has worn away my savings…first Acme magnets, now Hallmark ornaments…I’ve even joined the halfscaleminis, just to participate in the swap…(thank you)
Thank you! I’m not doing the swap this year but I hope you get lots of great stuff. :)