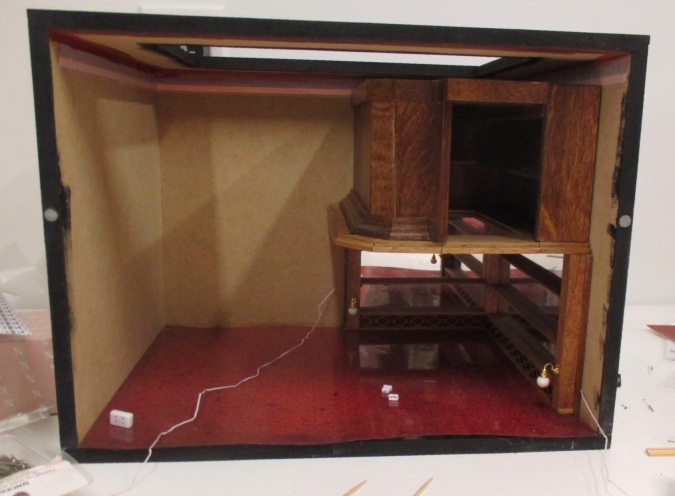
Before gluing in the bar shelves I built, I wanted to add lights. The bar needs to be removable from the roombox (it would be much too hard to add accessories if it were fixed in place), so this means the lights need to plug in to an outlet. And of course I didn’t want the outlet to be visible.
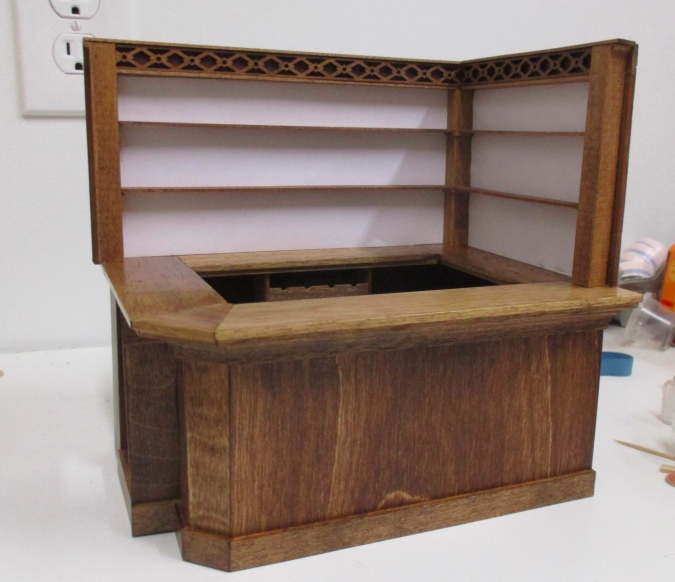
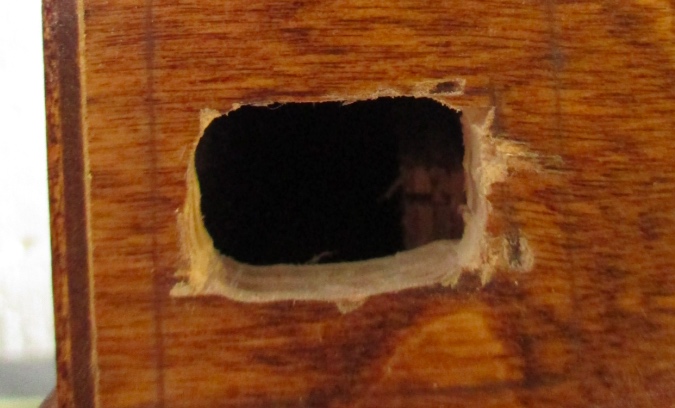
In order to add an outlet behind the bar, I needed to hack a hole in the side of the bar. This creates a recess for the outlet and plug to fit into, so the bar can sit flush against the wall. Geoff helped with the power tools. (By “helped” I mean he did it for me!)
The back and side of the bar have shelves underneath, but the front area has non-opening cabinet doors. This means there’s a hollow area behind the fake cabinet that can be drilled into. We started by marking where we believed the hollow area to be, based on the height of the floor, thickness of the front piece of wood, and height and depth of the cabinet. Then we drew a rectangle slightly larger than the socket, and Geoff drilled a small hole to see what was behind it.
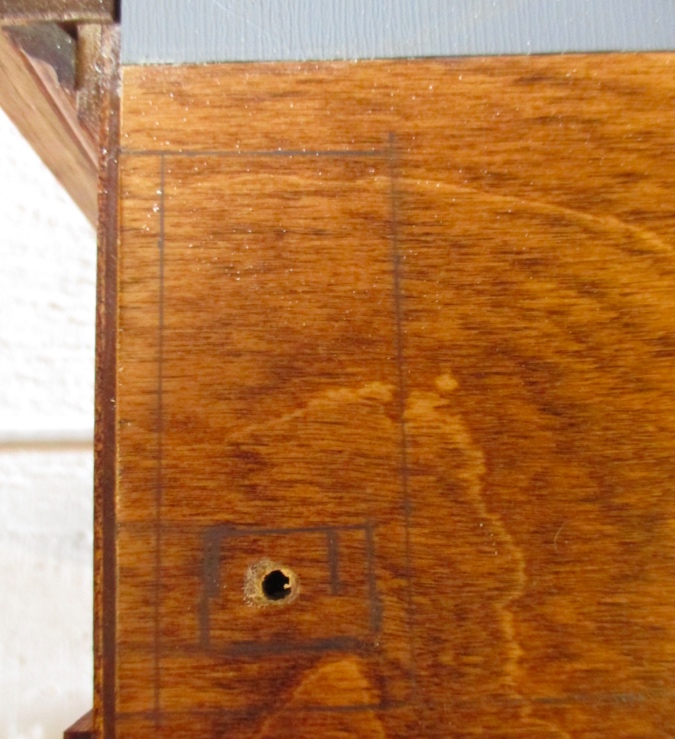
Satisfied that we weren’t going to destroy the bar by doing this, he drilled a larger hole.
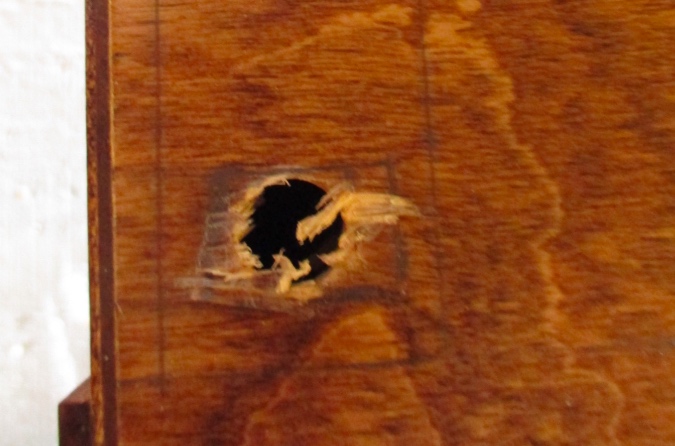
This hole was big enough to fit the jigsaw blade into, so he used that to roughly cut out the rectangle.
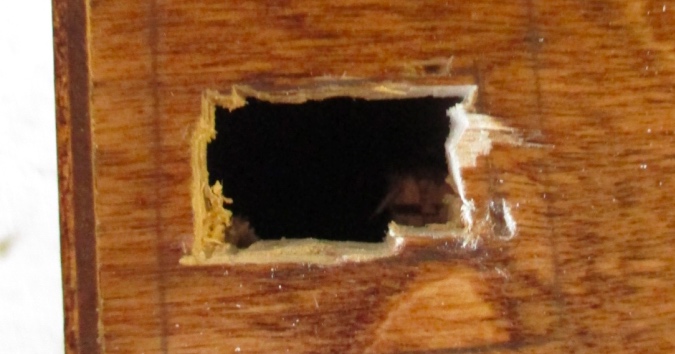
Finally he cleaned up the edges with the drum sander attachment on the Dremel.
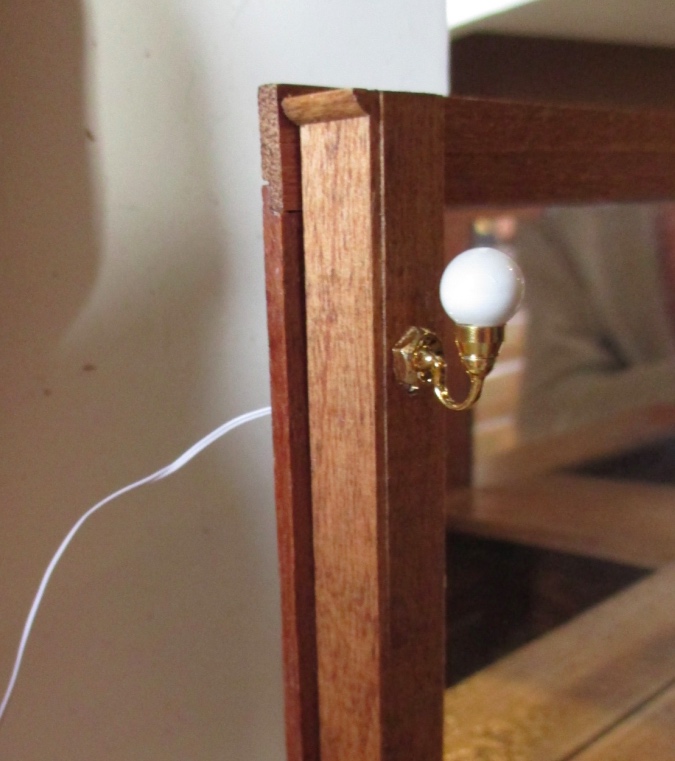
The posts that the lights will be mounted on are 7/16″ wide. I looked high and low for 1:12 sconces and literally every one I found had a 1/2″ base. I didn’t want the base to be hanging off the edges of the posts — in fact, I thought they’d look best if they were a bit smaller than the posts. I was pondering this for a ridiculously long time before I realized I should use half scale lights, which only have a 1/4″ base.

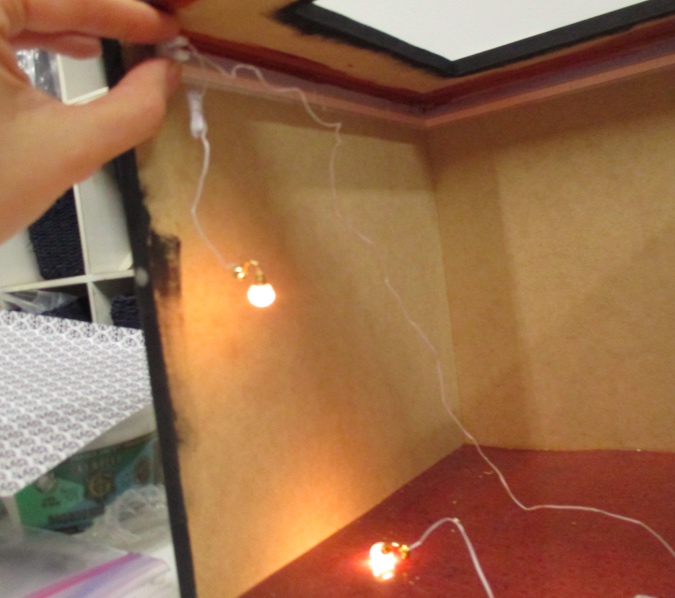
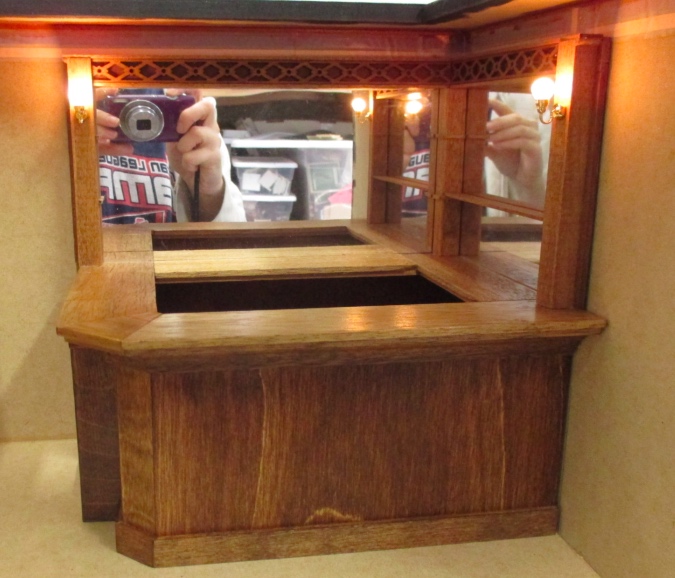
These are Houseworks globe sconces. The first step was to plug an outlet into the end of the tapewire and test the lights. They work! Considering my track record with electricity, this is something to celebrate.
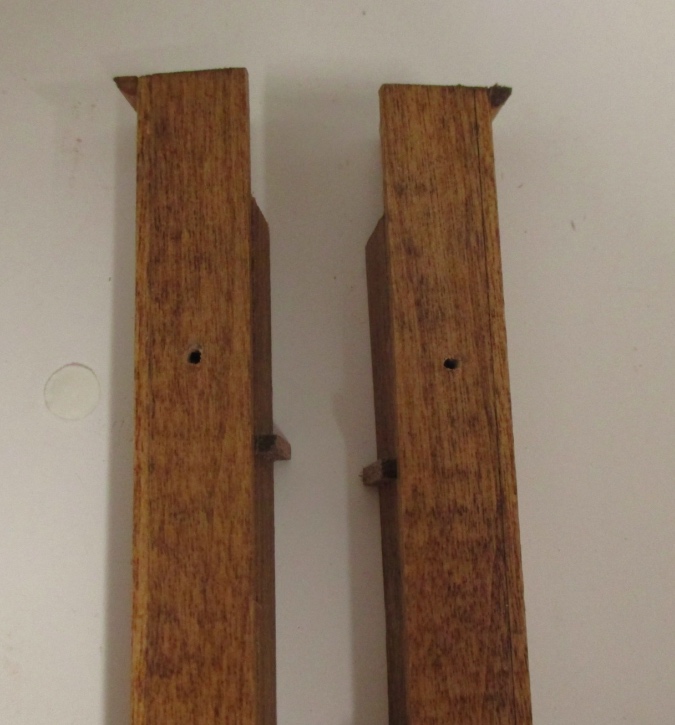
When I made the posts I didn’t have a long enough piece of wood to build around, so the posts have empty spaces in them. This makes it easy to drill a hole for the wire to go through. I hadn’t had the idea to put in lights when I built the posts, so I’m lucky it just happened to work out this way!
I measured down 1.25″ inches from the tops and drilled the holes.
Next I removed the plugs so the wires could fit through the holes. I did this by removing the pins with plyers, intending to re-use the plugs when the wires came through on the other side. If you don’t want to use the plugs you can just cut them off.
Next I glued the lights to the posts. I thought about having them face down instead of up, but then they would have had to be higher up on the posts and the voids on the backs of the posts weren’t in the right place for that.
Then I drilled holes in the wood behind the posts.
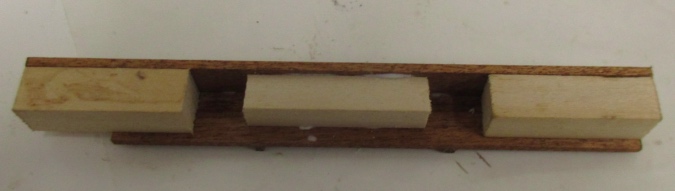
With the wires pulled through to the back of the bar, I was able to glue in the posts and the rest of the shelf pieces.
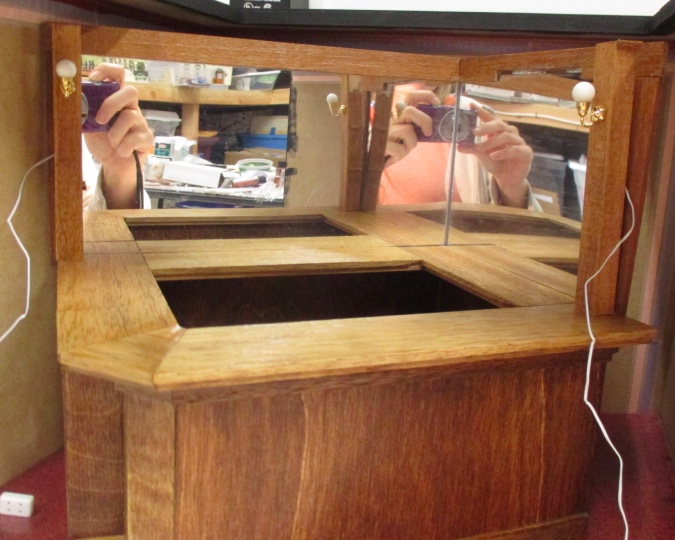
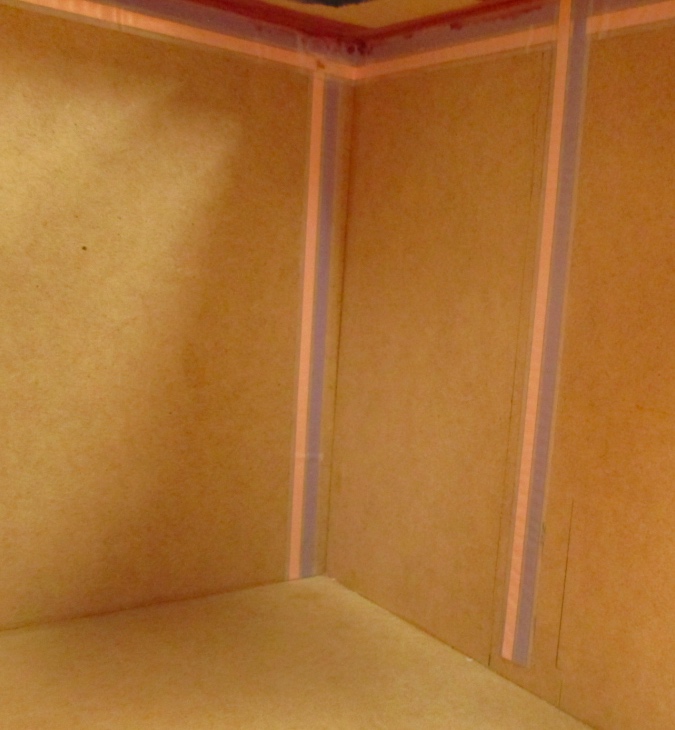
The mirror pieces are mainly held in with silver tape on the back of the bar, which means they move around easily and the mirrored part of the bar isn’t perfectly square. I put it upside down in the corner of the roombox while the glue dried to try to ensure the pieces stayed in the right position.
Luckily the wires are long enough to stretch from the far light all the way around the back, to meet up with the wires from the other light. I taped them down with electrical tape.
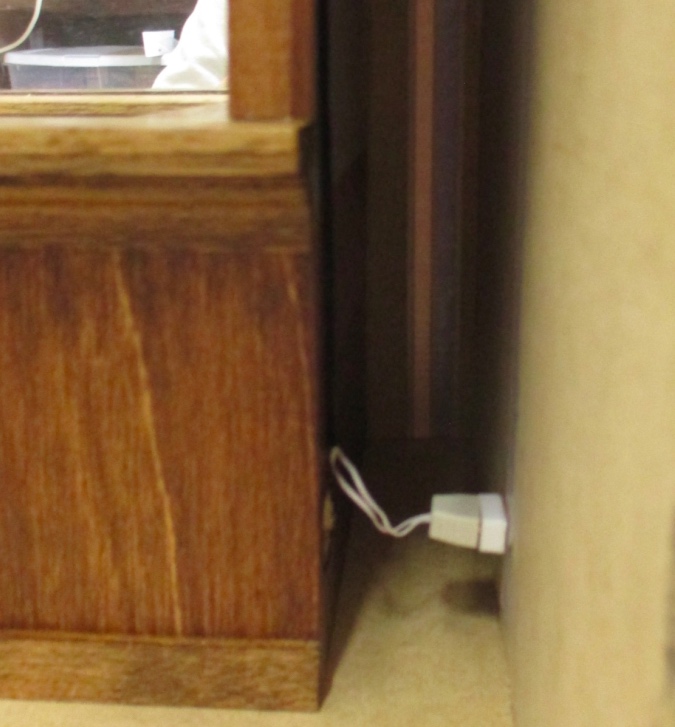
Then I fed both sets of wires down to the hole Geoff made for me.

I’d been planning to put the small plugs back on and plug the two lights into a double outlet, but I had a hard time with those little plugs. The original wires didn’t come out easily — I ended up picking out tiny pieces of copper wire with a pin, and even after I got out as much of the old wire as I could, I wasn’t able to shove the new wire into the holes. I think they’re blocked by some old wire I hadn’t managed to clean out.
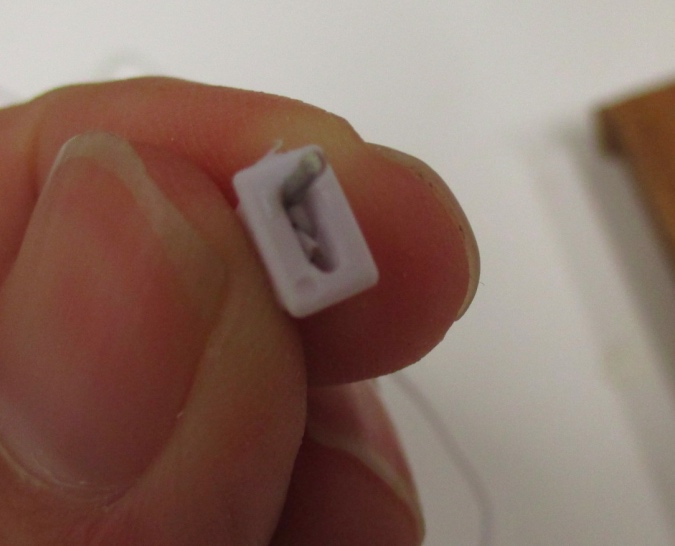
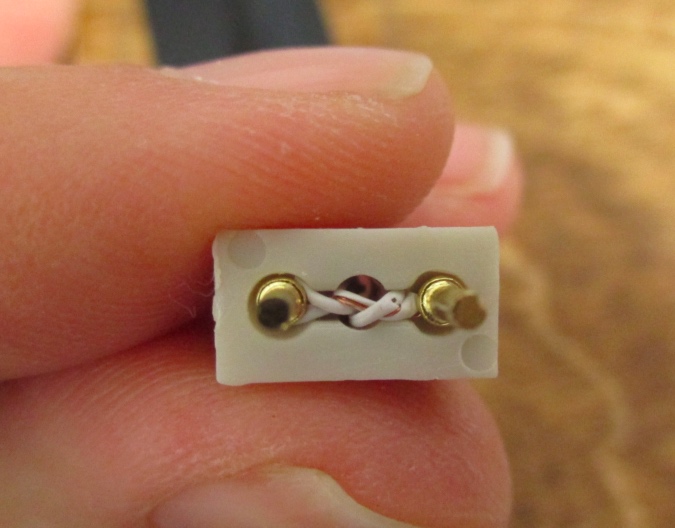
I’ve never tried to re-attach one of these little plugs so I’m not even sure if it’s possible, but they’re available for sale separately so I could have bought some “fresh” ones and tried that. But I had another idea: to feed both sets of wires into a 1:12 plug.
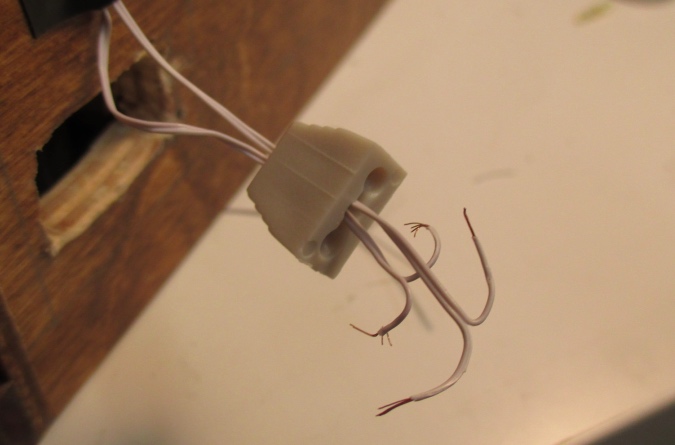
As I separated the wires, the insulation kept pulling away, leaving the bare wires exposed. I didn’t want to risk letting opposing wires from the same light touch each other, so I kept clipping beneath the exposed part and trying again in hopes of separating the pieces with the insulation in tact. Even though I started out with plenty of excess I got pretty close to the point of no return, but finally managed to do a (mostly) clean split and twist together the wires that need to be touching each other (one set from each light).

Then I poked the exposed wires into the holes and pushed the pins back in. This was a tight fit because the two sets of wires took up more space in the hole than just one wire, but I managed to get them in.
The insulation did pull away from one set of wires as I was cramming the pin back into the hole, but the insulation on the other wires seems to be in tact, so the metal isn’t touching any metal it shouldn’t be touching. (And it better stay that way!)
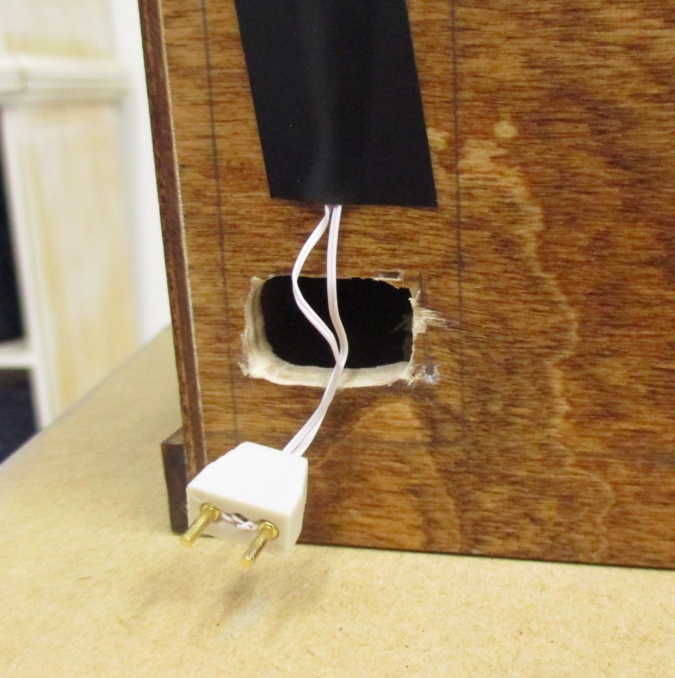
Next I figured out where the tapewire needed to be to line up with the outlet hole. After the trouble I had pushing in the brads in the upper corner, I decided running the tapewire vertically would be better than running it horizontally, even though that meant using a longer piece of tape. This way it’s closer to the front opening and accessible from the top opening, so pushing in the brads was a piece of cake.
Next I held the outlet in the center of the hole and measured up to see the distance between the floor and the prongs.
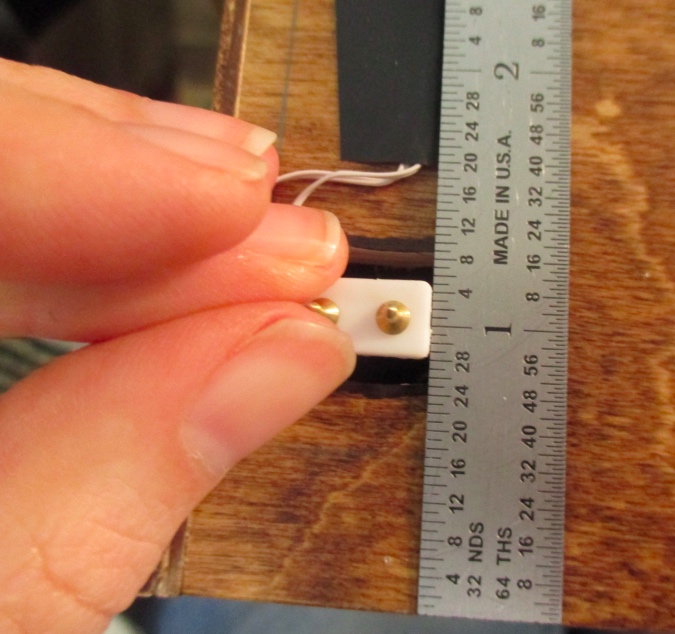
I drew a mark an inch up from the floor and used this as a guide to insert the outlet.
They work! They work! It’s such a good feeling to flip the switch and see the lights do what they’re supposed to do.
My grand plan was to add fluorette bulbs to the walls to look like fluorescent lights but unfortunately that didn’t go as well. (I shouldn’t be surprised — as I’ve said many times, electricity is not my friend.) I’m going to save that fiasco for my next post so I can bask in the glory of this electrical victory. The lights on the bar work!
A couple sites I’ve been meaning to plug (no pun intended):
- Little Shop of Miniatures included my site in their recent post 16 Dollhouse & Miniatures Blogs You’re Sure to Love — check it out, there are lots of incredible blogs on the list!
- When I started working on the bar I ordered a bunch of dolls and accessories from Dollhouse Junction and the customer service was excellent, plus they offer free shipping over $100. Highly recommended.
 Emily is a freelance writer, miniaturist, and adventure game enthusiast.


Electrification. Ugh. I feel your pain. But yay, they work!
I like how the mirrors multiply the sconces. :)
Congrats on making your electric work! I’m impressed that the tape wire is doing what it should. Mine never did. I hated that stuff!
But this looks lovely and I agree with your decision to have the sconces up. They look right.
Great idea to consolidate the wires into one plug! I have done this too, and two is really all you can fit. It all came out functional and beautiful!