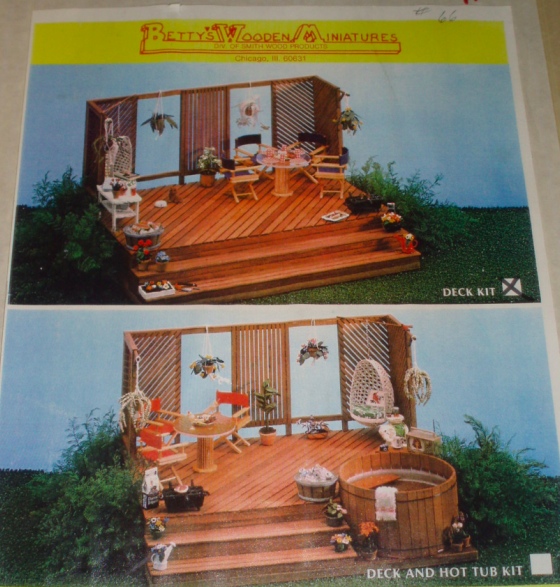
After completing the Hillside Victorian’s hot tub, I turned my attention to the deck. I’m using an old kit from Betty’s Wooden Miniatures. The dollhouse store had it marked down from $50 to $30 because they weren’t sure if all the pieces were there.
Since I was planning to bash the hot tub into the deck, I thought about just buying strip wood coming up with my own design, but $30 seemed reasonable for the amount of wood that came with it and a set of basic instructions to follow. Plus, there used to be a version of the kit that came with a hot tub and those instructions were included, so I figured that would make the bashing that much easier.
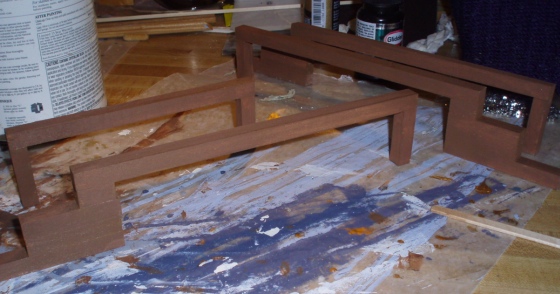
The first step was to build four supports, to be distributed evenly across the MDF base.
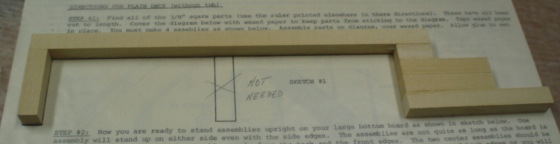
Since mine would have a hot tub in the corner, the stairs wouldn’t extend all the way across the deck, so I only built three of these.
For the fourth support, I cut the wood down to fit the length between the edge of the base and the edge of the hot tub.
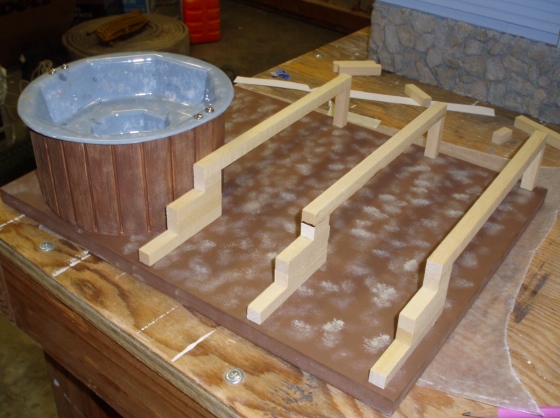
Originally I’d planned to stain the deck, but because the hot tub was made of plastic that needed to be painted, I thought I could paint the deck to match, applying accent colors with a dry brush for a weathered look just like I had on the hot tub. As you can see above, I experimented with accent colors on the base (and did a pretty horrible job). I decided to paint the support pieces brown and worry about the accent colors later.
The supports are slightly shorter than the base. I used a deck board as a spacer to make sure they were all an equal distance from the front of the base.
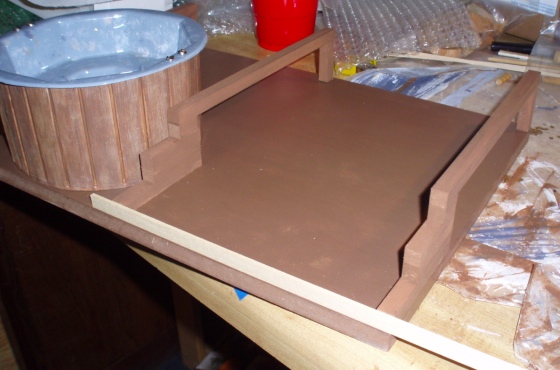
Here’s the view from the back. There’s a wider gap between the third and fourth support due to the width of the hot tub.
I’m not sure if this was necessary, but the directions for the hot tub version of the deck had a spacer between these two supports, and I figured it couldn’t hurt to add one. I made it out of a piece of scrap wood from a different project.
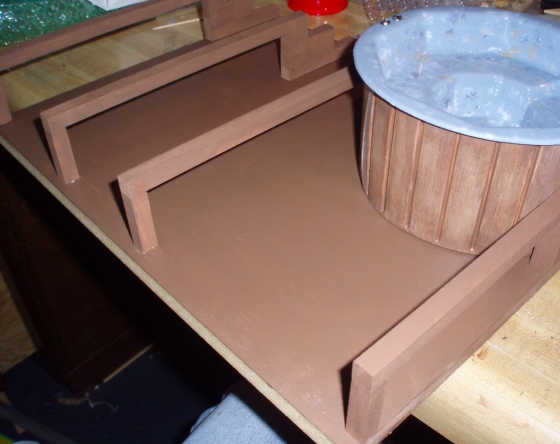
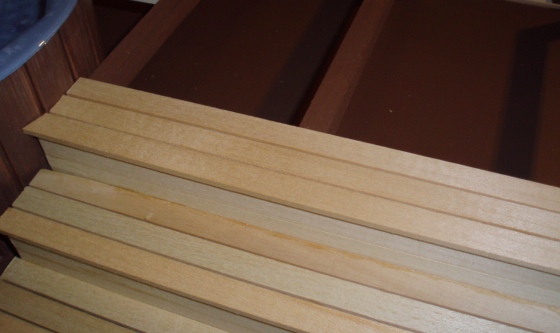
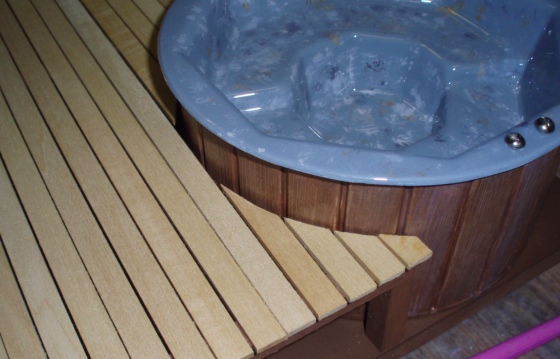
Next I lay the boards for the steps. These had to be cut down since they weren’t extending all the way across. Each board is half an inch wide (the finished deck is about three inches tall).
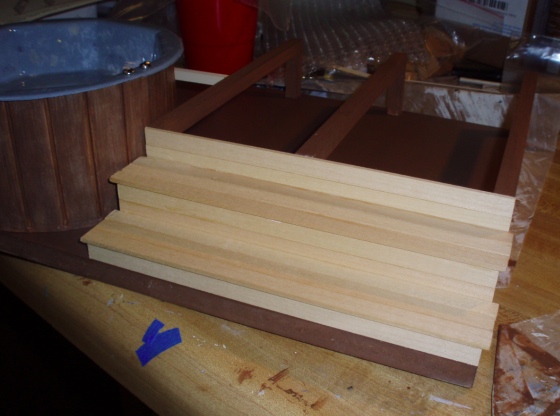
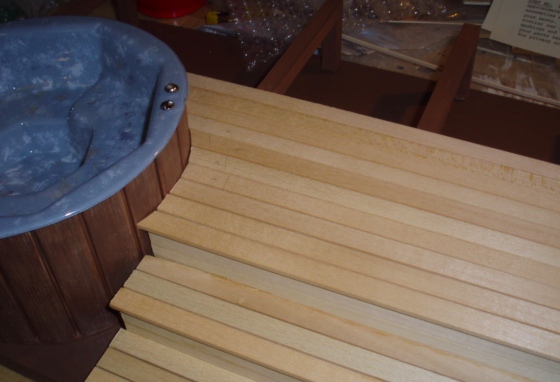
Starting with the top step, I cut the edges of the boards to curve around the hot tub. The instructions said to leave a small gap between each board, which I did.
The kit instructions also said to run the boards diagonally, and it might have looked more interesting to do it that way. I didn’t think their method for cutting the boards seemed like it would work (you were supposed to lay them all without making them the correct length, and then cut down the edges with a craft knife once the boards were all glued… seemed like a recipe for disaster). Figuring out how to cut a nice hole for the hot tub would be finicky enough, I didn’t need to over complicate it with diagonal boards!
Cutting the edges to make a nice curve did take a bit of trial and error, but luckily my changes to the design meant I had enough leftover wood to accommodate a few mistakes.
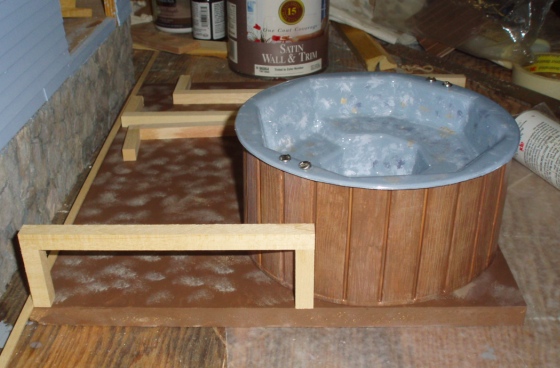
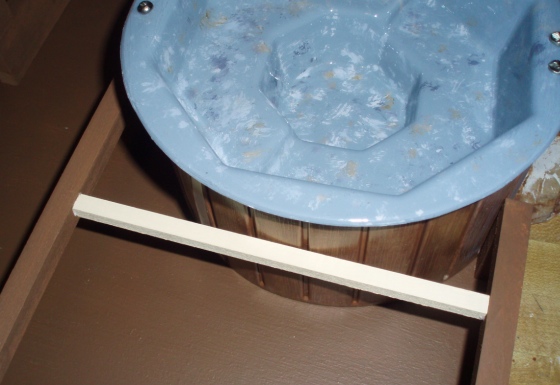
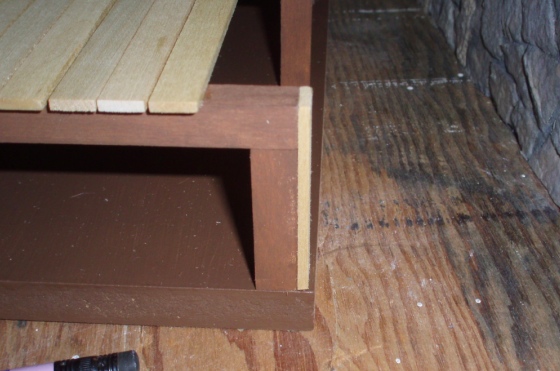
On the other side of the hot tub, there was nothing to hold up the small boards that completed the curve. Knowing it wouldn’t be visible, I added a support under the longest short board.
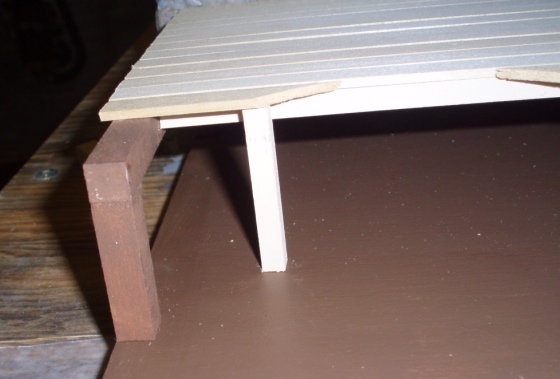
The others were short that I was able to get away with just gluing them to the support.
Once I made it to the back of the deck, I realized I had too much of a gap behind my bashed support to hold up the last deck board. I added a piece to the back to make up the space.
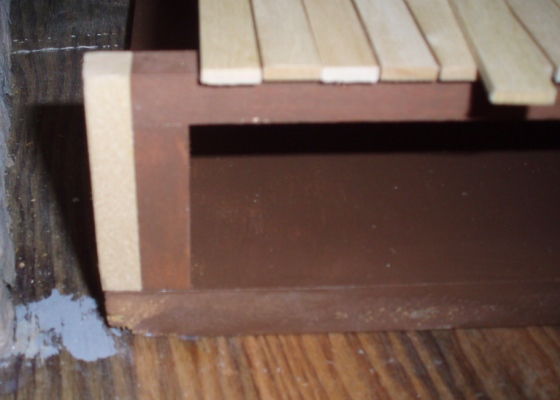
For good measure I added a shim on the other side, too, but a much smaller one.
And here it is with all of the boards in.

Seeing the finished deck up against the house, I decided painting the whole thing brown would be way too dark. So I put it aside for a few days to think about how to finish it. More pictures coming soon!

 Emily is a freelance writer, miniaturist, and adventure game enthusiast.


Well done, I think it looks great!
That has turned out really effective.