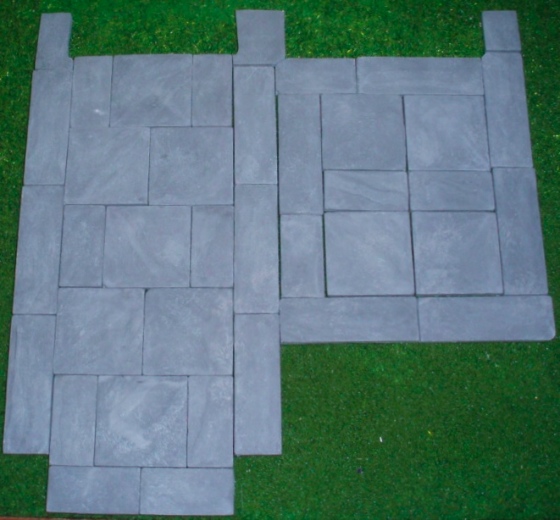
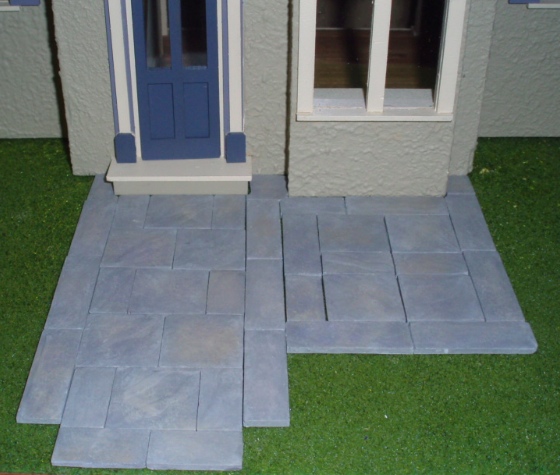
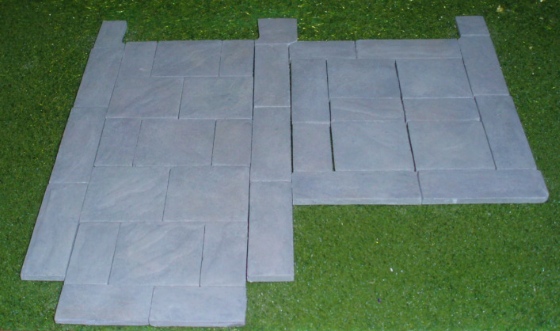
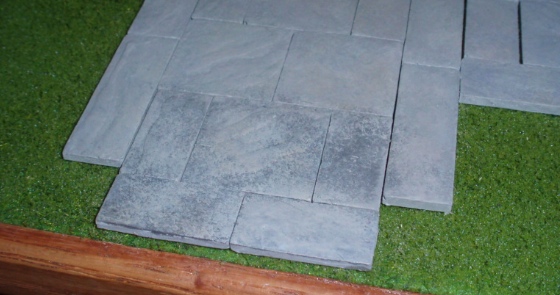
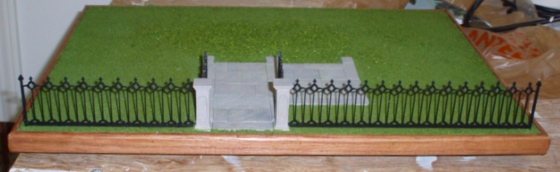
The final stage of landscaping the Rosedale involved finishing the patio and adding a fence. The patio is made from “slate” (actually, plaster) flagstones. They’re textured with very slight color variation that seemed too dull to me, so I decided to spruce them up using the same technique I’ve used in the past with egg carton stone.
Using a “dry” brush with most of the paint dabbed on, I first added two shades of gray to the stones. You can hardly tell.
Next came brown, which is more obvious.
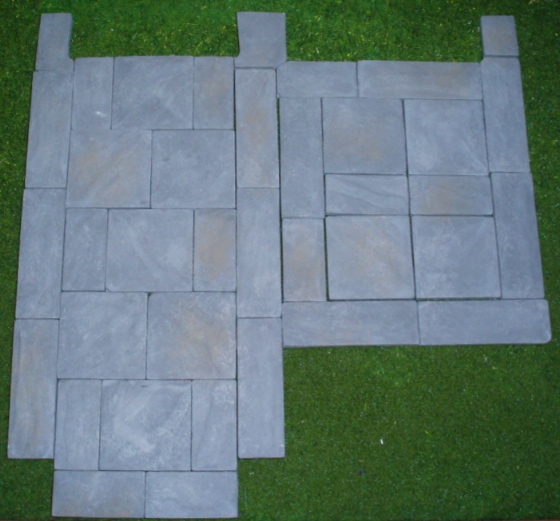
I kept at it with various shades, including the tan and purple of the house and shutters. I didn’t have any particular plan for how I wanted these to look, just wanted to give them some character while also making them “go” with the house.
Everything was going well until I got the great terrible idea to add black. Abort the mission!

I covered the black with a few more rounds of gray. It’s the sort of mistake that’s easily fixed.
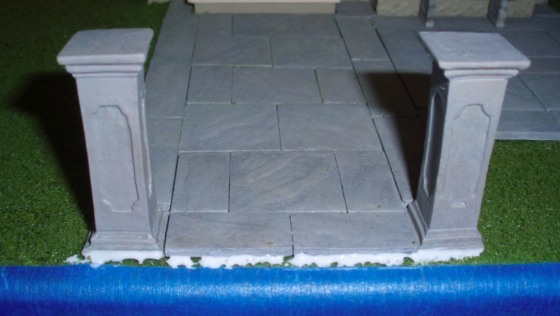
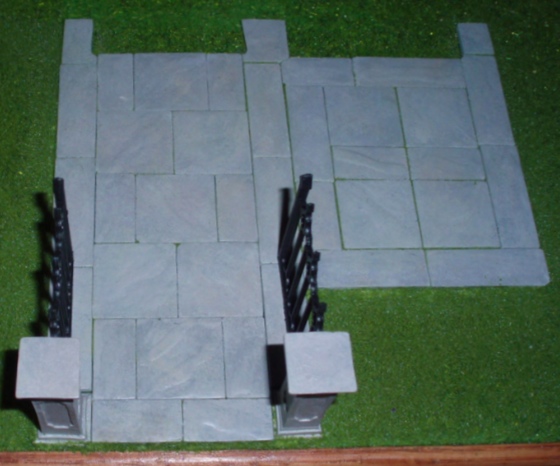
I also painted the columns I’d bought, which started out off-white. In the photo below the one on the left has just one base coat of gray, while the one on the right has had some other shades dry brushed onto it. I didn’t go as nuts with the different colors on these as I did with the flagstones, just a few coats of gray and one of brown.
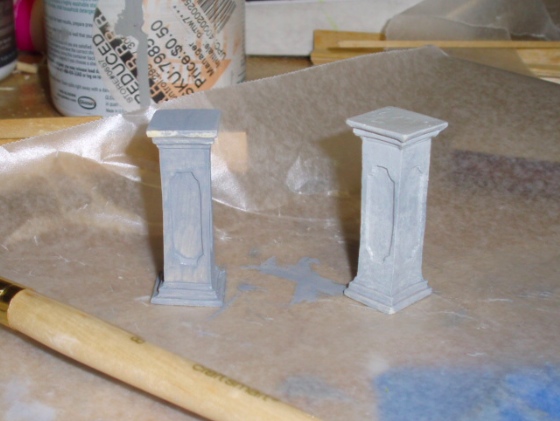
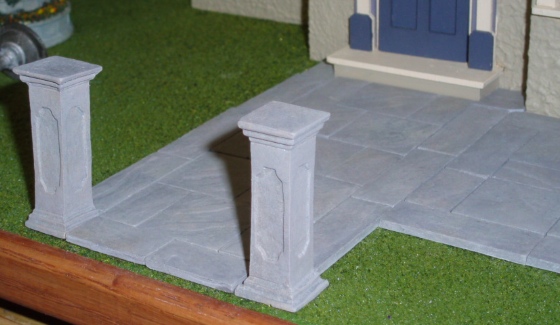
Here’s how they look together. Not a bad match considering they started out completely different colors!
With egg carton stone, the next step after painting would have been to add a coat of matte varnish. But when I started to do that to the flagstones, these black splotches appeared that totally freaked me out.
When I was gluing down the flagstones I got a few of them wet and the same thing happened, so I figured this was just due to the varnish being wet and that the splotches would go away when they dried. But I decided to quit while I was ahead, just in case coating the varnish ruined what I’d already done.
I did go ahead and varnish the columns, though. And once those front few flagstones dried they looked normal again.
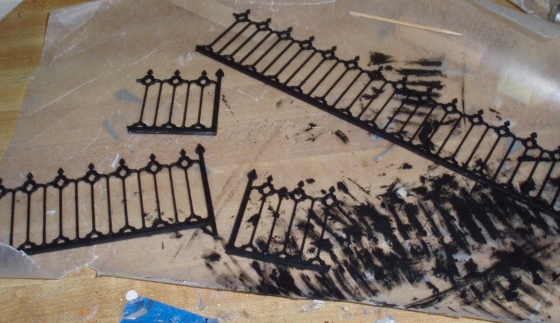
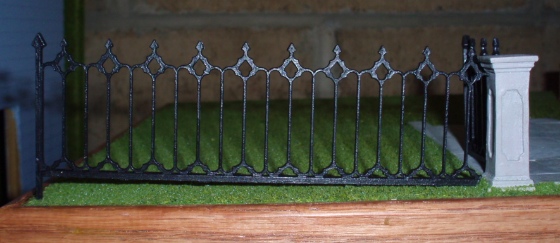
Next came the fence. I bought Grandt line Gothic railing at the dollhouse store. It came with two ~9″ pieces for around $11, which was pricey enough that I didn’t want to go back and buy a second pair, so I was determined to use as much of the lengths I had as possible.
On the right side, the distance from the column to the edge of the base would use up almost a whole piece.
This left me with a small piece I couldn’t really do anything with.
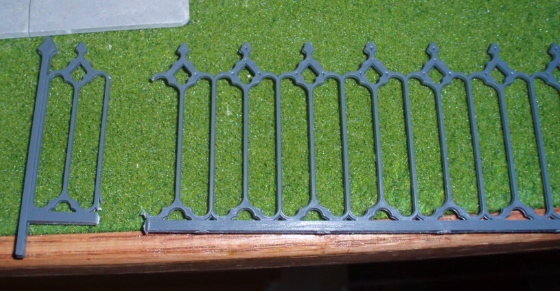
On the other side, the distance from the column to the edge of the base was smaller, so I had more left over. I failed to document this with photos, but I had enough fencing left from the second piece that I could remove some to create two short pieces to turn in on the patio.
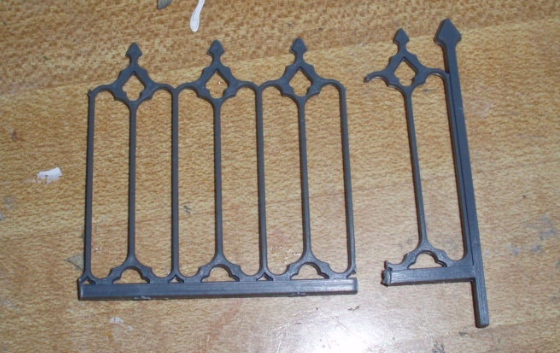
Since the flagstones add height, I sanded down the bottom of the post so these fence pieces sit flat on the patio. This had the added bonus of providing stability to the piece I cobbled together.
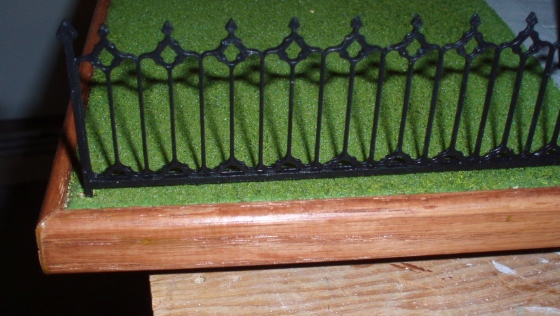
With all my pieces cut to the right sizes and the cobbled-together piece glued with Quick Grip, I painted them with matte black paint, then a coat of matte sealer. The end result looks reasonably like wrought iron.
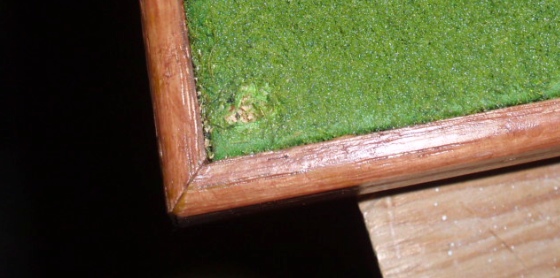
While the fence pieces dried, I added grass around the edge of the patio. First, tacky glue along the edge of the stones.
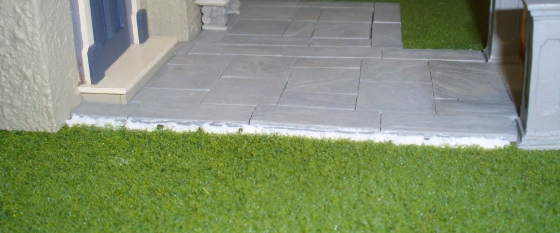
I pushed grass right up against this so it looks like grass is growing beside the flagstones, rather than the flagstones sitting flat on top of it.
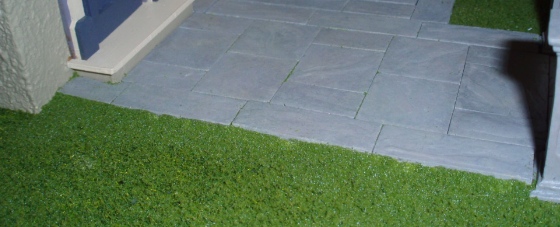
On the front, I masked the base’s trim first so I wouldn’t accidentally glue grass to it.
I sprinkled grass on top of the flagstones and worked it into the cracks with my finger.
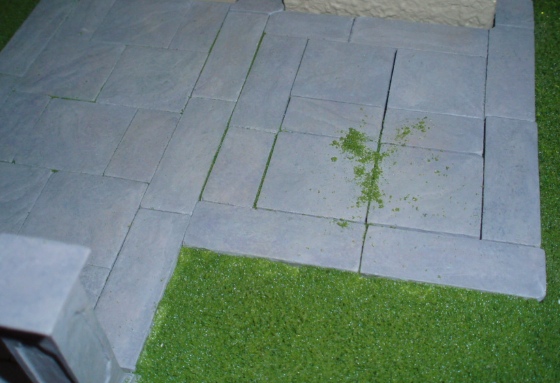
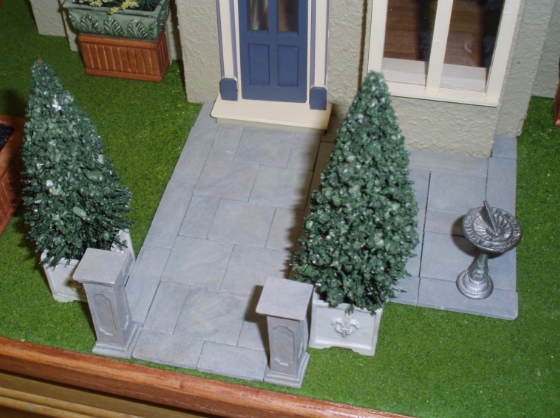
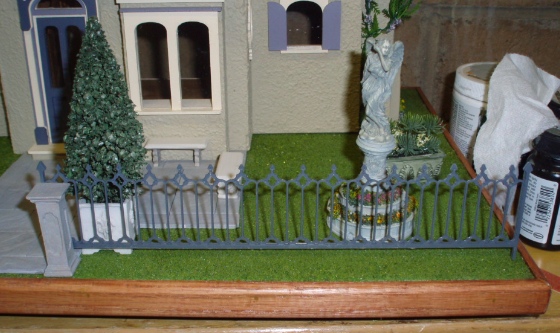
Here’s the end result.
Back to the fence. Since the fence posts were too tall and I doubted that gluing the fence in place would be sturdy enough, I decided to drill holes to insert the fence posts into.
I put the fence pieces in place and marked where the holes should be with a Sharpie.
On both sides I messed up the drilling — one hole was a smidge too far away from the column and the other a smidge too close. Then I tried to drill a second hole right next to the first and the bit kept slipping back into the original hole. Oops.
They both worked out okay, though. Since the bit kept slipping into the first holes instead of going all the way through, my second holes were too shallow, but I dealt with this by shaving off the bottom of the fence post.
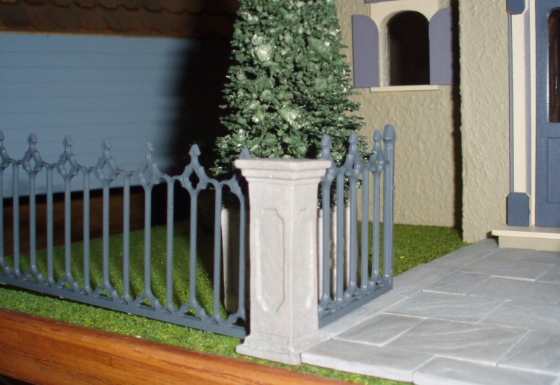
I glued the fence post into the hole and then glopped glue around the surface of it.
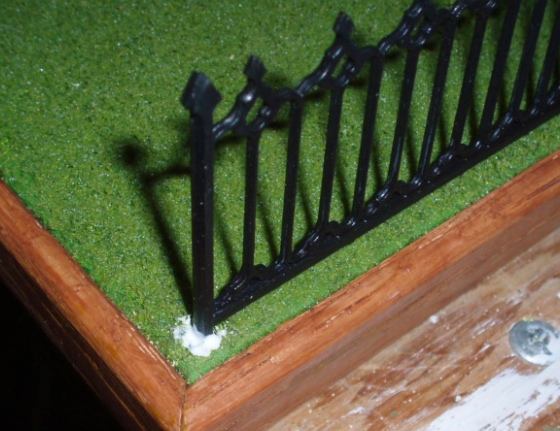
And I applied grass around the bottom of the post. You’d never know there’s a sloppy, too-big hole there!
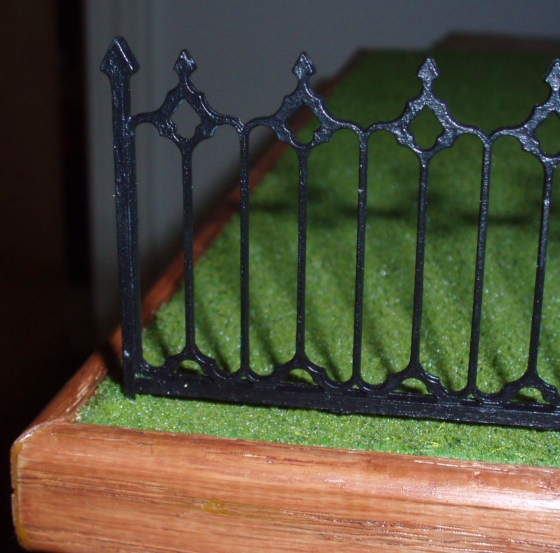
Here’s the finished fence. I used Quick Grip to glue the delicate front pieces to the columns. It’s a little flimsy but it’ll be okay as long as no kids go grabbing at it. (Which will hopefully never happen!)
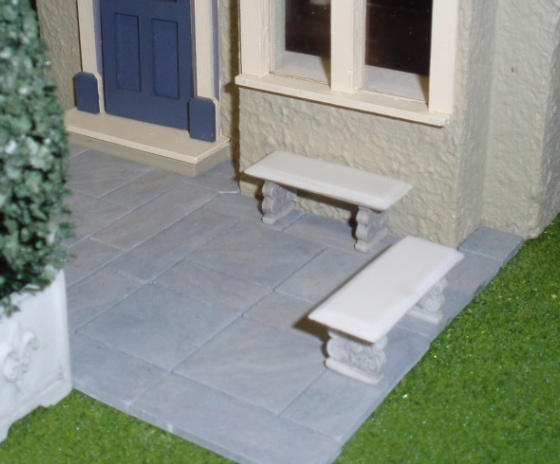
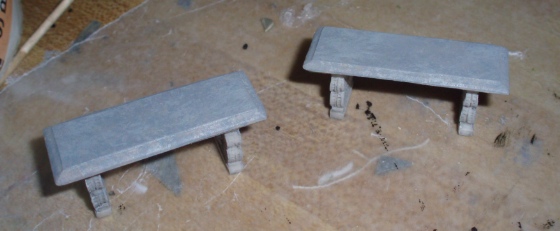
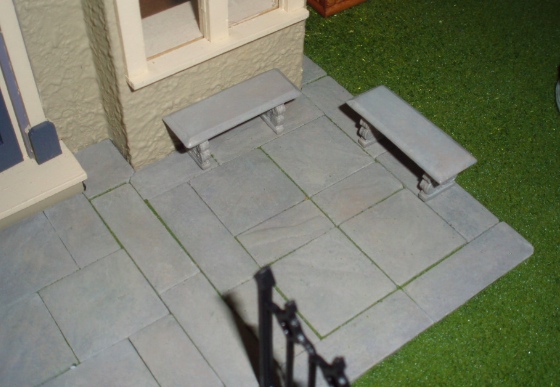
My last task was to paint this pair of benches I bought. They’re gray, but I felt like they were too light compared to the rest of the patio. (The pic below was taken before I added grass around the patio…)
I spattered on different colors with my dry brush until I was satisfied, then painted with matte varnish.
And voila! I might add a plant or something in the corner where the benches meet, but otherwise the patio’s done for now. Next time I’ll post pictures of the finished landscaping.
 Emily is a freelance writer, miniaturist, and adventure game enthusiast.


I love it! The landscaping is really pulling it together :)
Next time use an awl to mark the point where you want to drill. Then the drill bit will center itself in the hole made by the awl and be in the right place.
This is great, thanks for sharing.
Thanks John for the hint about using the awl – good point (no pun intended). The fence really finishes everything off beautifully. I too have some different garden pieces that are the wrong colour, you have given me the confidence Emily to paint them as you have. Thanks again for all your “how to’s”.