Painting windows: not my favorite thing to do. The Gull Bay has nine of them, plus the door frame, plus the three dormer windows I added to the back. I actually skipped the dormers with this batch for reasons I’ll explain below, but over Memorial Day weekend I forced myself to do the rest of them using an off-white paint named Raw Cotton that I’ve had a pint of for years and years.
A poor seal on the paint can has led to evaporation, which meant the paint was somewhat gloppy — making this process even more fun!
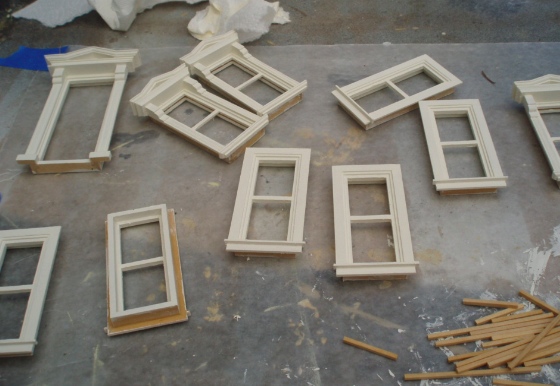
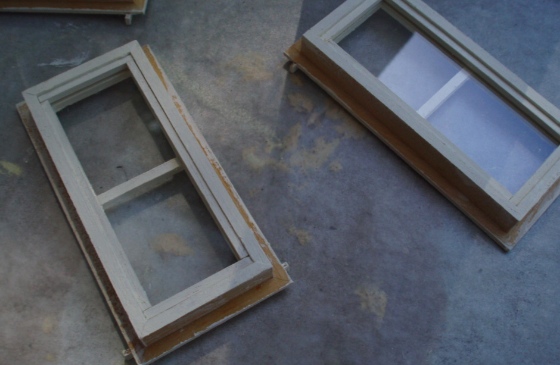
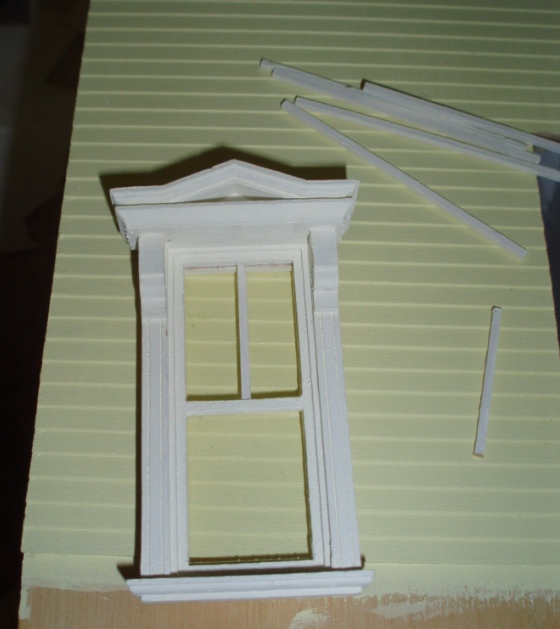
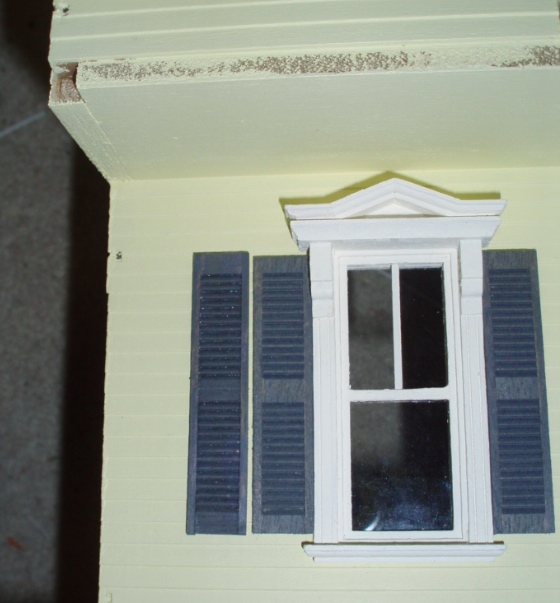
The three windows on the front of the house are the Victorian style, and the plexiglass slides out on a track. The rest of the windows are “traditional” style and the plexi is held in with little wooden sticks on the inside. (Joy, more pieces to paint!) I think this is my first time using this particular style of window, so I don’t know if they’re still like this or if the ones I got with the Gull Bay are an older version that’s since been upgraded to the plexiglass that slides out–a distinct possibility, since this kit is from the eighties or early nineties.
The sticks are slightly larger than the mullions that inexplicably come with Houseworks windows. (I say inexplicably because how often do people actually use those? I have *so many* leftover mullions.)
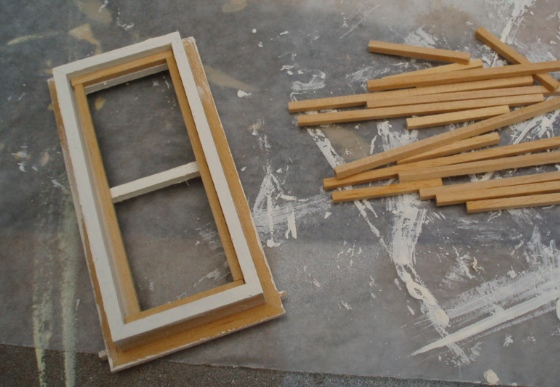
I thought the sticks would hold the windows in with pressure, but they’re not quite snug enough. I put glue only on the side that butts up against the window frame and not on the side that butts up against plexiglass, to prevent accidentally smearing it on the windows.
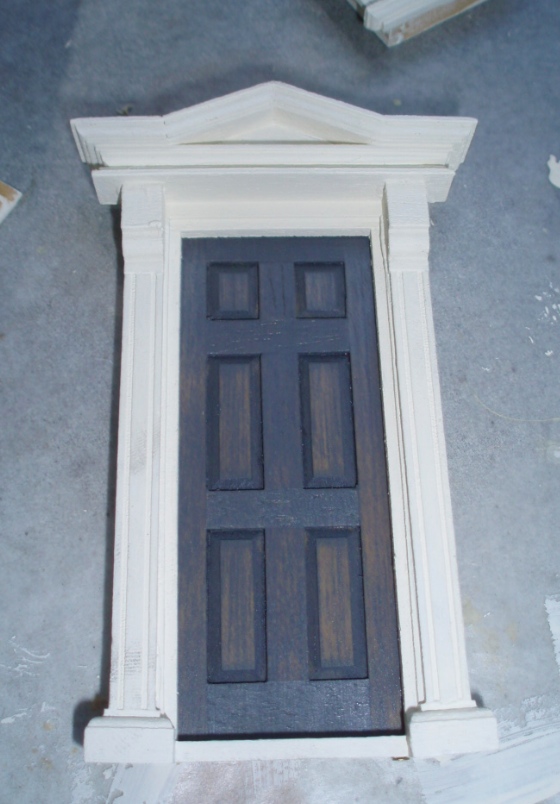
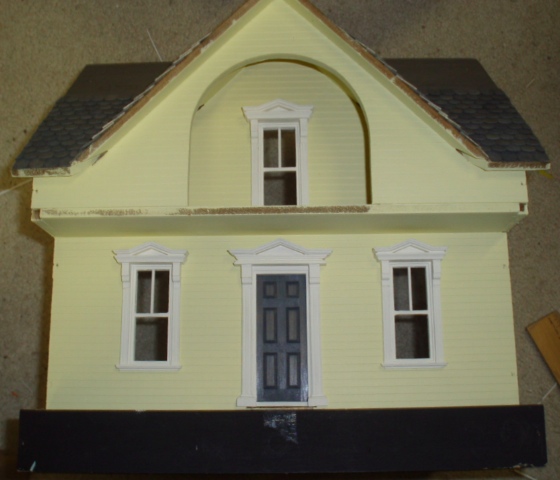
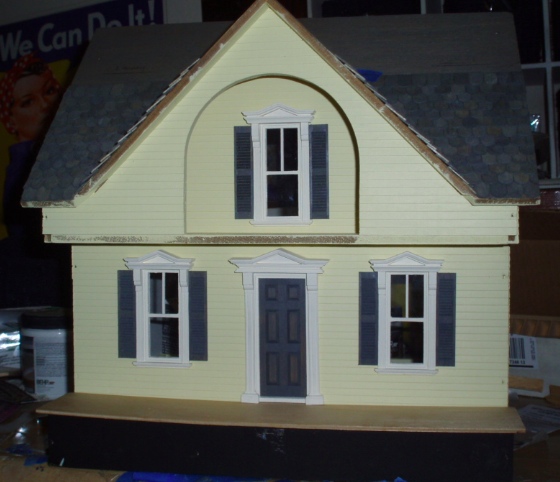
I really like the blue/gray shingles and decided to use that stain on the front door and shutters, rather than coming up with another accent color. One benefit of this is that it’s much easier to stain shutters than paint the slats nicely. The house only came with three sets of shutters, for the three Victorian windows on the front, but I decided to add them to all the windows — so I would have had 18 shutters to paint…
Staining these things can be challenging since there might be glue spots (not my fault, at least!) or the basswood just might not take stain evenly. I had to do several coats to get them to look more blue than see-through gray, but I do like how the wood shows through a little. The door and a few shutters had some stubborn spots that wouldn’t stain, which I hid by lightly dry-brushing on paint of a similar color.
Right, so as I was saying I never use the mullions that come with Houseworks windows. This is seriously the first time I’ve used them in windows. The 1:144 version of this house has a divider in the top pane and I liked the look, so decided to replicate it. (These are only held in with pressure, there’s no way I could have glued them without making a big mess.)
It may not look like an entire weekend of work, but it was…
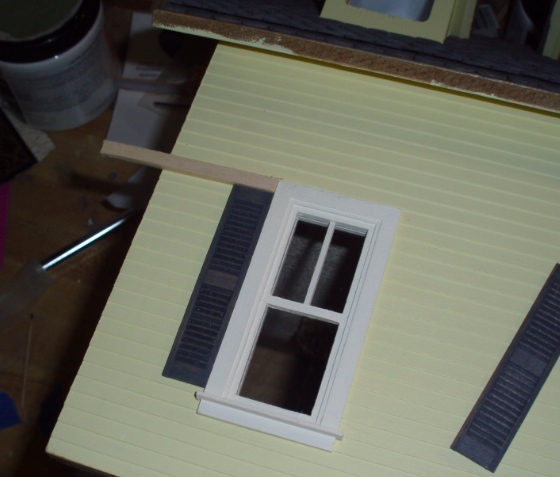
Gluing on the shutters, I used a piece of scrap wood as a spacer to make sure I positioned all of them the same.
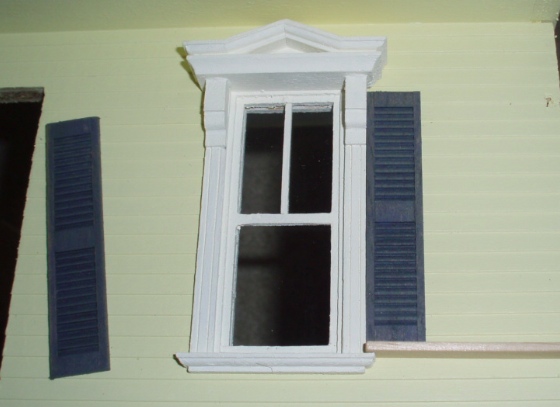
On the Victorian windows, the pediment gets in the way at the top so I lined up the shutters from the bottom instead.
Here’s where things got interesting. The house came with three sets of shutters (presumably from the 80s/90s) and I added six more (newer) sets. When I first opened them all up, I labeled them so I could remember which were the old ones, thinking they might have slight differences. But I couldn’t see any differences, and two of the old sets stained poorly, so I didn’t necessarily want those on the front of the house with the three Victorian windows. I glued those two old sets onto the back of the house first, then moved on to the front where I started with the two downstairs windows, then moved onto the upstairs window.
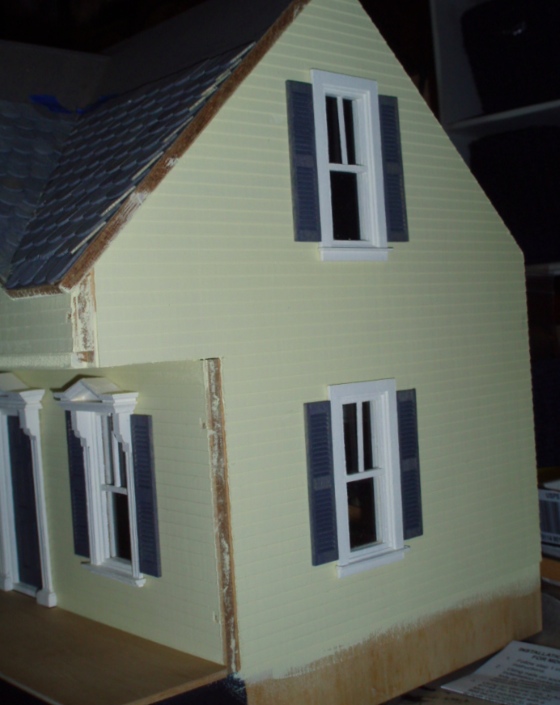
I went to use my spacer on the upstairs window, but the windows didn’t line up the way they had downstairs — the top of the shutter was bumping into the pediment, which had not been the case on the other Victorian windows. Turns out the older Houseworks shutters are slightly taller than the new ones, and my instinct to separate them out was correct. Too bad I ignored myself.
At least the slightly taller set ended up on the single window upstairs and not downstairs where the difference in heights would have been more obvious. (The other taller windows are on the back of the house, where you won’t notice that they’re different from all the rest.)
I had to position the upstairs shutters a tiny bit closer to the sill but I don’t think it jumps out at you, and especially won’t once there’s a railing across the opening.
Okay, enough shutter OCD for one blog. Here’s the ones on the side of the house look.
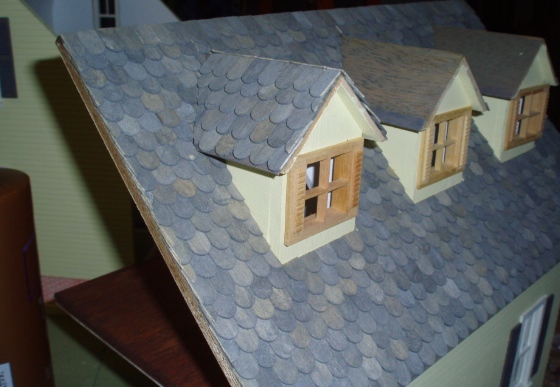
On the back, I’m not quite sure how to handle the dormer windows. One of the reasons I added shutters to all of the windows is that the dormers have built-in shutters… I’ve never really liked that look, but it’s how they come.
If I’m careful with masking tape I think I can stain the shutter part and paint the window part without going outside the lines, but there’s no side window portion, so it’ll look like the blue shutters are resting on top of the window frame instead of next to it. I’m not sure if that’ll look weird. I’ve put off the decision for later.
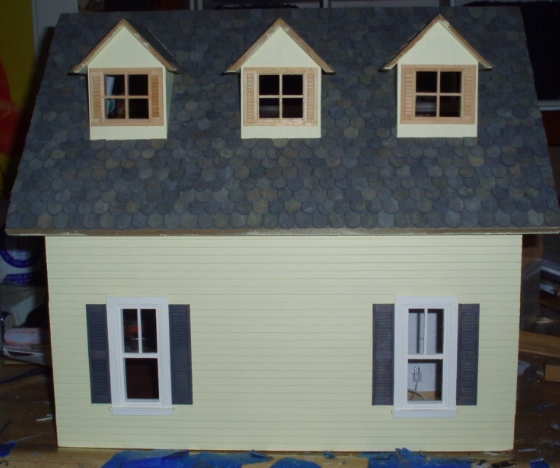
Finally, having nothing to do with windows or shutters, I also shingled one of the dormers. Not perfect but waaayyy better than my previous attempt. It’ll do, pig. It’ll do.
 Emily is a freelance writer, miniaturist, and adventure game enthusiast.


Your shutters look fine. That being said, I recently saw an article about real house shutters that made a point of saying that shutters look better if they are installed such that they would actually work to cover a window if they were closed. That means they are mounted on the side trim of the window on standoff hinges that allow them to close tightly against the trim and completely cover the window. The dormer windows have that look. Obviously that concept does not work for the Victorian windows that have the decorative brackets at the top.
That’s how I did the shutters on the Rosedale. For some reason with that house it was very important to me that they be positioned so they could close (if they weren’t glued in place!) But with this one I liked them next to the windows… maybe because that’s how they were in the photo that came with the kit.
I like what you did with the mullions, and yes, I believe it took that long, LOL!
The shutters look good and balanced :)
I can well believe it took that long too, because of my own experience – these fiddly things take forever! The mullions look great, and so do the shutters.