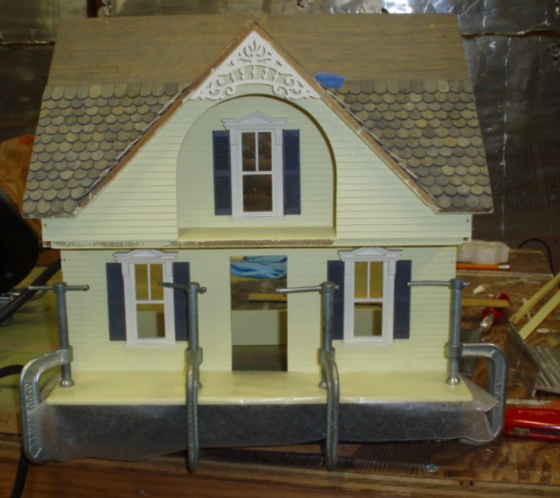
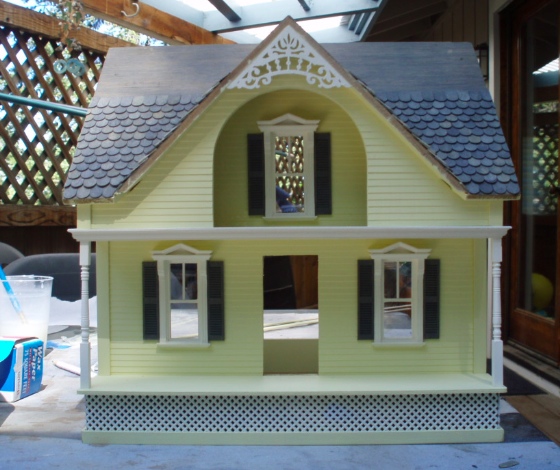
This past week I made good progress on the Gull Bay, and the exterior’s almost done. I have a ton of pictures so I’ll break them up into two posts.
The house came with “lattice” that appears to be made from stiff plastic needlepoint canvas cut on a diagonal. The photo of the completed house doesn’t have lattice and I’ve never been able to find any other pics of this dollhouse online, so I don’t know if it was originally included with the house or something the woman I bought it from planned to add on her own. The front part of the foundation was painted black when I got it — the only paint on the whole house.
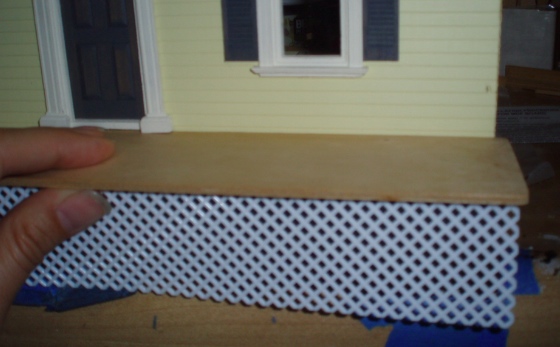
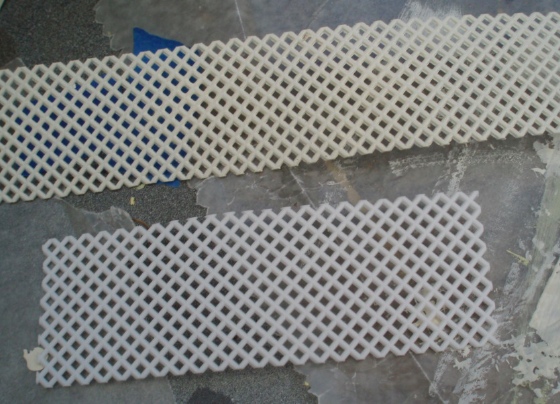
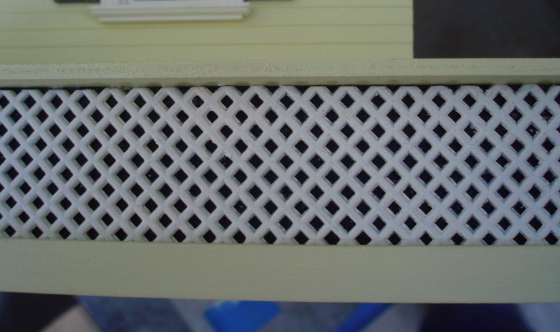
I Googled for pictures of real life lattice and found that it’s often white, framed by another color. I decided to paint my lattice the same Raw Cotton off-white as the trim, and frame it with the Sunny Lemon house color.
Though the lattice was white to begin with, in the photo below you can sort of see the difference between the original white (bottom) and the Raw Cotton (top).
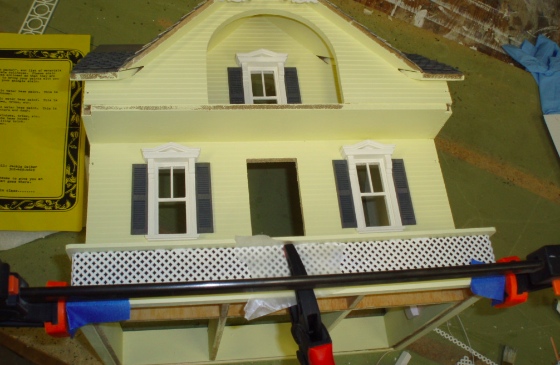
In the photo the porches and corner trim are white (trim color) but I decided to make mine yellow like the house.
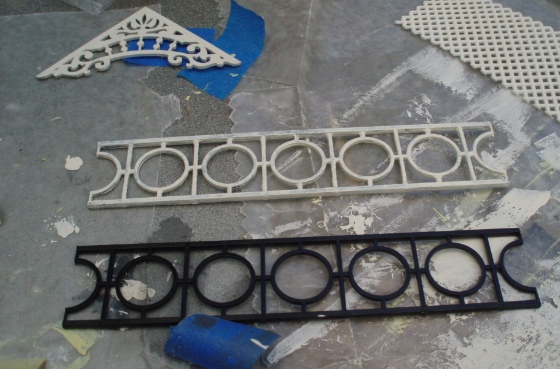
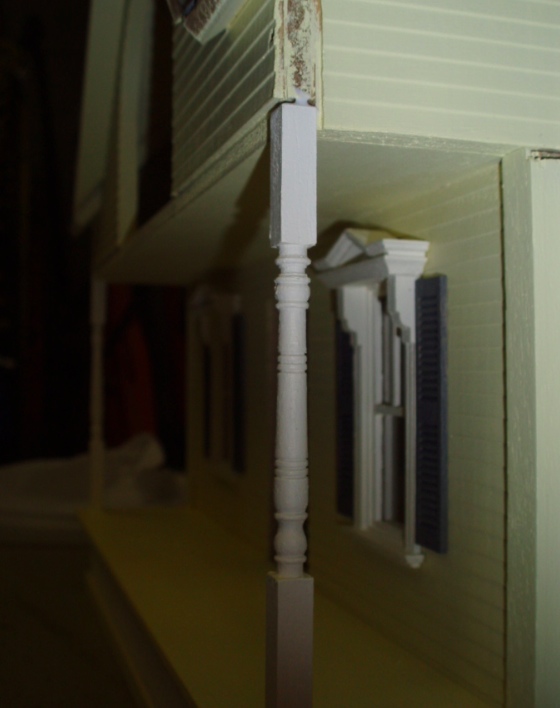
The porch posts, railings, and apex trim I painted my off-white white trim color. I got the apex trim off eBay for my Queen Anne Rowhouse and ended up not using it. The railings are 1:12 widow’s walk fencing. Apparently these also come in white, which would have made my life easier because the black took three coats of paint to cover up. I don’t know if the spikes were cut off or if there’s a version of this fencing without spikes.
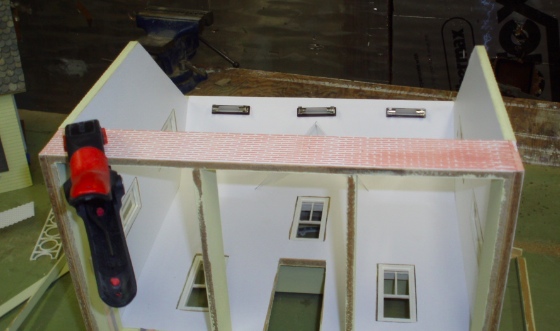
The porch floor was a bit warped, so I clamped it during gluing, putting a piece of wax paper against it so the clamps wouldn’t leave marks.
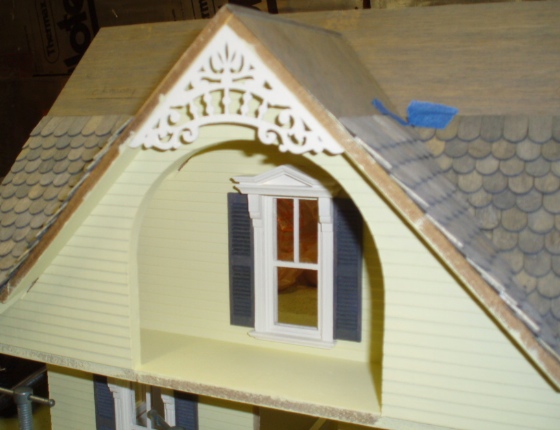
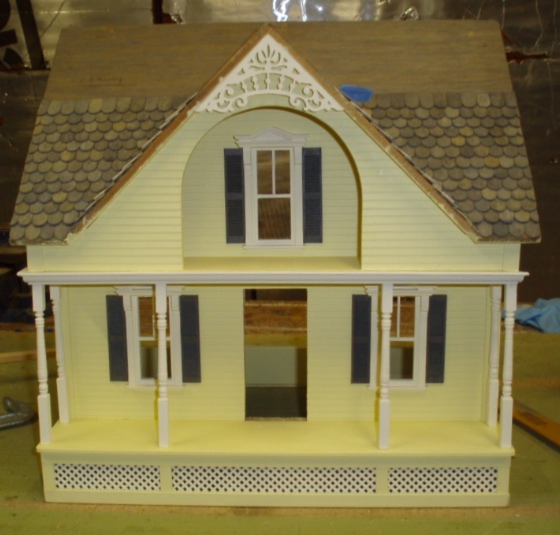
Sorry for the fuzzy picture, but here’s the apex trim. The curve complements the arch below it well.
Because the house didn’t come with any instructions, I had to rely on the 3″ x 5″ photograph to figure out how the trim went on and the order to do the various steps. As you can see here, the corner trim bumps into the porch floor leaving a little bare spot. I tried cutting a notch out of the front but was having trouble doing it without splitting the wood, so decided to find another way to cover the gap.
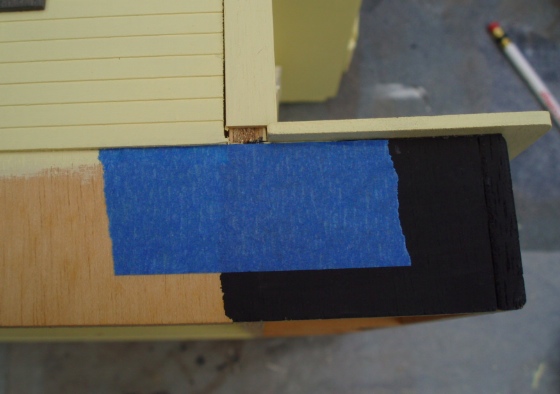
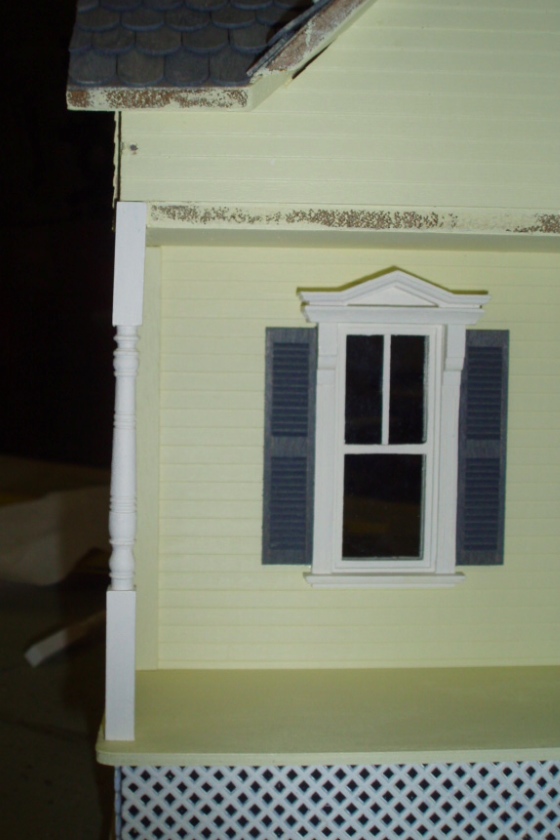
I did have to cut a notch at the top, because the white trim at the top of the porch (which is 1:12 crown molding) butts up against the top of the corner trim and wouldn’t sit flush otherwise. I’m can’t tell from the photo if this is how it was supposed to be done, but couldn’t figure out another way. Luckily a paint touch-up did a good job covering the cracks.
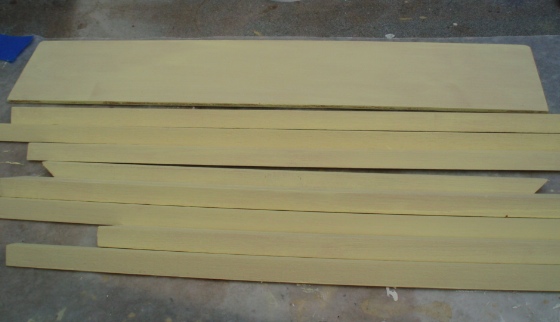
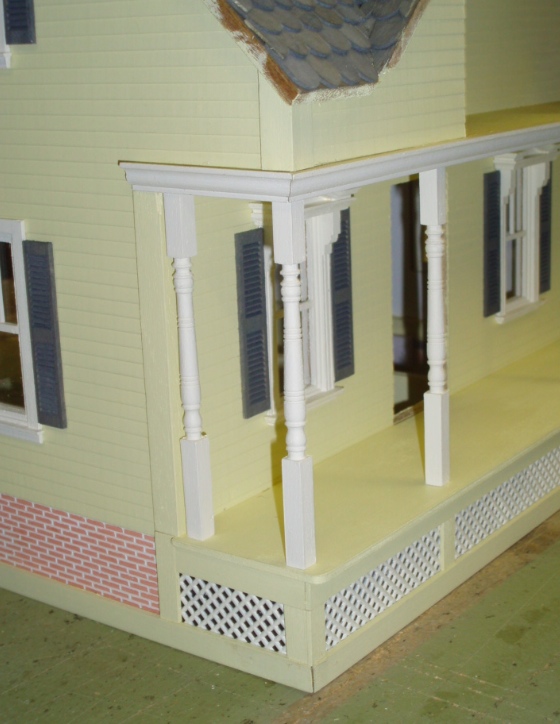
The house came with four pieces of mitered trim to apply to the bottom of the house, which forms the bottom part of my lattice framing. I bought some basswood to do the rest of the framing. But before I could start on that, I needed to glue on the bricks and lattice since the mitered trim goes on top of them.
The bricks are a white plastic sheet with brick texture, painted with a pinky paint. It’s not the most realistic look but I figured I could do something to it once it was glued on to make it look better. The brick sheet had some curves in it, so I clamped those areas while the glue was drying.
Initially I thought the lattice would rest on top of the trim, but I realized when I got to the front (the last side I glued) that the trim was slightly bigger than the base of the house to accommodate the thickness of the lattice. Since I already had glue on the last trim piece and the other three were glued on and drying, I had to scramble to cut the lattice to size and get it glued in. In the process I rubbed off some of the paint (which hadn’t stuck too well to the plastic to begin with). Oops.
I didn’t want to see dried glue through the holes, so I brushed the back of the lattice with Mod Podge rather than glopping it up with tacky glue. The mitered trim didn’t want to sit nicely, so I used a clamp to push the corners together.
Something I had trouble figuring out, for which the photo was no help, was how the porch posts and trim above the porch were supposed to work for the front corners. All the rest of the posts are flush against the porch ceiling, so it wasn’t immediately obvious that the posts at the front corners fit into a gap that’s then covered with corner trim. Luckily I figured it out before I cut any posts!
(You can also see in this picture that painting the gap under the corner trim didn’t look so good.)
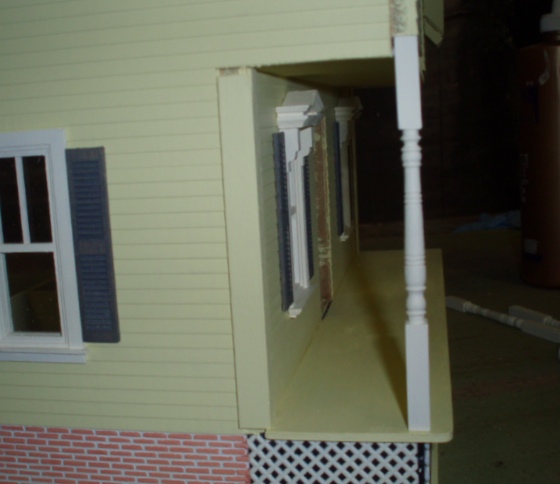
Here it is from the front. Using this first post as a guide, I went to cut the post for the other corner and made it a tad too small. The posts on my Fairfield aren’t a snug fit and were a pain to glue in because of that (plus it bugs me that they’re not “quite right”), so I really wanted these posts to be a tight fit.
I put the too small piece aside to use for one of the other positions (since all the posts but the two front corners are flush to the ceiling instead of inserted into a gap, so a tad shorter) and cut another one… again slightly too small. Then another one, and one that had a weird stippling in the paint I’d already set aside to use as one of the back posts since I didn’t want it front and center. Down to my last porch post… what could go wrong?
I CUT OFF THE WRONG SIDE! I had the post flipped over and accidentally cut the amount that needed to come off the top, off the bottom instead. Since more came off the top than the bottom this left me with a post that was definitely going to be too short. I ran to my stash where I happened to have a new package of porch posts, but like with the shutters, the circa late-1980s posts that came with the house were slightly different than my newer ones. In this case the new posts were a little bit narrower and I think you’d be able to tell that one of them wasn’t like the others. Sigh.
How to solve this dilemma? I took the piece I’d cut off from the bottom and glued it back on, then cut to the correct length. It’s the one on the right in the photo below.

Painting over the seam made it pretty innocuous, but I didn’t want this mangled post to be front and center. So I decided to use it in one of the back corners instead. This meant I had to use one that wasn’t quite long enough in the front corner position, but since the top gets covered up with trim it’s okay. I glopped some glue into the gap just to be thorough.
On to the upper trim, which is 1:12 crown molding. This came with the house, already cut to size. Lovely fit on the left.
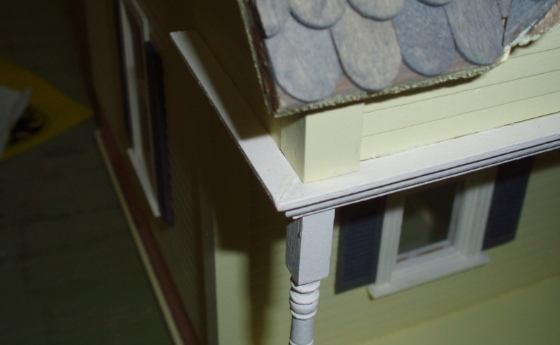
On the right… not so much. The big piece across the front seemed to be about 3/8″ of an inch too big. I don’t know if it was the wrong size or if I did something wrong with the corner trim that eliminated padding. I guess if I hadn’t cut a notch in the top of the corner trim for the crown to fit snug against it and instead glued the crown directly on top of the corner trim, maybe that would have made everything fit nicely… but then the crown wouldn’t have been flush against the siding, since the corner trim sticks out a little bit from the siding.
(I’m probably not explaining this well. Point is, it was a conundrum I couldn’t figure out, especially not with the trim pieces covered with glue awaiting my decision.)
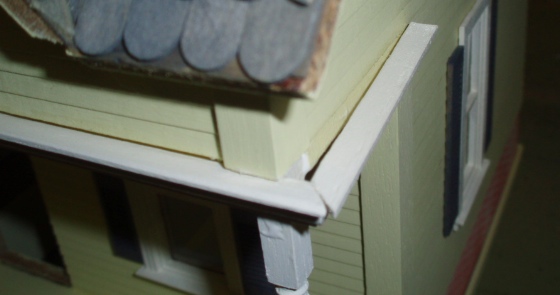
So I did what you should NEVER do in this situation… ran to the miter box and started sawing away at my trim pieces. I cut off a little bit too much off the long piece, and then I tried fiddling with the small piece to somehow magically fix the problem and completely mangled it. :(
It seemed like fairly standard 1:12 crown molding, so I went to Dollhouses Trains and More to hunt down another piece, but all they had was Houseworks and Classics molding that wasn’t quite the same. They’re usually well stocked in Northeastern Scale Lumber pieces but not so much right now, because they lost their distributor or something to that effect. (Actually the lady told me that Northeastern has gone out of business, which I hope isn’t true… the Northeastern website doesn’t say anything about it!)
The crown I needed was this one, and Northeastern’s shipping charge was crazy but I was able to find it on eBay instead — crisis averted! While waiting for it to show up, I moved along with the lattice. (I left the left and center trim pieces glued on in the meantime, but ended up having to remove the center trim piece to fix my mistake once the new piece arrived in the mail.)
When I glued in the lattice some of the paint rubbed off, especially underneath where I had clamped it. In this photo you can see white patch that’s lighter than the rest — that’s the bare plastic.
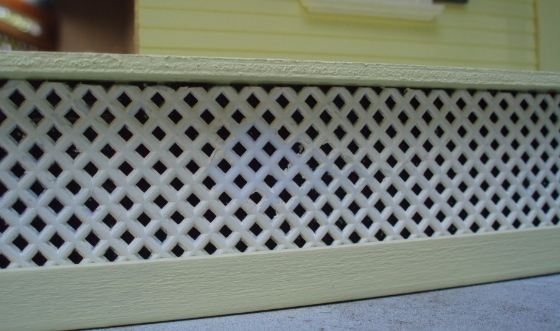
Using a small brush, I carefully painted over the lattice again. I did get some white spots on the black but was able to cover these up with black paint on the tip of a toothpick. Then I went over the lattice with a coat of matte sealer to (hopefully) keep it from scraping off again.
With the lattice finished, I started adding the framing pieces.
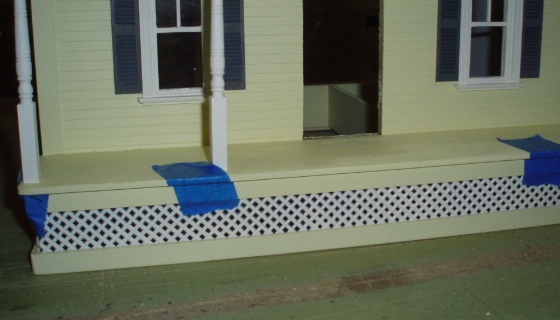
In the pictures I saw online, the lattice seemed to always be framed just underneath the porch posts, so that’s what I did with the exception of the back edges, which are positioned a little bit behind the posts to cover up the seam between lattice and brick. On those pieces I made the trim a little taller than the rest, to cover up the gaps under the corner trim.
Not bad for plastic canvas and a dollar’s worth of strip wood! The porch posts are not glued in yet in this photo, just held in with pressure. Later, I went around and painted over the seams where the trim pieces meet and the corners of the mitered trim yellow, so they’re not quite as obvious as in these pictures.
Coming up next time: more brick, scratch built stairs, and completion of the porch trim!
 Emily is a freelance writer, miniaturist, and adventure game enthusiast.


I feel your frustration with the trim pieces, since I did something similar on my Dura-Craft Victorian last week. Glad you were able to find some… isn’t eBay GREAT?!
Love the lattice and trim on the porch. It is coming along so nicely!!
You are sooooo fortunate to have a B&M dollhouse store so close even if it didn’t have what you needed this time. e-Bay to the rescue! The lattice and trim look great. Doesn’t adding the porch make a difference to the front of the house!
Unfortunately, now that I’ve moved, it’s a ~40 minute drive away over a toll bridge. :( Which is still better than a lot of people have, but I’ve had to change my habits a bit. I’m currently making a list of everything I need on my next trip over there…