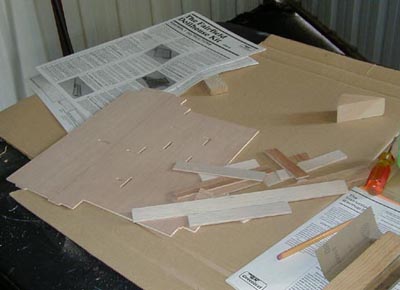
The first difference between the Fairfield and the Orchid: the directions are WAY more comprehensive. The Fairfield’s instructions are organized into about 20 chunks with {gasp} pictures to go along with them. The second difference is that this house is a lot more complicated. It has many, many, many pieces. And it’s a cube with openings on two sides, as opposed to a rectangle with one open side, so the process of putting it together will probably be a bit more complex. Not to mention that the Fairfield, being a 1:24 house, is half the size of the Orchid.
Okay, comparisons aside, I think I’m going into the building of this house with different expectations than I had last time. I expect this to take me a looooong time. And, I don’t expect it to be perfect. I noticed that the picture on the front of the box isn’t even perfect.
The first step was to assemble the foundation.
I started gluing these pieces with white glue, which is what I used on the Orchid. Soon switched to wood glue. Not only is it stronger, but it also dries quicker. The masking tape is holding the pieces in place as they dry.
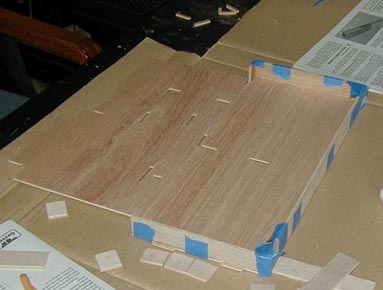
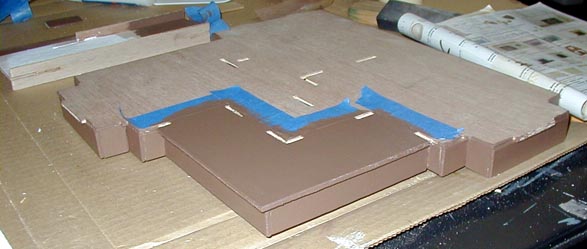
A few of the pieces were a little tricky to glue (I had to deviate from the instructions on the part of the foundation that goes under the bay windows) but overall it went pretty well. Next I put a coat of sanding sealer on the foundation and the porch area. When that dried, I painted. (The sealer is supposed to make the paint finish smoother… we’ll see!)
Step 2 was to assemble the chimney. This house has four fireplaces (two on each floor). This seemed a little excessive to me so I started thinking about how else the space could be used. Since dollhouses tend not to have closets (and when they do, they usually protrude like the one in my Orchid), I thought I could enlarge one of the holes and make it into a closet. This will be in one of the bedrooms. In the other bedroom, I’m making built-in shelves (maybe a TV or stereo system will go on them… I think this is going to be a modern house, too). I will keep the two fireplaces on the first floor (which, according to the floorplan, are in the living room and dining room). But since they’re just holes in the wall, I’ll probably use trim to dress them up. I have been looking at the fireplaces available in the HBS catalog for ideas.
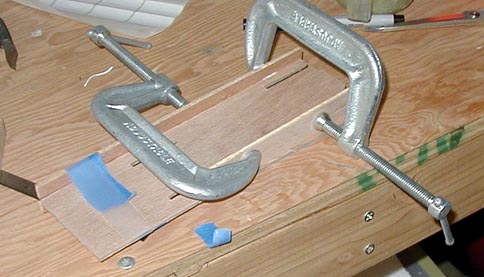
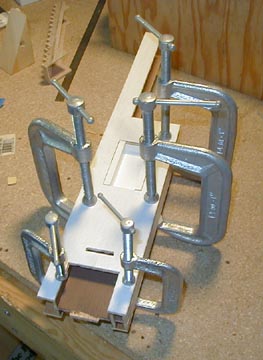
Geoff’s C clamps came in really handy with these pieces. Here I’m gluing the chimney walls to the piece that serves as the back wall of the fireplaces (and closet, and shelves). The finished chimney column stands in the center of the house.
Next I painted the pieces. I haven’t decided if I’m going to use wallpaper or not, so for now I painted the walls white. The slots above the fireplace holes are for the mantles… I wound up enlarging the second-floor holes to just above those slots.
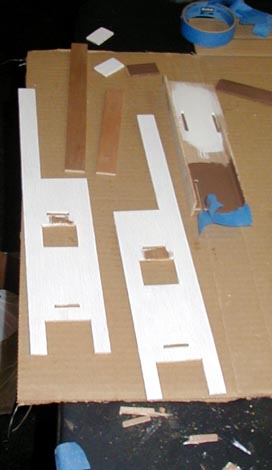
I got a pair of Houseworks 1:24 shutters to use as closet doors. I had to make the hole taller and narrower for them to fit. Geoff cut the opening to the correct height with his dremel tool. (I had him do the other second-floor opening to the same height, just in case I decide later to make it into a closet instead of shelves.) Then I glued in pieces of balsa to make the opening narrower. You can see the opening in the picture below. I will probably wallpaper over this before I attach the trim, but even if I decide to leave it white, the trim will cover the “seam” where the balsa meets the plywood. The closet doors fit over the space.
 Emily is a freelance writer, miniaturist, and adventure game enthusiast.


Shutters for closet doors! Great idea!! I can use that in my Leon’s Mansion.
I am trying to assemble the chimney and fireplace walls. Directions are not very clear. The center fireplace wall has three slots that I assume are for the sides of the interior of the fireplace. I do not see these pieces anywhere. Can you help?
Sorry, I built this a long time ago so I won’t be much help! You should post your question on Greenleaf’s forum, hopefully someone who built it more recently will have an answer: https://forum.greenleafdollhouses.com/forum/27-greenleaf-dollhouses/