Though my blogs have focused mostly on little things lately, behind-the-scenes writing continues. I spent last week at the Game Developer’s Conference in San Francisco, and Adventure Gamers has just posted Designing Journey, the first of several GDC articles to come. I also wrote a feature about Telltale for issue 134 of Games™, on sale in the UK in a week or two, so those who still like to feel the pages turning under your fingers (or the equivalent on iPhone/iPad) might want to keep an eye out for that. Oh, and I’m still working on my novel. Really.
So, about Journey. Months ago I downloaded the demo and really didn’t like it. Between my bad sense of direction and my preference to have lots of story in my games, I’m not a huge fan of “explore the big sprawling world” games like Myst to begin with. That plus the physics-based controls, which I generally suck at, made the first several minutes of Journey frustrating for me. I didn’t understand what I was supposed to be doing and had trouble making the jumps to reach the first few batches of cloth pieces. When offered the opportunity to review the game for Adventure Gamers, I turned it down, knowing it had been getting lots of praise elsewhere and thinking it would be in better hands with someone else.
I was right about that—AG’s reviewer gave it a perfect 5-star score—but it turns out I’m also a fool. Because this game is awesome. I may never have realized that if not for Jenova Chen’s talk last Thursday at GDC, where he went through the design process and explained the intention of Journey’s atypical multiplayer (which I didn’t understand at all when I tried the demo) and the narrative structure behind the game (which, as a fiction writer, I found fascinating). It’s all recapped in the article, so I won’t go into detail here, but the bottom line is if you’ve stayed away from Journey because you just “don’t get it,” this peek into the game’s development may well change your mind.
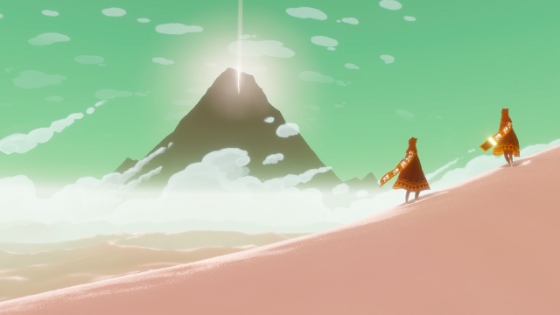
In the week since I saw Jenova speak at GDC, I’ve played Journey three times. The first, I kind of bounced around from companion to companion, continually losing track of them and focusing instead on making my way through the world (a worthwhile endeavor all on its own). But very early on in my second playthrough, I met up with a player in a white cloak. You get this by earning one of the game’s trickier achievements, so they clearly knew what they were doing. This player was incredibly generous, showing me all sorts of hidden areas I never would have thought to look for otherwise.
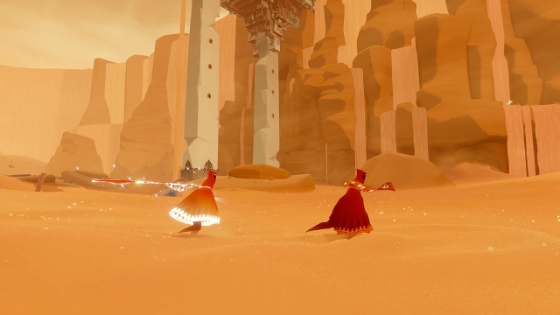
What stood out to me the most about this playthrough was my companion’s enduring patience. Several times when we got separated (often because my so-so mastery of the controls required several tries to make a jump, or my crappy sense of direction had me turning in circles trying to figure out where they had gone), my traveling companion always waited for me (sometimes for several minutes). When we got to the summit I thought we’d lost each other, but when I landed near the final area, there was my friend in the white cloak. The joy of finding each other again was surprisingly intense.
We hung out for a little while, he/she tried to teach me how to faceplant into the snow (which I never figured out, not but for lack of trying!), and finally we walked into the light together. I’m not a player of MMOs, so I don’t have any basis for comparison, but I can honestly say I never had an experience like this playing a game before, let alone playing for two hours with a stranger. Journey is a special game.
(I didn’t write it down, but I think the player’s username was Rasputin_Drew. In the unlikely event that you’re reading this, thank you.)


 Emily is a freelance writer, miniaturist, and adventure game enthusiast.

