This weekend I made some updates behind the scenes that hopefully haven’t broken anything. In December, 1&1 (my webhost) sent an email saying they would discontinue support for php 4 on April 1 so I needed to update my site to php 5.4. Naturally I waited until mid-March to deal with it. I actually wanted to do this update a while ago, because my blog was running on an ancient version of WordPress (2.9), but for a long time 1&1 only supported php 4 and the newer versions of WordPress need php 5.
Switching the php version turned out to be a simple matter of selecting the new version number from a drop-down menu in the 1&1 tools.
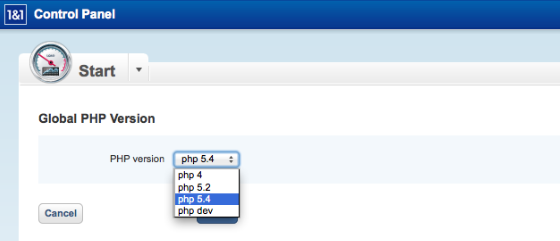
You can switch the php version setting by clicking Global PHP Version in the 1&1 Control Panel.
Of course, once I did this my blog displayed as a blank page, because my ancient version of WordPress didn’t work with php 5.4. As it turns out, newer versions of WordPress also require that the database is MySQL 5. Mine was using MySQL 4, because that’s what was available from 1&1 when I created the site. Switching this was not a simple matter of selecting a version number from a drop-down menu, however. I had to create a new database and move everything from the old version into the new version—a task that’s far beyond my comfort zone as far as this stuff goes.
1&1 has a fairly straightforward FAQ that explains the process… problem is, if it doesn’t work exactly right, they don’t tell you what to try next! According to an article from 2010, fewer than 6% of WordPress users were using MySQL 4 even then. (Lucky me!) So the problems I experienced probably apply to a relatively small number of people, but if you’ve found this post because you’re a 1&1 user who can’t figure out what to do next, here’s what worked for me.
Continue reading


 Emily is a freelance writer, miniaturist, and adventure game enthusiast.

