In December I got an email from a woman named Sue who reads my blog. She was downsizing her mini collection and offered to sell me a half scale Seaside Villa dollhouse shell. This house used to be available from Rocky Mountain Woodcrafts, a line owned by Norm’s Dollhouse in Colorado, which shut down in 2017.
For a while after that Norm’s son David continued to sell the Rocky Mountain Woodcrafts houses (and Sue told me that David built this one). But according to his website they’re no longer being produced.

The Seaside Villa — actually named the Sea Side Villa, but I can’t bring myself to break “seaside” into two words! — was originally a 1:12 house. The design is based on another dollhouse, the Visalian, that was available in the 70s/80s as a 1:12 kit by One-of-a-Kind Wood Shop, and later as a 1:48 kit by Debbie Young.
The Visalian dollhouse was based on a real house built in ~1902 in Visalia, California, that burned down in 1983. There’s a snippet of info about the house as well as a photo from another angle on Historic Happenings, a Visalia history blog.
Here’s a comparison of the two 1:12 dollhouses. On the left is a picture of the Visalian taken from the instructions (I grabbed it from an old eBay auction), and on the right is the model from Norm’s Dollhouse / Rocky Mountain Woodcrafts.
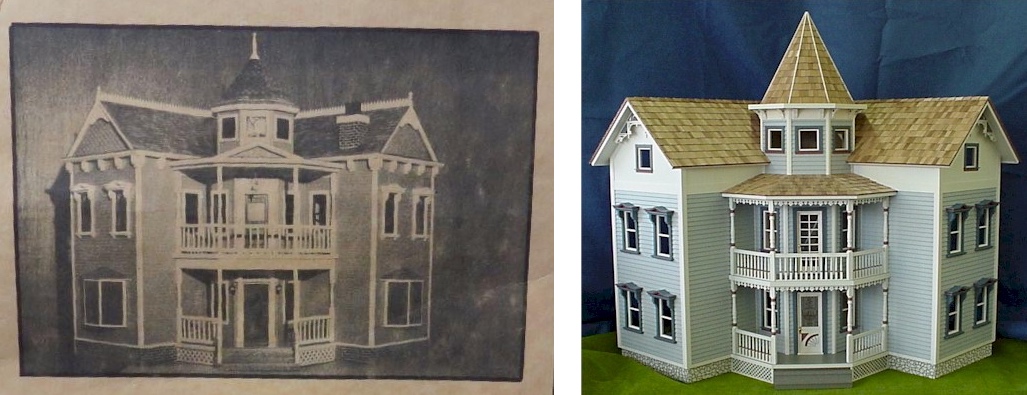
The Visalian and Seaside Villa have a few noticeable differences: the Seaside’s tower is taller/steeper and it has windows on the third floor. The Visalian has bay windows on the first floor, a chimney, and a peak on the porch roof. You can find a lot of pretty pictures of both houses by searching Google or Pinterest, as well as a beautifully built 1:48 Visalian on Cynthia Howe’s website.
 Emily is a freelance writer, miniaturist, and adventure game enthusiast.

