My obsession with dollhouse closets has intensified as I’ve started working on the Victorianna’s third floor. The slanted ceilings create weird little spaces no good for furniture but perfect for closets. For a long time I’ve been toying with the idea of creating a small closet next to the tower room.
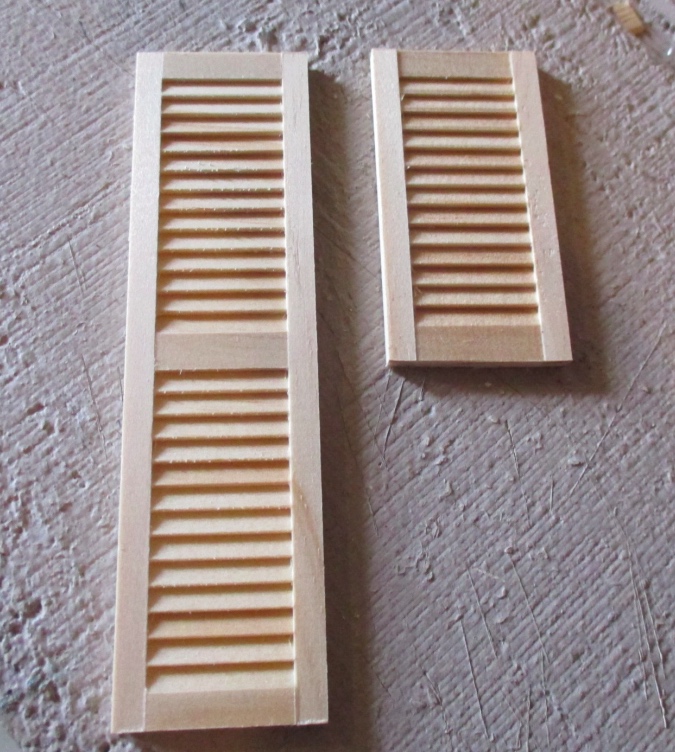
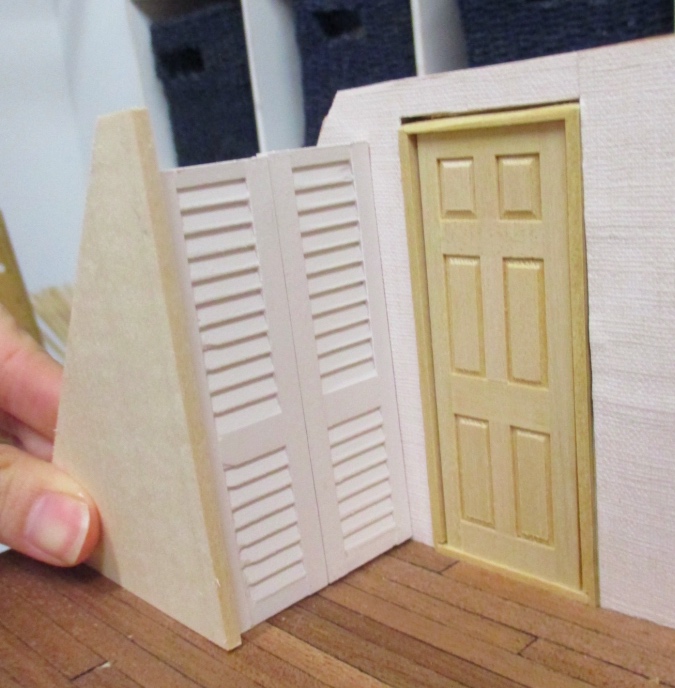
I bought these out-of-production Houseworks shutters on eBay — they’re meant to go on the bottom half of an interior window.
The height’s good, but since they don’t have built-in trim like the regular doors do, I wasn’t sure how to make a wall they would fit into. Also it’s a funny size and shape for a closet, too short for clothes, but not wide enough to access the full crawl space. (These are clearly very important issues for the imaginary people who live here!)
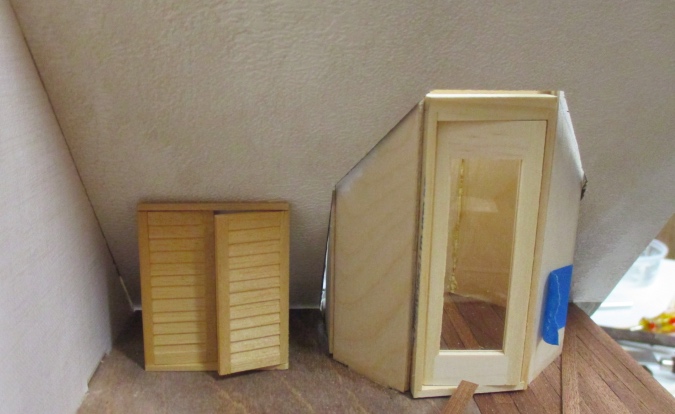
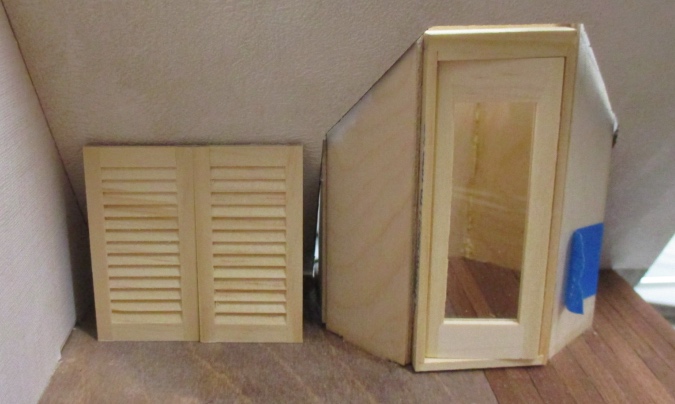
Next I bought a package of 1:12 shutters, which are slightly wider, and cut them down to fit in the space. (The full space is about 3″.) These are the small shutters which are each 1.25″ wide. Houseworks makes larger (wider) shutters as well, but those are also taller. I wanted the doors to line up with the joint where two sections of the tower wall meet so I the doors couldn’t go above 2.5″ in height.
With trim this would fill up the space perfectly width-wise, but once I saw it I realized I’d also need trim at the top, and that would force my doors to come forward a bit more, so they would no longer line up with that wall joint I wanted them to line up with. It was all making my head hurt, so I vetoed the closet next to the tower room. Instead I’ll add a knee wall and find a piece of furniture that fits, either a dresser or a bookshelf.
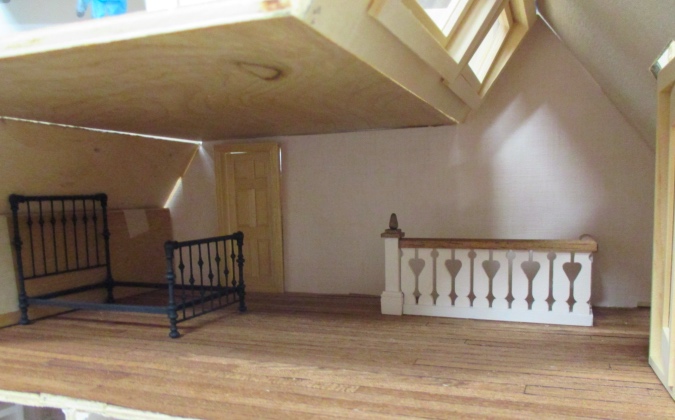
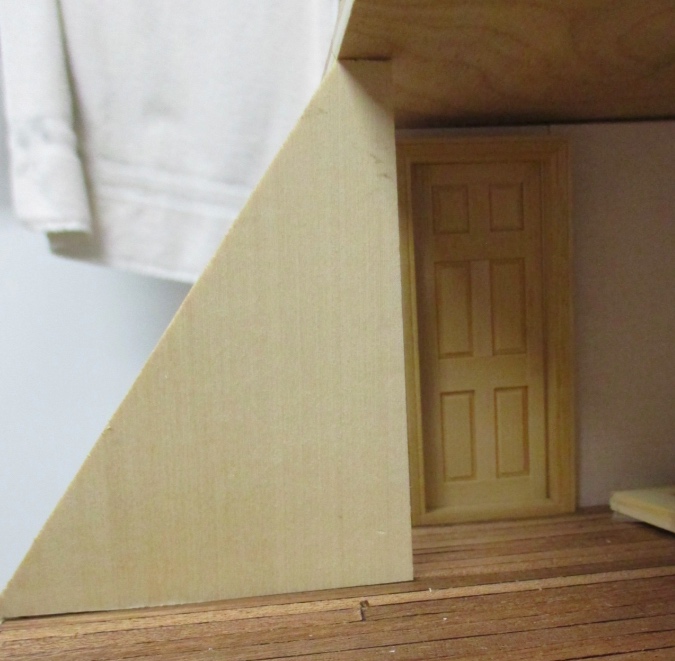
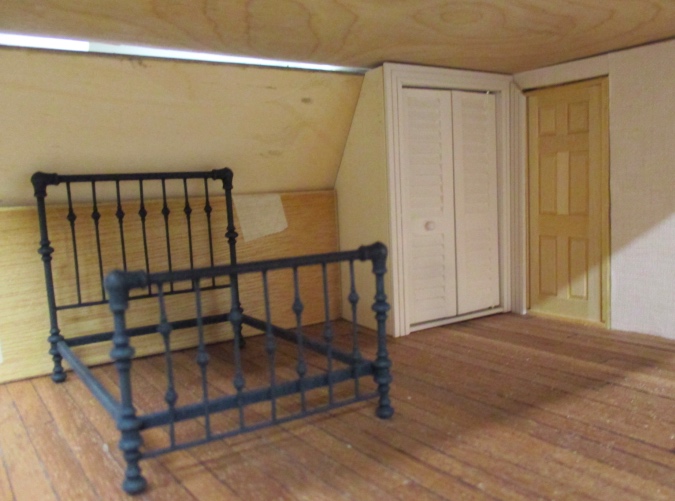
Then I started looking at the other side of the room. There’s space for a closet in the corner next to the bathroom door, with enough head room for the closet door to be the same height as the regular door.
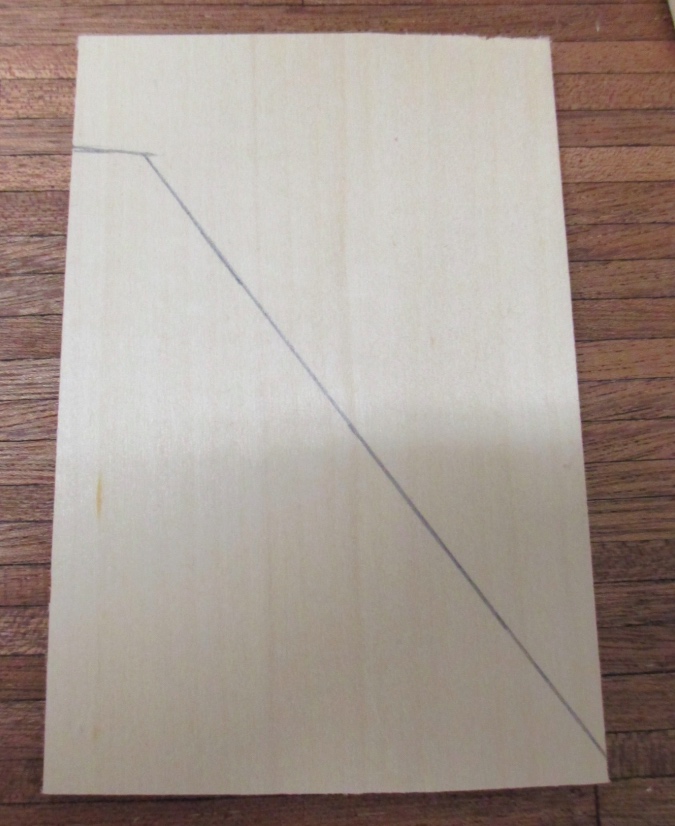
I took the end of the 3″ wide basswood left over from cutting the small sloped roof and held it up against the wall to trace the diagonal edge.
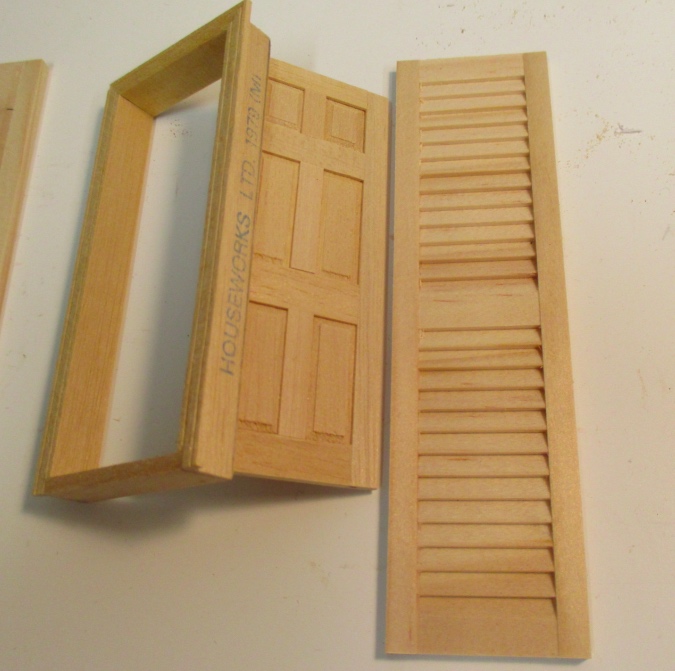
In the Victorianna’s bathroom, I combined shutters with a French door to create a laundry closet. I didn’t want to do the exact same thing again so this time I made a bi-fold door. (Note: I didn’t write this out step by step as a tutorial, but there’s a supply list at the end if you want to make your own.)
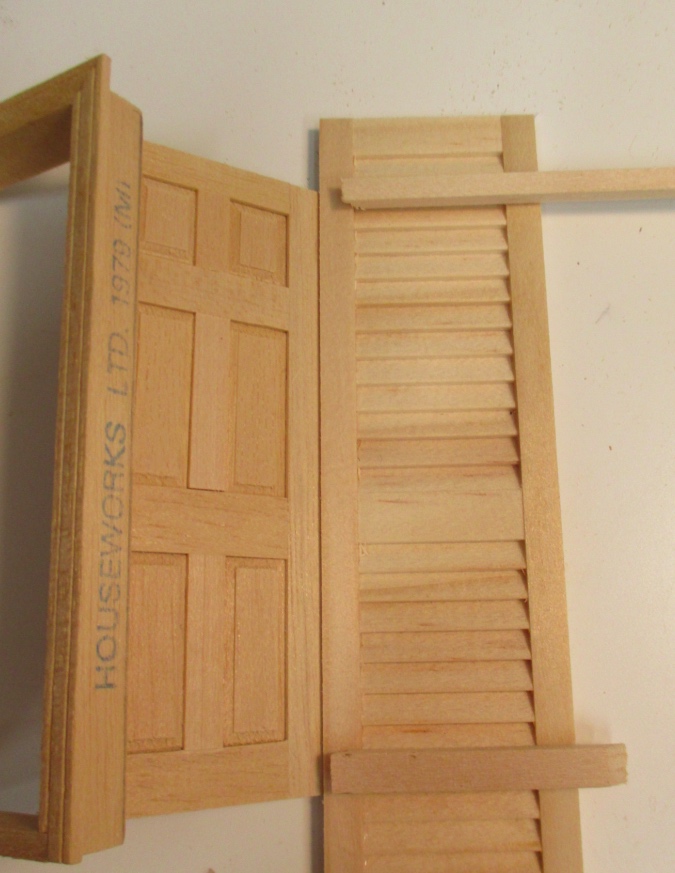
I started by holding a shutter up next to a regular door to figure out where to cut it vertically. When I did the bathroom closet I accidentally spaced it so there are the same number of louvers above and below the horizontal piece. In real louvered doors, the horizontal piece is closer to the bottom than the top (that’s where the knob goes – approximately 3′ off the ground).
I found some wood in my scrap pile to form the new top and bottom. The top piece is 1/8″ square and the bottom piece is 1/8″ x 3/16″.
I used my saw and miter box to cut off the top and bottom.
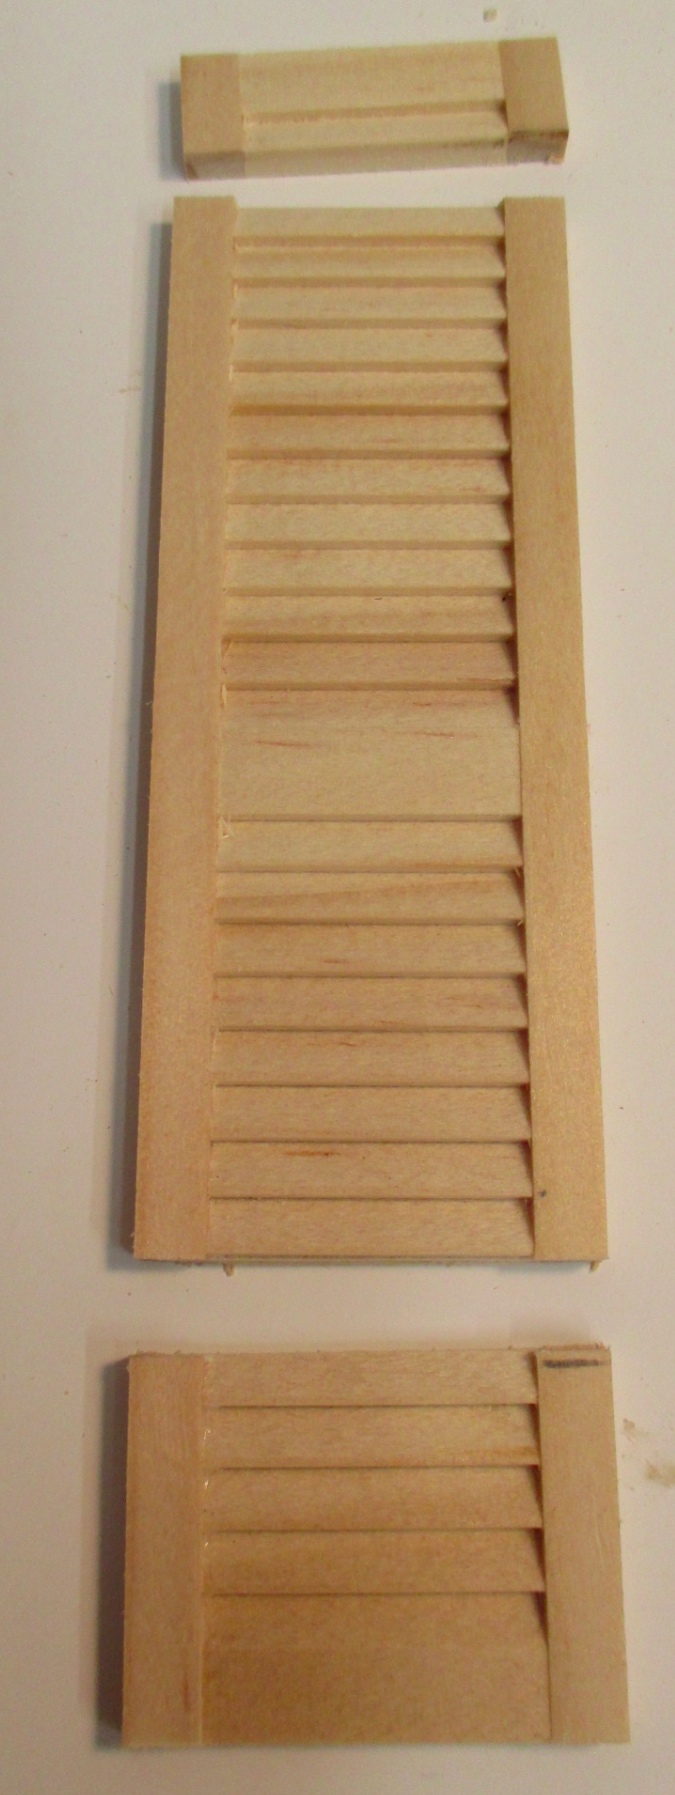
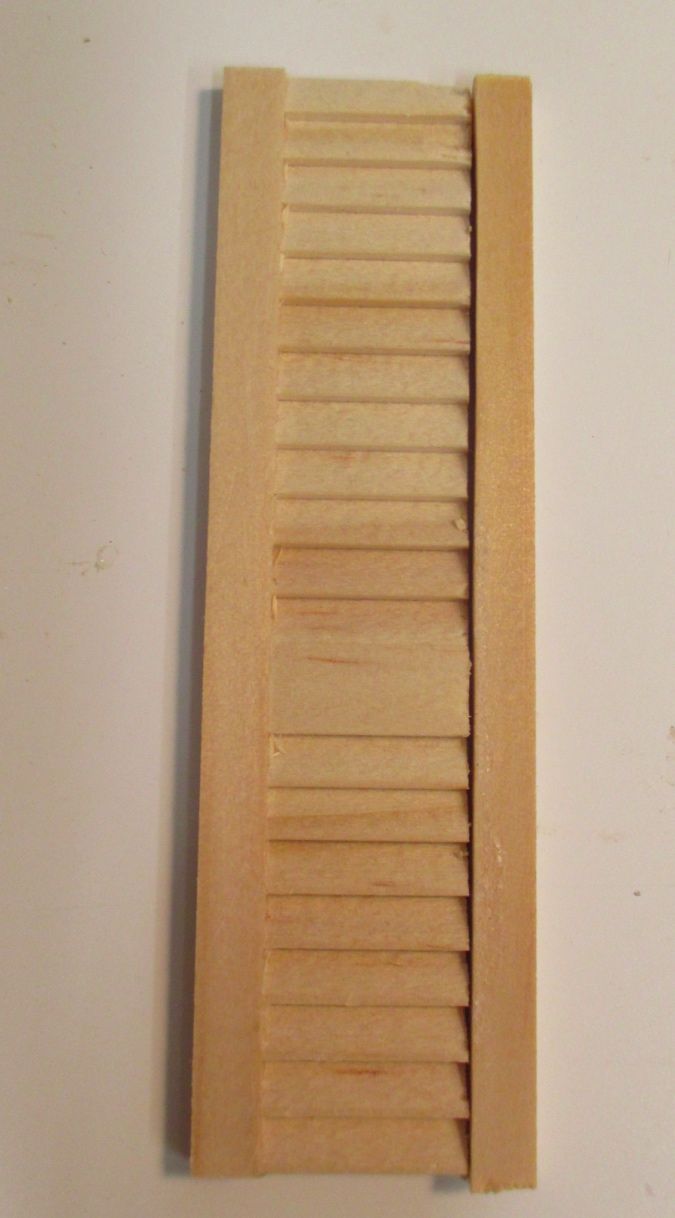
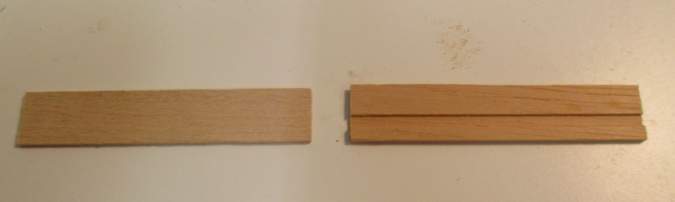
I also wanted the doors to be narrower than a shutter. The room is 7.5″ deep and I wanted the closet to be about 2.5″ to leave enough space for the bed and nightstands. Using the utility knife and a straight edge I cut the side piece off along the seam where it’s glued on.
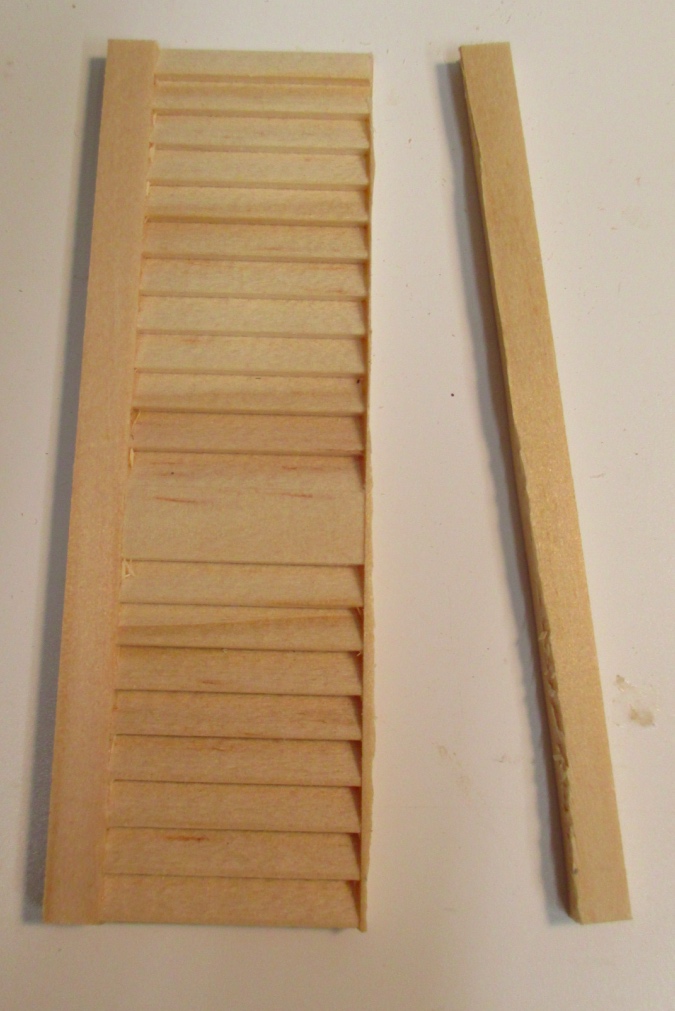
Again with the utility knife and a straight edge, I cut down the louvers so the louvers and remaining side piece are 3/4″ wide.
The 1/8″ x 3/16″ basswood I used for the bottom of the door would have been the right size to make a new side piece, but I didn’t have enough, so instead I reused the side I cut off. The edge was chewed up at the points where it disconnected from the louvers. I flipped over the cut piece, using the the back side (which had a cleaner edge) as the new front side.
Next I removed the top and bottom louver.
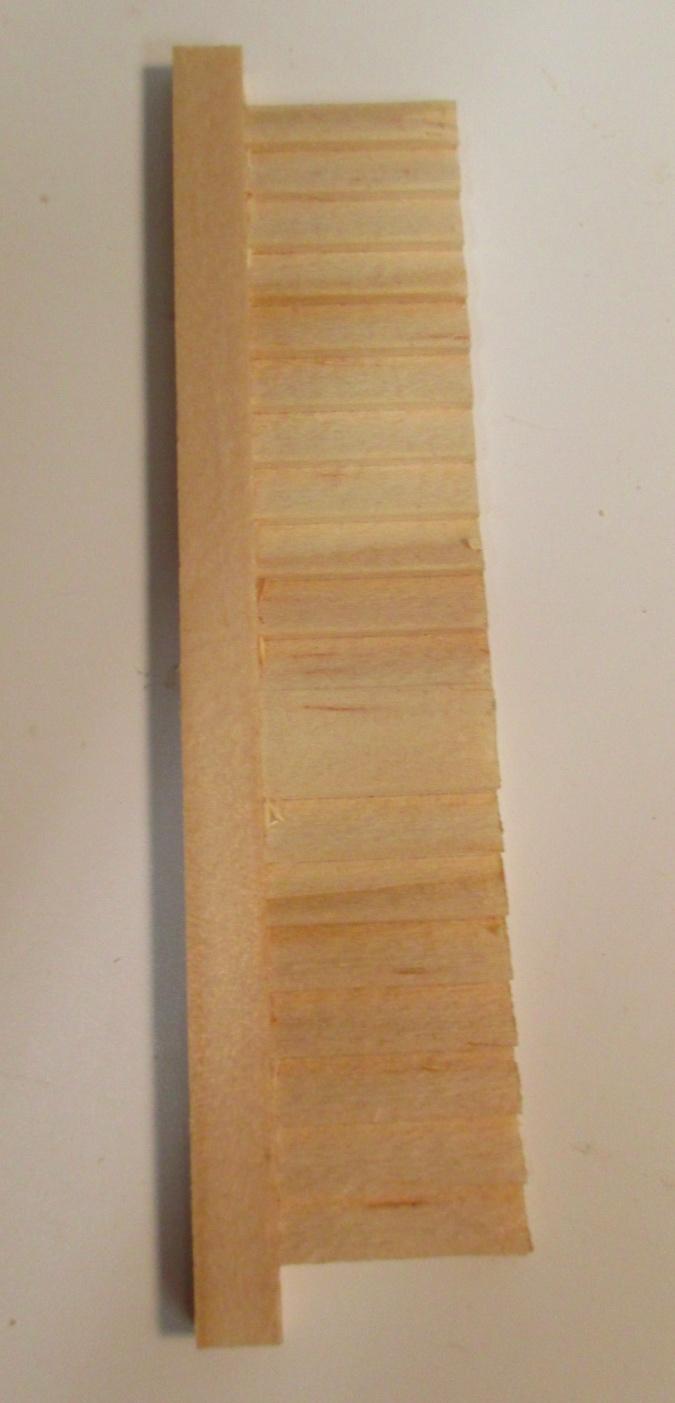
Then I glued the new top (1/8″ square basswood), new bottom (1/8″ x 3/16″ basswood), and repurposed side back together.
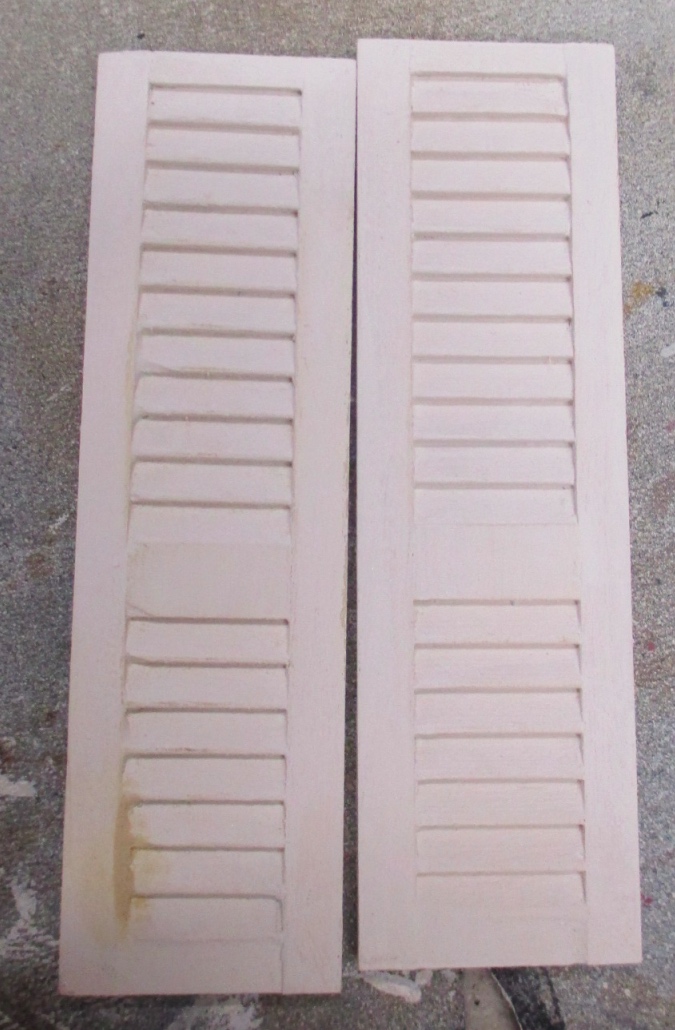
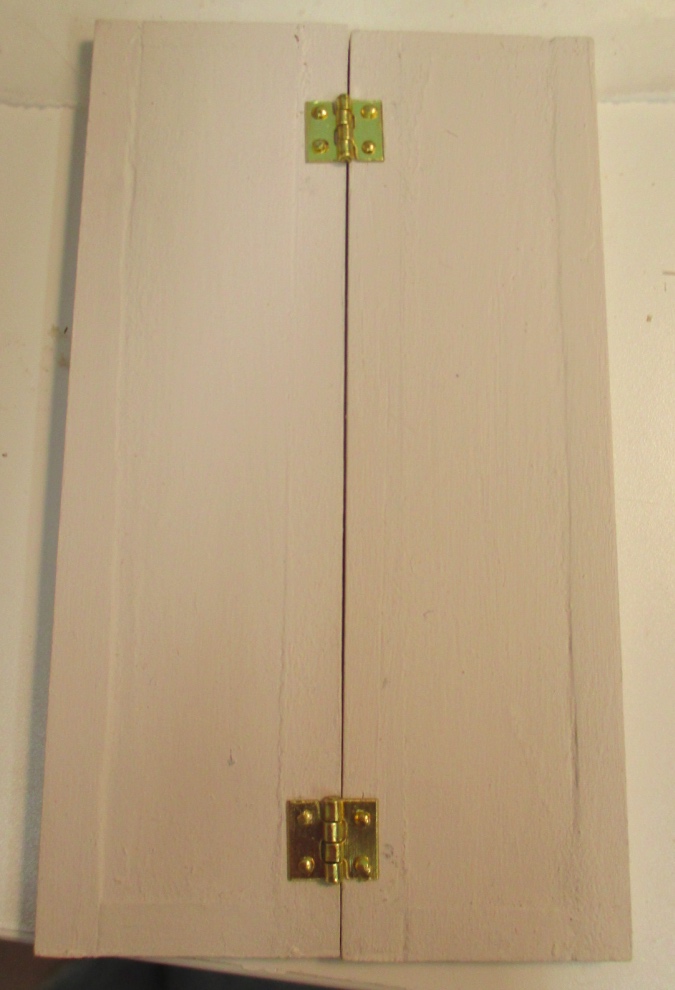
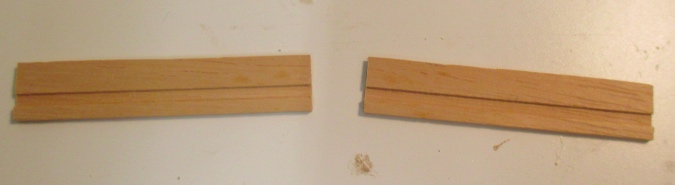
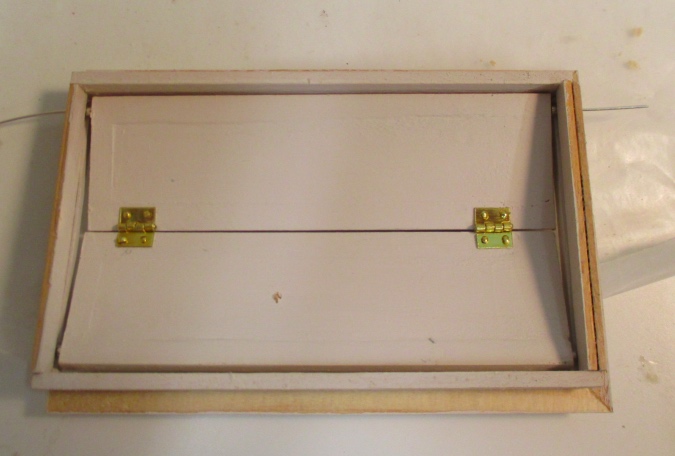
Here are my re-glued doors. I made a point of cutting the right side off of one shutter and the left side off of the other shutter. This way I can hinge them together on their the un-cut edges, just in case there’s anything wonky about the cut sides that would prevent the doors from hinging and opening well.

The second one I did (on the left) is worse than the first. I forgot to use the straight edge when I cut off the side piece, so it has a slight curve at the bottom. Also some of the louvers broke off while I was cutting and had to be glued back on. I filled in some of the chewed-up spots with wood filler but the left door is still not as nice as the right door. Oh well.
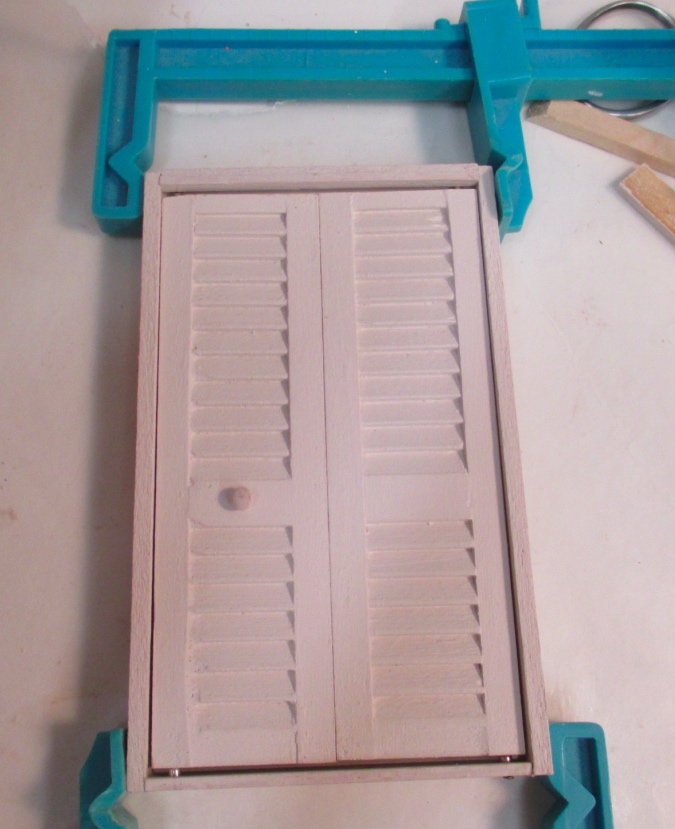
Next I hinged them. I had these hinges already, I think they’re these but there’s a chance they’re these. Even the larger hinges with three holes would work, the only caveat is that the nails that come with the hinges may be longer than the depth of the door. I used 1/8″ brads instead.
After hinging one door was a hair higher than the other, so I carefully used the disc sander to shave off a bit of the top of one and the bottom of the other.
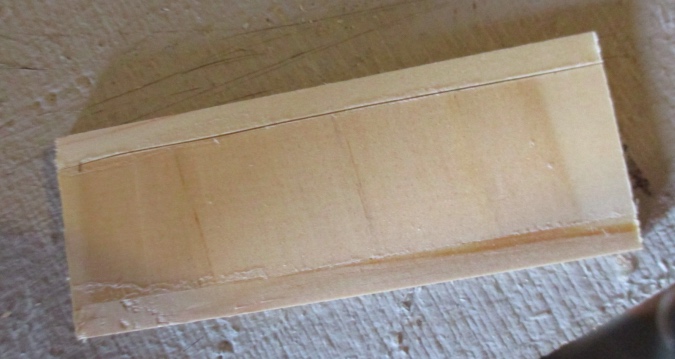
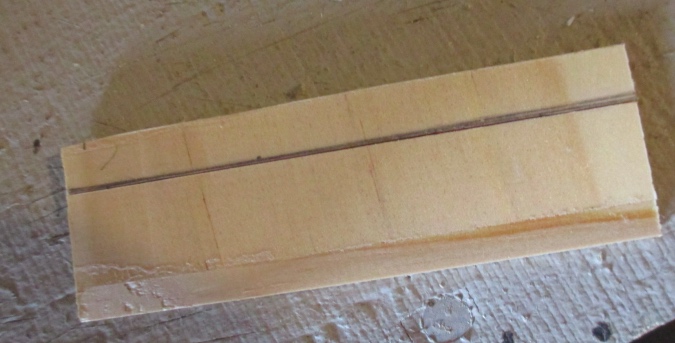
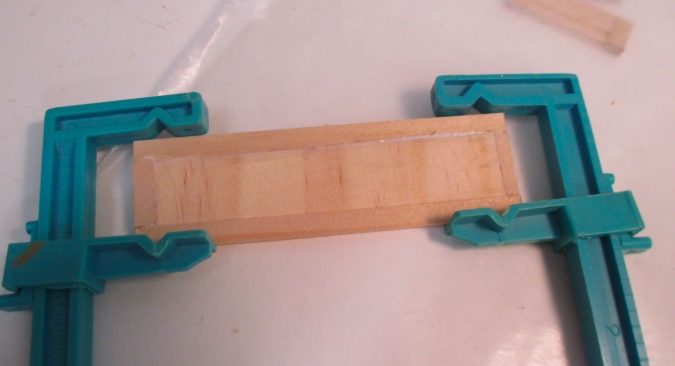
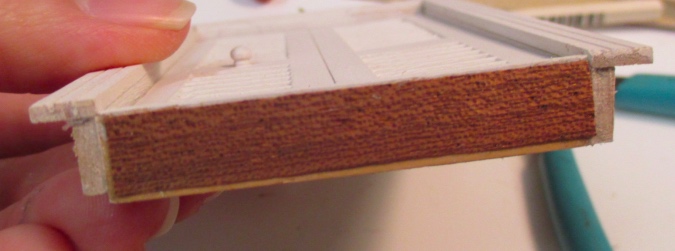
Since the closet is right next to another door, I wanted the trim to be consistent, including the height of the piece at the bottom. But the bottom and top also need a track so the door can slide open. I thought I would have to make something, and was experimenting with scrap pieces when I came across a piece of 1:12 baseboard. (I think it’s this.)
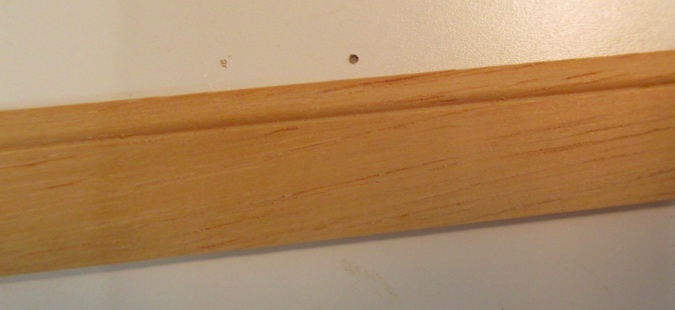
The back of the baseboard has a groove in it for wiring to pass through — perfect for a door track! I cut two pieces to the width of my two doors (1-15/16″), to form the top and bottom of the door frame. Using the utility knife, I cut off the tapered part of the baseboard. The depth of the piece is now 3/8″.
These are 1/16″ tall, which is exactly the same as the bottom of the regular door, so the bottom piece is fine as it is. The top piece needs to be taller both to give stability to the door frame and so the trim has enough wood to attach to. I cut a piece of 1/16″ x 3/8″ wood to the same width and glued it to the top of the piece with the groove. This makes the top piece of the door frame 1/8″ thick.
Not pictured, I also cut two side pieces from 1/8″ x 5/16″ basswood. 1/8″ x 3/8″ would have been better for the sides, to match the depth of the top and bottom pieces, but I didn’t have any. I made them 3.5″, which is the height of the doors plus top plus bottom pieces. I painted all the frame pieces as well as some 1:24 casing.
While the paint was drying I added a knob to the door. This is a 1:12 wooden knob. In retrospect it might be too big.

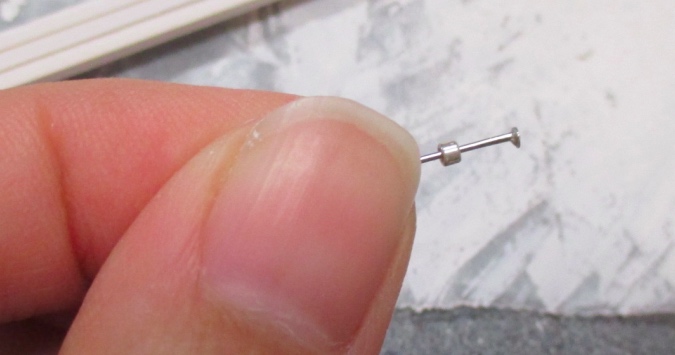
Of course, a bi-fold door is hinged on one side and slides on the other. I started with the sliding side. I have no idea what the thing that sticks out the top and bottom of the door to keep it on the track is called, so I’ll refer to it the sticking-out thingie. I made the sticking-out thingies by cutting down a pin and then adding a seed bead.
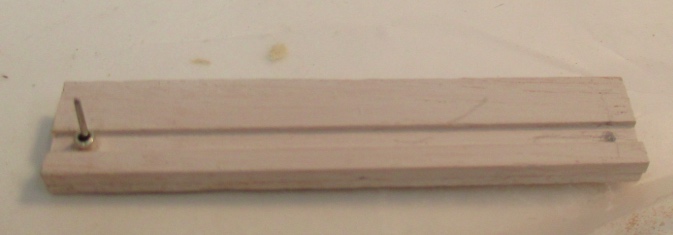
Here’s how the sticking-out thingie looks in the track.

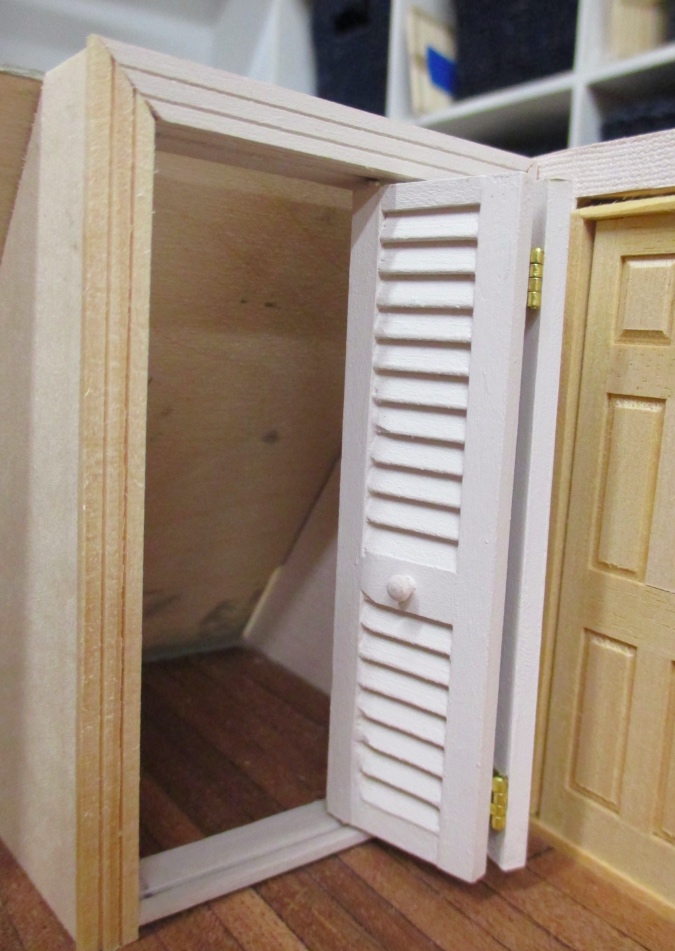
It totally slides!
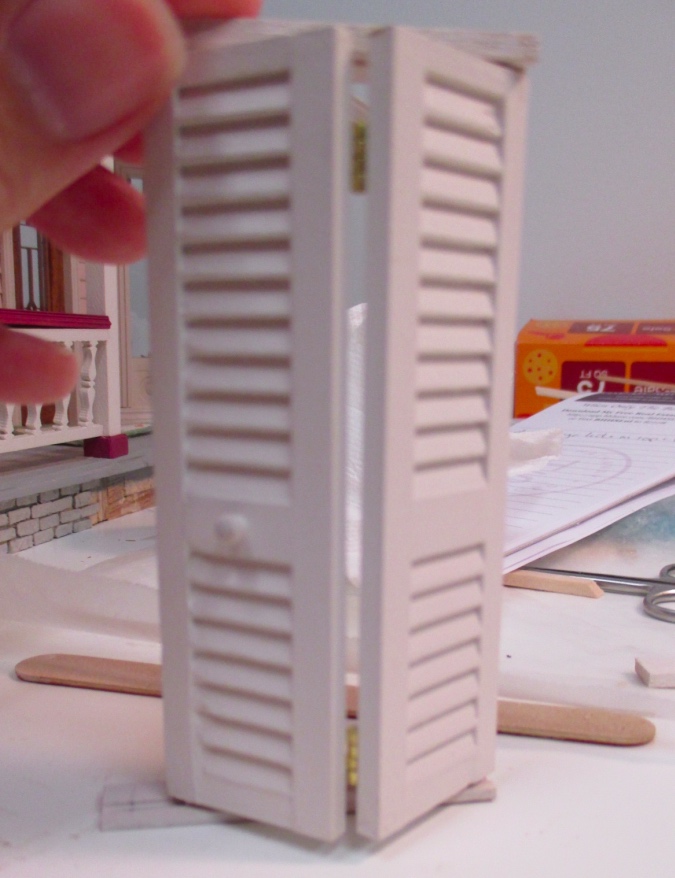
Next I pin-hinged the other side. Messing this up could have ruined the whole thing so I was very careful to get the holes in the right place. First I used the micro drill to make a hole in the bottom piece. I then lined up the door with the bottom piece and stuck a pin through to make a dot on the door, so I’d know exactly where to drill that hole. Next I held the bottom piece against the top piece and poked the pin through to mark where to drill into the top piece. Finally I lined up the top of the door with the top piece and made the last hole.
The sticking-out thingies add some extra space between the door and the tracks. To mimic this on the hinged side, I put a cut-down piece of pin through the hole, and then added a seed bead before sticking the pin into the hole in the door.
Next I glued on the side pieces. My sticking-out thingies added enough to the height that my side pieces are now slightly too short. I made sure they lined up on the bottom, since the top will be hidden by trim.
This assembly was hard to glue. The area being glued (sides of top and bottom to the edges of the side pieces) is small, and I couldn’t lie the door flat on the front due to the knob, or on the back because the 5/16″ side pieces weren’t quite as deep as the 3/8″ top and bottom.
I added trim to help reinforce the not-great glue job. I’d painted enough for all three sides but cut one side slightly too short, so I had to do it over with an unpainted piece. I put this on the edge where the door opens so it would be easy to paint without getting paint on the door or mucking up the pin hinges.
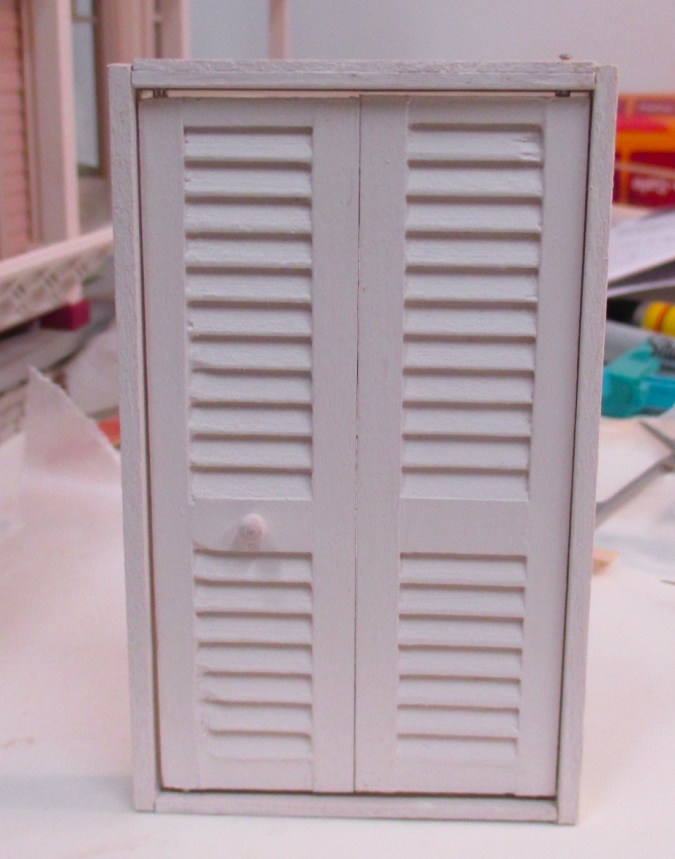
It’s the perfect attic closet!
I touched up the paint and came upstairs to post this blog. When I went down to take a few more pictures I noticed the bottom pin hinge had fallen out. Then while I was trying to fix it, the top pin fell out. I think the holes I made were slightly too big so the pins weren’t snug enough, and since they were cut down they didn’t have a pointy end to “grab” the wood.
Due to having to line up the seed beads on the door side of the track, getting the pins back in was very difficult. After messing with it for a LONG time, I managed to get it hinged again using pieces of wire left over from the wind chime project. (I knew I’d find a use for them!) I put a dab of glue on the ends of the wire before sticking them in, to theoretically help it stay inside the holes.
I cut down the wire and added a piece of wood veneer to the bottom to keep it from falling out. At the top I glued on a piece of the 1/8″ x 5/16″ basswood. This is the area where the trim would normally slip over the wall, but there won’t be a wall piece there — the top of the closet is flush with the ceiling — so it’s not getting in the way of anything. If that hadn’t been the case I could have used veneer at the top, too. (If you trying this and don’t have veneer, a piece of heavy paper would also work.)
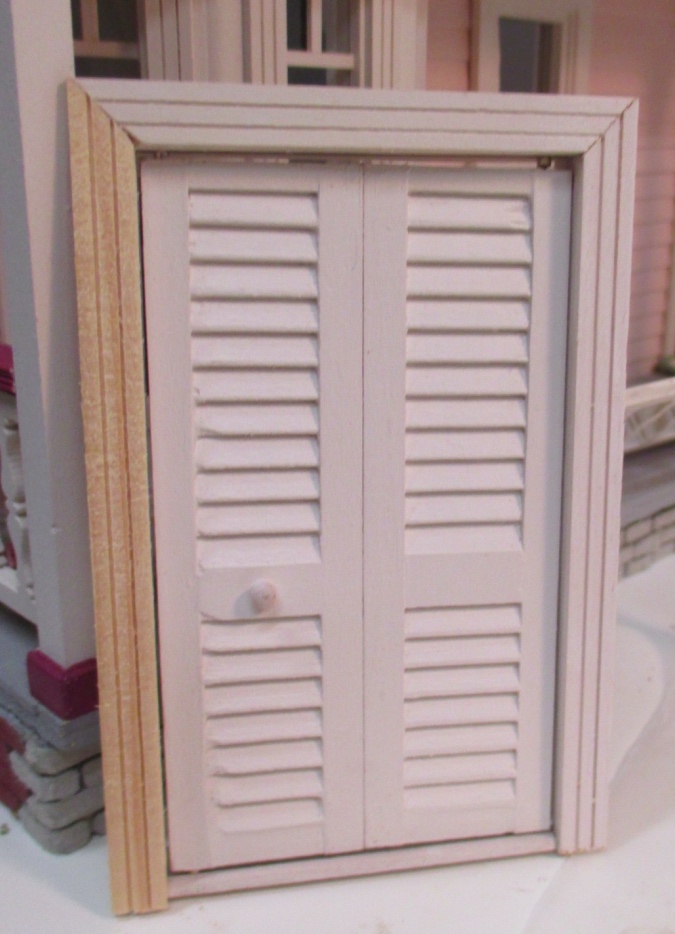
The closet would have lined up exactly with the door next to it, except the seed beads added a teeny bit of height, so now the trim on the closet will be a teeny bit higher than the trim on the door. I had to shave down the top of the door to make it fit in the hole here, so I can’t raise up the trim on the door to meet the closet trim. I’ll have to figure out another solution to keep it from looking uneven.
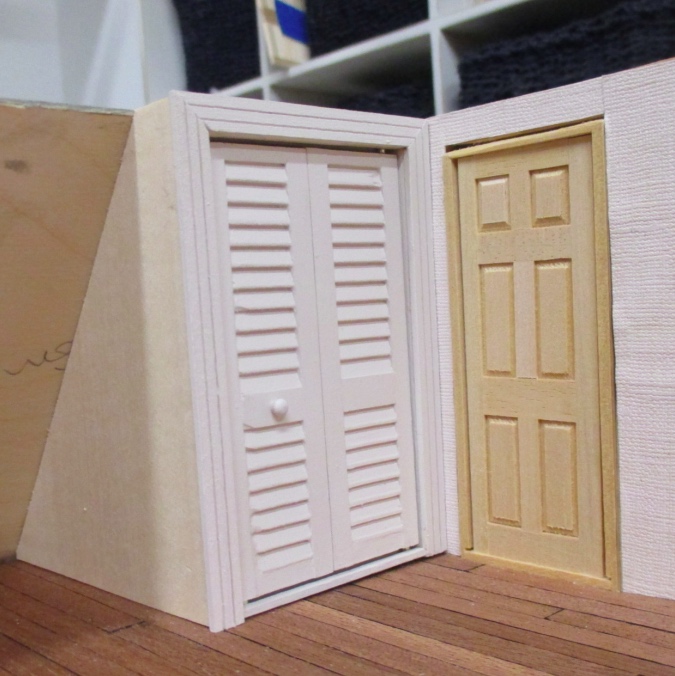
Ta da! I think this is my favorite closet yet. The finished size is about 2.5″ x 3.75″.
Supplies needed to make a half scale bi-fold door:
- 1 package of Houseworks small shutters
- Basswood: 1/8″ x 1/8″ (top of doors), 1/8″ x 3/16″ (bottom & sides of doors), 1/8″ x 3/8″ (sides of frame), 1/16″ x 3/8″ (top of frame)
- 1:12 baseboard with a channel on the back
- 1:24 door and window casing
- Two mini hinges and brads for hinging
- Straight pins
- Seed beads
- Knob (if the wooden knob I used looks too big, try a pin + seed bead, painted)
- Saw, utility knife, straight edge / ruler, micro drill, tacky glue, wire cutters, wood filler, clamps
- Wood veneer or heavy paper, in case your pin hinges slip out like mine did!
 Emily is a freelance writer, miniaturist, and adventure game enthusiast.


What a neat way of doing the bi-fold doors. Great how-to blog, thanks! I am always impressed by the methods you work out to do things :)
I accidentally hit the unsubscribe button. I want to keep following. Your work is inspirational! I love getting emails.
I fixed it! Thanks! :)
Wow! That’s really amazing. I love how it looks and I can’t wait to try this out when I finally do a closet!
Brilliant solution to the space…closet doors look amazing and to think they actually slide! Loved seeing the step by step instructions and thank you for sharing your how-to’s!
Clever girl! And in half scale! Now that’s talented!
Extremely impressive! I can’t believe you built a half-scale bi-fold door that actually slides on a track! Bravo!