The theme for this year’s Half Scale Miniatures Group swap was “filling the shelves”. Every year I try to make something no one else will think of, but initially I was having a hard time with this one. This is a big swap — I needed to be able to make 40 of whatever I came up with, without them being crazy expensive or having an overwhelming number of steps for assembly. I was thinking about books with bookends, but I kind of hate putting together miniature books (even though it’s easy), so I wasn’t too excited about it.
Right around the time I started working on the Blackbird Bar roombox, I made a trip to Michaels to get inspired. And with booze on the brain, I came up with the idea of a half scale cocktail set.
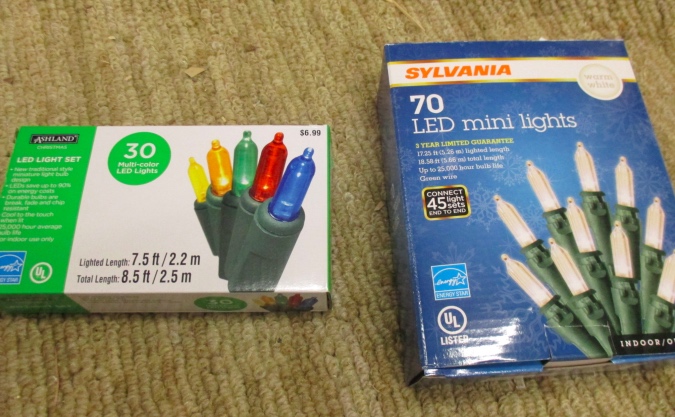
It was late November and Michaels was in full Christmas mode. That’s actually part of the reason I made the trip — I wanted to look for Christmas lights like these that I could use to make bottles for my 1:12 bar. Every year since Joann Swanson (the queen of dollhouse diy projects!) posted that tutorial, I have looked high and low for the type of lights she used and can never find them. Regular Christmas lights don’t look enough like bottles to me. They need that long neck like the ones Joann used.
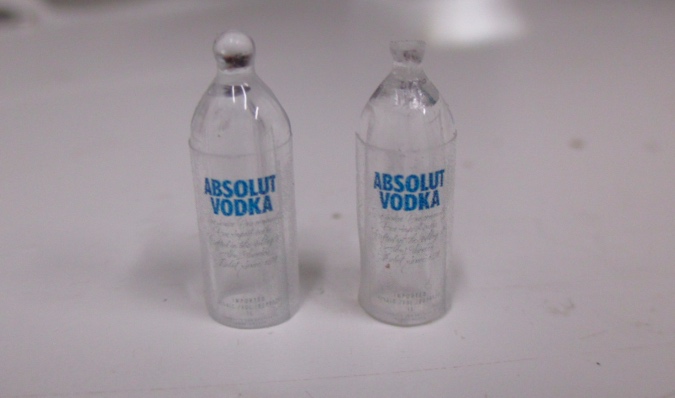
Once again, Michaels didn’t have them this year, but they did have these. (Actually, only the Ashland lights were from Michael’s. The Sylvania lights were from the Joann Fabrics around the corner. But Ashland makes clear bulbs, too.) These lights have a rounded top edge and a ball on the top that reminded me of Absolut Vodka bottles. I thought I could paint the ball to look like a cap.
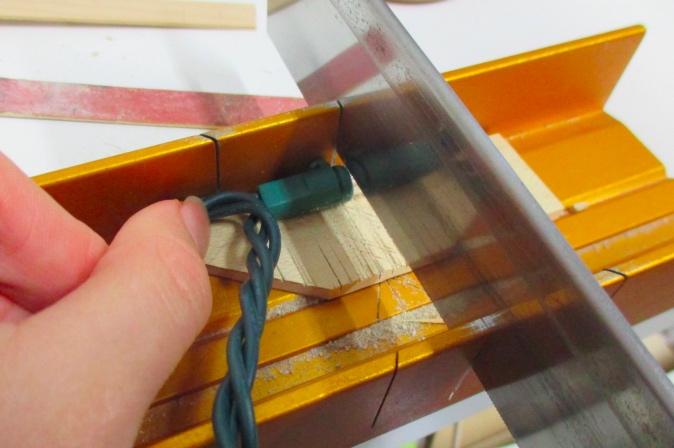
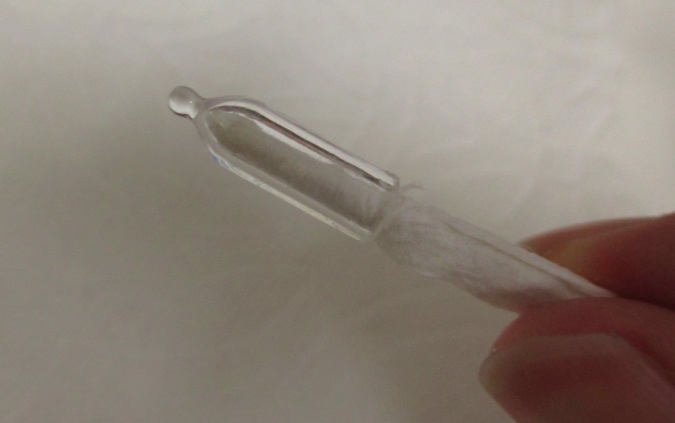
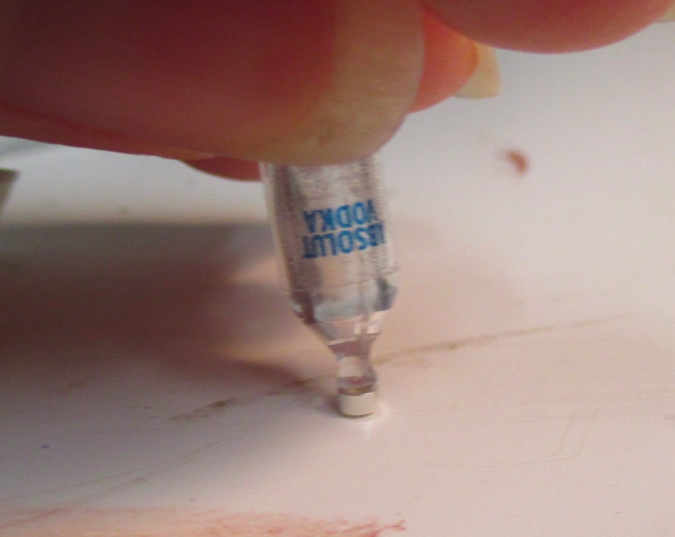
These LED lights are made out of plastic, and you can’t just pull them off their base like you can the incandescent lights attached by little wires. I used the saw and miter box to cut into each light near where it meets the plastic base. The LED is a bulb that sticks up out of the base. I sawed into the light about halfway and then snapped it off. Most of the time the LED stayed attached to the base. That’s a good thing — otherwise it’s hard to get out of the “bottle” because the bottom of the LED is the same diameter as the bottom of the bottle.
Of course, the snapped-off bottles have a jagged edge. I carefully used the disc sander to flatten them. (My fingers got awfully close!) If you don’t have a disc sander you could use regular sandpaper or a file, but it’ll take longer.
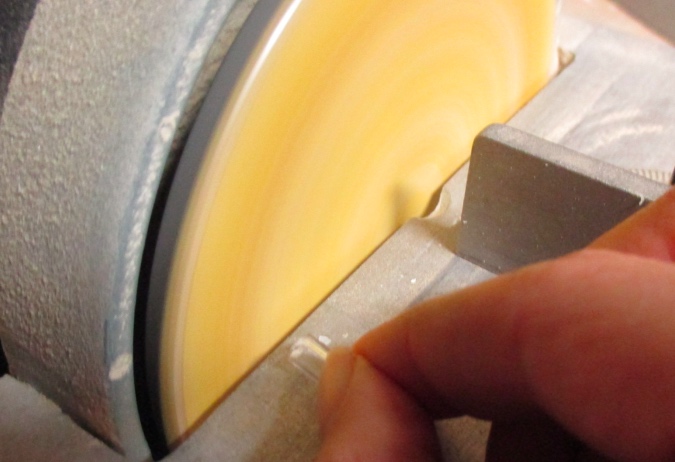
The sanding heated up the plastic, which created warm plastic crumbs that immediately hardened as they cooled. I poked these off with a toothpick, but then the bottles ended up with little plastic crumbs inside them that didn’t want to come out. I soaked them in water for a few minutes, and then dried out the insides with the rolled-up tip of a paper towel.
On to the labels. I could have printed out labels on regular paper, but I really liked the idea of these being Absolut bottles, and for that to be realistic the labels needed to be clear. In researching ink jet printer labels I read a lot of reviews from people saying that “clear” labels are actually cloudy, which wouldn’t have the effect I wanted. I eventually found Avery Full-Sheet Sticker Paper in Glossy Clear. This stuff is expensive — $13 for just seven sheets — but I had a life sized house project planned that would need them as well, so I splurged. (That project, which I’ve since completed, was to make labels for spice jars. Geoff built a recessed spice rack into our kitchen wall so the jars are out on display, and I wanted them all to match.)
Little known fact: color printers don’t have white ink. When you print something in color, any white in the image doesn’t get printed, and the white is the paper showing through. I couldn’t anticipate how the labels would look without the white background, and didn’t want to waste pricey paper by testing it out, so I printed a bunch of different labels, some for the half scale bottles and some to make 1:12 bottles for the bar roombox.
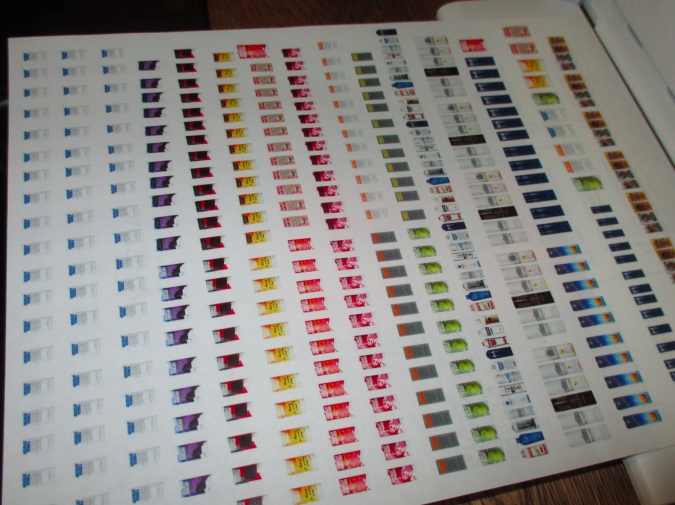
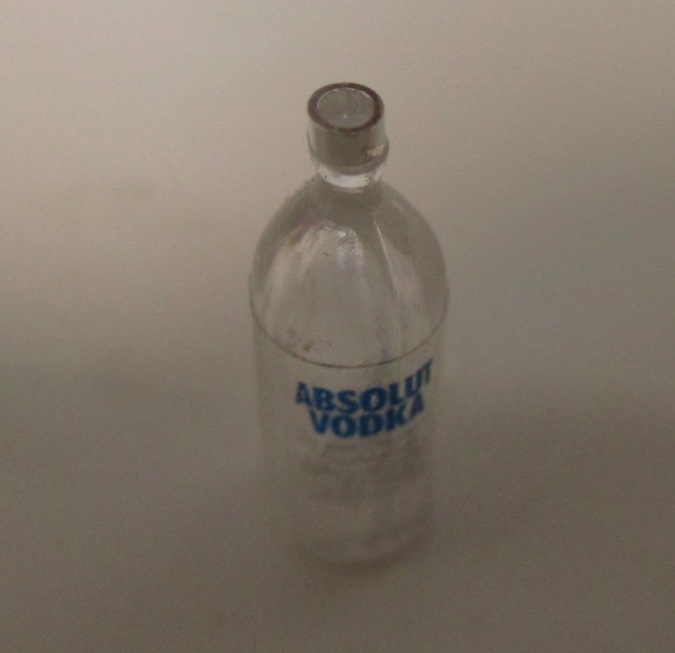
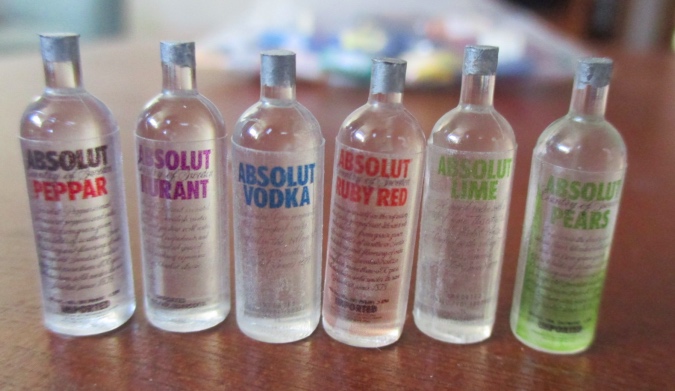
I made the Absolut labels by downloading very high-res images from the Absolut Media Room and shrinking them down to 1cm tall (slightly smaller than the height of the bottle) at 600dpi (dots per inch). I wanted to do a variety of different Absolut labels for the swap, but since I wasn’t sure how they’d turn out, I included enough of the standard label on the sheet to I make 40+ of those even if none of the other designs were usable. The standard blue Absolut logo shows up decently on the clear label.
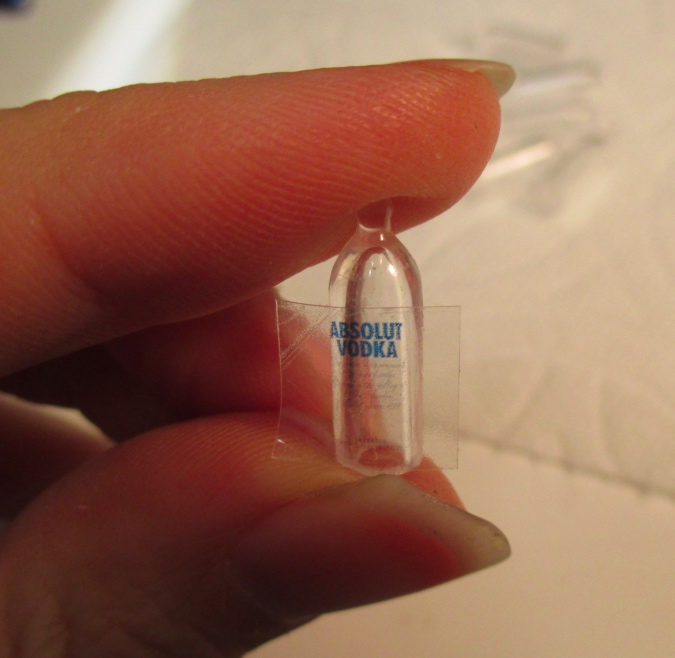
For the prototype I cut close to the printed part so there wasn’t excess sticker going around the bottle. By the next day it was peeling off. I started leaving extra space around the logo (as shown above) so there was more label to wrap around the bottle, but even some of those started to peel up a few days later. Despite printing plenty of extras, I ended up with just enough labels to replace the worst peeling ones. If I did it again I would have left even more blank space so the label could wrap all the way around the bottle.
(If you participated in the swap and your label is peeling off, I’m sorry! You can use a sliver of Scotch tape to stick the edges down.)
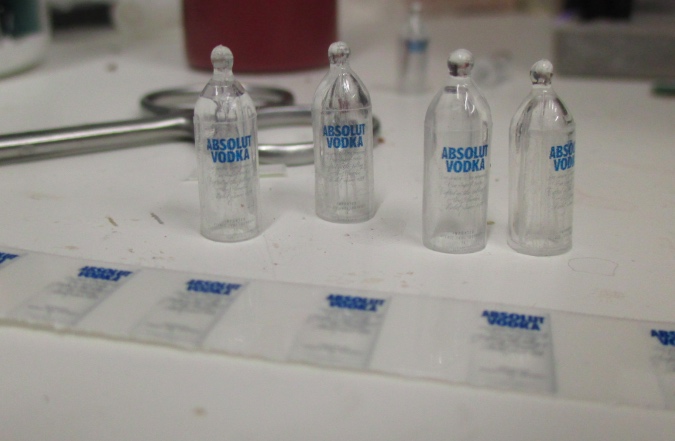
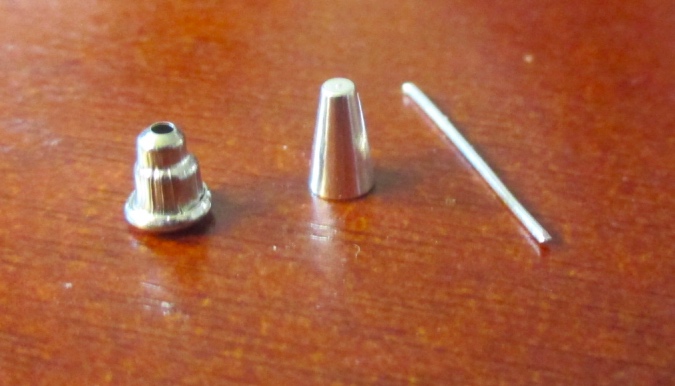
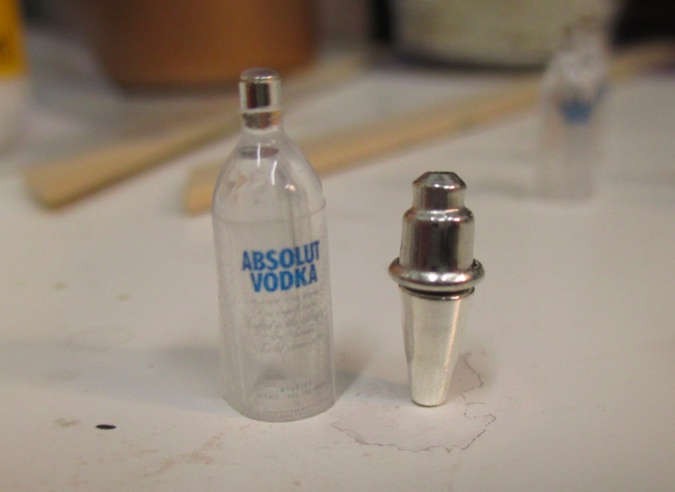
Time for the caps. I tried painting the ball silver on my prototype bottle, which looked horrible. Next I tried some small silver seed beads I had, but those were too small. So I started looking online at other bead sizes and crimp tubes. I wanted something 2mm wide and kept finding crimp tubes that were 2mm wide x 2mm tall, which were too tall. Finally I found some 2mm wide x 1mm tall crimp tubes, which have the right proportions to be tiny bottle caps.
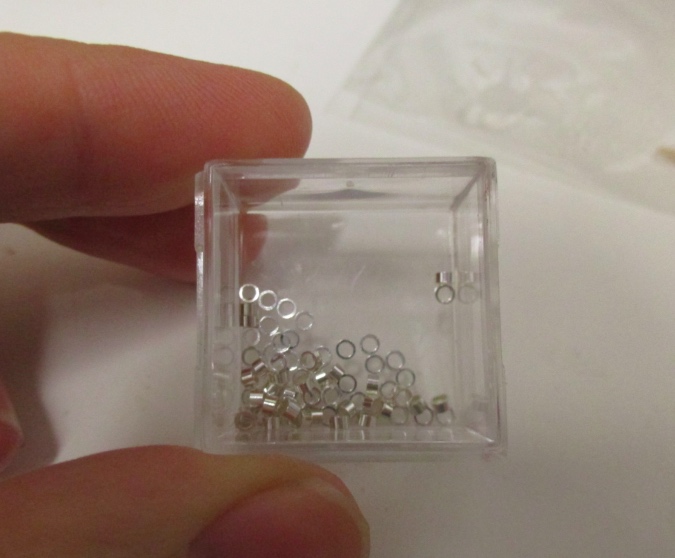
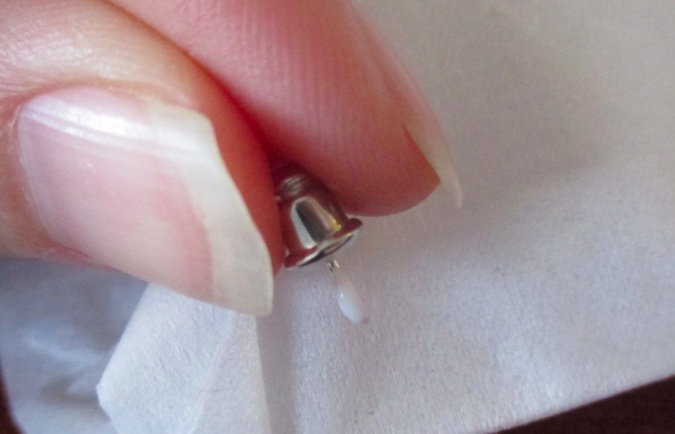
Figuring out how to attach the caps took some trial and error. Gluing them directly on top of the ball looked weird — the widest part of the ball was wider than the 2mm crimp tube, so it looked like the neck of the bottle was bulging out from under the cap. I ended up using the belt sander to sand off the top part of the ball.
After sanding off the top of the bottle, I spread tacky glue over the top with a toothpick, and then “picked up” a crimp tube with the glue.
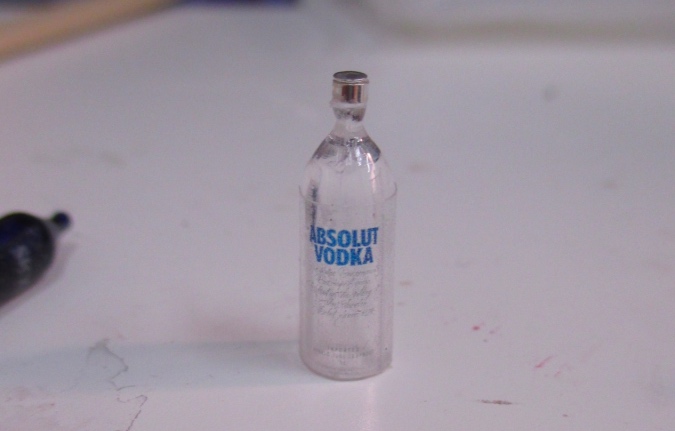
Here’s how that looks. The sanded edge of the bottle is still a hair over 2mm wide, so it flares out slightly underneath the cap, but that’s kind of what an Absolut bottle looks like — there’s a lip where the bottle meets the bottom of the cap.
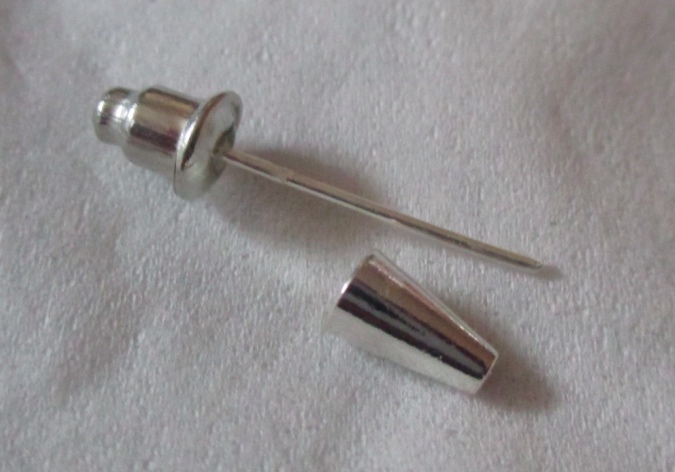
To close up the top of the cap, I used wire cutters to cut off the top part of an eye pin, so only a tiny nub of the pin part remained. To do this without sending the tiny piece flying, I pressed my thumb against the pin head, which was pressed against the wire cutters, and then held my hands over a cup when I snipped it so the wire would fall into the cup. The pin head stayed pressed between my thumb and the wire cutters until I released it over the desk. (Don’t throw away the wire you cut off — there are a million mini uses for scrap wires! Including one farther down in this post.)
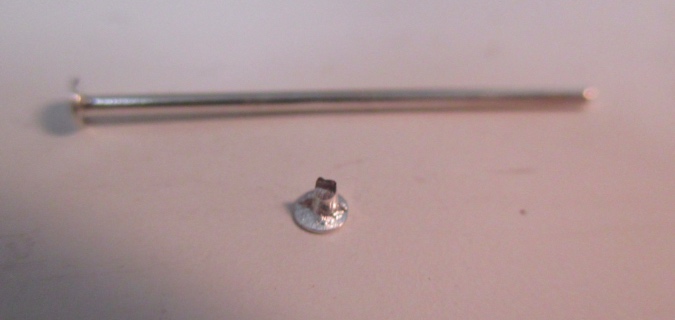
Next I used a toothpick to spread glue over the top of the crimp tube, making sure to get it on the edges as well as in the center.
With the pin head lying so the little nub was facing up, I turned the bottle upside down and positioned it over the pin head so the glue would grab it. Sometimes these went on crooked and needed to be positioned with a toothpick to get them lying flat on top of the crimp tube, and not at an angle.
Here are some bottles I practiced on while I was figuring out the best process for making the caps. As you can see, some labels show up better than others. Also the lighter ones, like Absolut Mandarin, look better on the white table than they do against a different colored background.
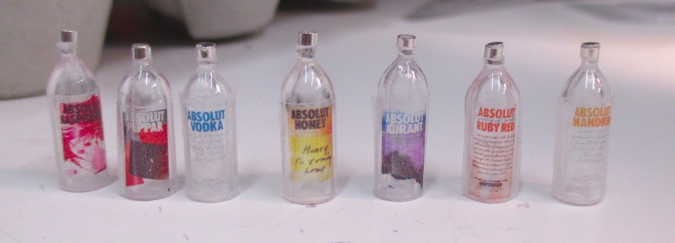
Absolut recently redid all their labels with these stylized designs, which don’t look great on the bottles because the words Absolut Whatever are printed in white. I thought the colors around them would help them stand out, and I tried making some of the logos black, but I’m not really happy with how any of those fancy labels printed out on the label paper. I didn’t use them for the swap.
For the 1:12 bottles I made for the bar roombox, I found some graphics of the old style labels online. These weren’t as high resolution as the ones from the Absolut media site, but because they’re being shrunk down so much they still printed out decently. (General rule of thumb for printies: the higher resolution / larger the image you start out with is, the sharper it will be when you shrink it and print it.)
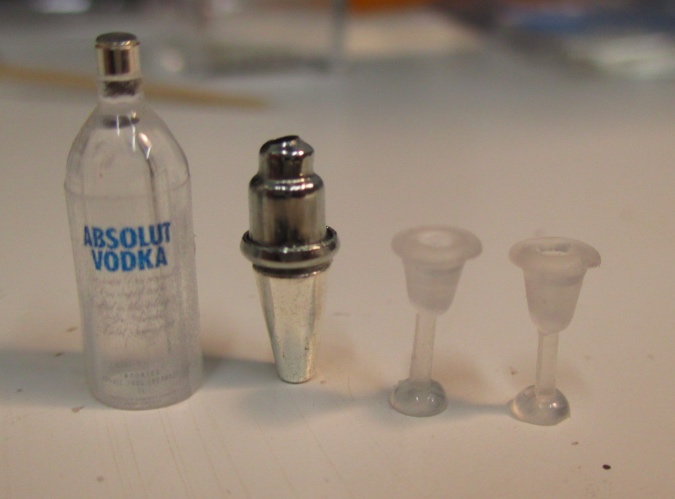
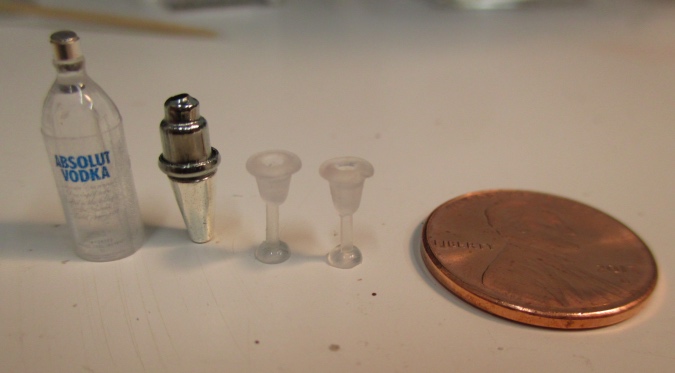
The bottles were the most labor intensive part of the swap, but as you saw in the image at the top of the blog I also made a cocktail shaker and glasses. The shaker is made from an earring back, end tip beads for memory wire, and a piece of wire cut off from an eye pin.
This was so easy it’s almost ridiculous. I started by dipping the top of the wire in tacky glue and poking it into the bottom of the earring back.
Then I cut down the wire to be slightly shorter than the end tip bead, dipped it in glue, and inserted it into the hole.
The bottoms of some of the end tip beads weren’t quite flat and didn’t want to stand up. I sanded some with the belt sander but sometimes the more I sanded, the worse it got because I wasn’t able to hold it exactly straight, so it sanded at an angle. I didn’t have a lot of extras, so in the end I had to say it was good enough even though some of the shakers are more wobbly than I would have liked.
Finally, the glasses. These were my first prototypes, made from silicone earring backs, 5mm sequins, and cut-down eye pins. I glued the flared part of the eye pin to the underside of the sequin (the glue’s still wet in this picture). I liked them in theory but the bases seemed too big, so I went online looking for smaller sequins.
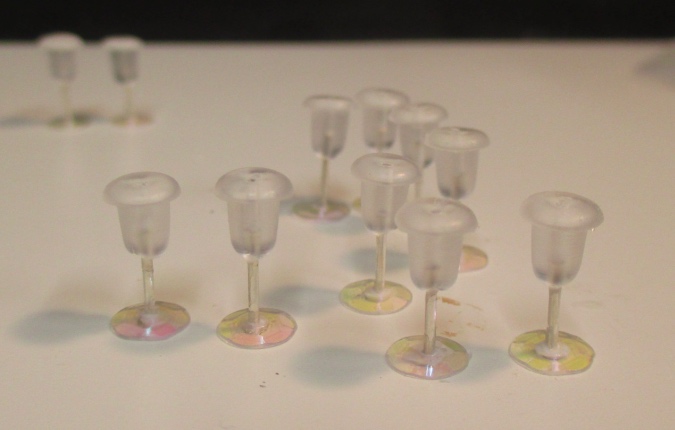
During that search I stumbled upon 3mm cupped flat pad earring studs with earnuts. I’d never seen the plastic studs before, only the backs. I didn’t need more backs, but they came this way, so I bought them.
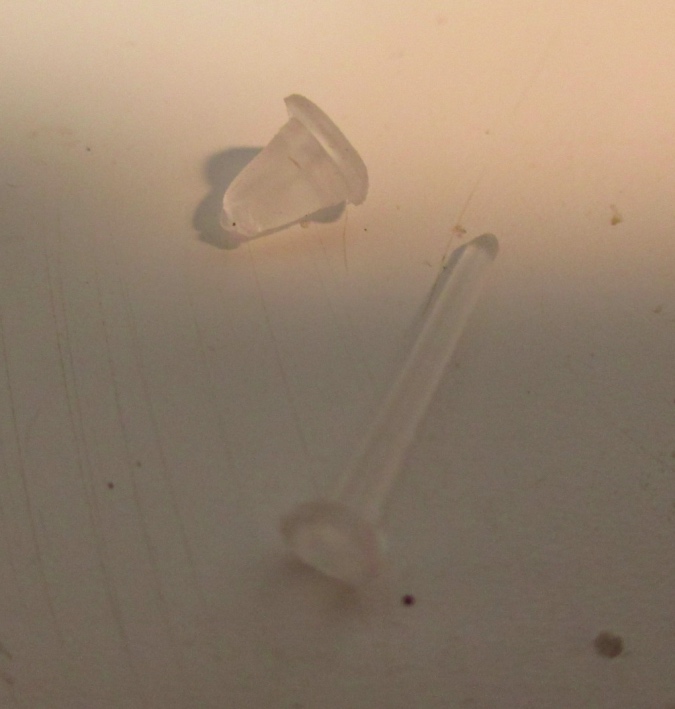
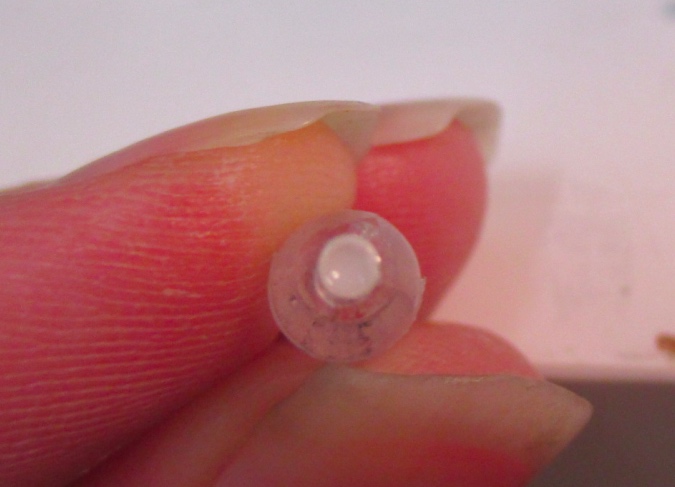
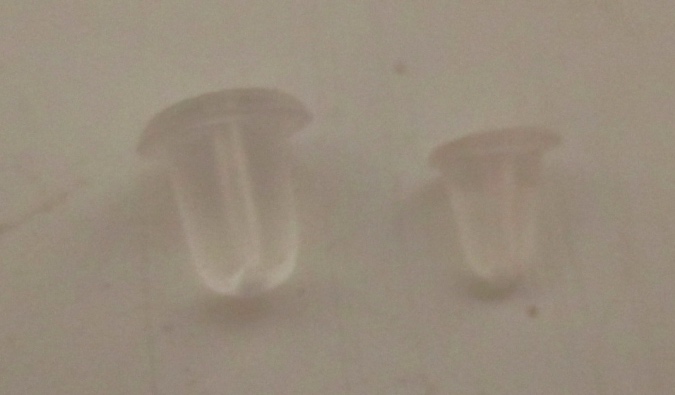
It turns out the earring backs I bought are smaller than the ones I got at Michaels. (Sorry for the fuzzy picture!) The small ones were actually more to scale than the ones I’d already bought, so I decided to use these instead.
I cut the studs to about 1/4″ long using the wire cutters, since I had them out, but I’m sure scissors would work too. Then I just popped the top of the “stem” into the hole at the the bottom of the earring back. It’s a snug fit so it doesn’t even need to be glued.

I’m happy with how these turned out, but the stems do seem a bit thick. These earring backs with an eye pin stem and a 3mm or 4mm sequin might be a little more elegant.
It’s cocktail time!
Because these fall over so easily, I decided to include a tray with the swaps. I would have glued everything down but was worried about them coming unglued in transit, so I enclosed a note suggesting people either glue them to the tray or to a shelf. The trays are 16mm connector bezels.

Thank you to everyone who participated in this year’s swap! As always, there were lots of goodies in the box, and I’m excited to spread them around in my houses.
 Emily is a freelance writer, miniaturist, and adventure game enthusiast.


Wow, lot of detail, and lots of genius invention went into that. Well done!
Very nice! I’ll have to look for those earring parts.
Very Very Clever! Your cocktail sets definitely have the WoW factor and I bet the recipients were thrilled!
Clever! They turned out really well :D
Incredible work and amazing cocktail set. Even more so when you realize that it is in half scale! I love your tenacity in sourcing just the right materials, and the information shared is very helpful.
Those are wonderful. Thank you for sharing.
Love how your brain works and thanks for sharing.