I’ve been looking at other people’s miniature bars to get ideas and I keep coming back to the Henchmen Pub. (I wish there were more pictures!) I especially like the lighted fridge under the counter, which was made by Elf Miniatures, but my bar has shelving underneath that prevents putting in one of those. Instead I decided to cover up the two fake cabinets under the front side of the bar with printies to make them look like built-in fridges.
I found a picture online of a double fridge that had roughly the same proportions as the cabinet doors, and then manipulated them in Photoshop to make them the correct width and height. I also duplicated the sides and top so they can wrap around the edge of the cabinet door.
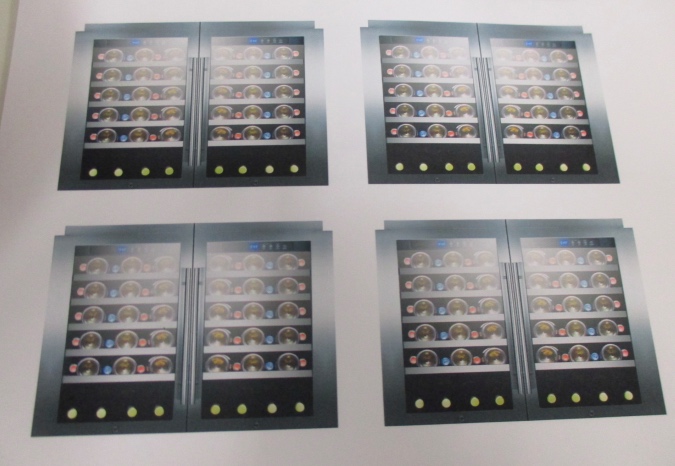
After spraying the printie with matte sealer, I cut it out and scored the edges so they’d fold neatly over the edges of the cabinet door. Rather than cutting out the white space at the corners, I left them attached to the top edge to become tabs. The top edge gets glued down first with the white tabs draped over the sides, then the sides get glued down over the tabs, so no wood will be visible where the side and top edges meet.
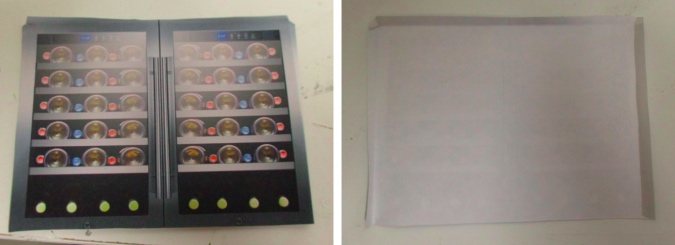
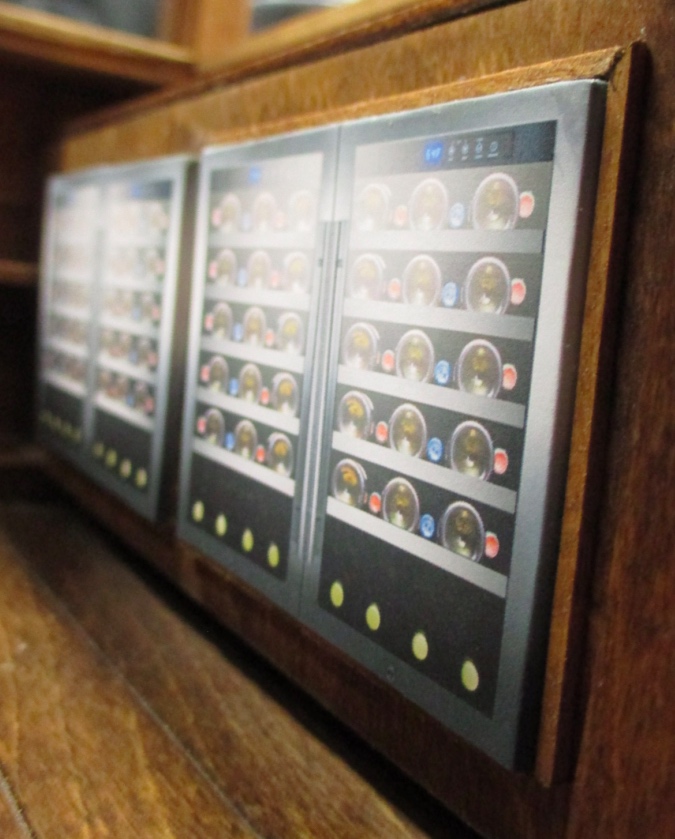
Here’s how the first one looks. Next to it you can see the cabinet doors that are getting covered up.
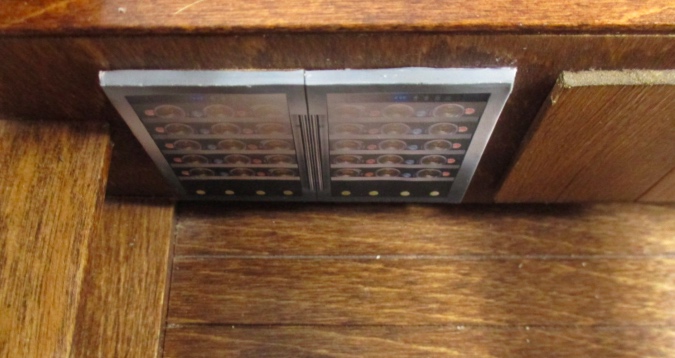
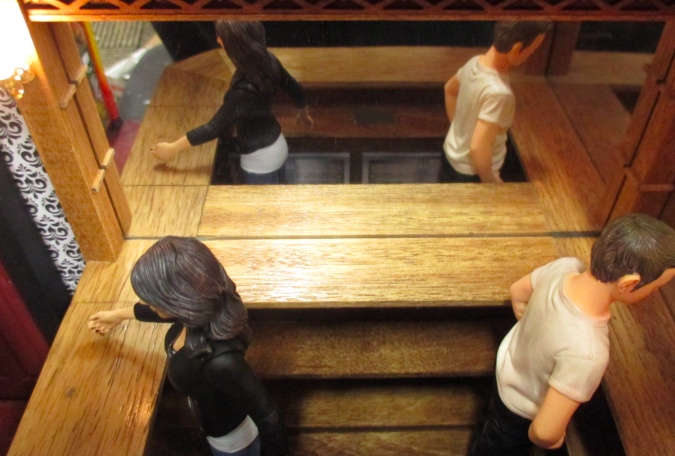
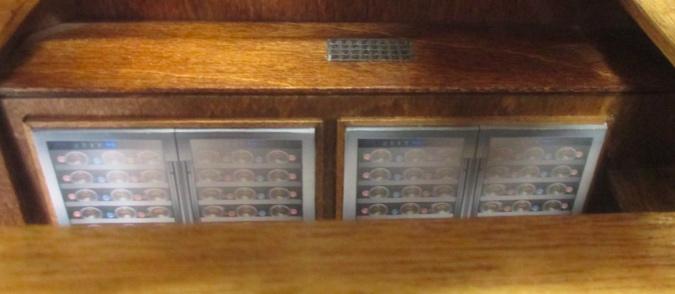
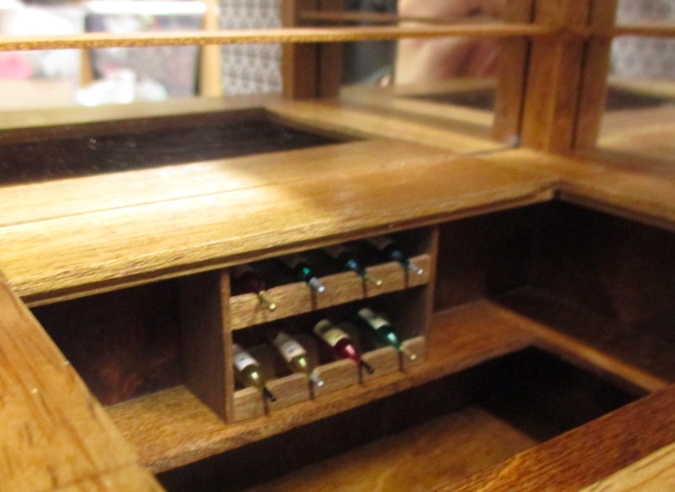
Because these are under the front of the bar and not the back like in the Henchmen Pub, they’re almost impossible to see. Looking in through the top of the roombox, you can get a glimpse of them in the mirror, but once there’s stuff on the bar I’m not sure if that will still be the case. Maybe next time I’ll realize I’m doing something that can’t be seen *before* I put the work into it. (Not likely.)
Even though they’re nearly impossible to see, I wasn’t happy with them. It looked too much like a printed graphic glued on to cabinet fronts. (Gee, I wonder why?) I decided to add a small border around them to give them a more built-in look.
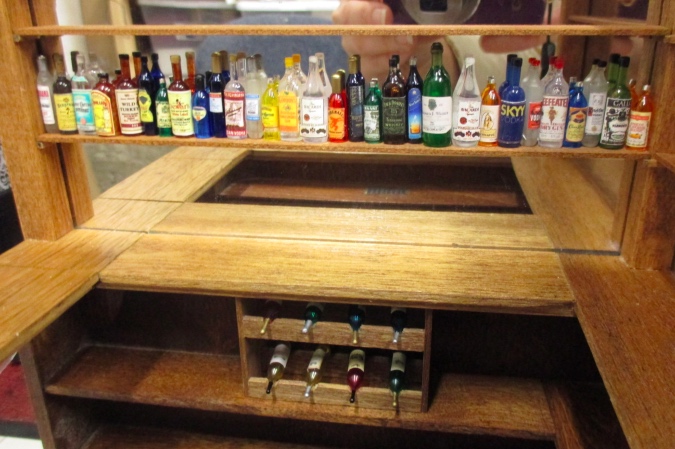
Here’s a view in the mirror again. That’s a lot of fake wine!
Next I worked on bottles. I already bought a bunch of bottles for the bar, but not nearly enough. They’re expensive — the best prices I’ve been able to find online are $3 for a finished bottle or about $2 for a blank bottle that I can add my own graphic to. I’m planning to put bottles on both of the long shelves along the back of the bar, and maybe also under the long shelves, on the bar itself. (The short shelves on the side of the bar will hold glasses.) At about 30 bottles per shelf, it adds up! In the interest of not going broke, I’m going to supplement the “real” bottles with some made out of Christmas lights.
Joann Swanson has a great tutorial for making bottles out of Christmas lights. The lights she used have long necks that really do look like bottles. Unfortunately I’ve never been able to find any like them. Even when the picture on the box looks the same as hers, I’ve opened the box to find they just look like regular Christmas lights, with a pointy end and a ball at the tip.
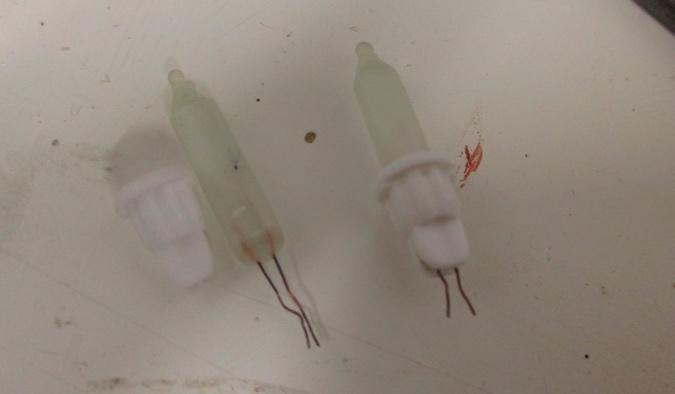
The closest I’ve ever found to Joann’s lights are these, which I picked up a few years ago at a thrift store.
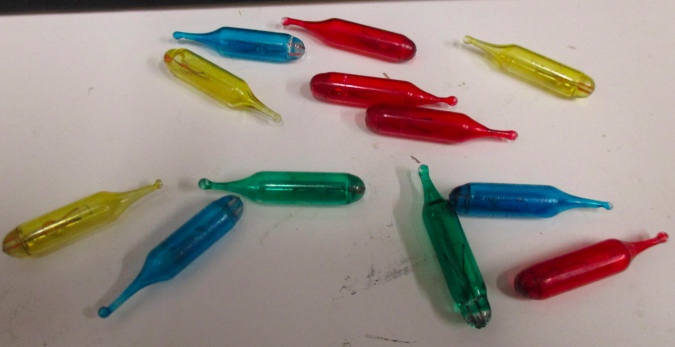
These are either glass or very brittle plastic, because cutting off the bottom or sanding with the disc sander both resulted in the light cracking and breaking. This means they need to be used with the round end in tact, so they can’t stand up on the shelf. Luckily, when they’re in the wine rack you won’t be able to see the backs.
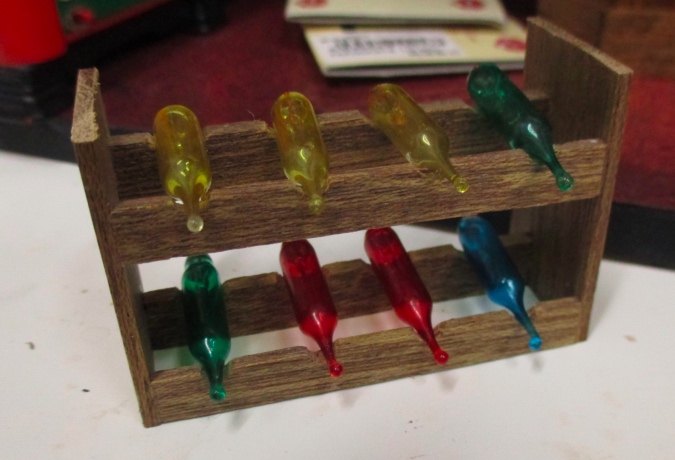
I colored the tips with Sharpie and made the labels with a printie from My Small Obsession. These are perfectly sized and 300 dpi, so the print quality is good.
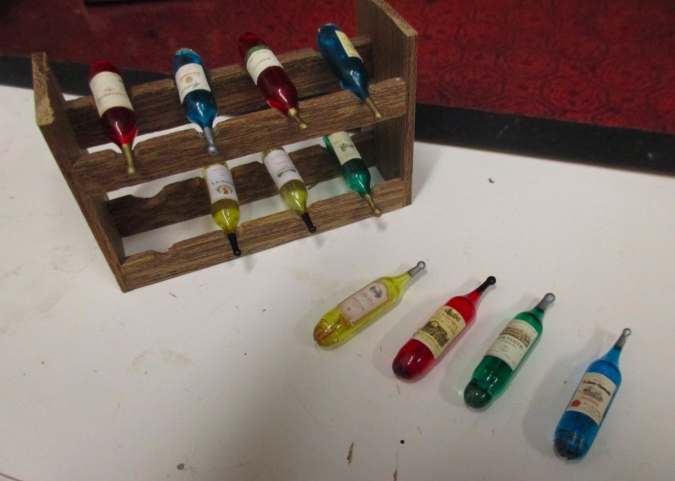
I glued the bottles into the wine rack. The color of the yellow ones is perfect for white wine, and the green ones are pretty realistic as well. The red and blue are kind of weird colors for wine bottles, but with the wine rack in place under the bar you can’t see the colors very well anyway.
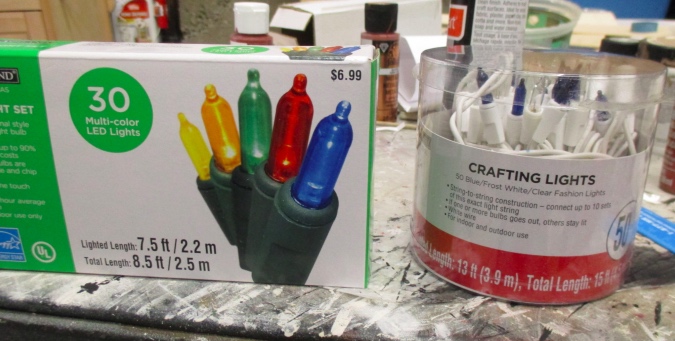
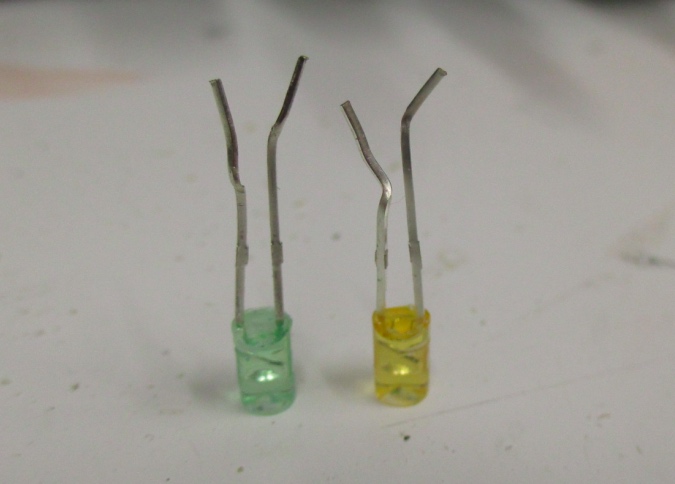
I bought these lights at Michaels before Christmas (on sale!). The ones on the left are LEDs that have a more bottle-like shape than standard Christmas lights. The ones on the right are more like the standard lights, but I got them because of the colors – some are a nice cobalt blue that looks like a blue bottle and some are frosted white, which reminds me of frosted vodka bottles.
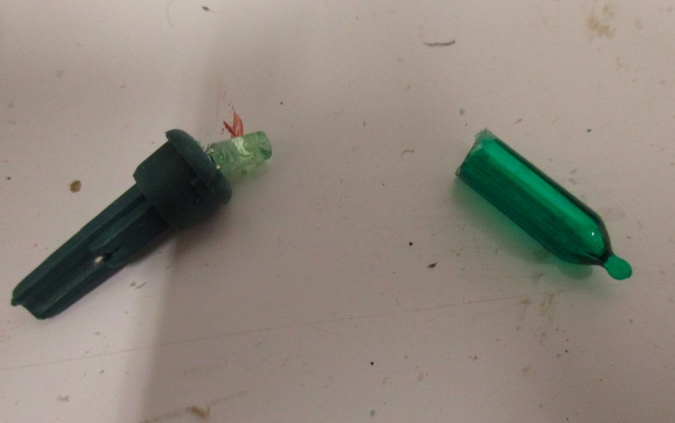
I cut the LED lights off the plastic base with my miter box and saw. To do this, I sawed in a little bit and then snapped it off. This way the LED doesn’t get stuck inside the light. I sanded the jagged edge of the bottle with the disc sander so the bottle stands up straight.
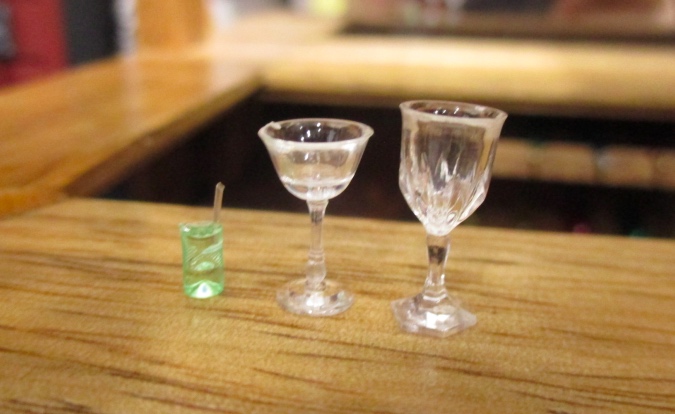
Pulling out the LEDs, I realized they look like little filled glasses.
The wires don’t pull out, but they can be cut off very close to the lip of the “glass”. Here’s one where I left a piece of wire sticking out to look like a straw. It could be used as a shot glass in 1:12 scale, or as a regular glass in half scale.
The incandescent lights are easier to remove, just fold down the wires and remove the plastic base. The wires can then be snipped off. Again, I used the disc sander to sand the base flat.
For comparison’s sake, here are the three different shades of blue. I really love the dark blue!

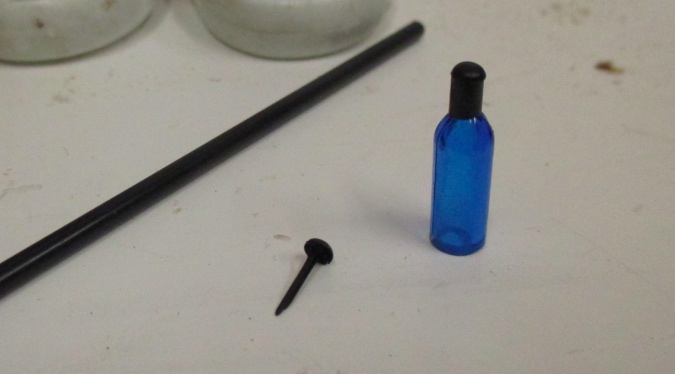
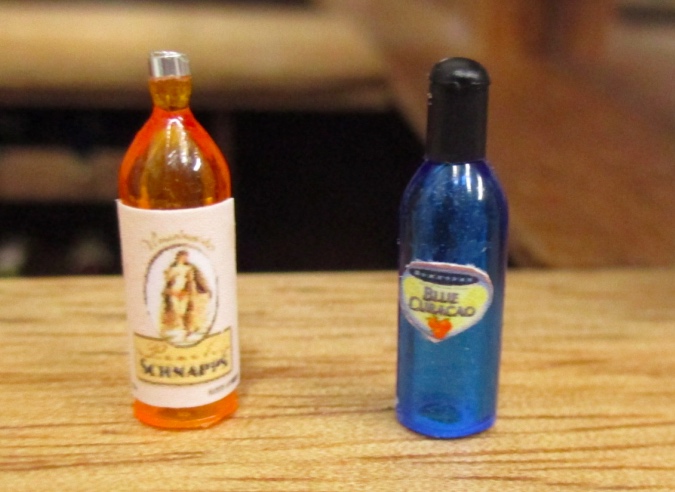
These labels came from from the same printie as the wine labels. I tried to pick labels for liquors that correspond to the colors of the bottles. I sanded the balls at the tops to create a flat surface to glue the cap onto. The caps are made from 2mm x 1mm crimp tubes, with the cut-off head of a pin glued into the top.
Those sort of, kind of look like liquor bottles, but they’d be better if the necks were longer. Next I experimented with a stir straw and the top part of a mini brad to create a neck that slips over the top of the bottle.
Which one looks more realistic to you?
Here are a few others. The silver and gold necks are also made from a piece of straw (colored with metallic Sharpie) and a cut-down mini brad. The black caps are seed beads. The balls at the top of these lights are smaller than on the LED lights, so they didn’t need to be sanded down before gluing on the bead.
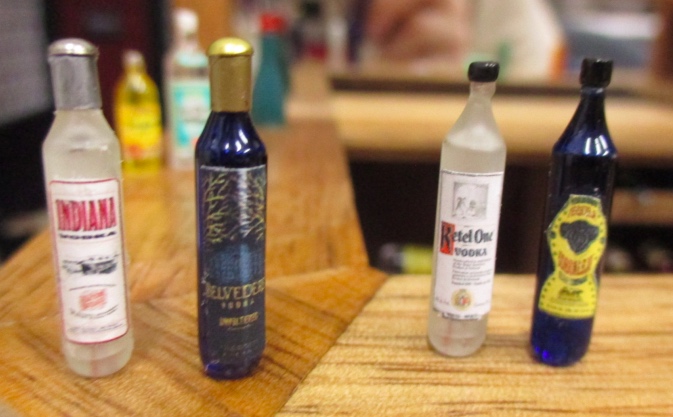
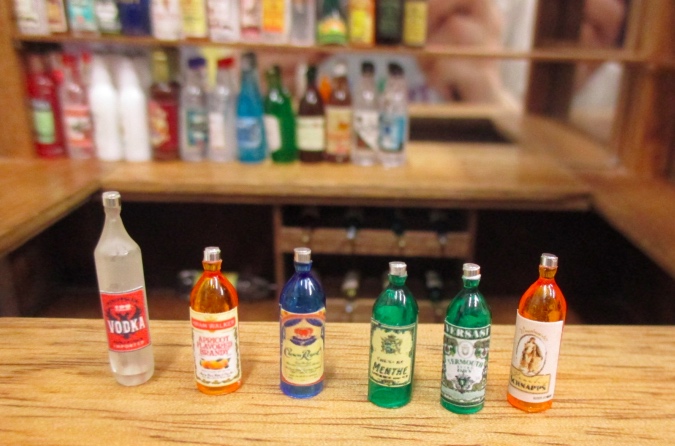
I made all of these bottles (plus the one with the yellow label in the photo above, that somehow didn’t make it into the line-up). Some of these are labels I found online and resized — I specifically went looking for vodka labels to go on the frosted bottles, and for labels that belong on blue bottles. I like how the different tops give the bottles some variety, so they’re not all exactly the same shape. (The silver top fell off the red label vodka on the right so I replaced it with a red seed bead.)
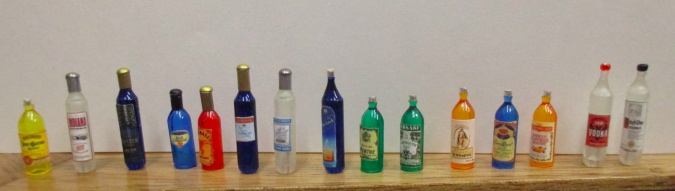
Once they’re interspersed with “real” bottles, they really blend in.
So that’s 30 bottles down — 16 that I made and 14 that I bought. (On the plus side, I bought them years ago, so I don’t have to feel bad about how much I spent on them!) I need at least 30 more, maybe 60 if I put bottles on the lowest shelf (the bar itself). That’s a lot of bottles.
 Emily is a freelance writer, miniaturist, and adventure game enthusiast.


Your bottles are STUNNING! Just keep going, and mix them in with other bottles. The more variety you have, the less one will notice the individual bottles, and the more real they all will look.
What about making a mold of some of the more unique bottles and casting them in resin?
That’s an interesting idea! I haven’t ever done that before.
The bottles look fantastic! The different shapes definitely help with the verisimilitude and I like both types of caps.
Yes, the bottles are fantastic! You did a wonderful job with all of them. (Even the fake printed ones below the bar that you will never see!)
All of your creative solutions REALLY WORK! I love your mix of bottles and the faux wine fridge which you can’t see- yet you know is there.
Well done on all fronts !
I have about a dozen bottles that I’d be happy to give you, if you like — most are the usual wine shape, and three are the squat canteen-like ones. I’m remodeling my “Golden Lion Inn” to be a house, and don’t need the bar accessories anymore!
http://mathomhouse.typepad.com/bluestocking/2017/02/in-the-right-place-at-the-right-time.html
Jeanne (from the Petitpointers list)
I love that house! I remember when you posted about it on the Greenleaf forum. I’ll send you an email.
I think the wine fridges are my favorites. But I love how all your bottles turned out. Alcohol comes in so many different shaped bottles you don’t need to really worry about ‘realistic’ bottles as much.
Maybe you could also try this: https://www.youtube.com/watch?v=bvpIQCau3xY