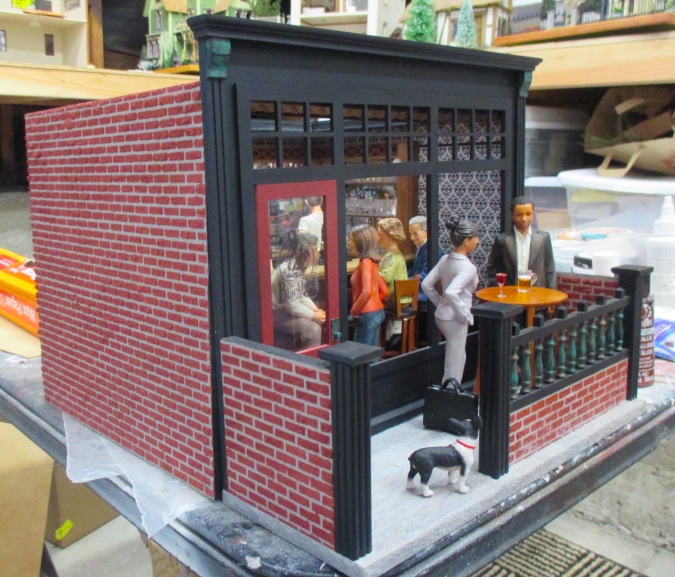
I’ve put off posting about the bar roombox while I finish up some small details that didn’t seem exciting enough to post about on their own. Back in March I added brick to the outside of the roombox, using Magic Brick like I did on the front. I thought it would be easier to do all three walls at once than to try to match up the pattern at the corners, so I started by wrapping the sticky templates all the way around the roombox. I protected the junction box with masking tape.
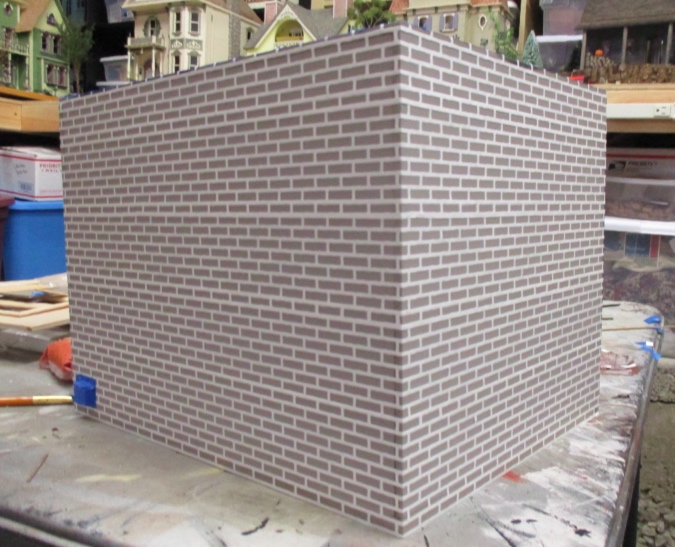
The bricks on the front part of the roombox came out disappointingly flat, so I made a point of spreading on the brick material very thick this time.
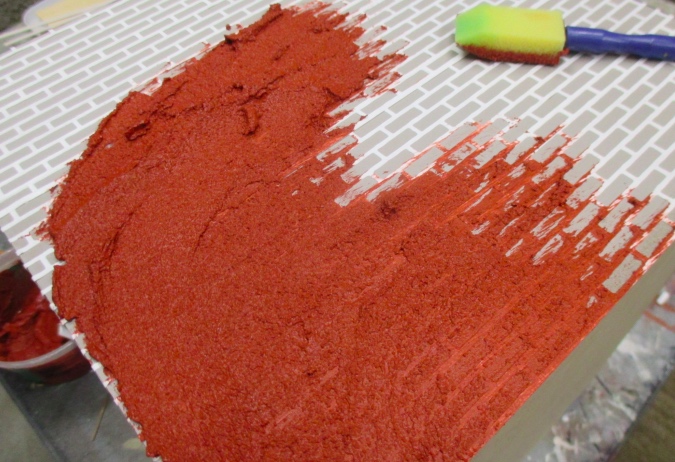
You’re supposed to pull off the template no more than five minutes after spreading it on. With this much area to cover, that wasn’t going to happen!

It worked out okay, though. I took this picture while the bricks were still wet. Some are a little messy and on the right you can see a spot where I accidentally stuck my finger into the bricks and smeared red color into the grout line, but overall I’m much happier with these bricks than the first attempt.
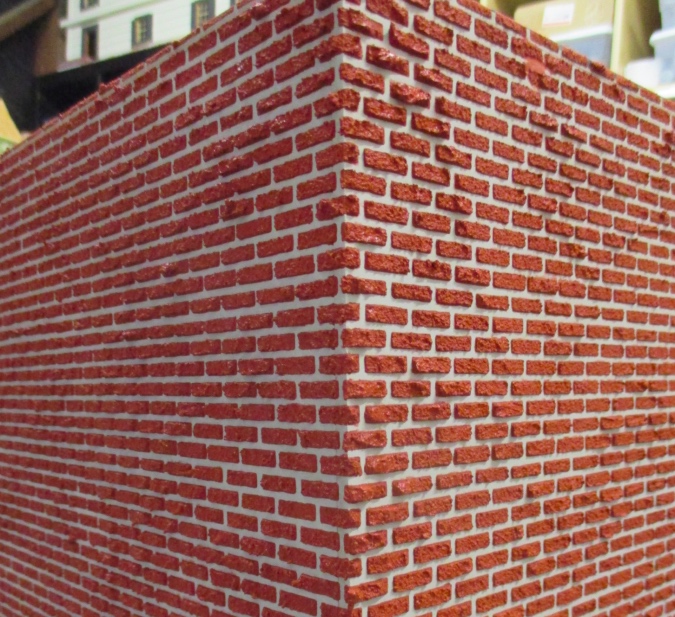
Here’s a comparison – the new bricks on the left and the first ones on the right. See how some of the original bricks don’t even have texture, just color? I think I just didn’t use enough of the brick material, plus it was too watery, so the texture that did stick ended up flaking off after the bricks dried. That’s happened a little bit on the new batch, but overall they’re much more brick-like. Even so, I don’t think I’ll use this stuff again. It’s a cool concept but I think egg carton bricks look more realistic.
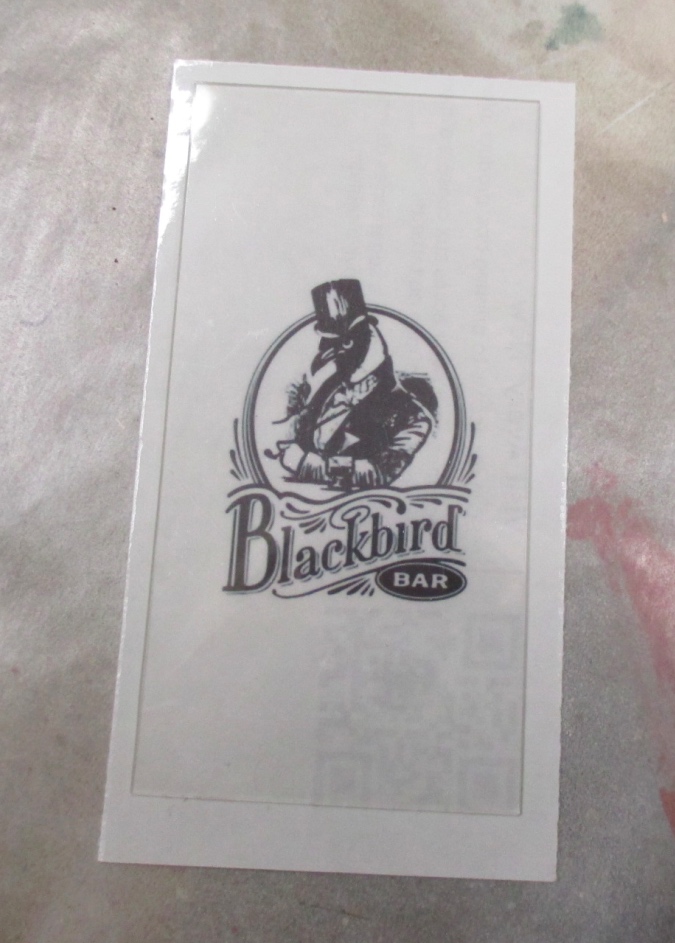
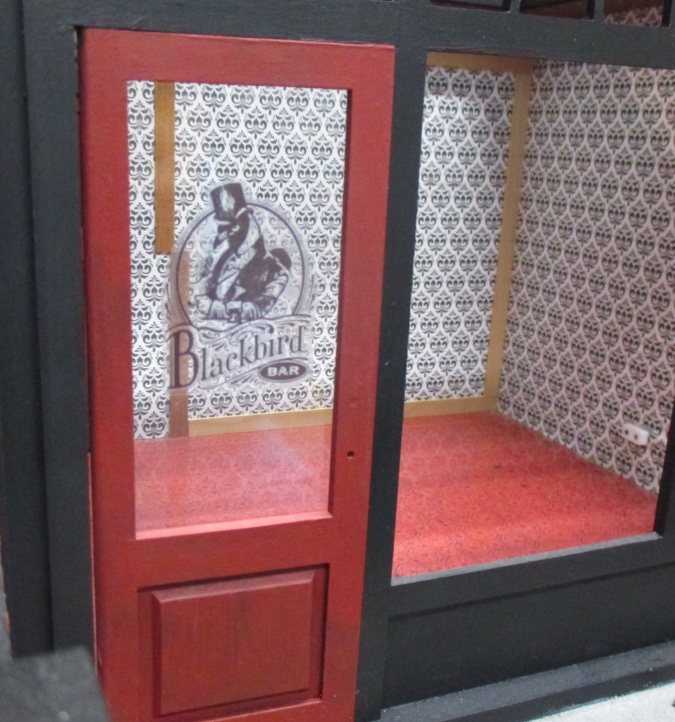
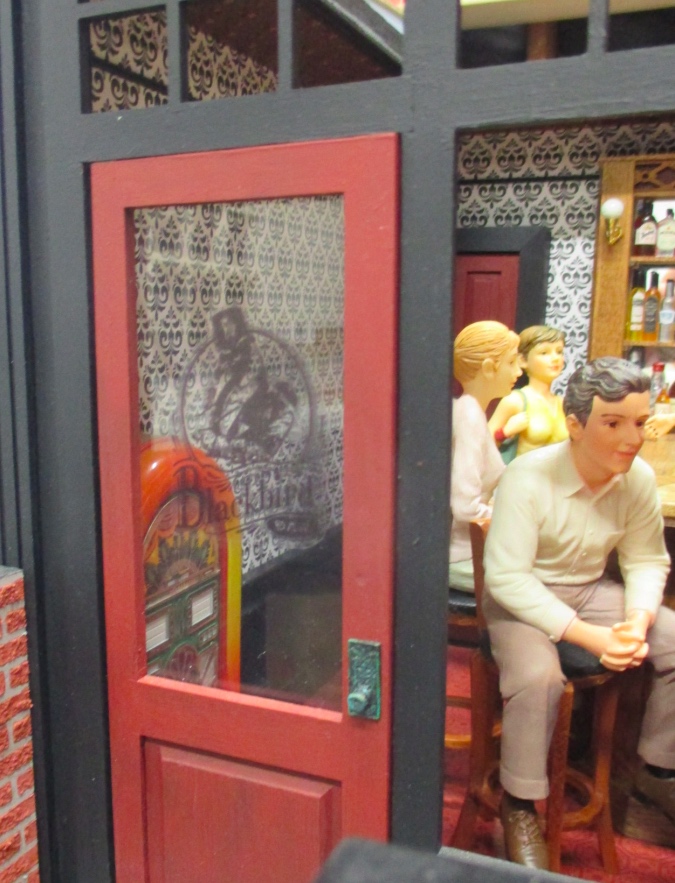
Next I added a logo to the door. I came up with the name Blackbird Bar early in the project because I knew black was going to be a prominent color in the decor, and it just sounded cool. I have some glossy sticker paper left over from my mini Absolut bottles and life sized spice jars, so I decided to print something to go on the front window of the bar.
Initially I was thinking of a simple blackbird in silhouette, but when I started Googling I discovered several real life bars named Blackbird. This is the logo for a bar in Milwaukee.
I printed it out with enough space around it to put sticker paper over the entire window.
Unfortunately the sticky paper has these creases on the back of it, where the backing separates so you can pull it off. On the liquor bottle labels and spice jar labels I printed out before, this didn’t matter too much, because those labels were so small. But on the window it looks like a huge scratch.
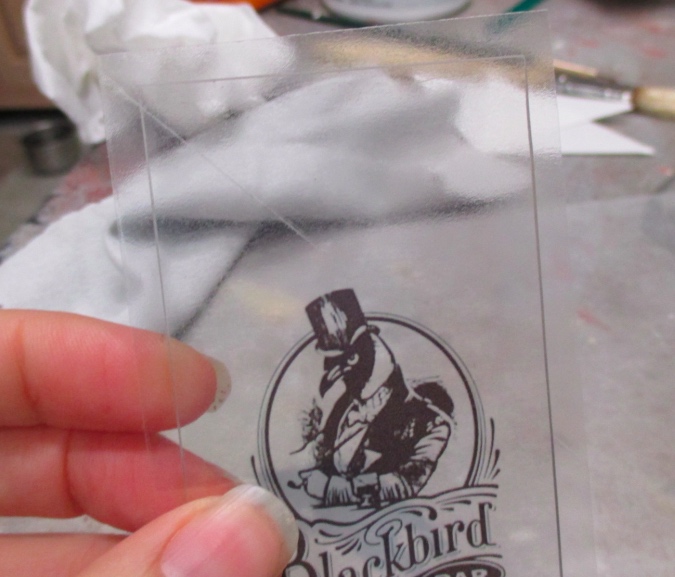
I tried several times, but even when I managed to print out the logo on a portion of the sticker paper that didn’t have a crease running through it, the sticker wrinkled as I stuck it down, resulting in bubbles. I wasted almost a whole (expensive) sheet of sticker paper on this.
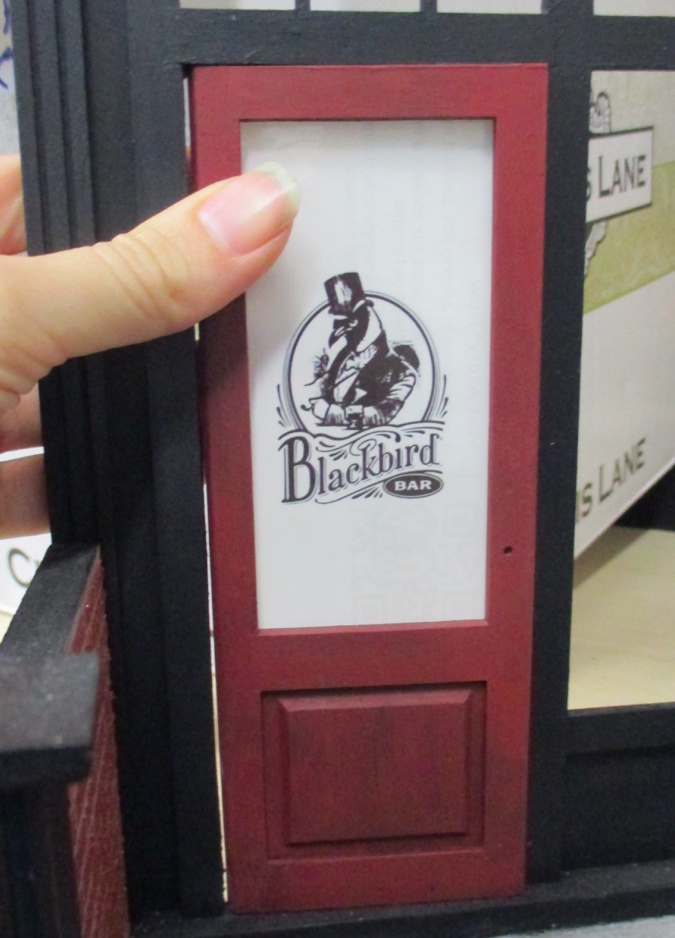
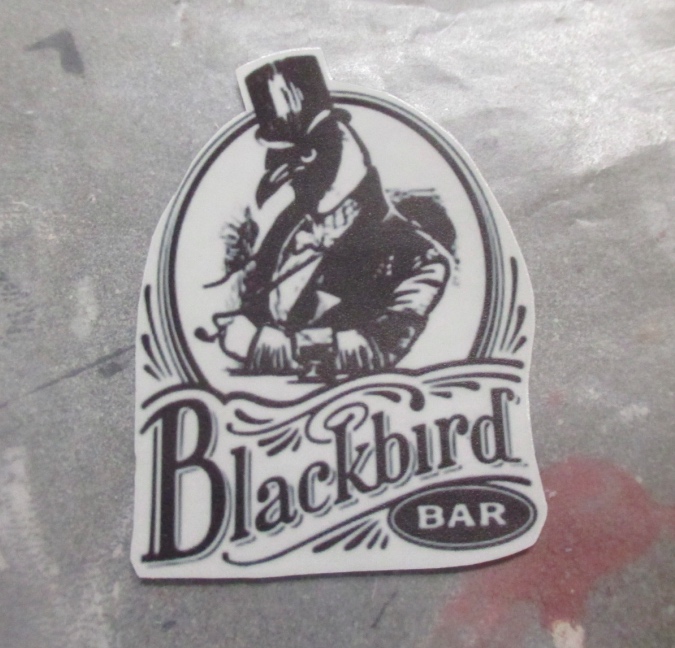
Finally I gave in and cut around around the logo. This was the only way I could do it without getting bubbles under the sticker.
That looks okay, but I’m not 100% happy with it. When the whole window was covered by the sticker, it looked like frosted glass. Now it looks like clear glass with a sticker on it.
Here’s how it looks with furniture inside the bar. Now the edges of the sticker are even more obvious.
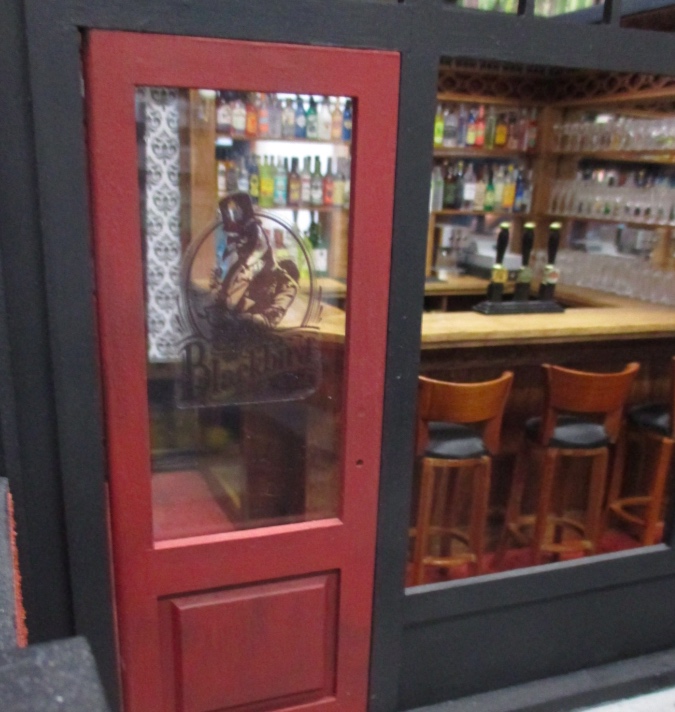
The logo is kind of hard to see on the window, so I should just call this good enough, but the more I look at it, the more tempted I am to try again with a sticker that covers the whole window. I’m thinking about printing out a mirror image of the graphic and sticking it to the inside of the window — I think I can pin down the corners of the sticker so it’s taut, and then place the window on top of it, so there won’t be bubbles. I haven’t decided if it’s worth going to the trouble. Stay tuned, I guess. (I haven’t glued in the window yet.)
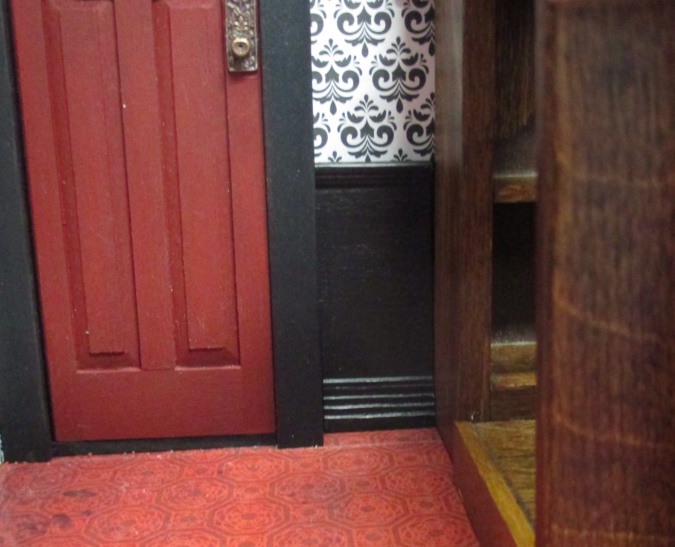
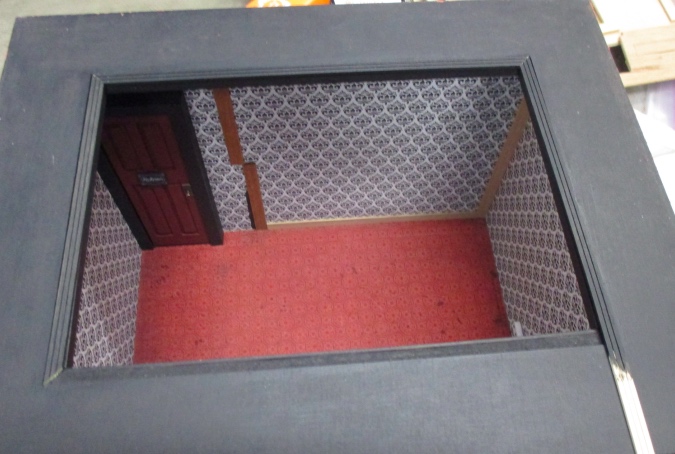
Speaking of perfectionism, here’s another little thing that was bugging me. This piece of wainscot is slightly too short, so the wallpaper shows through next to the bar. When the bar is in place it’s not quite as bad as it is in this photo, and once the dolls are in they’ll block it, but I still wanted to fix it.
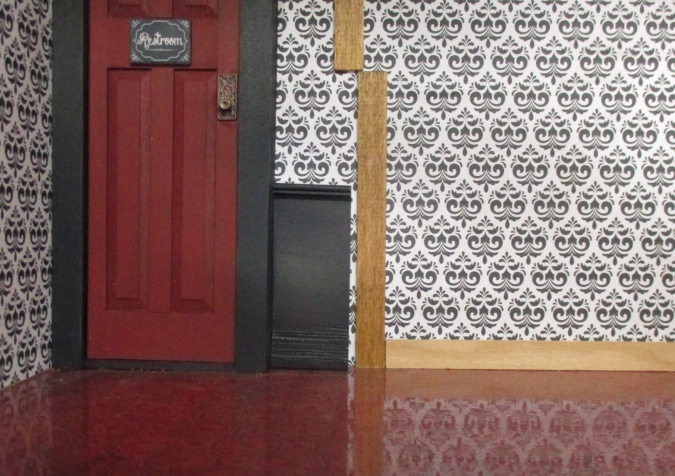
Redoing the wainscot would have been the “right” fix, but why go to all that trouble? I filled in the area in question with black Sharpie.
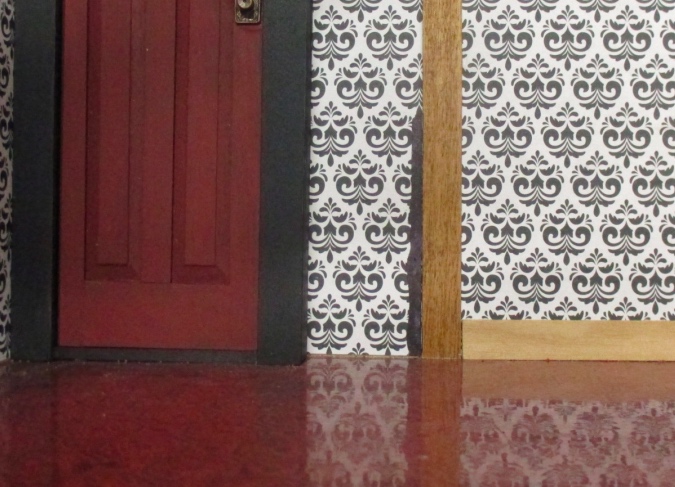
Problem solved!
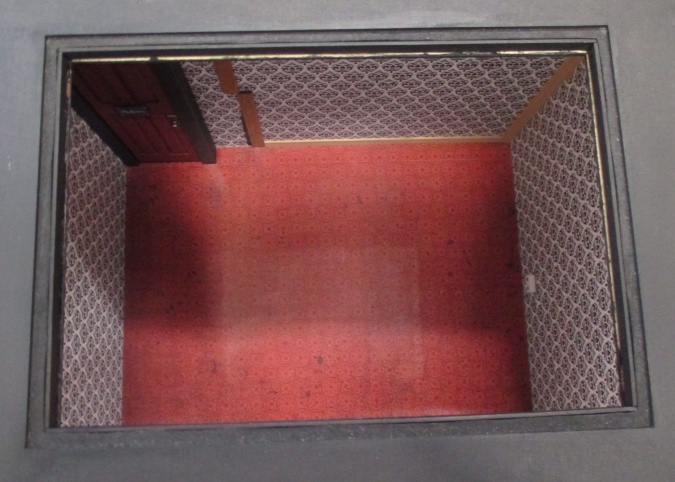
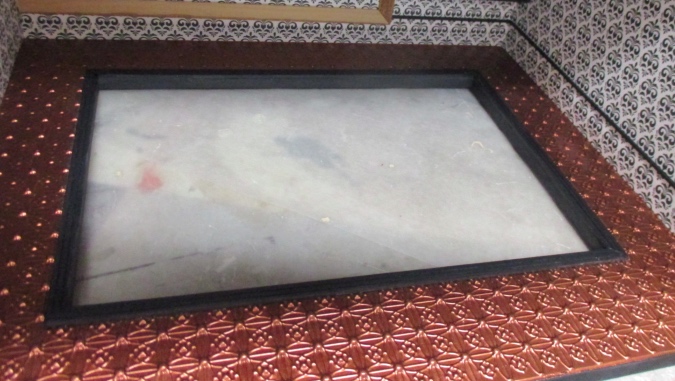
The last thing I needed to do was to finish the hole in the ceiling. The MDF edges of the hole were wavy, so I cut strip wood to cover them up, along with 1:24 window casing to give the hole a finished look on the ceiling.
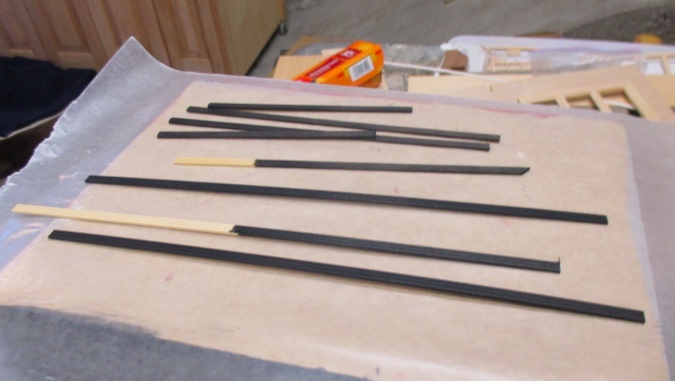
I glued the strip wood over the edges of the MDF first. Then, using the outside of the hole for reference, I cut the casing pieces. This was a lot easier than reaching up into the roombox to measure them against the ceiling.
Then I turned the roombox upside down and glued in the casing pieces. They really didn’t want to grab on to the bumpy styrene with Tacky Glue but I was hesitant to use Quick Grip after my last experience with styrene roofing, when Quick Grip melted the plastic. I ended up using Crafter’s Pick Ultimate glue, which is a white super glue, and then putting a heavy book on top of the casing while it dried.
That didn’t turn out as planned. The casing was supposed to be flush with the inside edges of the hole. The trim on the front edge is good, but the other three extend past the edges of the hole so you can see the back of the casing. Not sure if they slid when I put the book on or if they weren’t positioned right in the first place (I couldn’t see this angle with the roombox turned upside down). I really didn’t want to damage my painted styrene ceiling by pulling them off, so I decided to live with it.
I added a coat of wood filler to cover up the cracks where the casing meets the strip wood around the inside edge of the hole, as well as the pieces of casing that didn’t line up like they were supposed to.
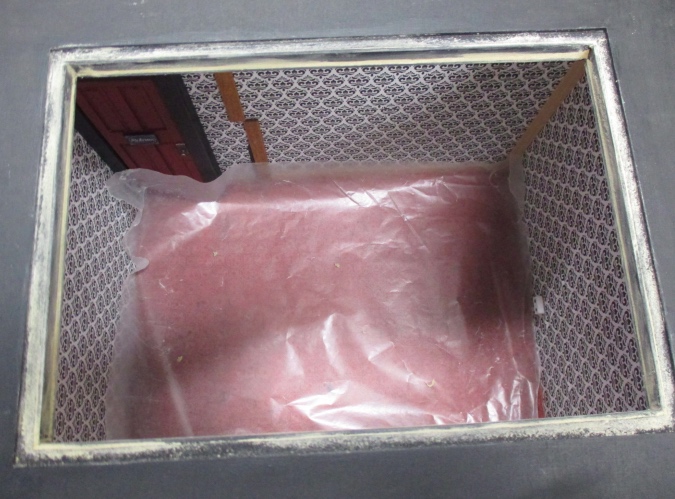
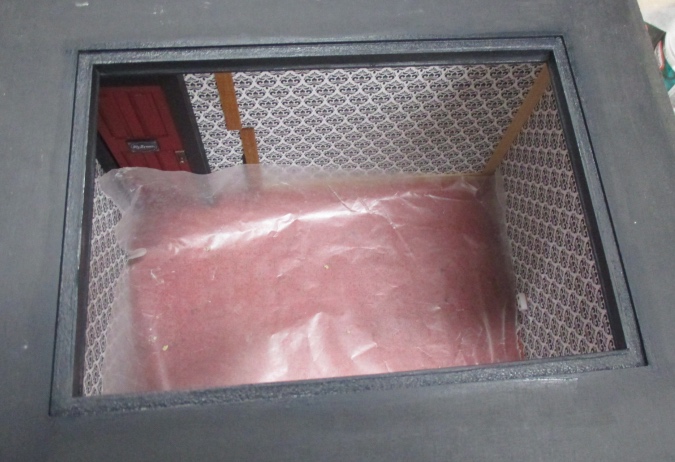
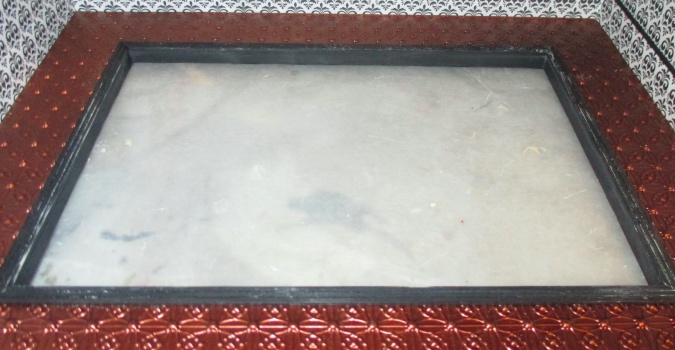
Here it is after paint. Not as clean as I’d envisioned, but it’ll do, pig. A plastic window will sit in this opening, but I’m not going to glue it in so I can keep using the hole to access the inside of the roombox.
Of course, as I was reaching into the hole with the wood filler, I got some on the casing.
I carefully painted over the casing again, and also did a few copper touch-ups on the ceiling.
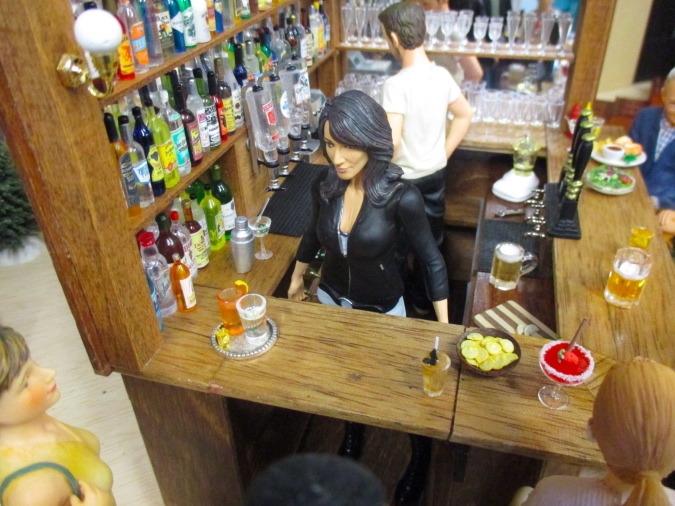
And with that, the roombox is complete! (Well, except for the windows, which I haven’t glued in yet.) I have a bunch of accessories to spread around, and I’ll do a separate post about those, but for now here are the bar patrons getting ready for a night of heavy drinking.
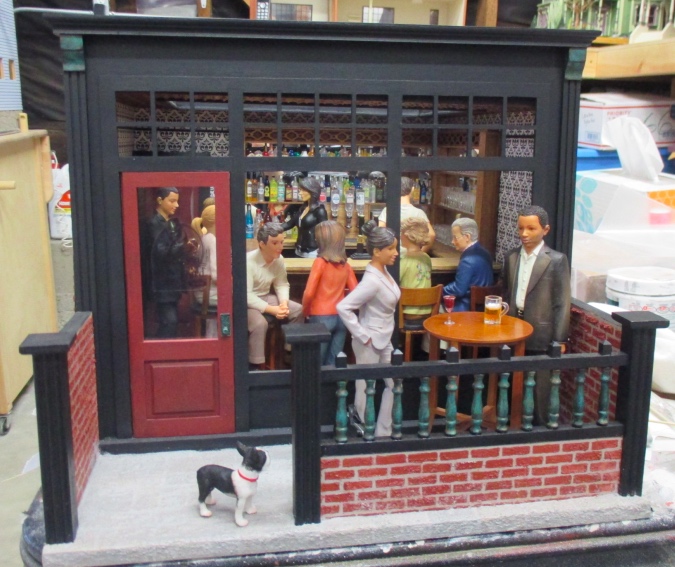
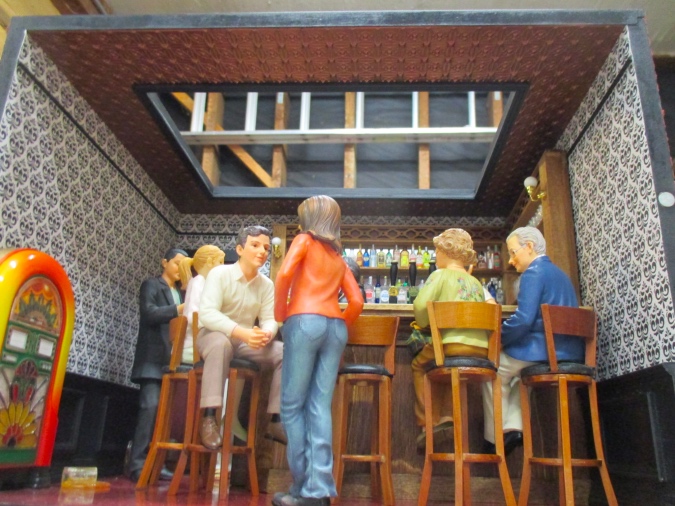
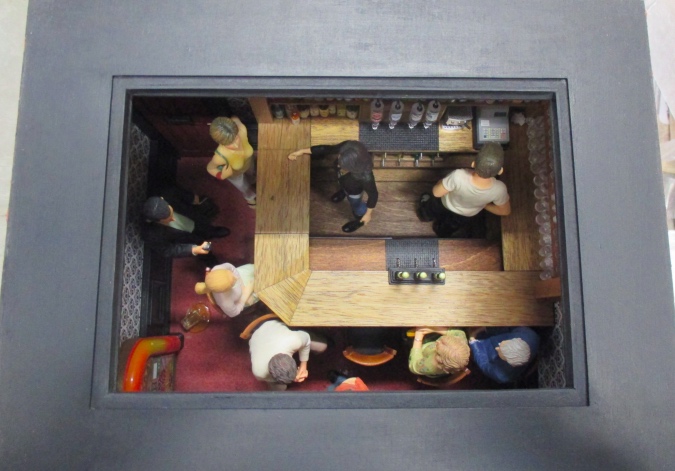
And a sneak peek of the libations…
 Emily is a freelance writer, miniaturist, and adventure game enthusiast.


I agree with you about the sticker and logo. But I also love the image. Wish I had a solution for you. Maybe frost the glass with a product and then add the sticker so the scratch doesn’t show?
Your bricks turned out awesome. Great texture. And the bar looks wonderful with all the people in it drinking.
You probably already know this. If you apply the sticker from one edge and use a squeegee or plastic (or hard rubber) “spatula” to smooth it down from center to edges as you go across you can usually avoid bubbles. Same with the “scratch” line. You should be able to “polish” it away with a plastic spatula-like tool. Achieving that, I think the whole window coverage looks better.
I tried that, but in order to get it positioned right on the window I needed to stick it down all at once, otherwise it ended up being crooked. Once it’s stuck down, if I lift it up again to try to smooth out the bubbles or reposition it, the sticker gets wrinkled and it looks even worse. It would work better if it were a plastic cling instead of a sticker.
Hmm… now that I’ve said that… there is inkjet plastic cling paper. Maybe I should be using that instead of sticker paper?
A big blank brick wall like that is just begging for some painted-on outdoor advertising, especially for a bar. A beer ad perhaps?
Oh, that would be really cool!
Yeah, good idea! I was thinking of a graffiti decal but I’m not sure how that would work on top of the bricks.
You do such nice work. In fact when I compare my work to yours, I feel pretty inadequate. This post, however, makes me feel better. The wainscoting error is a brilliant and brave fix. On problem I have is wanting to make the miniature reflect realness. And sometimes it can’t. The BlackBird Bar is quite nice.
Thank you! I think our mistakes always look worse to us than they to do other people. I like to show how I messed something up and then fixed it because I really believe most miniature mistakes can be fixed — what feels like a tragedy in the moment really isn’t, you just need to come up with a creative solution.
Two rooms in my Queen Anne Rowhouse need major surgery because wallpaper I printed out has gotten all messed up over the years. It’s going to be complicated because the stairs are in the way and the room has wiring that might get messed up when I remove the wallpaper and stairs. I feel awful that these rooms that had so much work put into them look so horrible. I’ve been putting off doing anything about it for 2+ years, but I think I’ve finally worked out a solution. I think you’ll feel even better about your work when you see how bad these rooms are. ;)
I feel better already. Thank you. I have are fiasco with my bricks. Scared to use the product that you used, I ordered “real” bricks and that didn’t turn out so well. I’ll be posting on the blog next week how I managed to salvage my chimney.
What I did, for my windows, was to put the template under the plastic window “glass”, tape it down, and then paint directly on the window in black acrylic. It gives it more of a ‘vintage’ sign look and you won’t get the detail of the black bird, but it is a very pretty effect.
The bar is looking great!
Thanks for the tip. If it were just a logo I might be able to do that but I’m not a good enough painter to do it with this design, and now I really love the design!
Being the perfectionist that you are, as well as being the creator of this Fabulous Project, you are more particular about those little irritants of which you are so closely acquainted with, however to one from the outside looking in, your Attention to the Details looks Flawless, as well as Enviable!
I’ve admired the way you’ve made your corrections, and throughout the entire process, your skills and abilities to adjust and tweak, here and there were little lessons for all of us, on how to take a work from better to BEST-
and ALL of the patrons at the Blackbird would most certainly Agree-
the place is BUZZING!
Standing room only :D
Wow, the BlackbirdBar turned out stunning!
Have you tried gently heating the sticker before peeling and sticking it down? Use a blow drier or put it down on a heat pad. If the acetate is soft and pliable, you might get fewer creases and bubbles.
Interesting, I hadn’t thought of that.
Oh the bar is looking great.. I love the libations.. :D Strawberry margarita, oh yeah… The bar looks fantastic fully stocked and you have picked your dolls so well. It really looks like an active scene at a buzzing local watering hole. Love it! Oh, I also agree that blank side wall is calling out for an advertising sign and the back wall (assuming it’s in an alley) would probably have some grafitti on it.. lol.
Love your Blackbird Bar scene, The sticker on the door came out very nice. You did a terrific job on it.