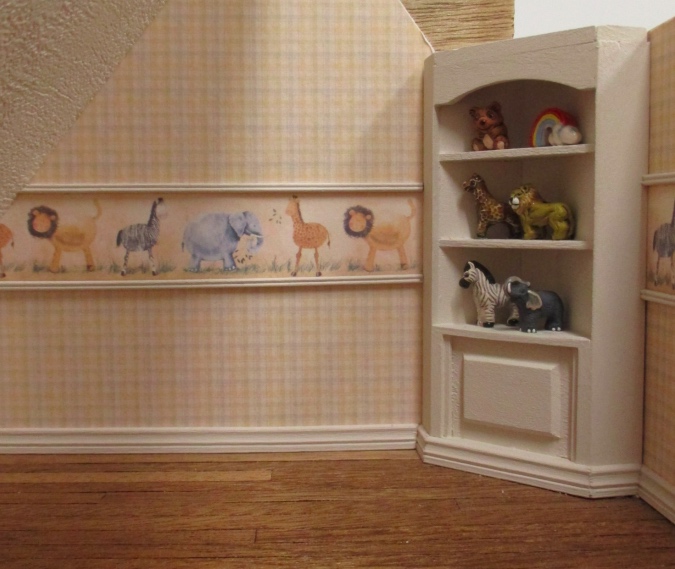
A while ago I used some resin embellishments I had lying around to make knee walls for the Victorianna’s nursery. The one to the left of the tower door would have looked like this.
Since then, I finished the master bathroom, which is next to this room. In the bathroom I put a piece of siding under the sloped part of the roof. To be consistent I decided to do the same in the nursery (and I’ll also do it in the master bedroom, on the other side of the house).
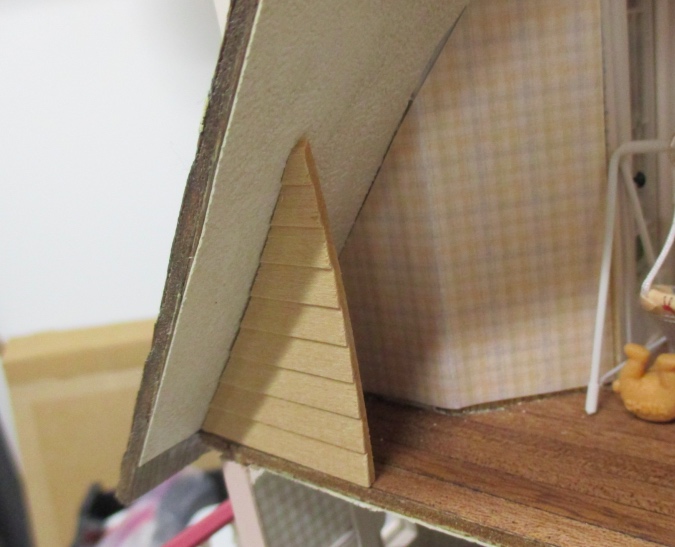
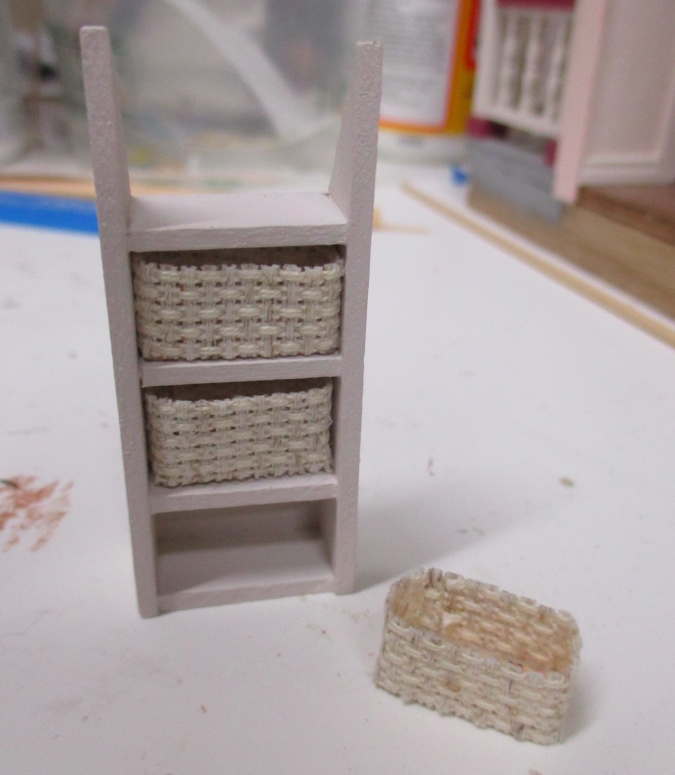
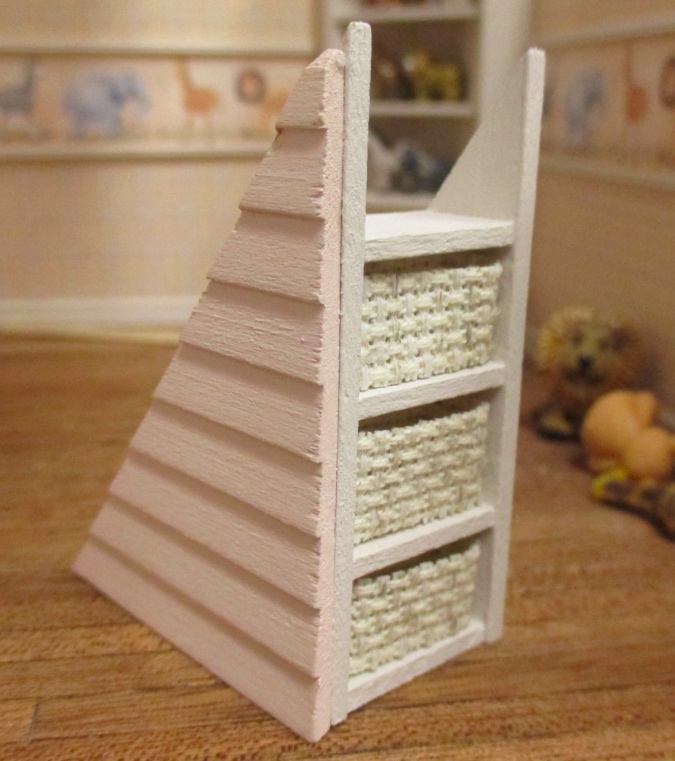
I built a shelf to attach the siding to.
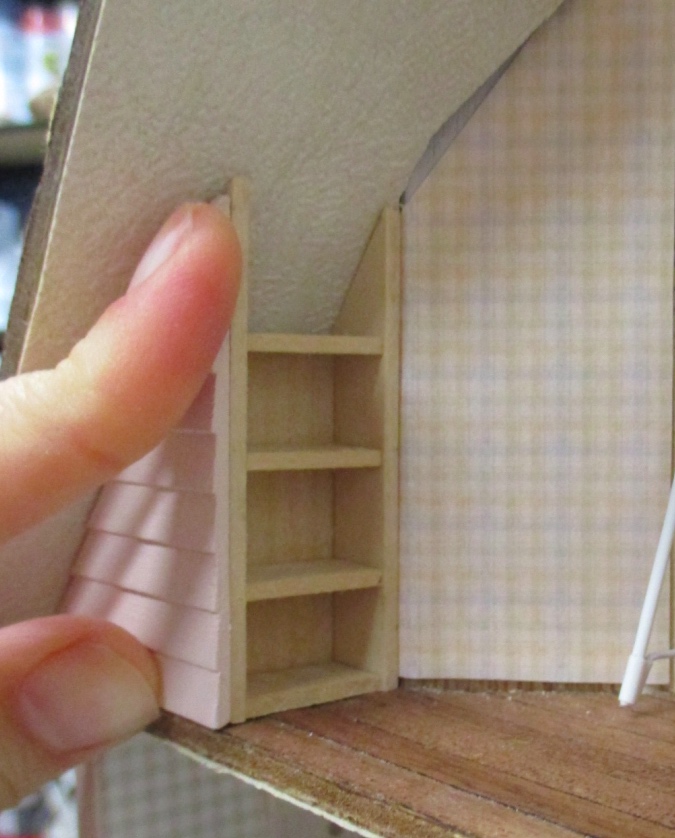
My initial plan was to fill the shelf with books. Here are some I made with covers I found online and resized.
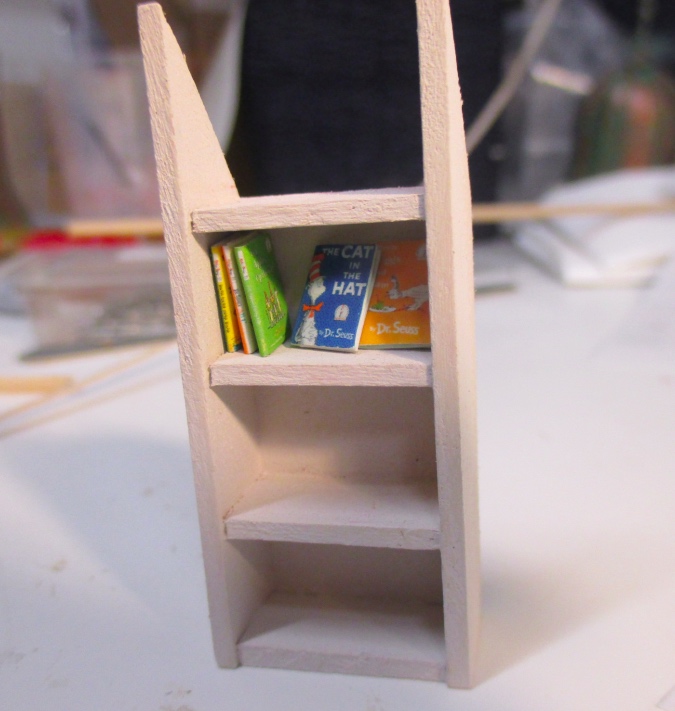
But I would have had to make a lot of books to fill up those shelves, plus the covers aren’t visible once they’re on the shelf, especially from the angle where this shelf will be installed.
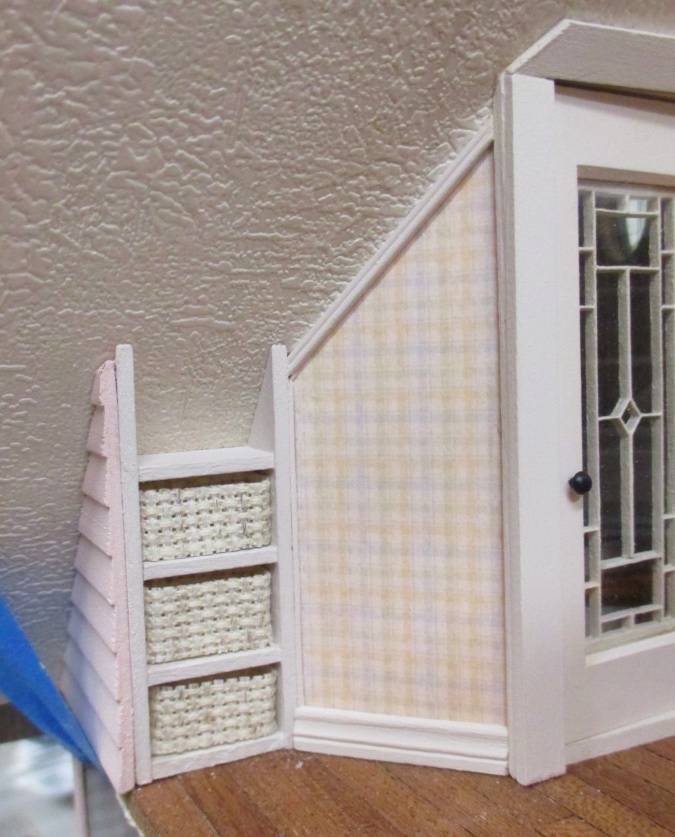
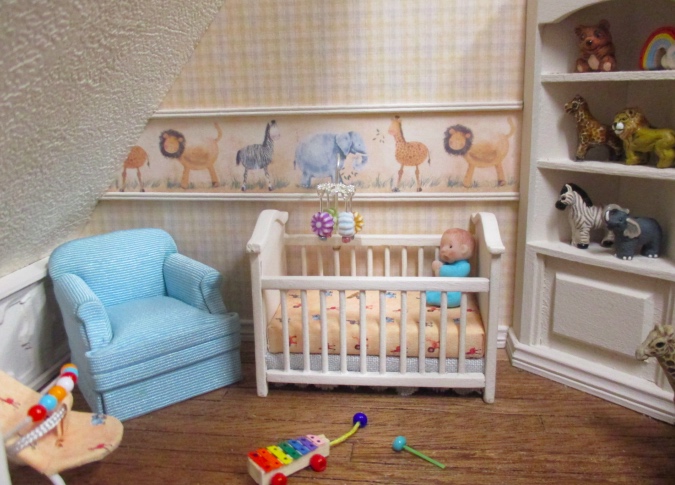
The nursery already has a toy shelf in the corner and I didn’t think it needed another one, so I ended up making baskets. I made these the same way I did the linen closet basket, except I didn’t bother with piping. The material is “fiddler’s cloth” that I had in my cross stitch stash (a thrift store purchase). I don’t know why it’s called fiddler’s cloth, it just looks like Aida to me.
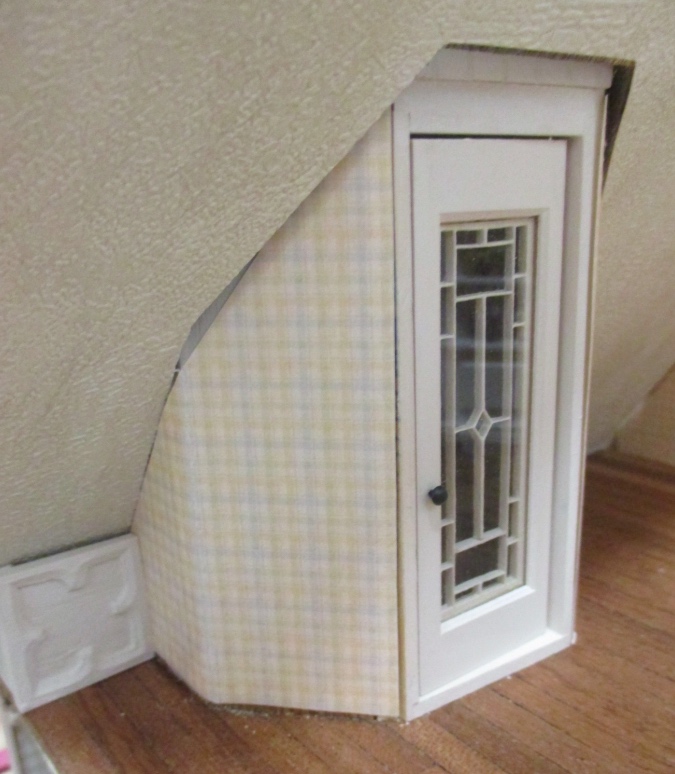
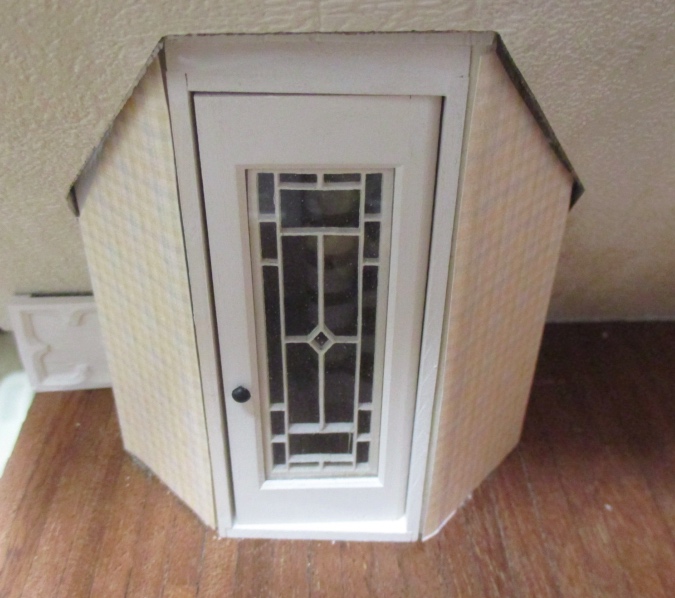
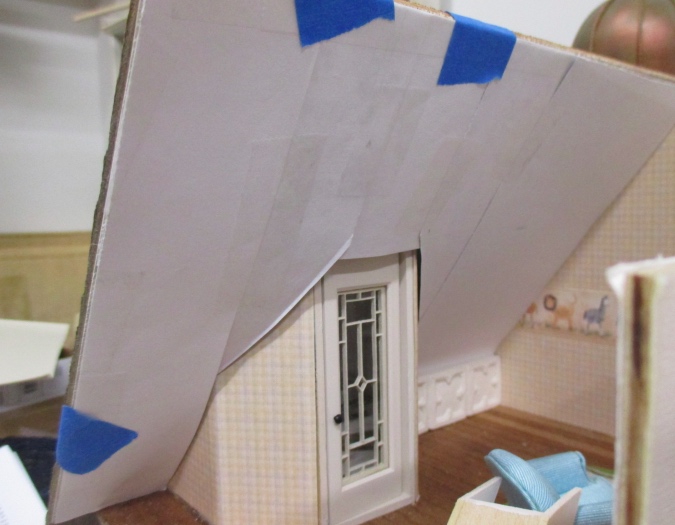
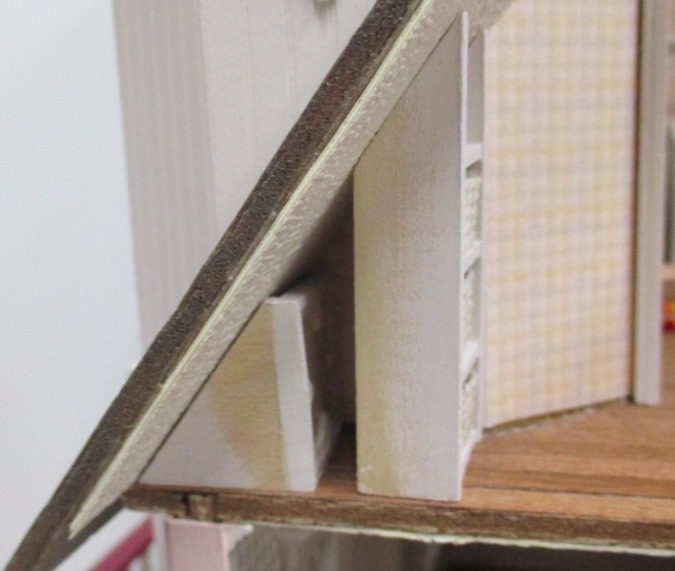
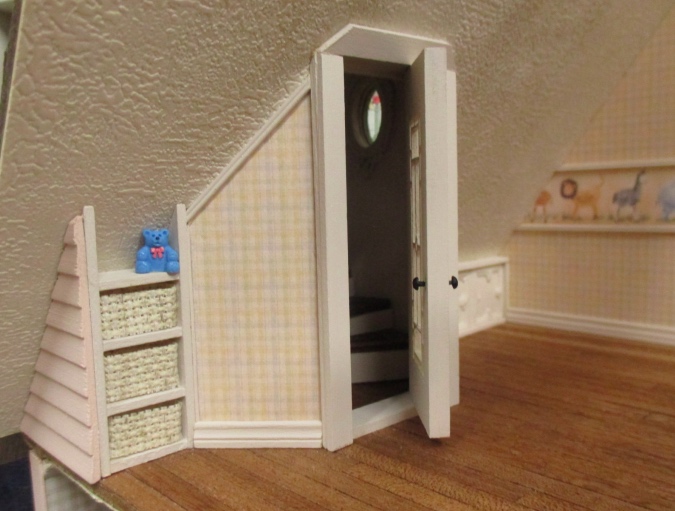
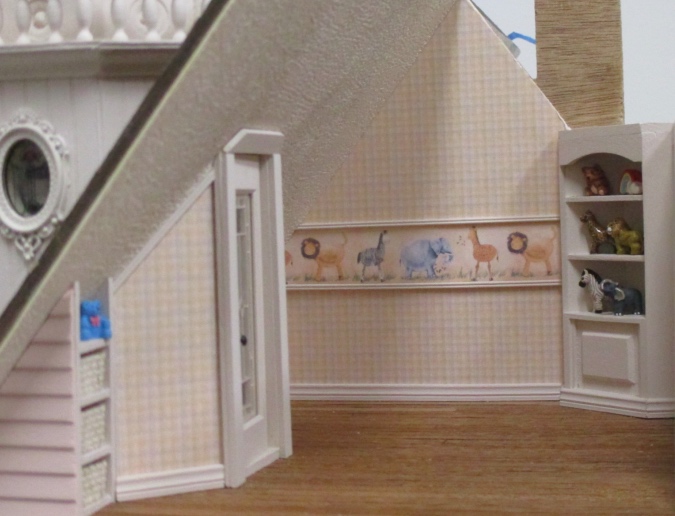
Before I could glue in the shelves and siding, I needed to figure out what to do about trim around the tower door. This has stumped me for a while. The gaps between the roof cutout and tower walls would have required large pieces of trim to cover up, and I just couldn’t think of a classy way to do it.
I stared at this for a very long time and kept thinking, “If only I could redo the ceiling!” Well, why not?
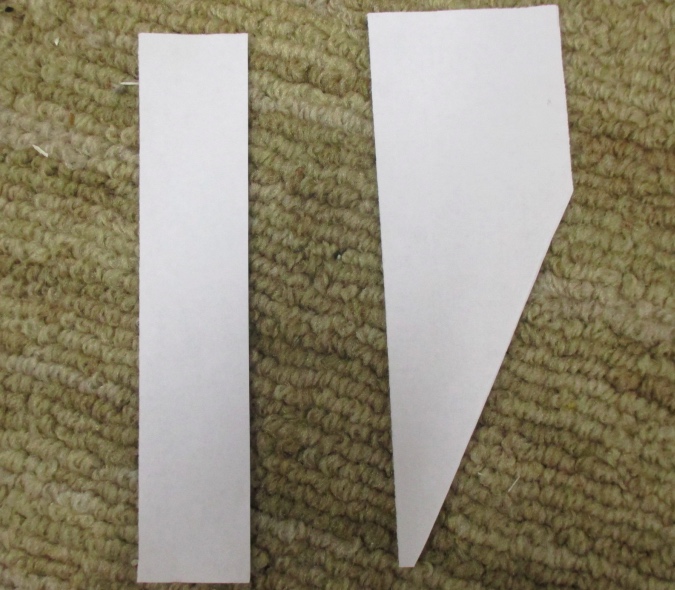
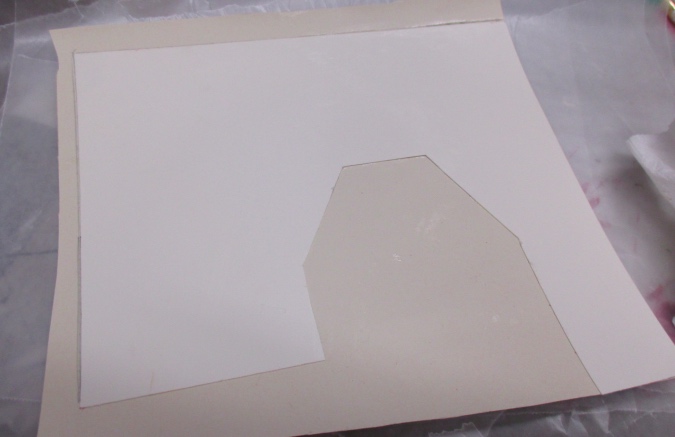
I made a ceiling template using strips of paper. Here are the first two pieces. To figure out the angle, I just put the piece of paper in place and folded it where it met the wall, then cut along the fold line.
I worked my way across the ceiling, taping the strips together as I went.
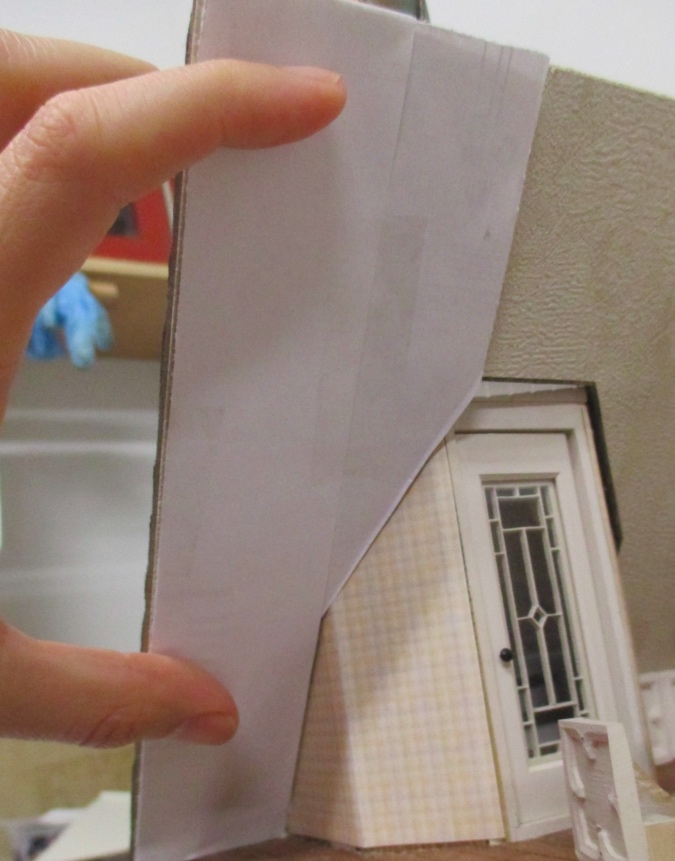
Here’s the finished template. It doesn’t look tight against the tower in this picture (and the next one) because it’s held on loosely with tape, but in reality it’s a snug fit.
Next I traced the template onto a piece of stiff paper.
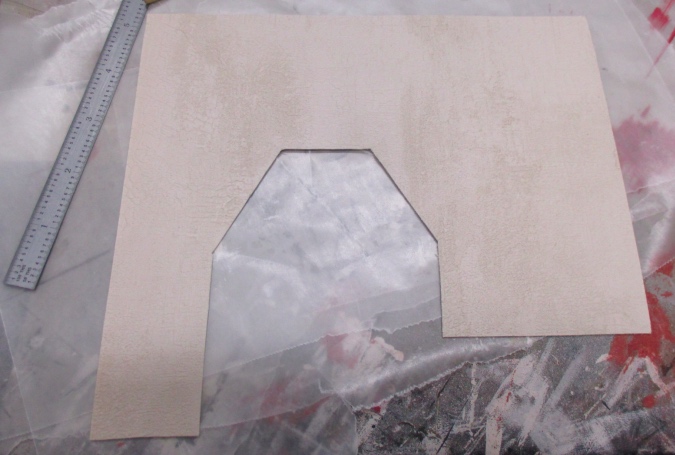
I glued that to a piece of ceiling paper larger than the template.
Then I cut around the edges with an Xacto knife.
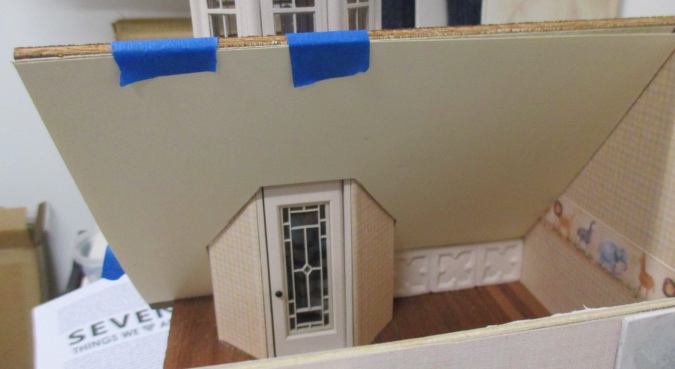
I neglected to take a picture of the new ceiling before I started adding trim, which is a shame, because it looked beautiful. The seams against the tower are nice and tight and you can’t tell at all that it’s glued on top of the original ceiling.
With the ceiling fixed, I spent another big chunk of time staring at the door to figure out how to do the trim. I wanted to use door casing on the sides with a header at the top, like on the bay windows, but the sloped ceiling made that difficult. The slope also prevented me from doing a simple door frame with mitered corners, like on the rest of the doors. And I didn’t want to use the striped door casing without mitered corners, because then the stripes wouldn’t have matched up at the corners.
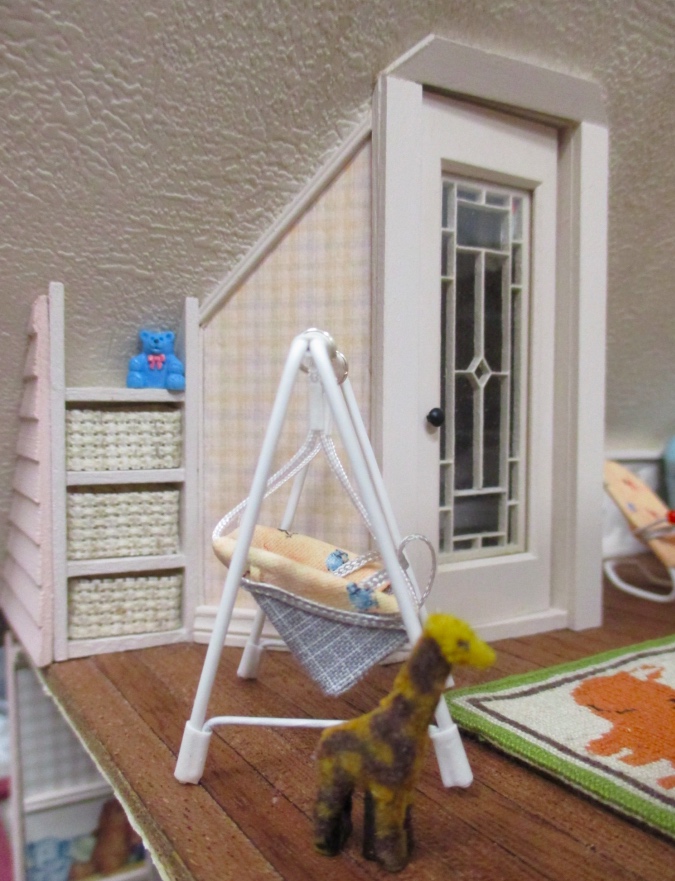
I ended up making this frame out of the trim that came with this door. I cut off the mitered corners on the side pieces and flipped the center piece upside down, thinking the angles mirrored the angles of the ceiling cutout and other angled elements, like the towers and the corner toy shelf.
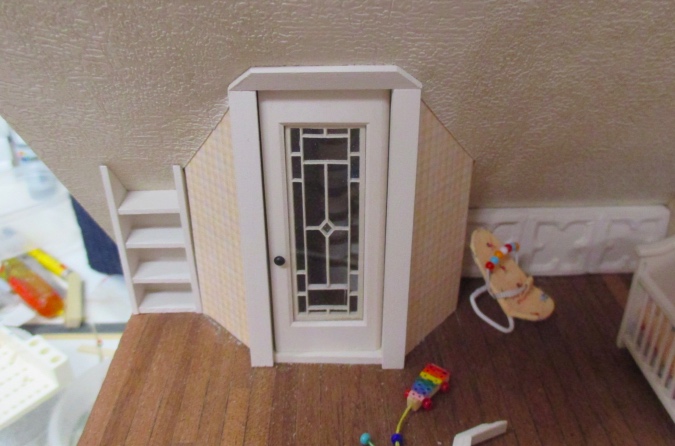
Now that I’ve been staring at it for a while, though, I don’t really like the top, and I’m planning to pull it off and replace it with a piece that doesn’t have the angled corners. (Of course, I didn’t decide that until after I took all the pictures…)
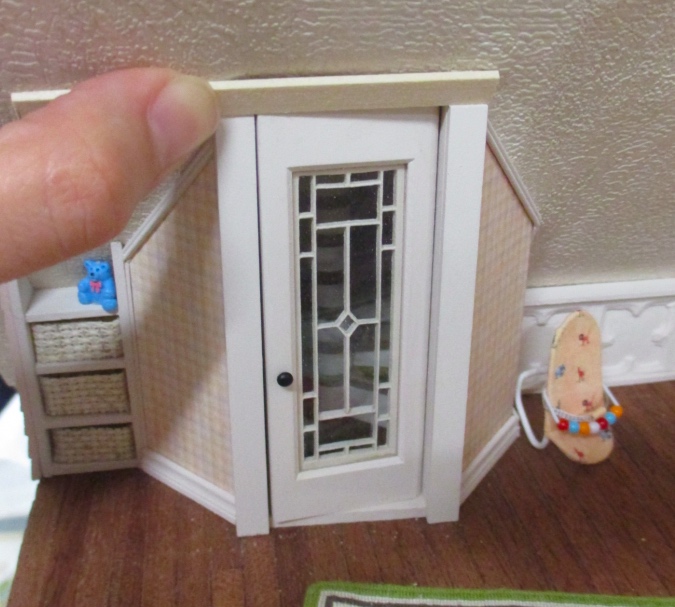
With the door trim figured out, I went back to the shelves. Since I no longer needed that little knee wall I’d made, I put it behind the shelf to give the siding another surface to glue on to. The knee wall hung over the edge a little so I had to sand it down first.
I glued the siding piece to the shelves and support piece.
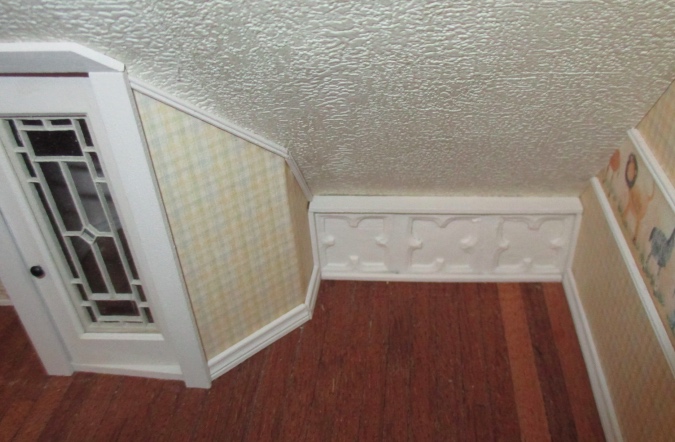
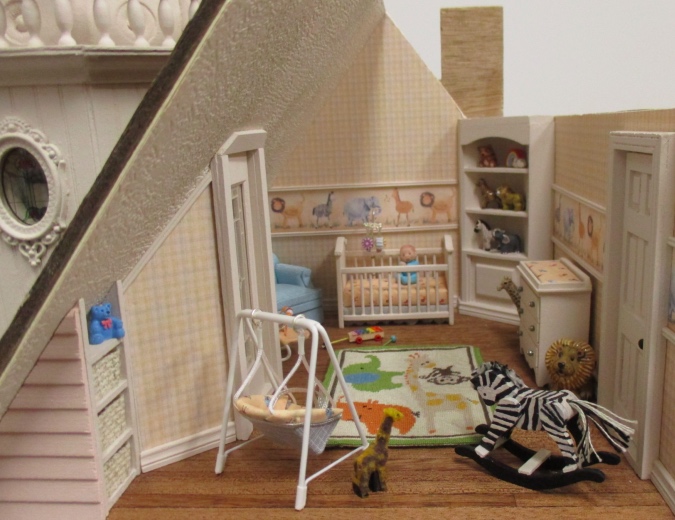
Then I glued the unit in under the roof. This portion of the roof wiggled a little, so the tape is holding it against the shelves while the glue dried. Once the shelf was in place, I added the baseboard and a piece of double bead trim where the ceiling meets the wall. The double bead almost wasn’t necessary, since the new ceiling met the wall so nicely, but it looks more finished this way.
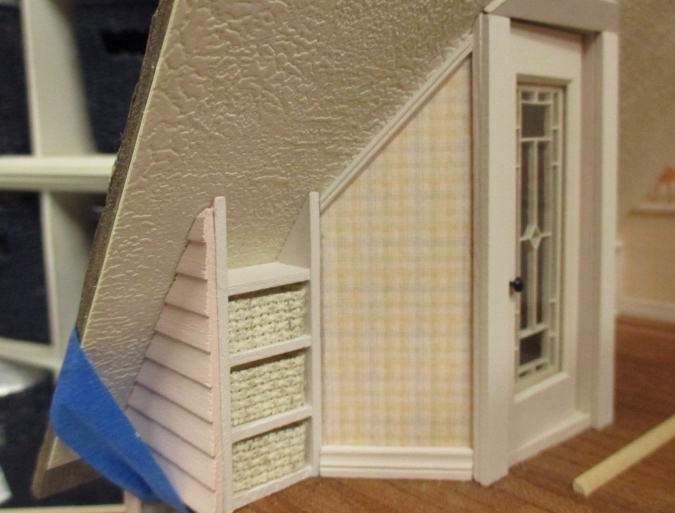
The shelves don’t quite meet up with the wall. This was always true (none of this is square!), but the piece of trim might have made it a little worse by getting wedged between the shelf and the wall.

I added a very skinny piece of trim to hide the crack.
Here’s the trim on the other side of the tower wall. The knee wall had some gaps around it, so I cleaned it up with strip wood around the sides and bottom and added a ledge on top. All of this was overkill — once the ceiling’s on this will be very hard to see, plus it will have furniture in front of it. But I’m a perfectionist.
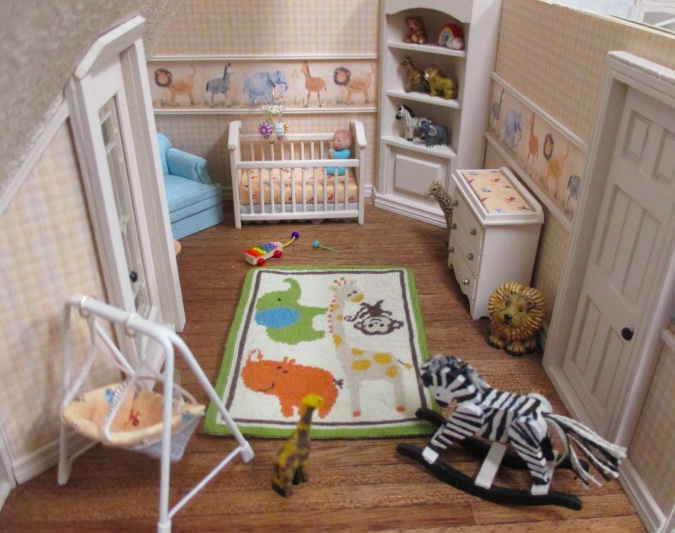
I’ll still have some work to do in here once the ceiling gets glued in, but this room is done for now. (Well, except for replacing the header on the tower door.)
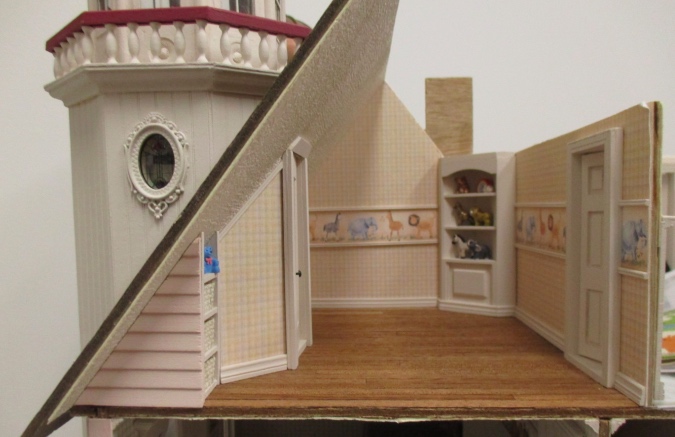
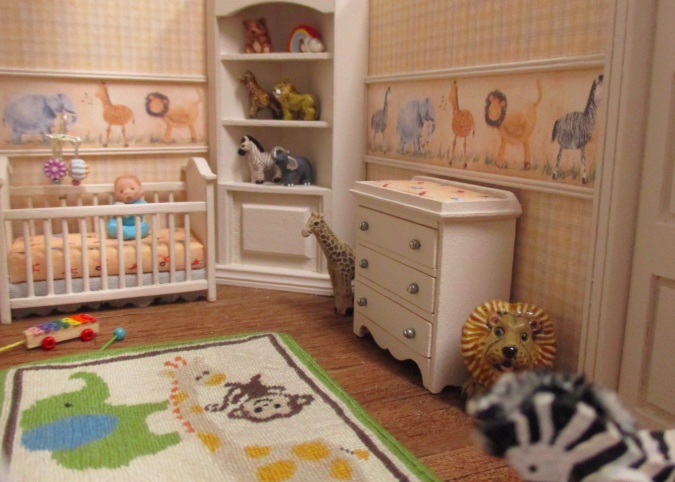
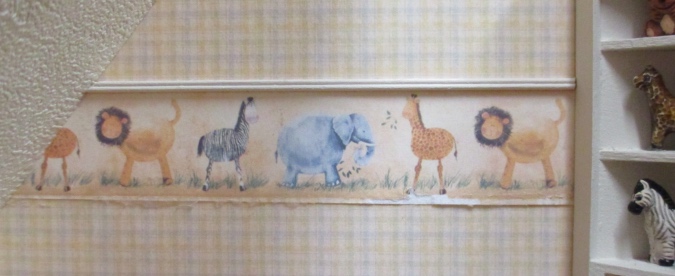
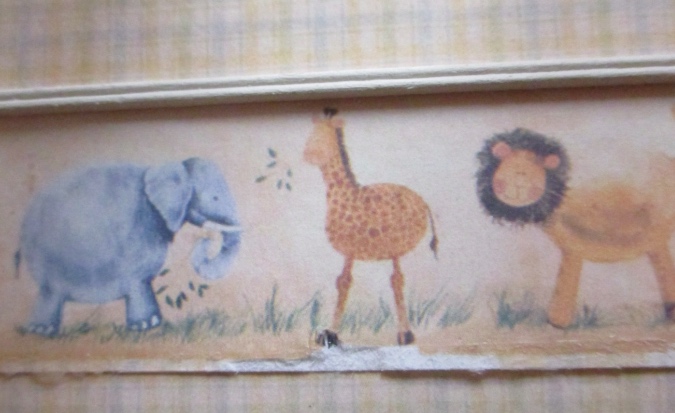
Yikes, I’m just noticing that the mural along the back wall looks crooked. The bottom piece of double bead trim isn’t straight. Hopefully I can fix that without ripping the paper.
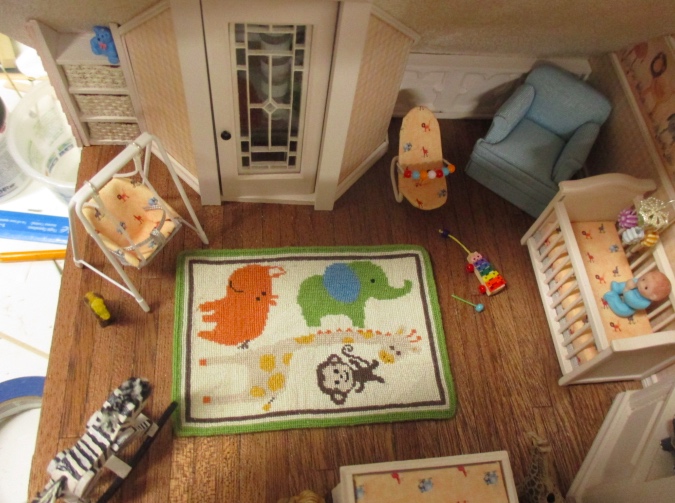
And here it is with the furniture.
UPDATE:
I was able to remove the bottom piece of double bead trim. I wiggled it free at the edge, and then slid in a razor blade to separate it from the wall.
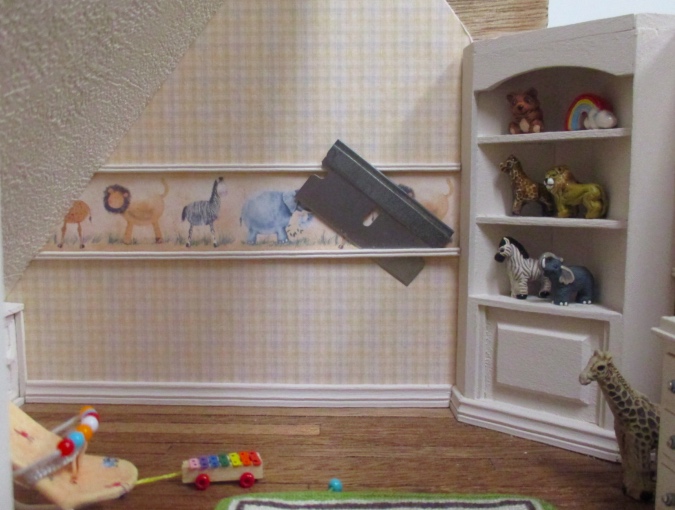
Unfortunately the paper tore a little bit underneath the giraffe’s feet.
I used a pencil to color in the torn piece of the foot that would show above the trim.
I sanded the non-angled side of the trim to make it a little shorter. I think it glued in crooked before because it was slightly too long. And… I think this is better?
It’s weird – it seems straight against the grid on the paper, and the distance between the trim and the baseboard is consistent all the way across, but it still looks like it slopes up slightly at the right side. Now I’m not sure if it’s really like that or if my brain is playing tricks on me.
Here’s how it looks with the crib in place. I could try moving the mobile to the other side of the crib to distract from it.
I also removed the angled trim on the door to see how it would look with a straight piece, but don’t really like this either.
So maybe I’ll just leave it how I had it.
 Emily is a freelance writer, miniaturist, and adventure game enthusiast.


It looks gorgeous. I might have to steal your basket idea because they look so real and pretty!
Love your bookshelf. I’m a huge fan of built ins and your roof solution is brilliant. I actually like how your door trim looks with the angles but I understand if it bugs you.
I don’t actually notice the mural border being slightly angled when the furniture is in front of it. It’s more noticeable when the room is empty.
Thanks! I was able to fix the mural (or made it a little better, at least). I tried pulling off the door header but didn’t like how it looked with the non angled piece, so I might end up keeping it how it was.
The angled trim over the door is fine. I can’t think of a way I would have done it different, either. And the mural is probably straight, whenever there are lines close together one’s eye tends to connect them in weird ways.
Despite your worries the room is looking awesome!