Multiple people have asked me recently what I’m working on mini-wise, and I’ve said I’m working on nothing, and it’s because of Daisy.

She’s around 17 months old now (the vet actually adjusted her age a few months younger than we thought she was), and she’s doing well with training, but she still has a lot of mischievous puppy energy, as well as separation anxiety when she’s apart from me.
I can leave her in her crate for a few hours here and there, but I’m finishing up a novel revision/rewrite that’s taken much longer than I wanted it to, so I’ve been prioritizing Daisy’s crate time for trips to the coffee shop to write. If I try to bring her into the workshop, and tie her up or crate her, she barks and acts bratty because she wants to be free to roam around. As long as she’s full of mischievous puppy energy, that’s just not going to happen.
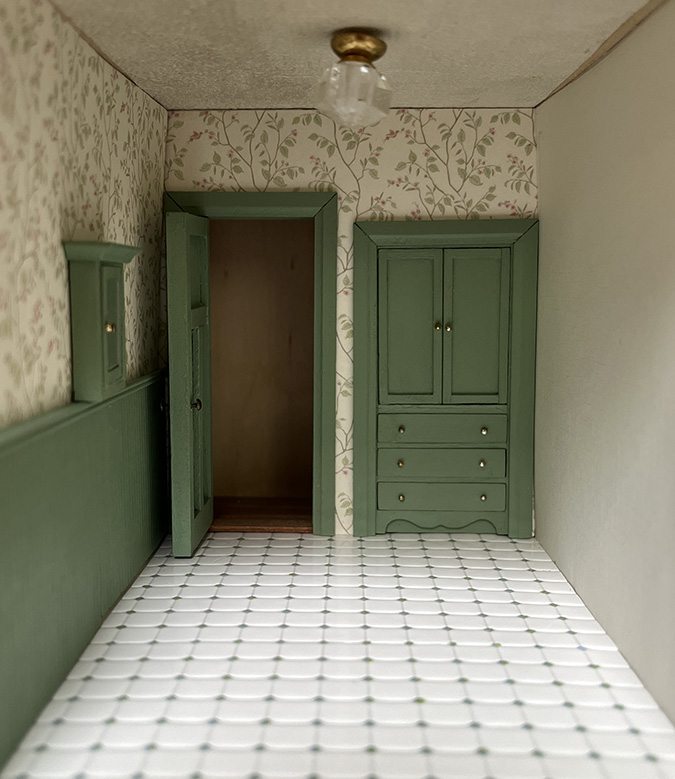
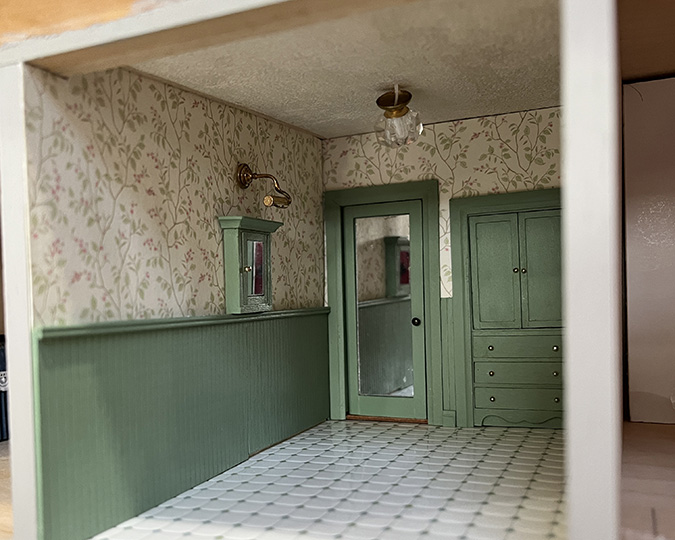
Anyway, that’s my long-winded way of saying I’m annoyed the Mansard Victorian’s bathroom has taken so long (over a year now!), and I’m annoyed that every time I do have a little time to work on it, I don’t even know where to start because I’ve made the putting-together of this room excruciatingly complicated.
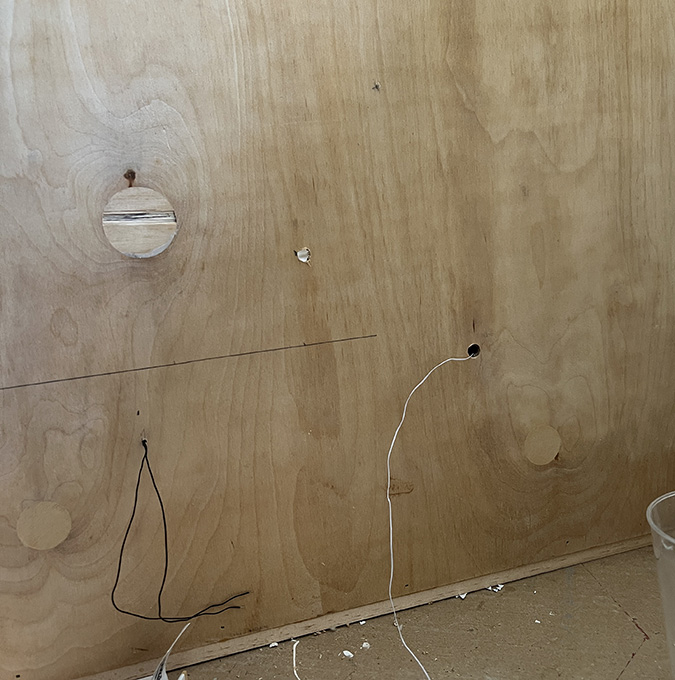
This is a front-opening house with a solid back. I’m adding false walls at the backs of the rooms to give the illusion that there’s a hallway behind them, and hiding wiring and power outlets behind the doors.
Wires attached to the outlets then go through a hole in the back wall.
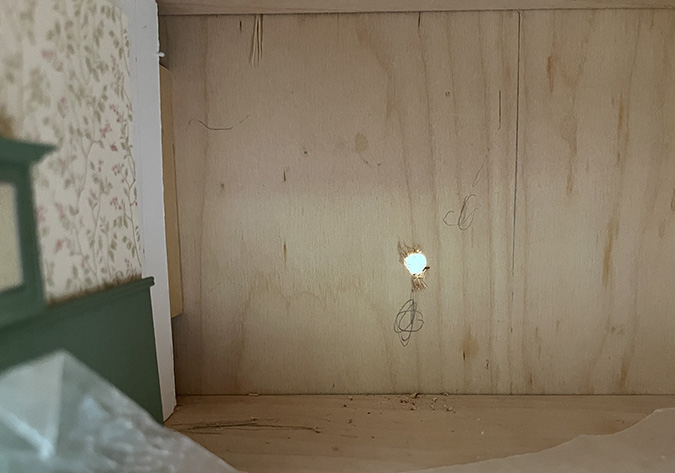
And they come out the back side, where they plug into a power strip. I’m making the holes big enough for the plug to fit through, so I don’t have to remove and reattach the plugs.
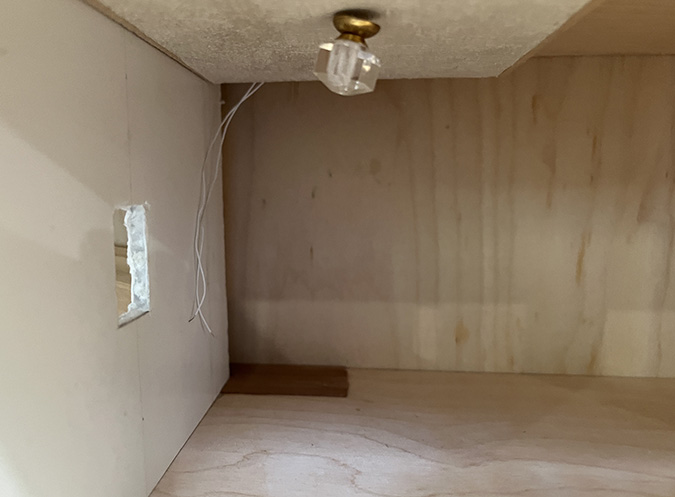
As shown in this post from over a year ago (jeez), the bathroom has a false ceiling with a cavity between the false ceiling and the real ceiling to hide the wires. I’m using a Lighting Bug fixture that didn’t come with its own plug.
I have had some success attaching half scale plugs in the past, but for whatever reason I just couldn’t do it this time. Maybe the Lighting Bug wires are too thick. After wasting a lot of precious dog-free time trying to attach a plug, I remembered how easy it was to use heat shrink tube in the dog vignette and decided to try that here.
I went into my stash and found a plug already attached to a wire, that I cut off a light another time. I attached this to the Lighting Bug fixture. I used a hair dryer this time, but afterward Geoff dug a heat gun out of the garage and said I can have it. The downside to this is that I will have to remember where I put it, whereas I always know I can find the hair dryer in the bathroom (assuming I actually put it away after using it to shrink tubing).
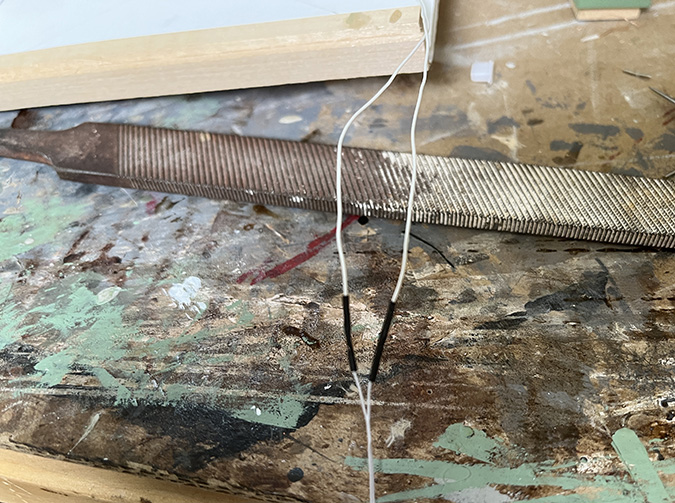
Look, it works!

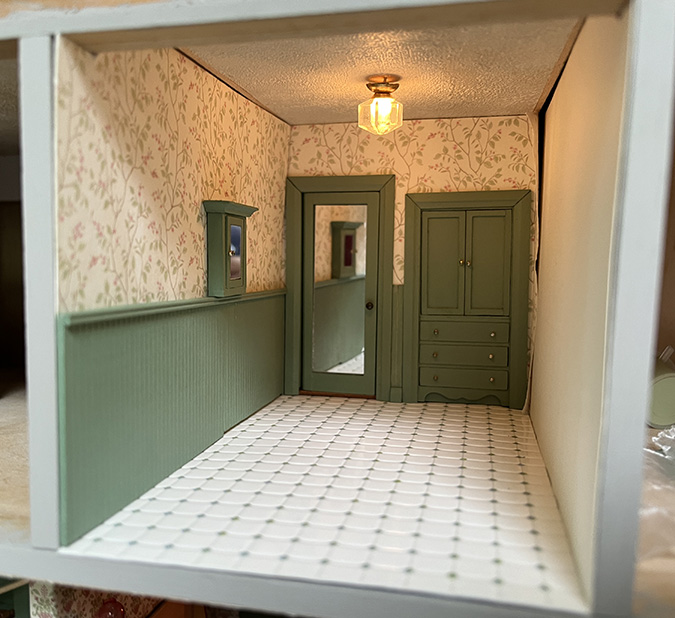
(As I showed in my last bathroom post, the wallpaper and wainscot is glued to a piece of scrapbook paper that will eventually be glued to the wall — that’s why the wall is bare in the picture above when it wasn’t in the pictures that came before it.)
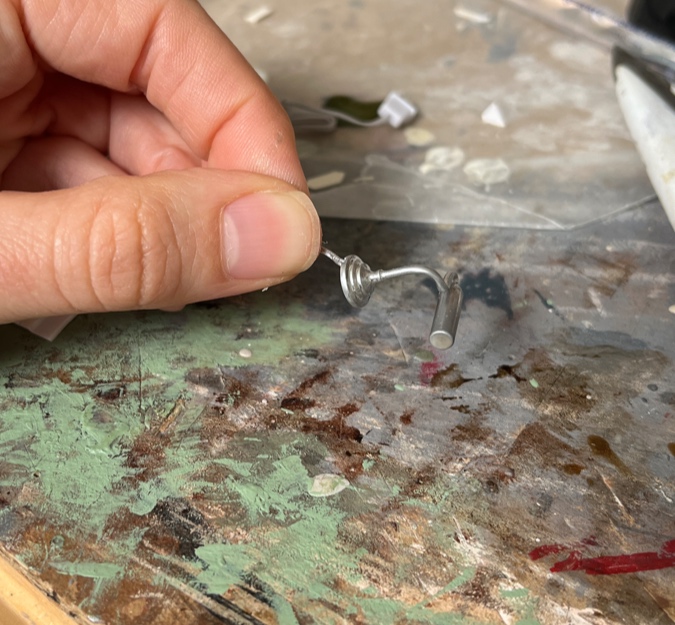
So this looks good and could have been the end of it, but I decided I also wanted to put a light on the wall with the medicine cabinet. The wire will go through the wall to the bedroom, where it will be hidden by the bedroom wallpaper.
I have several of these from a lot of half scale components I bought on eBay a few years ago (old store stock).
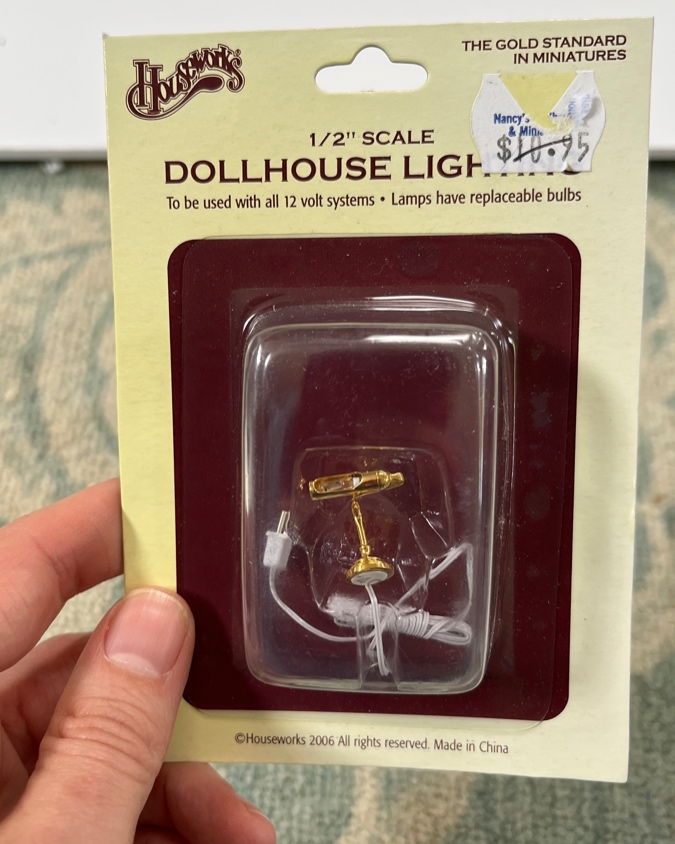
These lights are supposed to go over paintings, but it seems like it’ll work over the medicine cabinet. Only problem is I don’t like that shiny brass.
I tried painting the fixture silver. I actually did this twice. The first time I used spray paint and the fixture wouldn’t light up afterward (even though I’d covered up the important bits with masking tape). The second time I used silver gilding paint from Michaels.
I’m not sure which iteration these pictures are of, but both attempts turned out good — too modern for this house, though. I envisioned a chrome look, and these looked like brushed nickel.
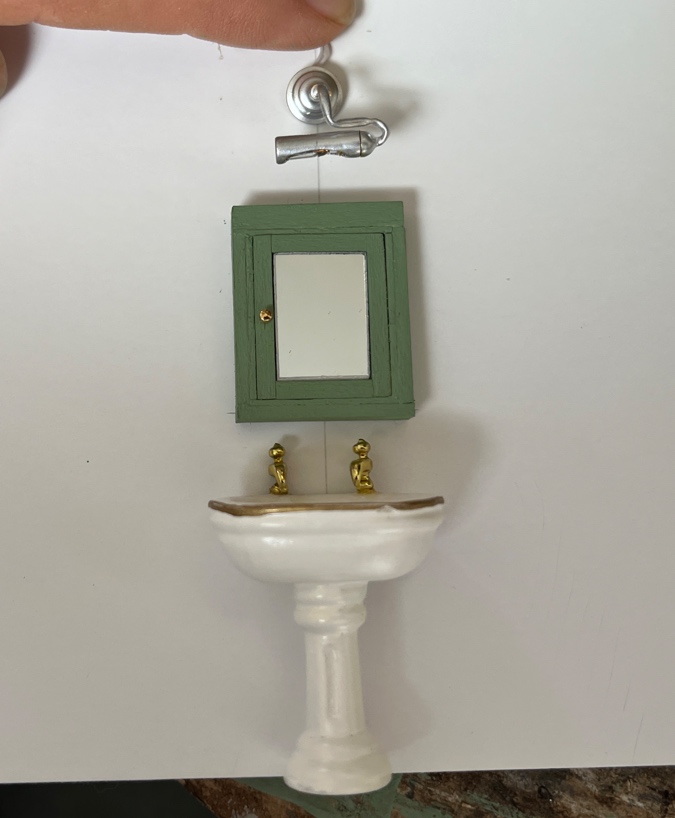
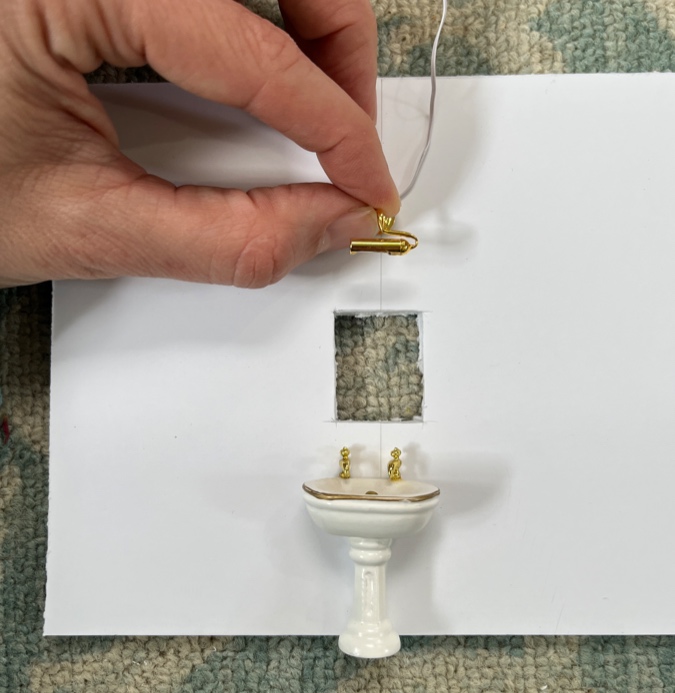
(This is not the sink I’m using — just a placeholder!)
The Lighting Bug fixture has an antiqued brass finish, so I decided to try antiquing the shiny brass. First I tried Tim Holtz Distress Mica Spray thinking it would be paint-like, but it was more like a wash and wouldn’t stick to the light fixture at all. Another precious half hour of dog-free time wasted.
These attempts to change the color of the light fixture were done here and there, over the course of several months. One Saturday afternoon at the beginning of May, Daisy was being rambunctious and I was frustrated with her so we went on an excursion to Michaels.
I picked out four different metallic paints that seemed close to what I was looking for. (Four, because I was tired of trying things that didn’t work out, and didn’t want to have to come back!)
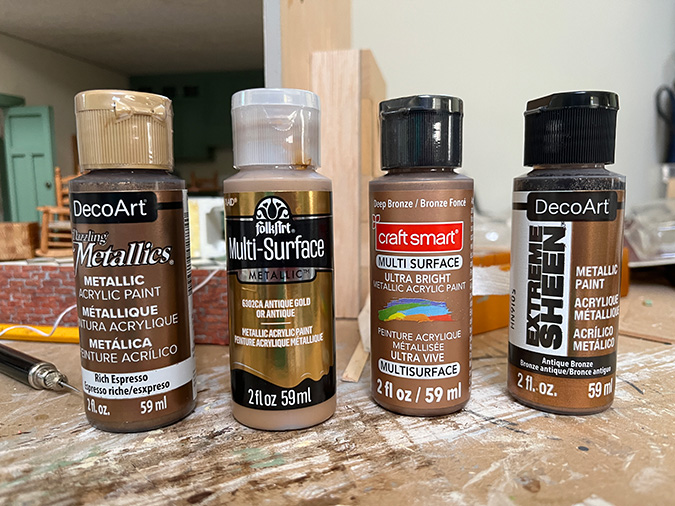
I played around with all of them, but I think the Antique Gold is mainly what I ended up using.
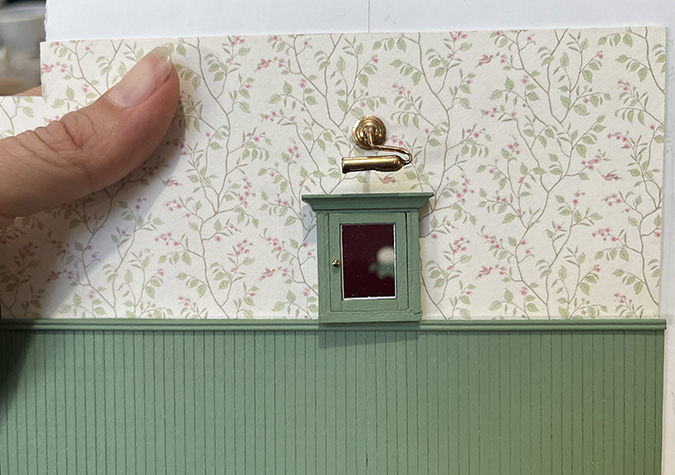
Here’s how it’ll look. I poked a hole through the wall for the wire to go through — easy to do, since this wall is made from foamcore — but I can’t attach the plug on this light until the wallpaper-attached-to-scrapbook-paper gets glued to the wall.
So that brings me one step closer to completing the bathroom. Maybe I’ll finish it this month…?
 Emily is a freelance writer, miniaturist, and adventure game enthusiast.


Daisy is so cute, though! Excellent work as always. I know I’ve said it before, but I so admire your skill and dedication with electricity!
Thank you! I’m sure there would have been less complicated options for electrifying this house but I’m determined to use these finicky little lights.
As always Emily, your work is outstanding! It makes me feel better about some of my projects that have sat for over a year (or more) untouched. I am trying to be better and get some finished up before I get started on one or two more! It is nice to know other do this. We have a vision for our projects and then when they start to come together, it just doesn’t seem to work. So we go back a bit and rework items for the finished project. I am dealing with that for a project now. The light fixtures seem too small, and need to find new ones to get just what I wanted. Keep up the Great Work!
Thank you! I have so many unfinished projects it’s not even funny. Not sure how I’ll ever get to the dozen or so unbuilt kits in my stash at this rate. I’m not getting any younger.
It’s coming along! I love how you give us a detailed foray into the process of arriving at a great-looking result. I also really appreciate that false wall/illusion hallway trick. It looks amazing.