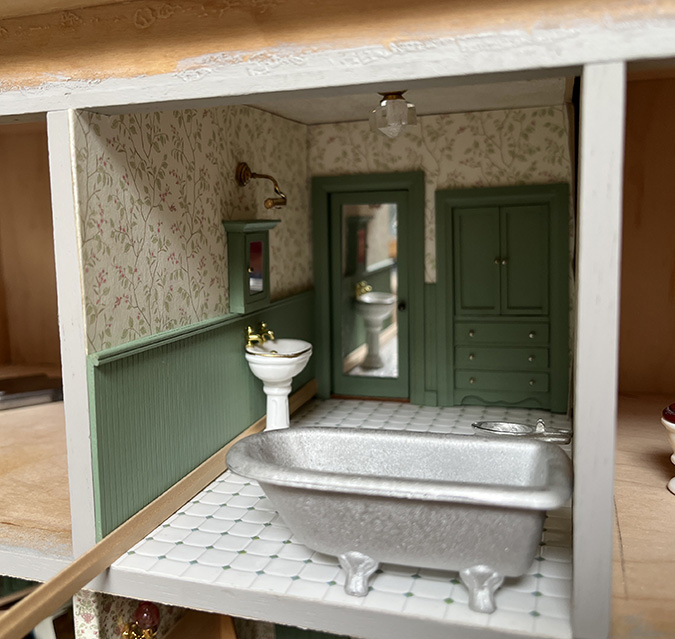
Fourteen months after I started the Mansard Victorian’s bathroom by kitbashing Cassidy Creations kits into a linen closet, I’ve finally hit the home stretch with this little room.
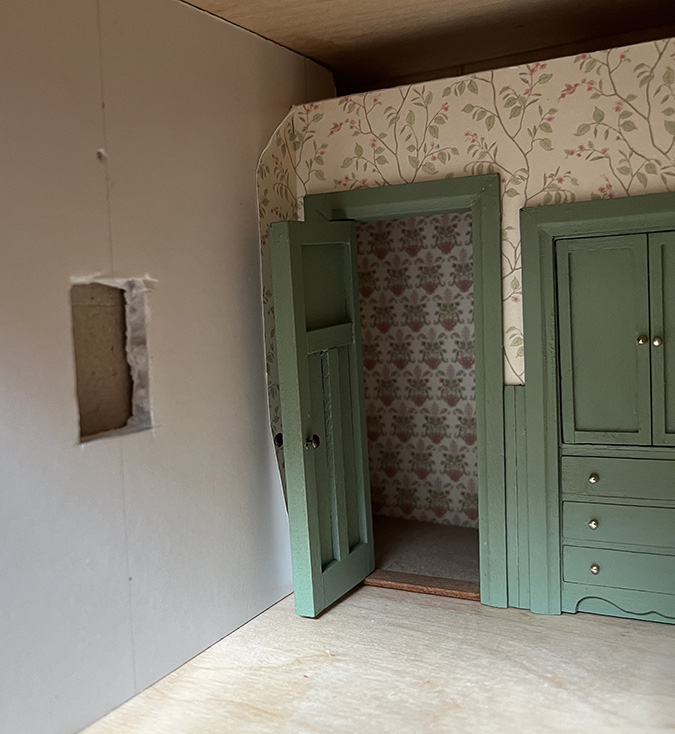
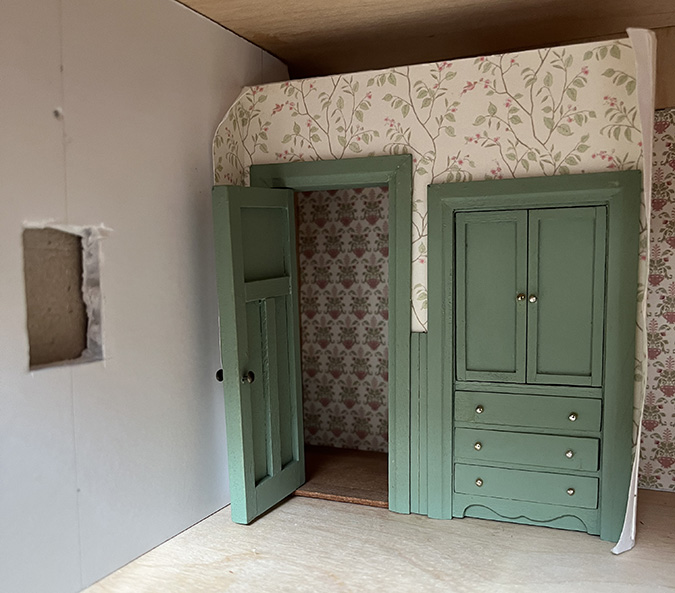
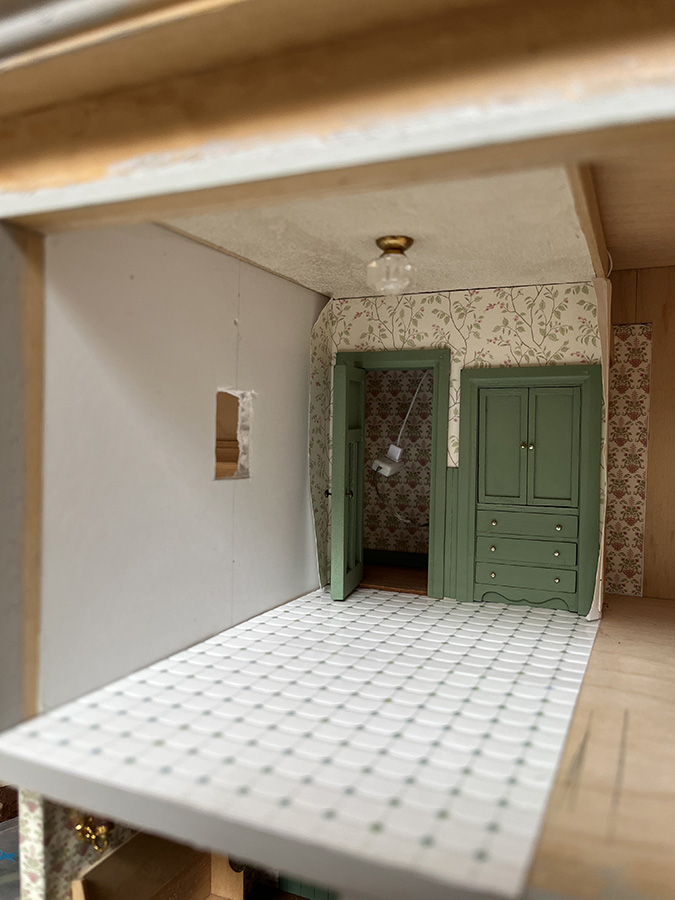
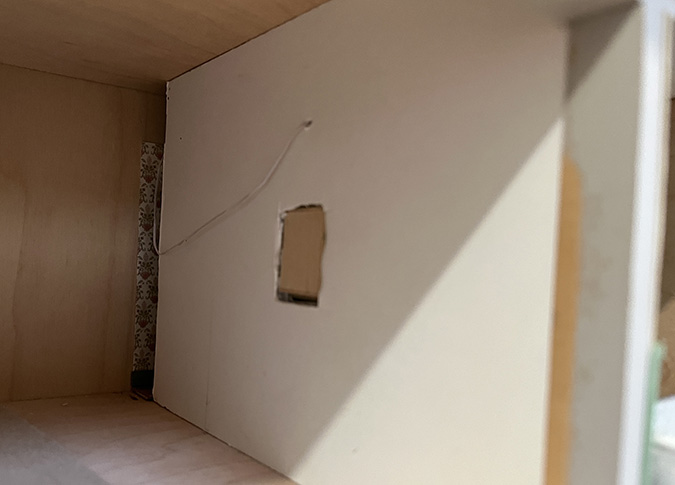
Something that was holding me up was my indecision over whether I should finish the area behind the bathroom door. The door is set in a false wall, with wiring accessible behind it.
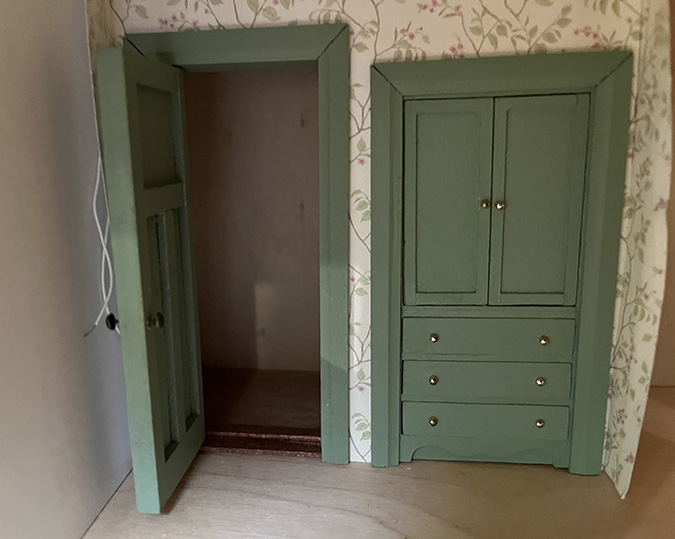
The bathroom wall has more space behind it than the bedrooms will (because I didn’t need such a long skinny room, and to accommodate the built-in linen closet), so I thought I should make it look like a hallway back there.
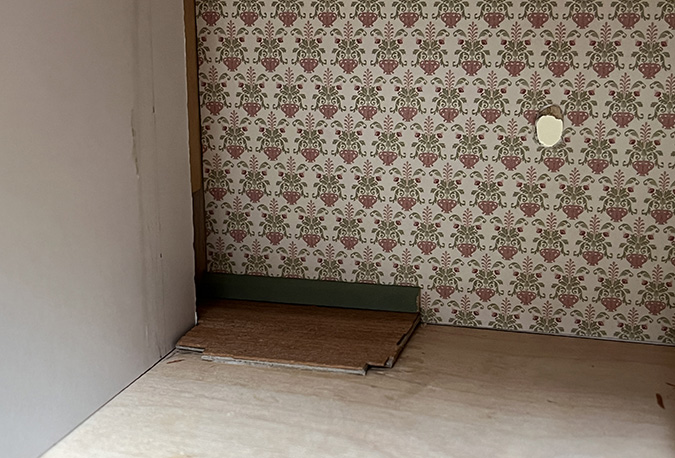
I started this process months ago by cutting hardwood floor pieces to go in that space. As I was doing this, I realized I couldn’t live with the threshold, which I’d stained hoping it would blend in with the flooring. I just didn’t like how it looked and wanted a seamless transition like the kitchen door has.
The door was already glued into the false wall at this point, so I couldn’t do much to modify it, but I was able to remove the threshold and replace it with a piece of flooring. Since the flooring piece was skinnier than the threshold, this resulted in a big gap (and visible pin hinge) at the top of the door.
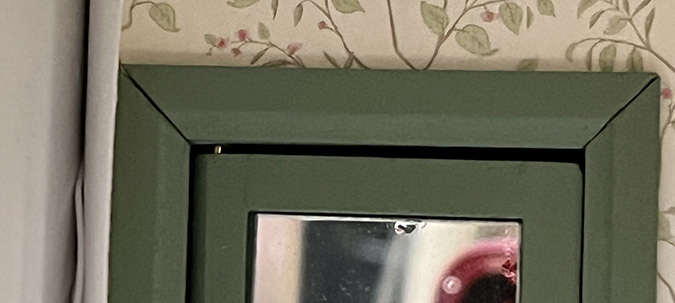
(Since taking that picture, I’ve filled in and painted over those big cracks at the corners!)
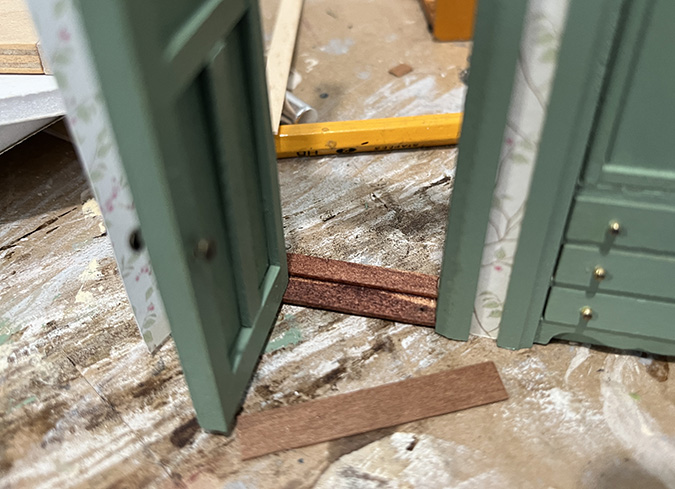
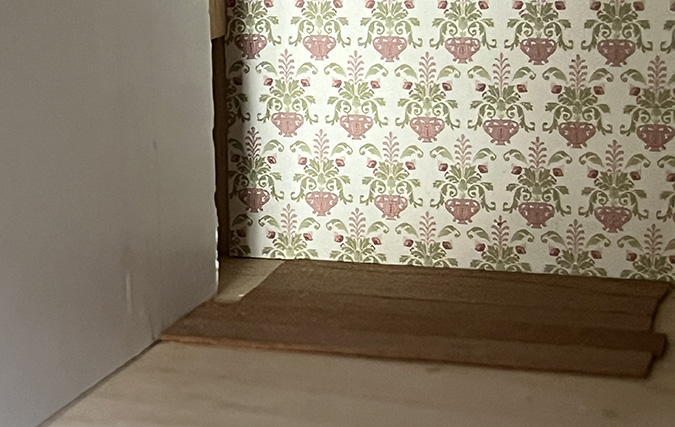
I stacked two floor pieces together to make the threshold taller.
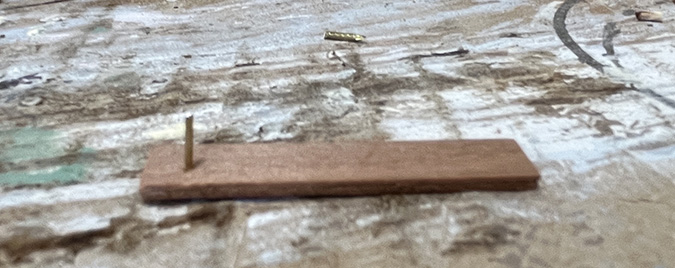
The new threshold is glued to the trim on each side, just barely, but once it’s glued into the house it won’t go anywhere. I put a tiny piece of Scotch tape over the pinhead to keep it from falling out in the meantime.

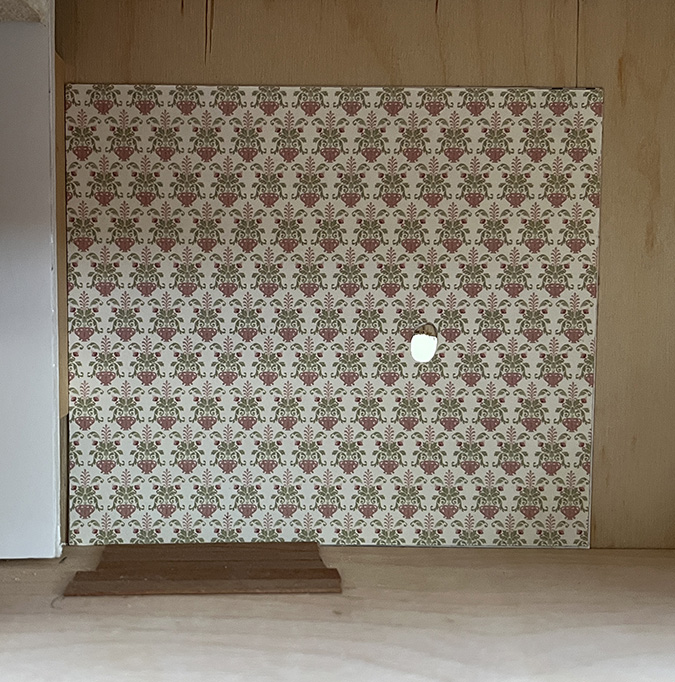
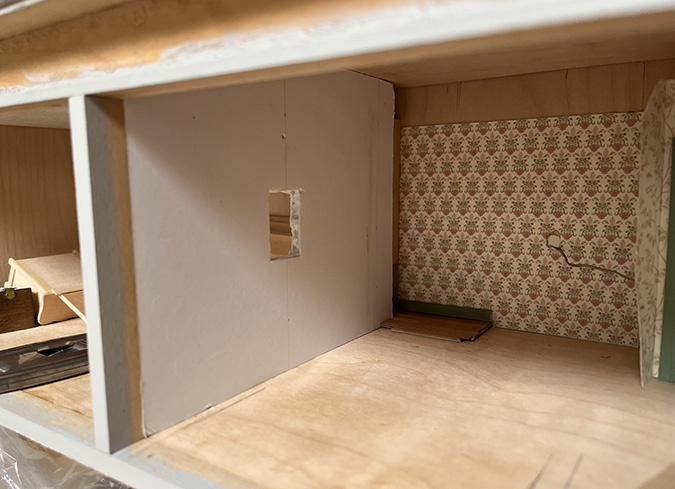
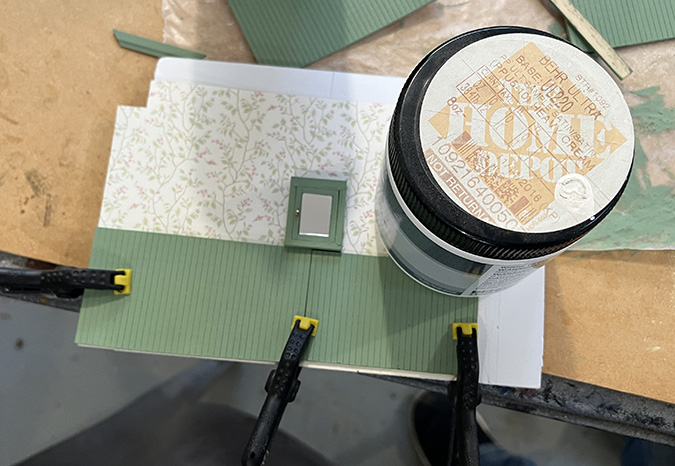
I cut a piece of the wallpaper I used downstairs and glued it to the back wall. There will be an outlet in this space that the two bathroom lights plug into, attached to a power strip on the outside back of the house. The hole is for the outlet’s wire to go through (it’s so big because I didn’t want to remove the plug from the wire).
When I glued in the flooring pieces a couple weeks ago, it had been so long since I cut them I couldn’t remember why two of them were longer. I assumed since you can’t really see back there that I had just been haphazard about it. (You know what they say about assuming…)
It looked fine head-on. But when I put the side walls in and looked through at an angle, I was able to tell that the floorboards stopped before they were supposed to. Oops – I guess that’s where those two longer boards were supposed to go!
The right thing to do in this situation would have been to take a deep breath, maybe sleep on it, and come to the conclusion that it really didn’t matter, it was barely visible, nobody cares, etc.
The wrong thing to do in this situation was this:
Silly me, I thought the floorboards would pry up easily. They did not. This was the best I was able to do. Argh.
Cardboard to the rescue!
Getting this piece right took several tries, putting the cardboard and wall in place and then removing them again, before I realized I needed to notch it around that back trim on the door.
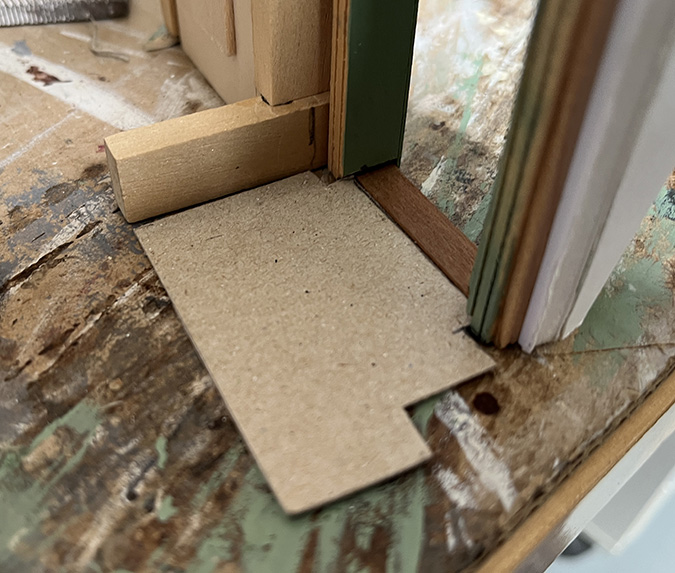
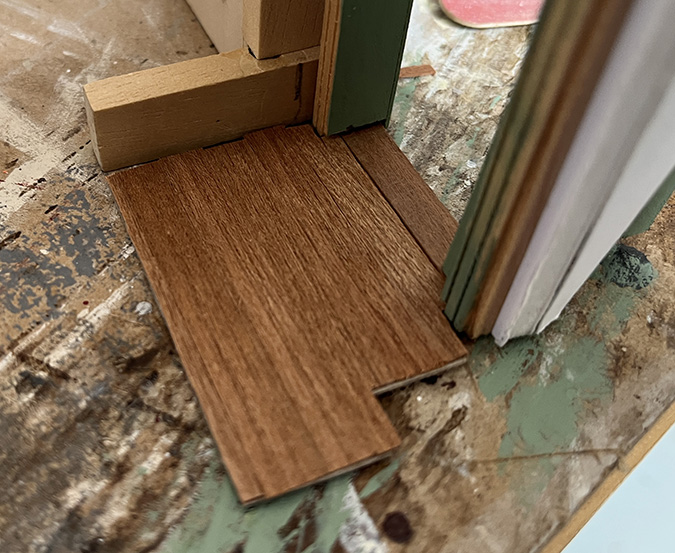
Applying the floorboards to the cardboard was actually easier than gluing them in directly, since I was able to see how they meet up with the door, outside of the house. Thanks to the added height of the cardboard, the floorboards meet up perfectly with the double-stacked threshold now.
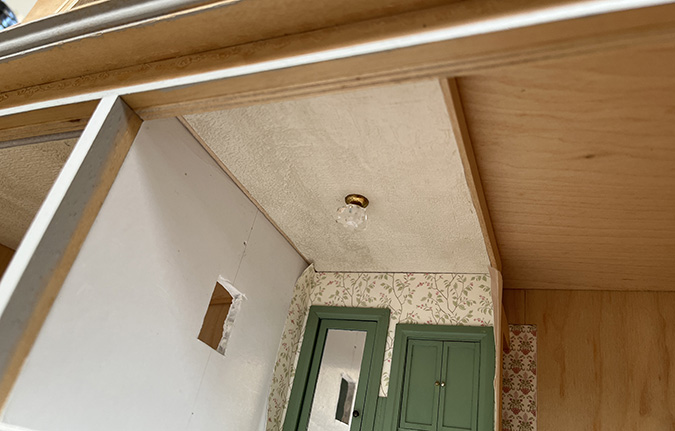
With the flooring disaster fixed, I spent a long time staring at this little hallway room and thinking about how I could add a light to it. I came up with some ideas but none that would allow me to reach in and replace the bulb if I needed to, and I didn’t want to make this any more complicated. I’m ready to be done with this bathroom!
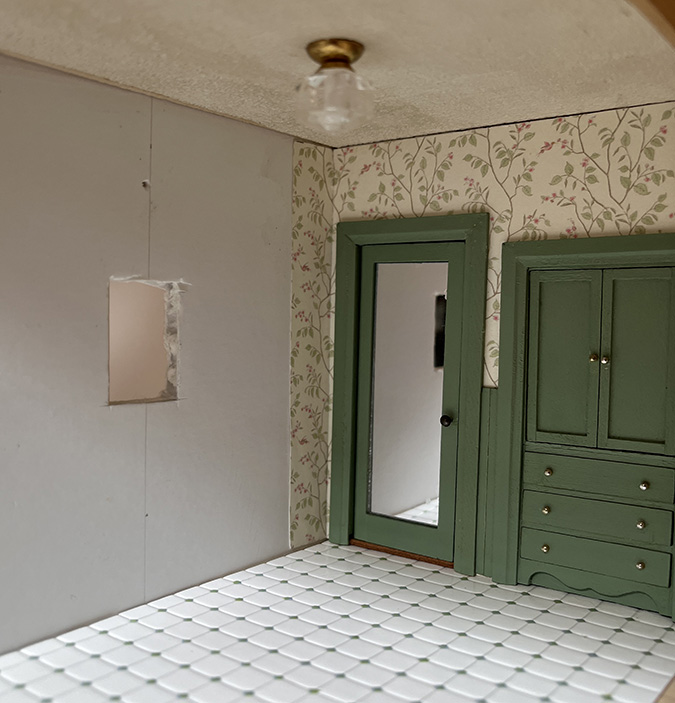
Finally, it’s time to put everything together. I started by gluing in the hall floor and a piece of baseboard.
Next I glued in the left wall (it had been sitting in place before this, but not glued).
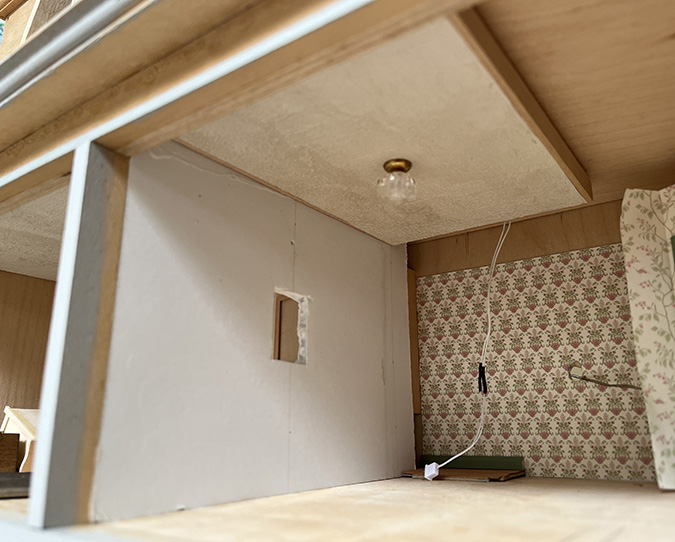
Then the ceiling, with the wires for the light fixture hanging down.
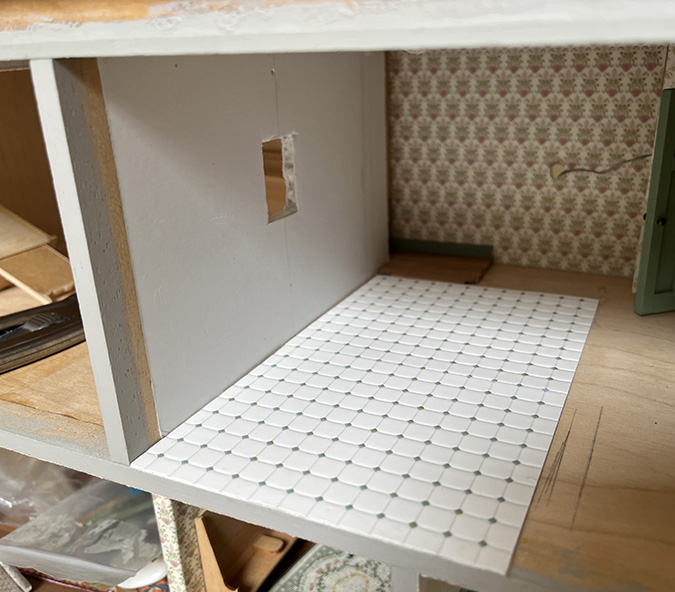
Then the floor.
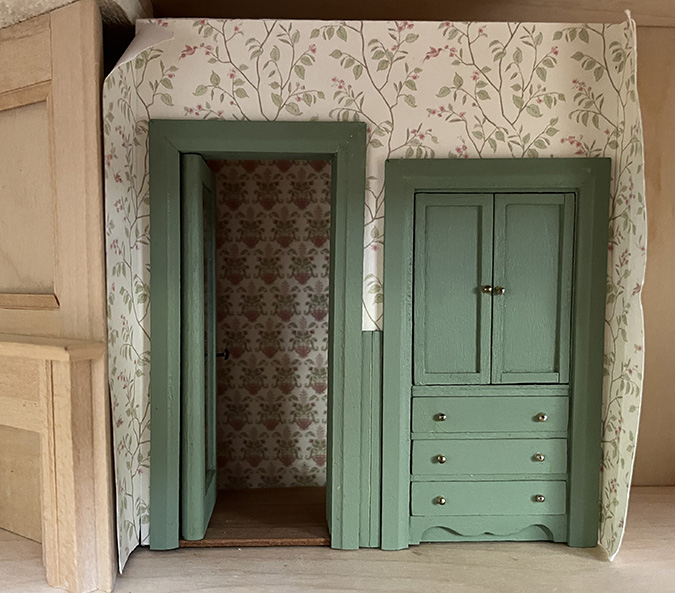
Then the back wall. I’ll leave the right wall out for now, since I still need to be able to get my hands in there to work.
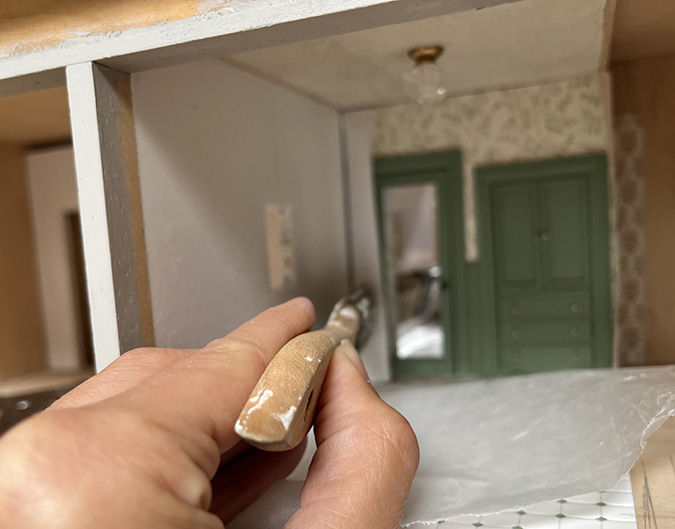
At this point I realized I needed to paint the underside of this trim at the front of the house, before adding wallpaper. So I did that next.
Then I applied wallpaper mucilage to the flap that wraps around to the left wall.
This is getting exciting!
I’d already prepared the wallpaper and wainscot for the left wall — they’re glued to a piece of scrapbook paper. This had gotten wrinkled over time due to moisture in my workshop. (During the rainy season! Six months ago!)
I’d previously flattened it by ironing it, and I did this again now in preparation for gluing it in. But first I decided I should make the wallpaper/wainscot panel for the right wall, so I would have the one I already made handy as a reference.
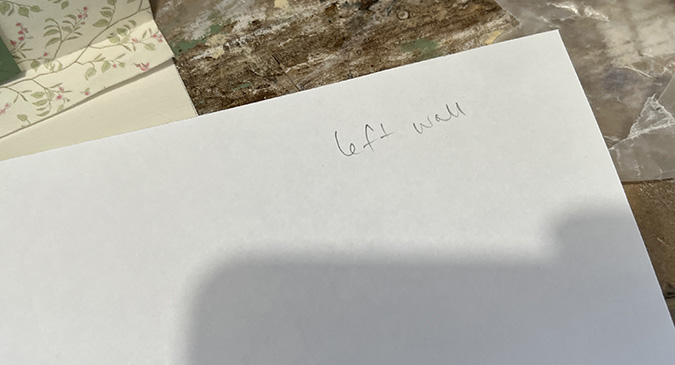
I’ve had a strip of wallpaper sitting out for months, waiting for this moment. But hmm… this design doesn’t match up?
I remember spending a lot of time making sure the design matched up at the corners. Flipping this piece of wallpaper over revealed the very helpful label “bathroom.”
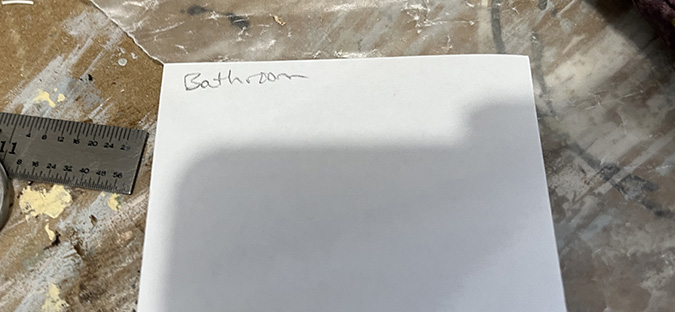
I went into the wallpaper drawer and found another strip, the same size. This one matches! (Sorry for the fuzzy pic!)
This one is labeled “left wall.” The wall I’m working on is the right wall. I probably just got my lefts and rights mixed up, but why did this one end up in the drawer? And what was the “bathroom” piece meant for? A mystery that will forever remain unsolved.
I’m not sure if I ever sprayed this strip of wallpaper with UV sealer, but my spray can is empty and I wanted to keep going. The joke will be on me when it fades and I have to figure out a complicated process to fix it. (It wouldn’t be the first time…)
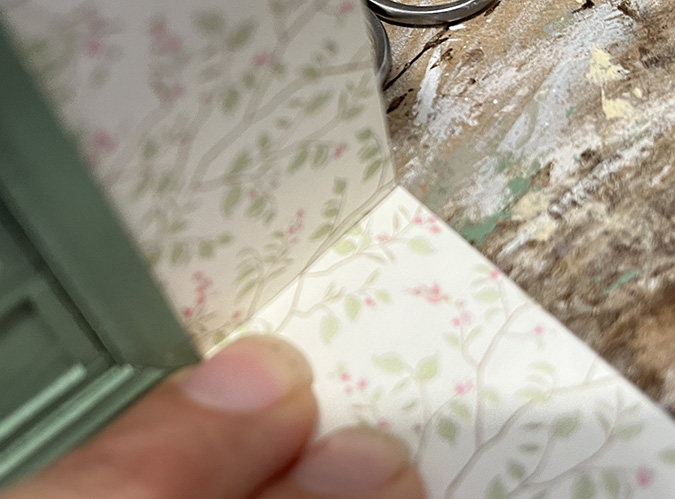
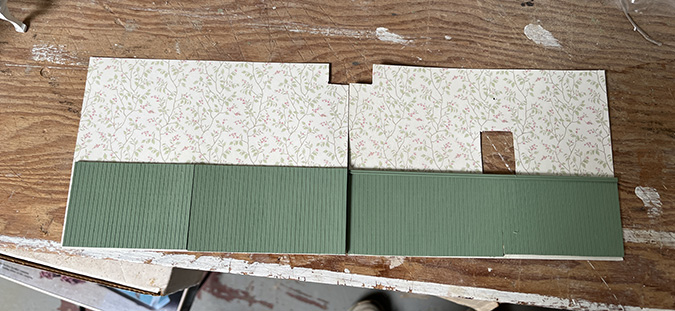
Anyway, I glued on the wainscot pieces, making sure they line up with the wall I already did. I then put the new piece inside a heavy book. Seeing this picture made me worry that I should have clamped the wainscot like I did when I made the first piece, but I just checked it and the glue dried nice and flat. Whew.
Before gluing the wallpaper/wainscot to the left wall, I added this little piece of wood I’d prepared to prevent a funny sliver of wallpaper from showing between the wainscot and the door trim.

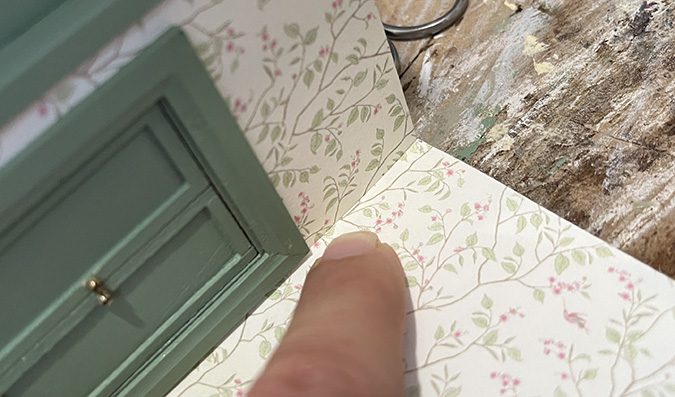
And then I glued in the wallpaper/wainscot piece, which did not go quite as planned. I couldn’t push it all the way in. It might be because the wainscot is bumping into the little piece of wood next to the door trim, exacerbated by me not being able to get my hands in far enough to really push down that edge of the paper, or maybe there wasn’t enough glue on it.
I really tried to shove it in there but I just couldn’t make it fit all the way. (But hey, at least the pattern matches up!)
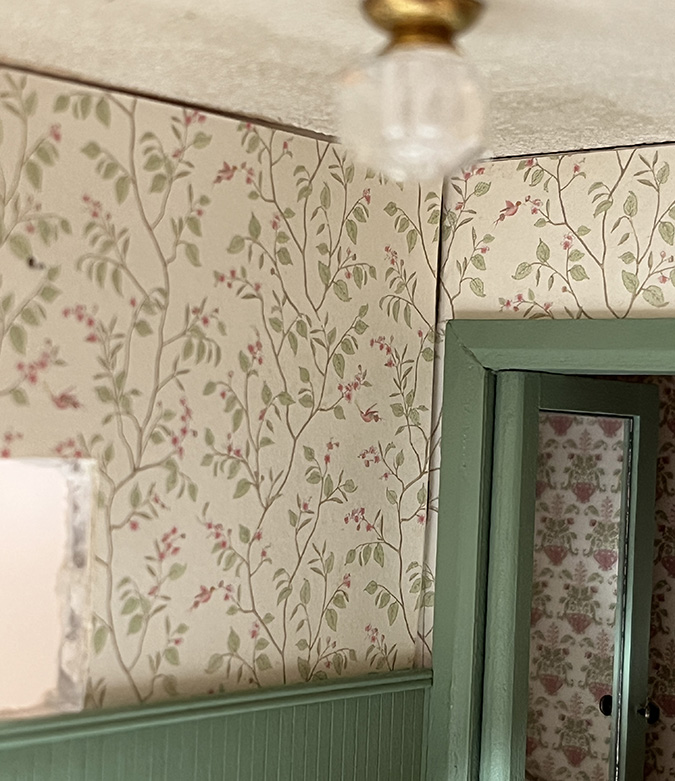
I’m a perfectionist, but I had to call this good enough. If you stare at it from an angle, it looks bad. If you look at the room head-on, it’s less obvious. I hope once everything’s finished in here, your eye won’t be drawn to it. (And to be fair, you can never see it as well in real life as you can in the picture above.)
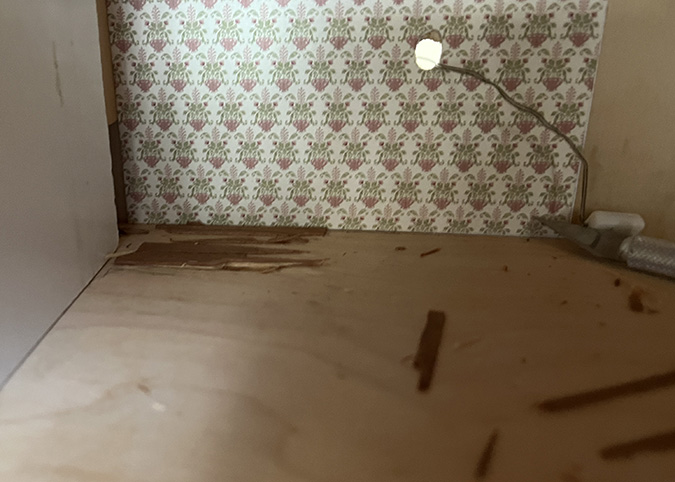
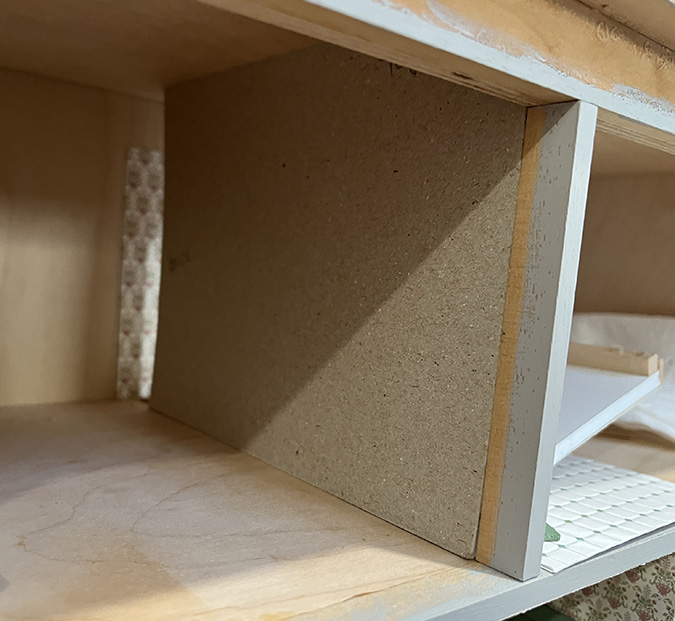
The wire for the light over the medicine cabinet goes through to the other side of the wall.
The foam board is slightly skinnier than the strip wood attached to the edge. I’ll put a piece of cardboard over the foam board, to hide the wire, that meets up with the strip wood to makes the back of the wall uniform. This will be covered with wallpaper.
I attached a plug to the wire and plugged it into the outlet behind the door.

I was able to push the outlet and wires into the area behind the linen closet, so you can’t see them when the door is open.
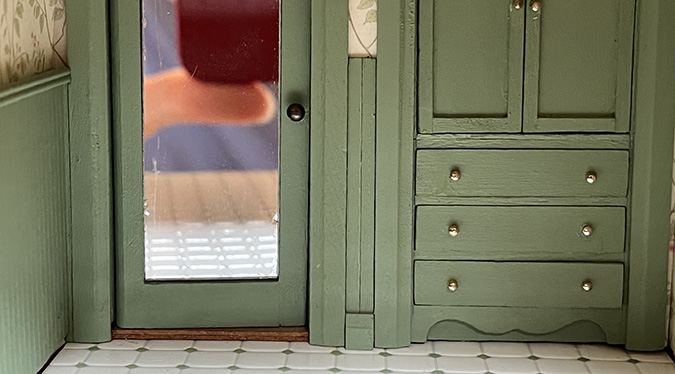
One last thing, I glued this little piece of baseboard to the wainscot on the back wall. I had also prepared a piece of double bead to go on top but it’s gotten lost, so I have to make another one of those.
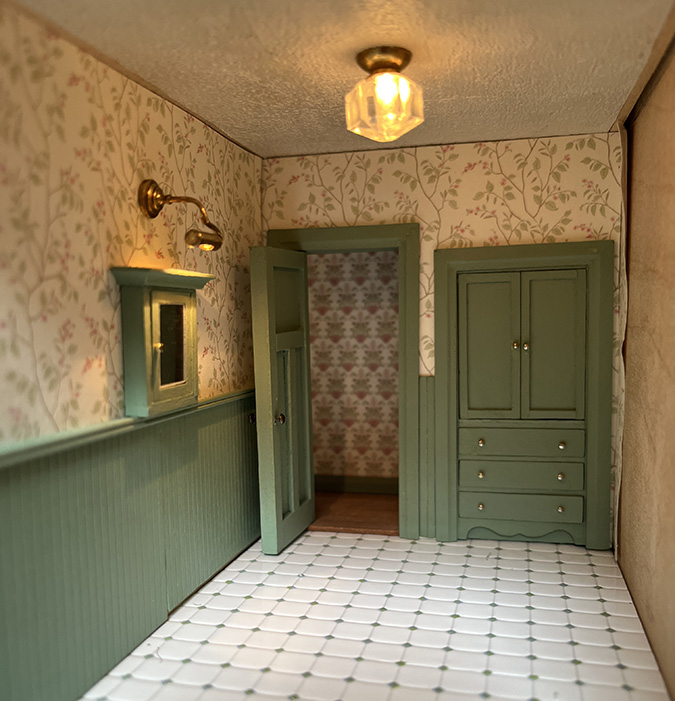
Next up will be adding baseboard and crown molding, and of course gluing in the right wall.
 Emily is a freelance writer, miniaturist, and adventure game enthusiast.


Solving issues in a creative way is the lot of a miniaturist but you have tackled and solved any problems with skill. The bathroom and visible hallway are looking exceptional!
Thank you! Of course I lay awake last night thinking about how I could fix that messed up corner…
Whew, I’m exhausted & amazed at your patience! It will look incredible though, certainly worth it.
Thanks!
you give me confidence that you can think, plan your way out of the inevitable mess ups and get to a great result. You even show that you can get to a ‘good enough’ situation and have it be fine. Thanks.
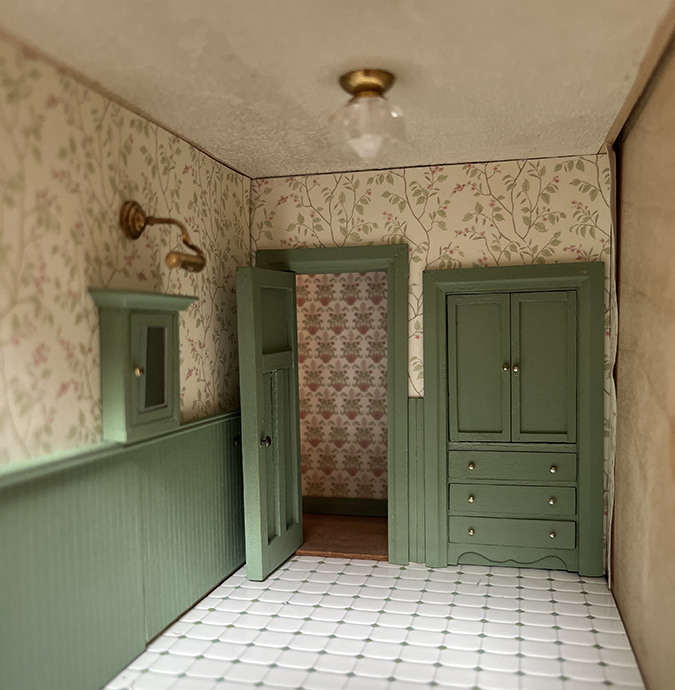
Nice work. I love that peak into the hallway – really adds dimension to the house.
“The right thing to do in this situation was… The wrong thing to do was this:” ???????????? I feel for you here, but your phrasing made me laugh out loud.