My Mansard Victorian didn’t come with any door holes in the walls. Since it’s a front-opening house, I decided to add false walls with doors along the back wall, to give the illusion that there’s a hallway there. The false wall gives me an opportunity to add a built-in linen closet to the bathroom. I love putting closets in dollhouses!
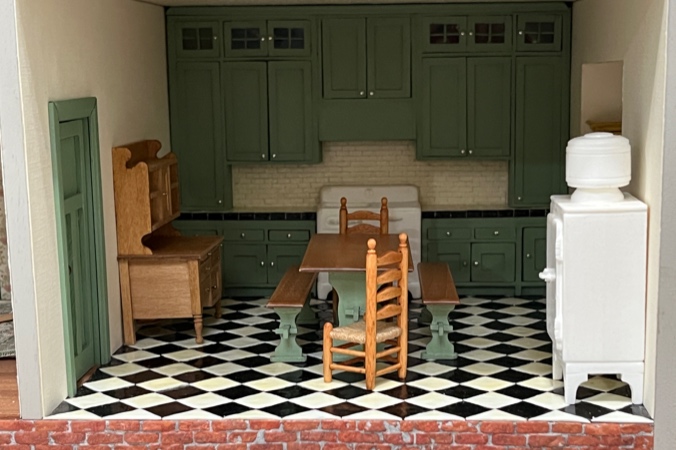
I’m not trying to recreate a specific era with this house, but the kitchen is 1920s-ish with its checkerboard floor, subway tile, Wedgwood stove, and monitor-top fridge.
The bathroom will have similar tiles, so I googled “1920s linen closet” to get ideas. I found this picture on Pinterest (here’s the original source).
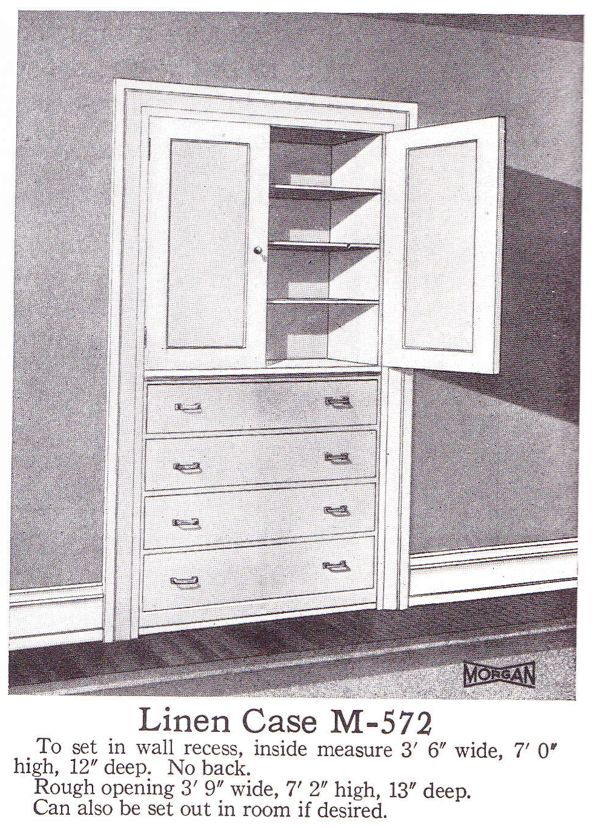
The person who posted it said it was from Homes and Interiors of the 1920s, a reprint of a 1923 catalog from the Morgan Woodwork Organization. I found a 1921 catalog from the same company on the Internet Archive, which doesn’t have this model of linen closet but includes a similar one with fold-down panels on the bottom instead of drawers.
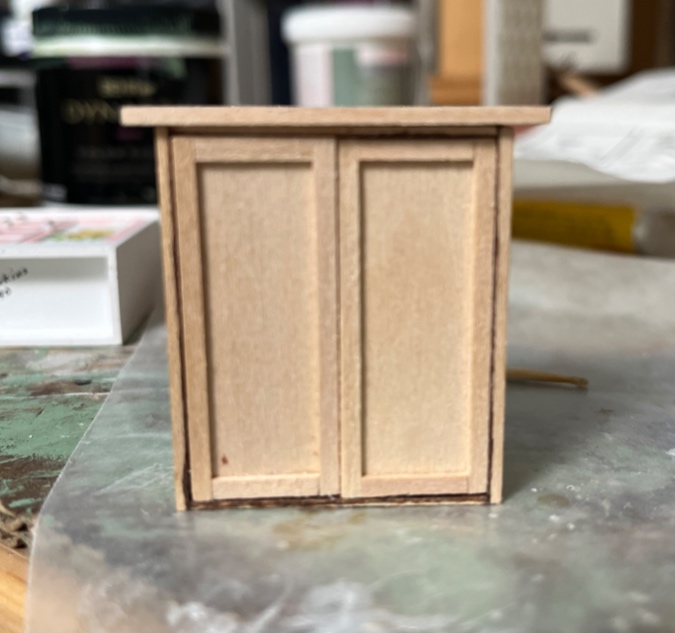
Like I did for the kitchen cabinets, I wanted to bash Cassidy Creations kits to make the linen closet. The bottom is basically a dresser — that’s easy enough. The top could be modified from a wardrobe, but the standard wardrobes were too tall. Cassidy Creations makes a nursery wardrobe that’s a little shorter.
Hmm…
Not seeing it yet? Bear with me! (No pun intended.)
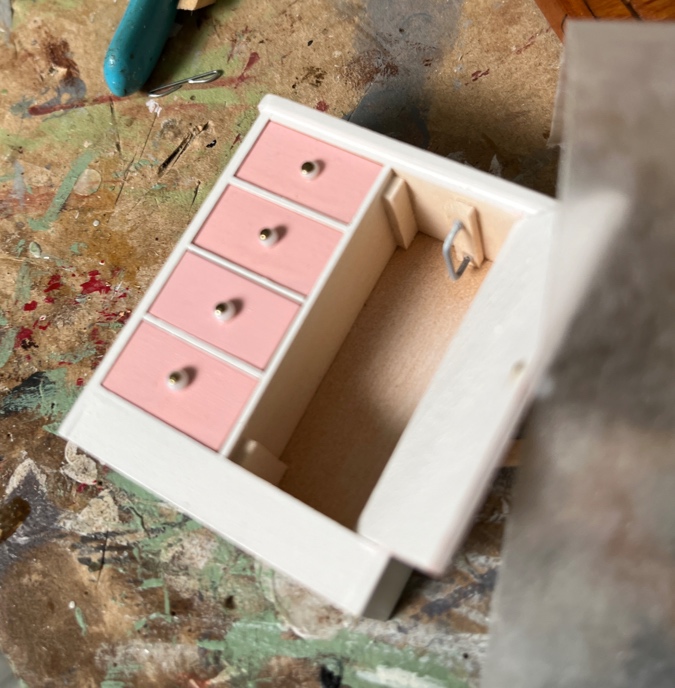
I once bashed one of these kits into a chest of drawers for the Victorianna.
I saved the leftover pieces (of course). That means I have an extra wardrobe door, which I can now pair with another nursery wardrobe kit to create the top of the linen closet.
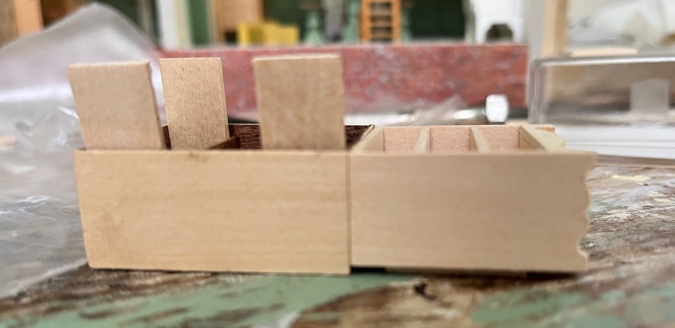
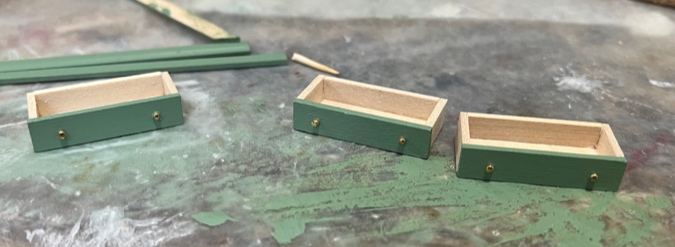
I started by building the dresser. I used the drawer fronts and bottoms as spacers between the dividers. Normally this dresser has a routed top, which I left off.
The wardrobe back is the same width as the dresser. The 1/16″ side pieces attach to the outside edges of the back, making the finished wardrobe 1/8″ wider than the dresser.
I cut down the fronts, sides, and top and bottom to the new width. I also made the back and sides a little shorter, to omit the base. Now they’re the same height as the doors.
The top and bottom have a hole drilled at one edge, for the pin hinge on the door.
I stacked these on top of each other with the holes on opposite corners. I poked the pilot tool through each hole to mark where the new hole should be.
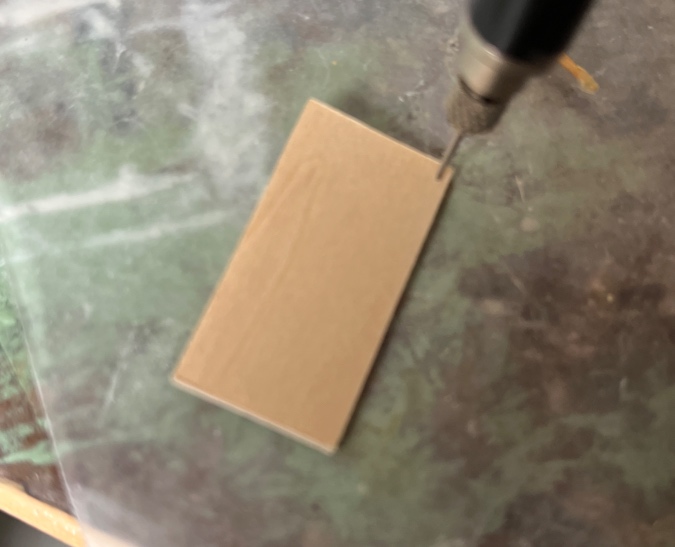
Then I drilled the holes with the finger drill. Now doors can be pin hinged on both sides.
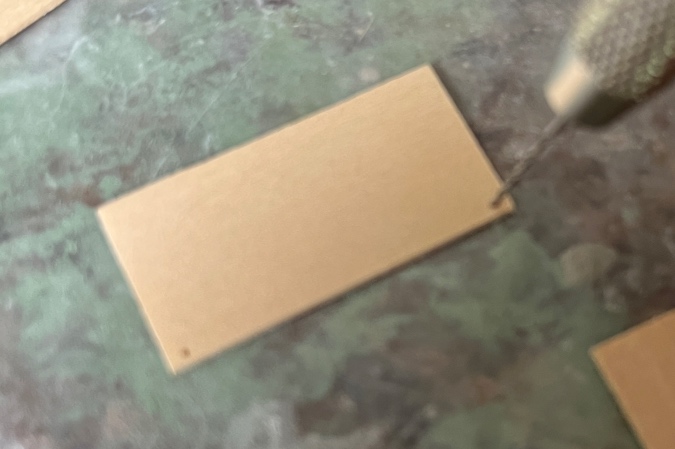
(Fuzzy pics, sorry! You get the point.)
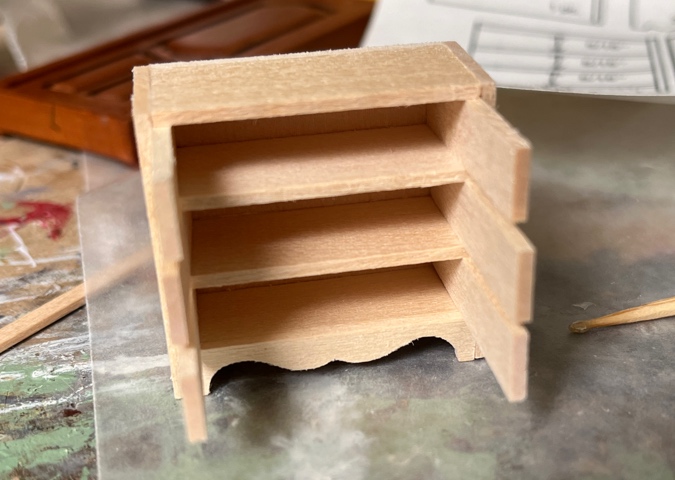
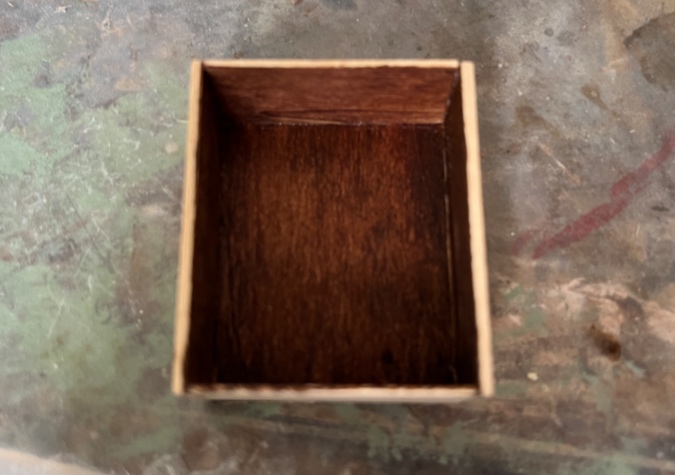
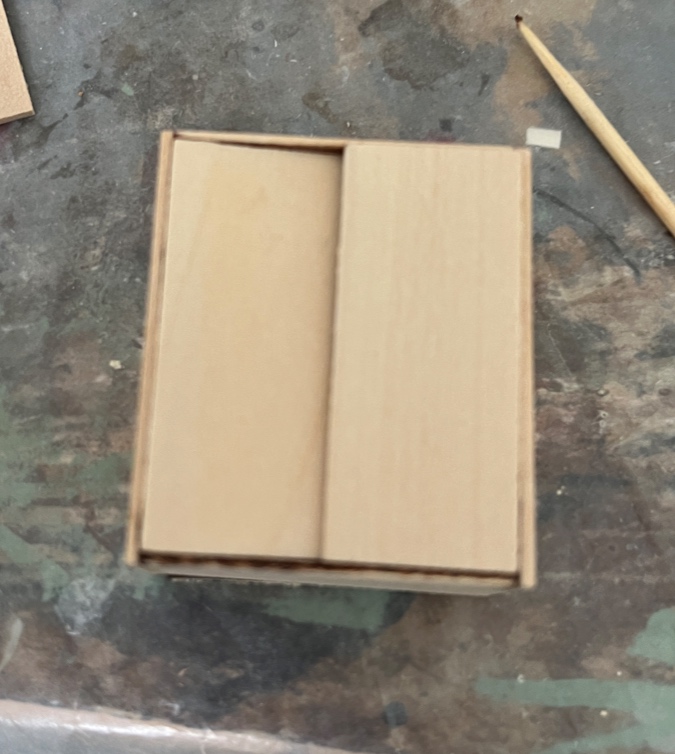
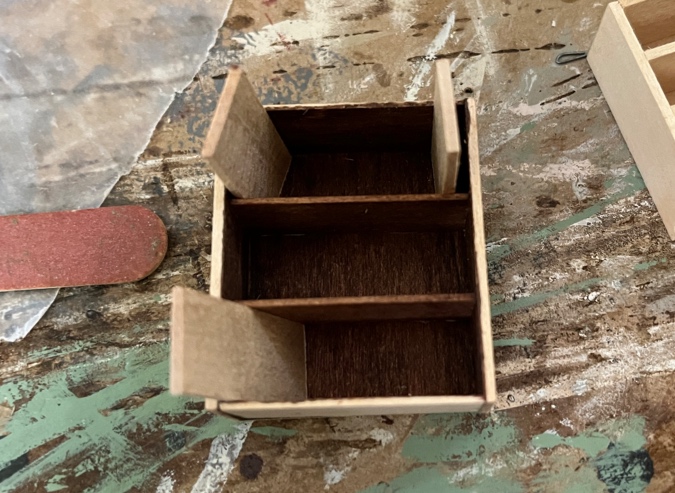
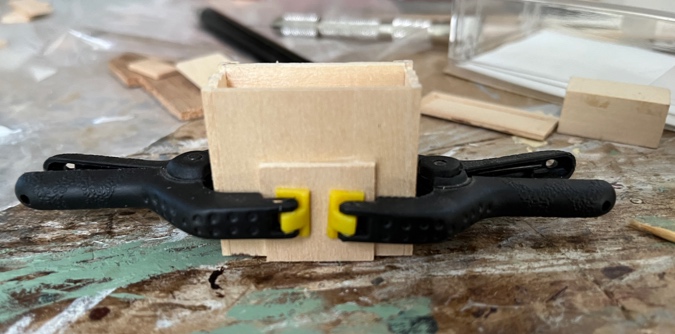
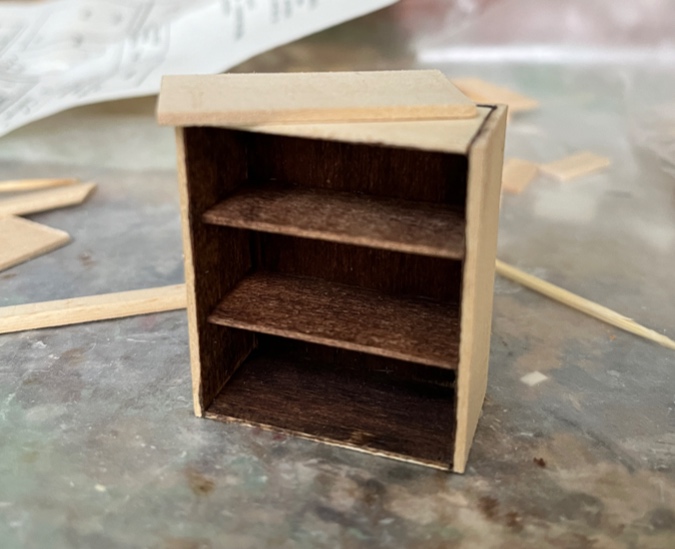
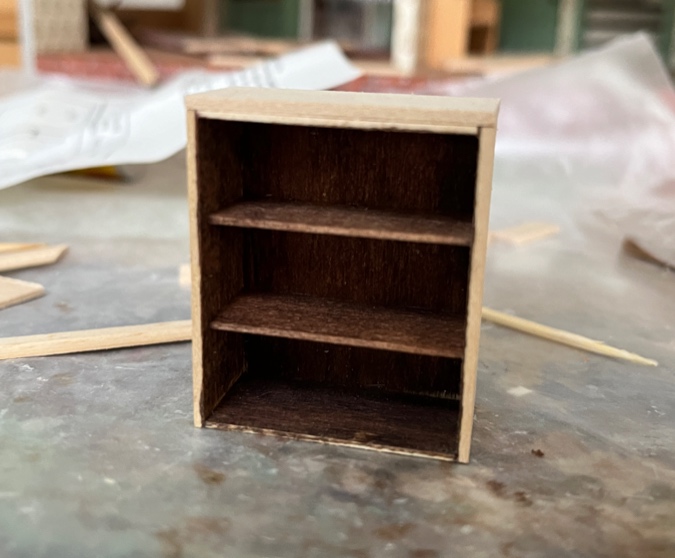
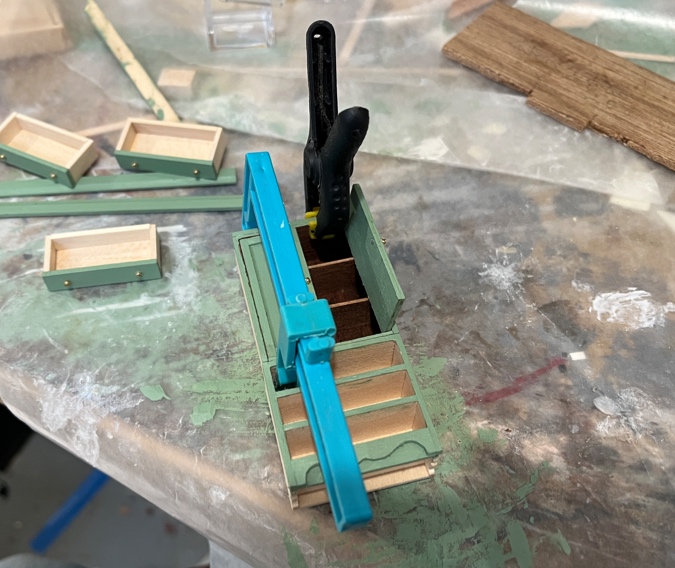
I stained the interior sides and assembled the box.
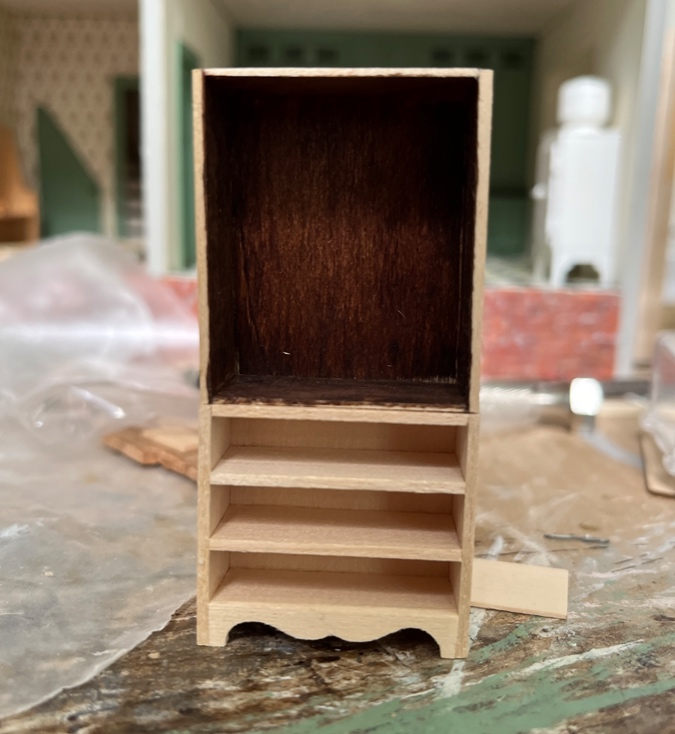
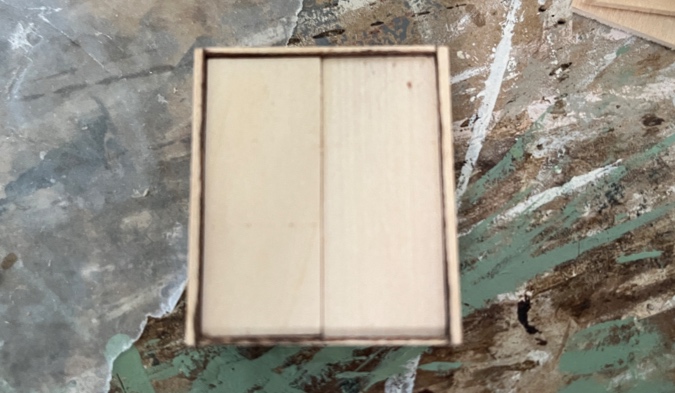
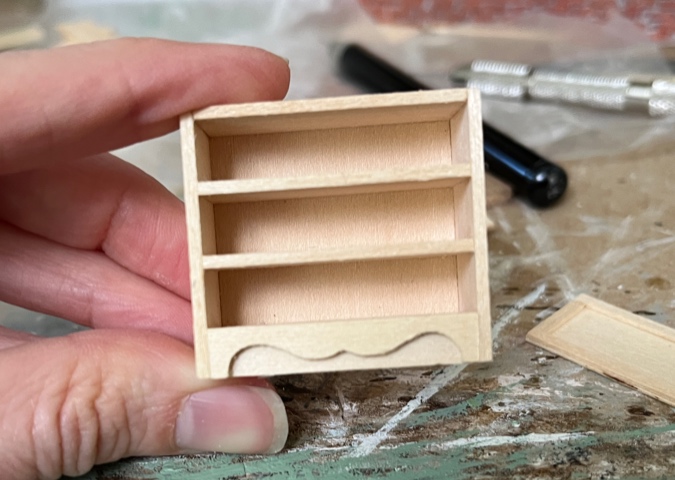
Here’s how the cabinet will look on top of the dresser.
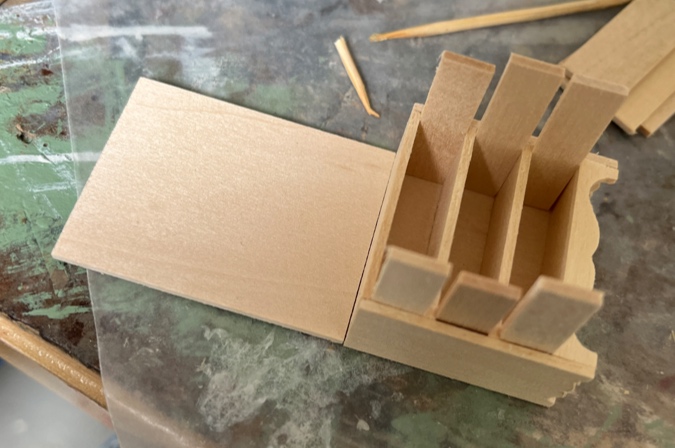
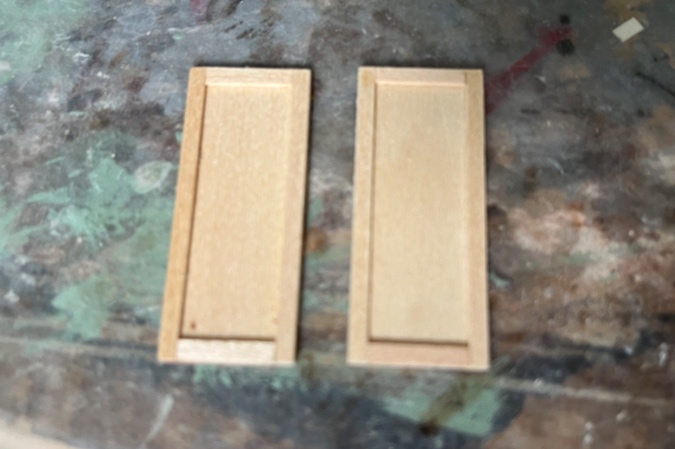
Thanks to the leftover pieces from the previous kit I bashed into a chest of drawers, I had two door pieces as well as two center dividers. These were all the same height and thickness, but the center dividers were slightly narrower.
They fit into the cabinet almost exactly, so I decided to use these for doors since they’d only need a small amount of sanding. If I’d used the actual doors, I would have had to cut each one down by 1/8″, and since the wood is very thin I might have ended up with a wavy edge.
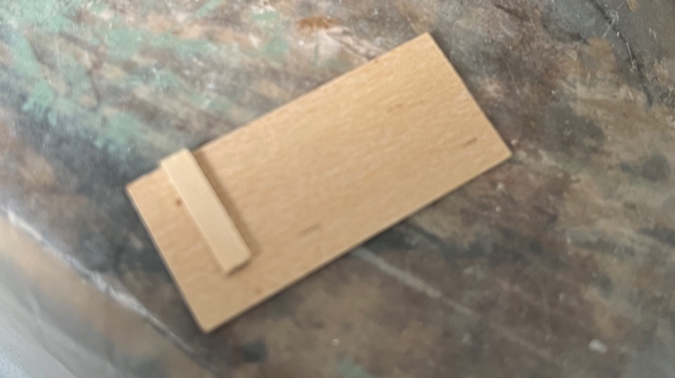
The wardrobe kit comes with doorstops that you glue inside the cabinet to prevent the door from swinging inward.
Using one of thes as a guide, I cut down the original door pieces to create two shelves. Now shelves will prevent the doors from swinging in, and I don’t need to add the doorstops.
I don’t care if the cut edge is a little wavy on these, since I glued the cut edge facing into the cabinet where you won’t be able to tell. The bottoms of the dresser drawers happened to be the right width to use as spacers for the shelves.
The wardrobe is about 1/16″ deeper than the dresser. If I were making this into a standalone piece, I would have modified the cabinet pieces to be the same depth as the dresser, but since I’m planning to recess this into the wall, it doesn’t matter.
I glued a piece of wood left over from the previous wardrobe kit to the back of the dresser. This pushes the dresser forward so the front lines up with the cabinet.
I sanded the doors a little with an emery board until they just fit in the space.
Then I glued on the door trim (the horizontal slats had to be cut down first). Once the glue dried, I checked the fit in the cabinet and sanded them a bit more.
Like the dresser, this kit would have had a top piece that extends past the front and sides of the cabinet.
I cut it down to the same width and depth as the cabinet.
Here’s how it’ll look. But before I can glue this piece on, the doors need to be hinged, since this top piece will cover up the pin holes.
Since the linen closet will be a built-in, it shouldn’t be open at the bottom. I cut down the front base piece out of the wardrobe kit to fit behind the decorative bottom of the dresser.
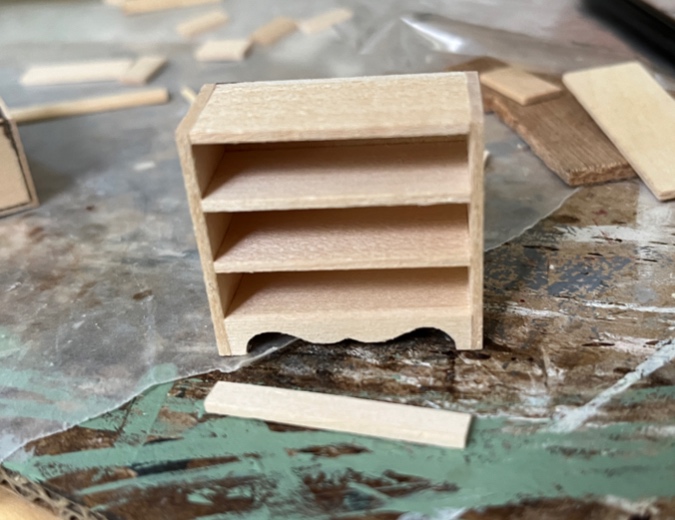
Alternatively I could have just used this piece for the front of the linen closet and saved the curvy piece for another time, but I like the look of this. It retains the charm of the Cassidy Creations dresser.
Time to paint! Since the cabinet will be recessed, I just painted the parts that will show.
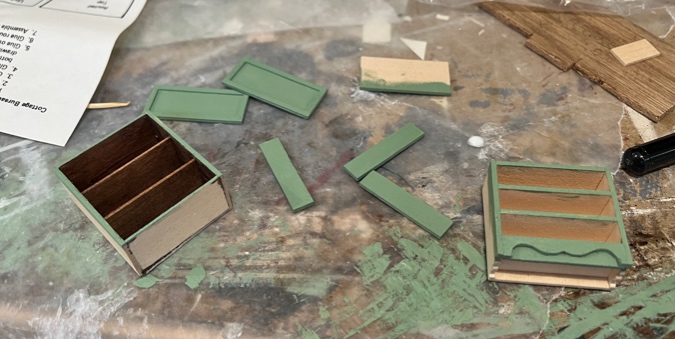
For pulls, I wanted to use the gold pins that came with the kits, but dressed up a bit. I had some little gold seed beads left over from a cross stitch project. Apparently it was a very long-ago project, because the plastic package had become brittle and it snapped in half when I opened it. Sigh.
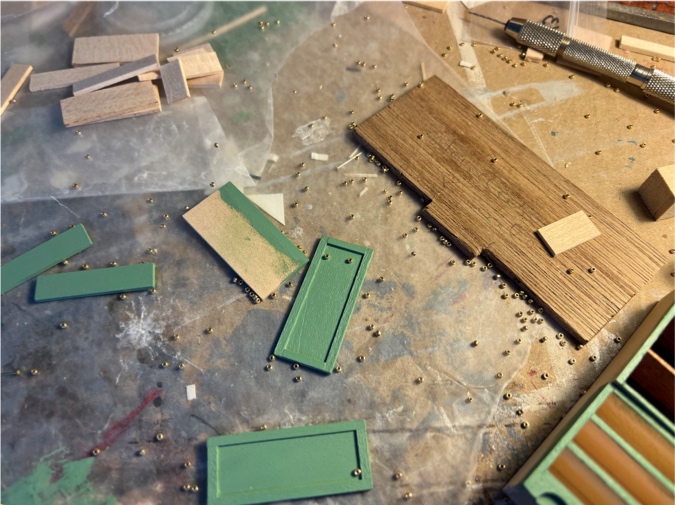
I don’t know how many beads ended up on the floor and immediately disappeared (as all tiny things do when they hit the floor), but I managed to salvage a lot that had fallen on the desk. The pin inserted through the bead makes a round gold handle.
The glue was still drying on the drawers when I stopped for today. They’ll need some sanding before I can insert them.
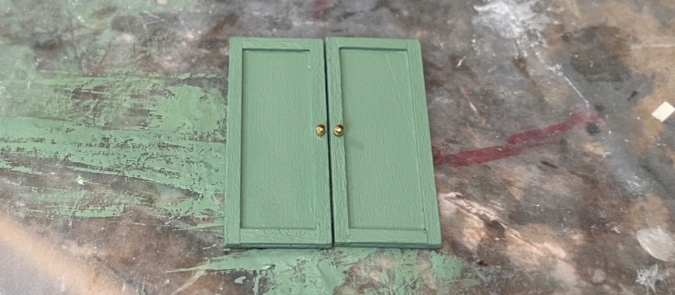
But I did pin hinge the doors and glue everything together.

After taking that last picture, I noticed a gap where the top piece wasn’t adhering snugly to the top of the cabinet box. I added more glue and clamped. When I come back to it next weekend, the cabinet will be ready for touch-ups.
 Emily is a freelance writer, miniaturist, and adventure game enthusiast.


You’re generous to share your progress and innovative strategies! You are both skillful and patient, and I always enjoy seeing your updates. Thank you!
Nice! I’m excited to see how it looks installed.
Emily, you rock!!!!!!!!!!!!!!!
Your comment about the tiny things disappearing reminded me of how interested you were in the “button in the floorboards” story you saw at Williamsburg. Remember? Think of the items disappearing as creating history for the future (or for The Borrowers.) The full size linen closet in our hallway has four flip down doors above three drawers. The “short closet” in your old bedroom that I just made duplicate drawers for originally had two flip down doors above three drawers but now has five drawers.
Great to see your ingenious use of pieces from one kit to create a piece of furniture that is needed and desired. Thank you for sharing your knowledge and creativity!
Wow such amazing work as always! I really look forward to your updates. Thanks for sharing & giving all of us ideas!
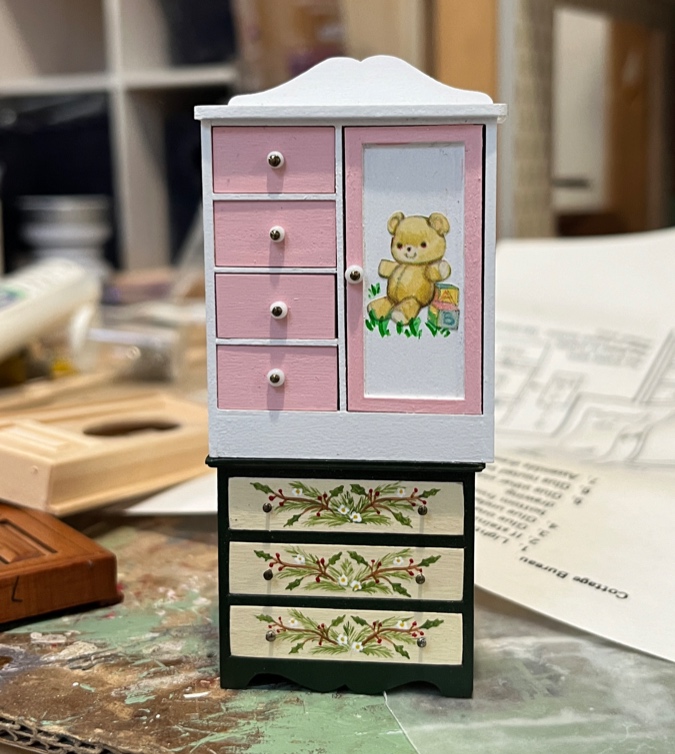
Great idea I’ll have to try! Think I have a baby set and really haven’t been inspired to do a baby’s room. This is a nice touch.