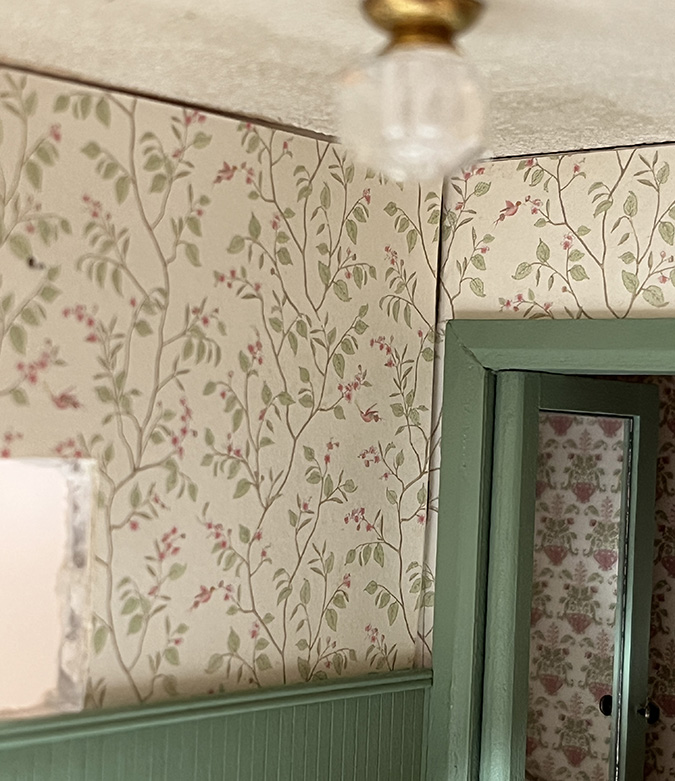
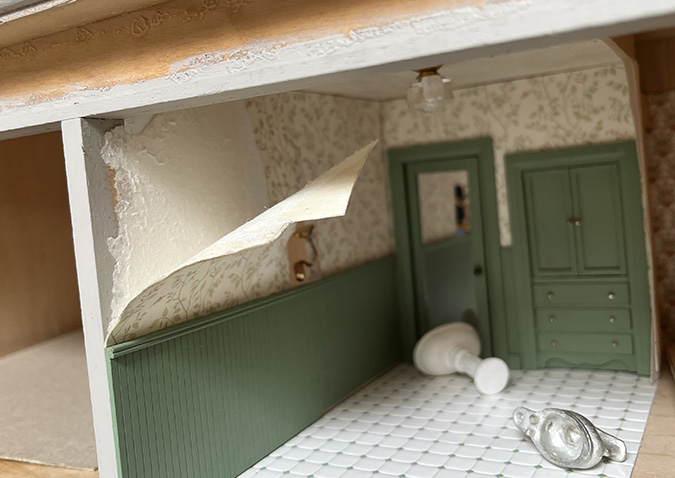
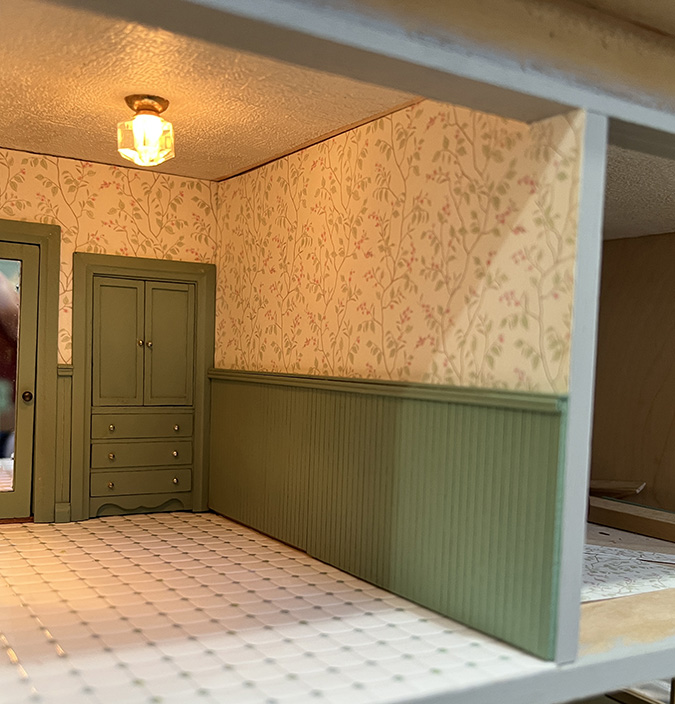
Immediately after I posted my last entry, I decided I couldn’t live with this awful corner after all and I started thinking about how I could fix it.
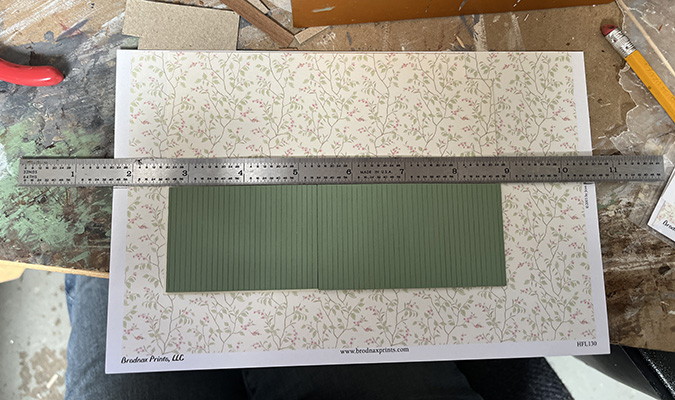
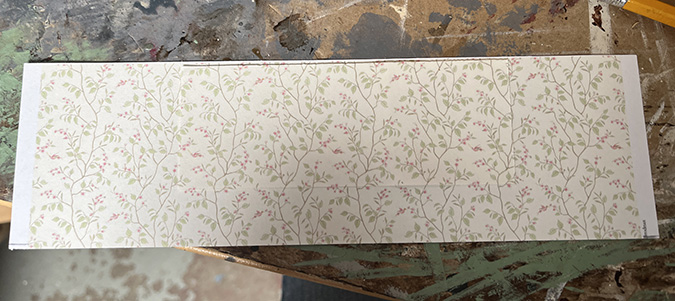
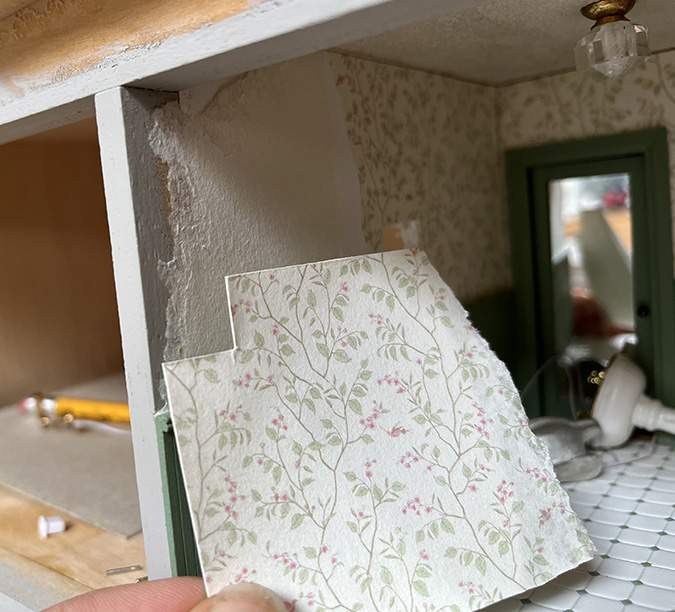
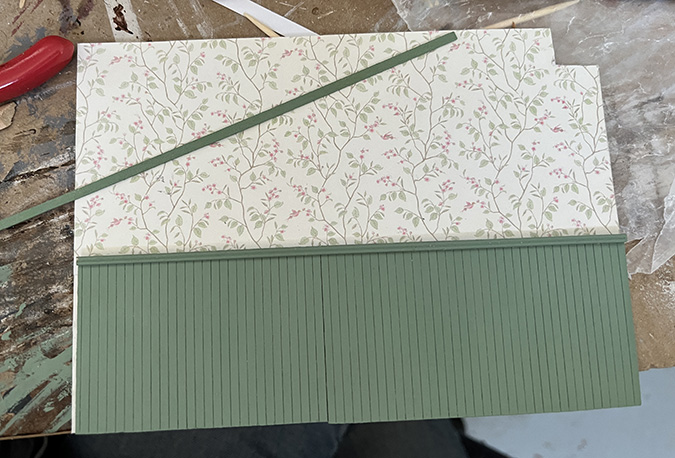
Turns out it wasn’t that hard. I started by laying the wallpaper/wainscot piece for the right wall (which wasn’t glued in yet) on top of a new piece of wallpaper, so the pattern lined up.
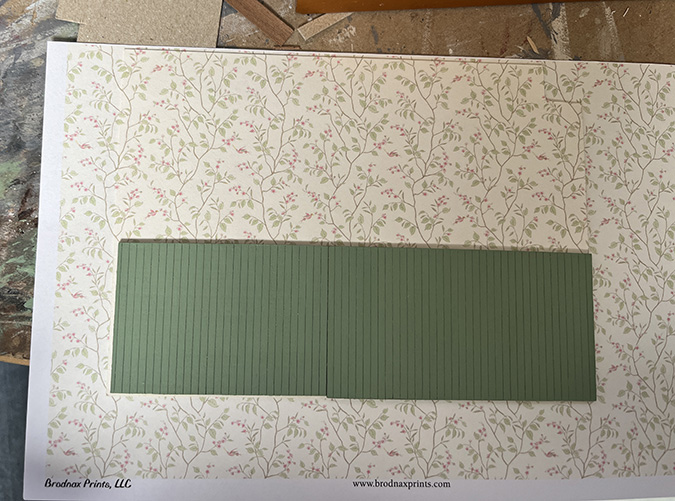
I laid a ruler against the top of the wainscot to mark the bottom of the wallpaper piece, and used my paper cutter to cut it.
Next I took a smaller scrap and held it up in the corner, cutting little strips off the side until the pattern lined up.
I laid the scrap on top of the piece I’d cut to the correct height, and used this to figure out where the edge of my new piece needed to be.
That’s going to look much better!
I then cut the notch at the front… and what do you know, I messed it up. Luckily I had a couple more sheets of this paper, so I was able to prepare another new piece.
A few days earlier I’d picked up a new can of UV spray from Michaels. Since I couldn’t remember if I’d already sprayed the paper for the right wall, I sprayed it too.
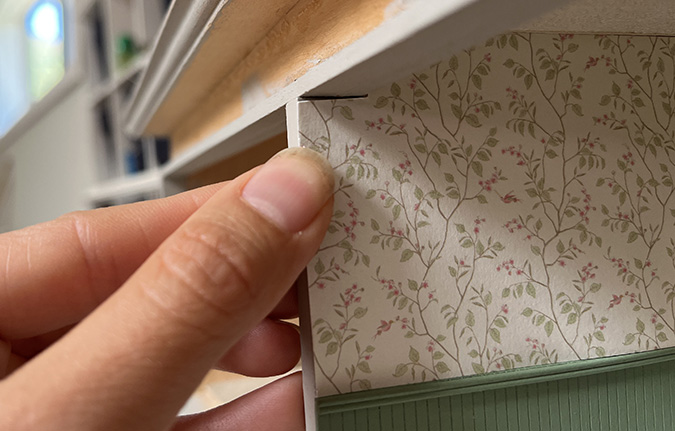
Because my wallpaper / wainscot / scrapbook paper wasn’t pushed all the way forward when I glued it in, the edge of the paper and wainscot extends slightly past the edge of the wall. I can’t fix the wainscot (and it’s not that bad), but the edge of the paper bugged me. I had tried curling it to wrap around the front edge of the wall, but it didn’t really work.

I decided I should remove it so I could have a clean edge here. It peeled up easily.
I used an Xacto knife to slice it where it meets the wainscot, and removed just this piece.
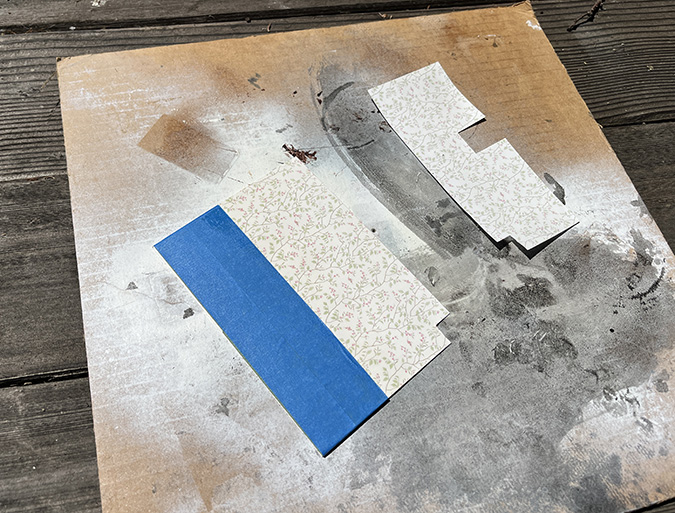
I didn’t want the new piece of wallpaper to be wrinkled when I glued it to an uneven surface. I used the Xacto knife to cut off a sliver — just enough so it will look neat on the front edge of the wall. Then I glued the torn piece back on the wall.
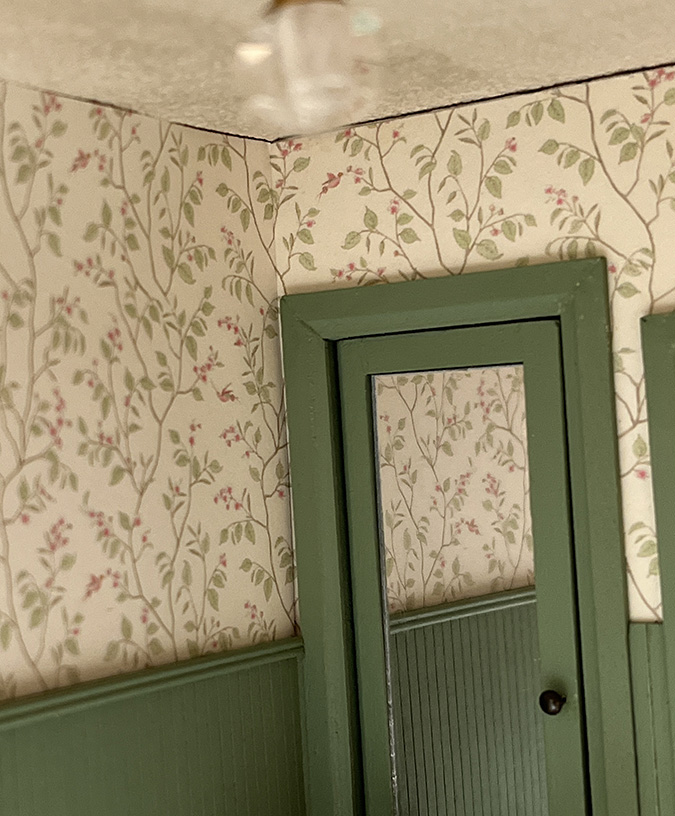
Ironically, you can barely see the seam — it’s a lot less obvious than the corner I’m trying to fix!
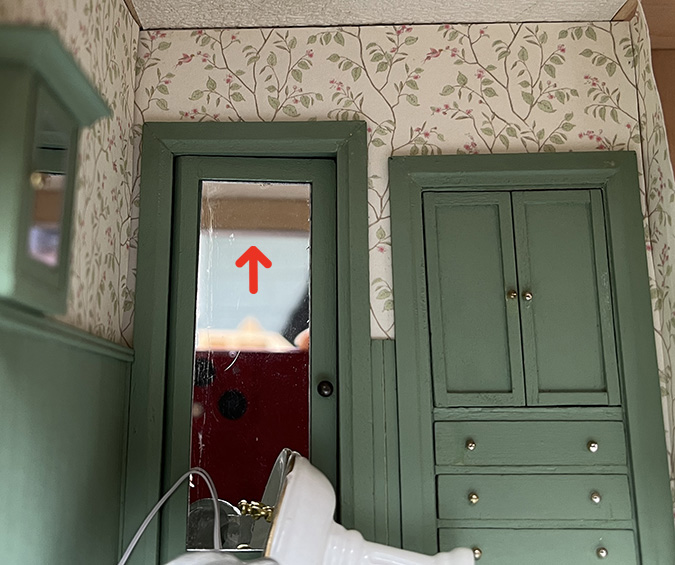
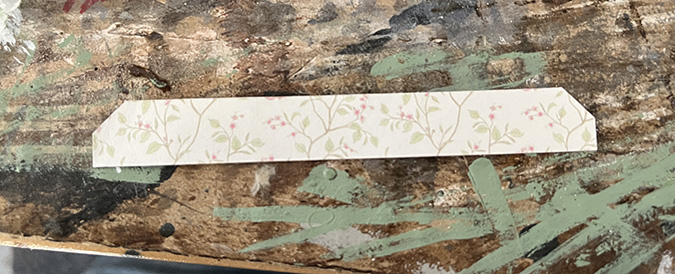
While I was working on this, I noticed that the unpainted back edge of the front trim is visible in the mirror on the back of the door — only if you hold your head in a specific and unnatural position, but still. I prepared a strip of wallpaper to add once the right wall was glued in. I didn’t bother trying to match the design on this one.
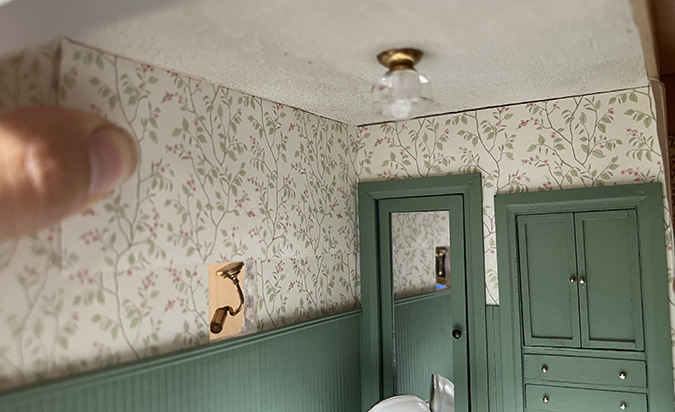
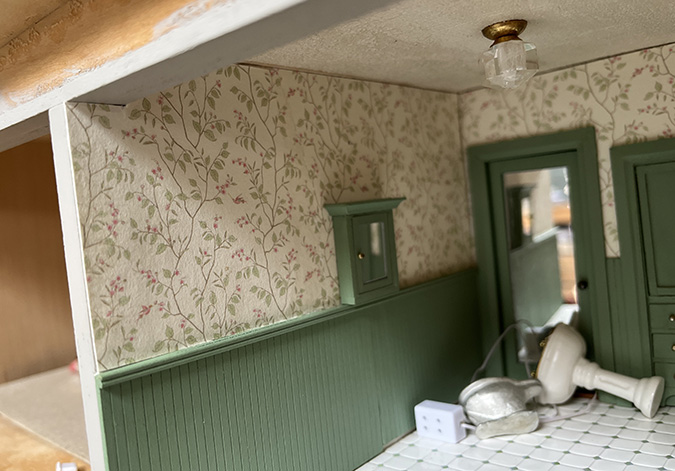
I glued in the new wallpaper piece, and then put the wall light back and reattached the plug. The new piece of wallpaper bows out in the corner, because the wallpaper and scrapbook paper underneath it was not flush against the wall. So it’s not a straight line running parallel to the door trim, but this looks much better than it did before.
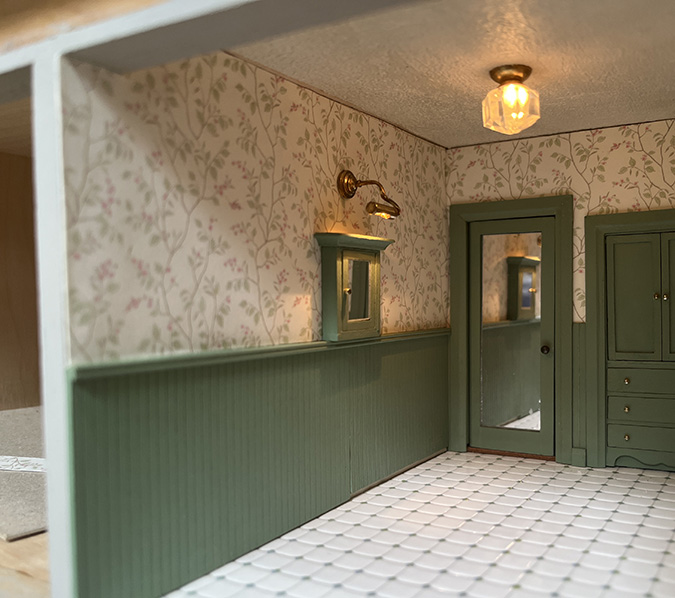
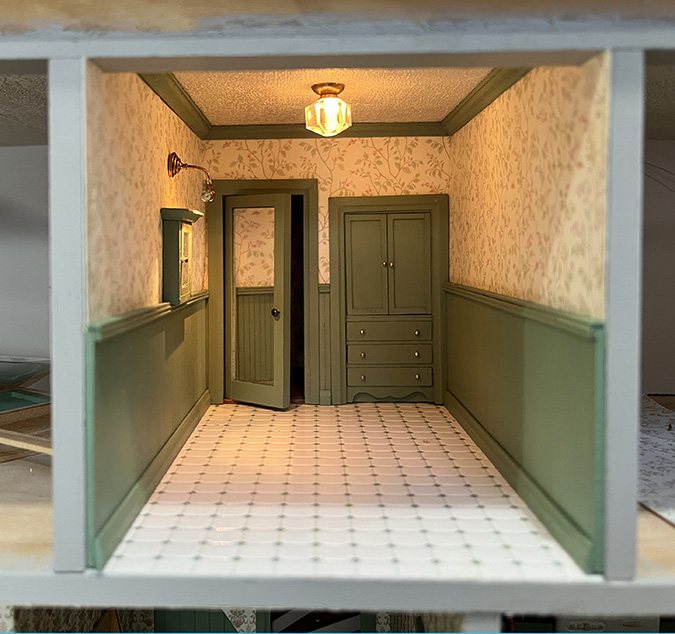
Here’s how it looks at the front. Nice and neat.

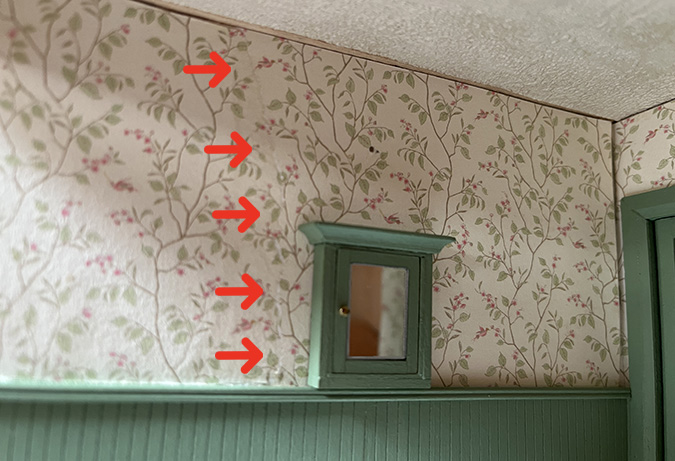
And then I noticed this. When I was playing with the piece of wallpaper to line it up at the upper corner, I didn’t notice that the bottom wasn’t flush against the wainscot. You can see a sliver of the old wallpaper underneath. Argh.
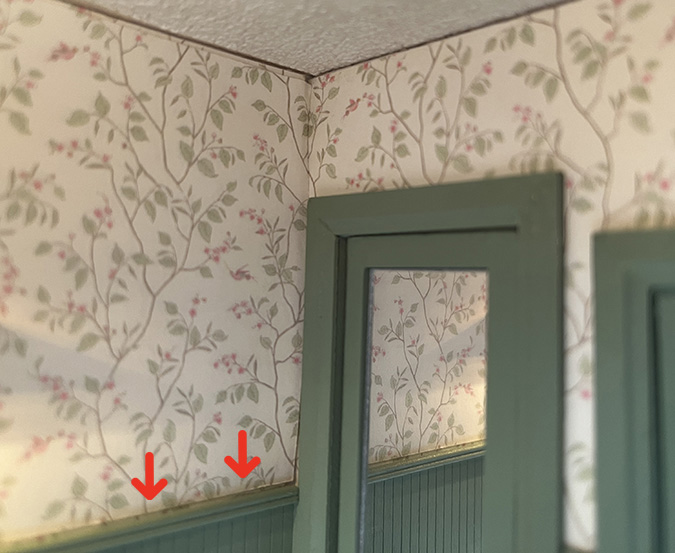
To be fair, you only see this from a certain angle, and it’s much less egregious than the flaw I was covering up. But I still couldn’t live with it. I pawed around in my stash and found a piece of strip wood to rest on top of the double bead.
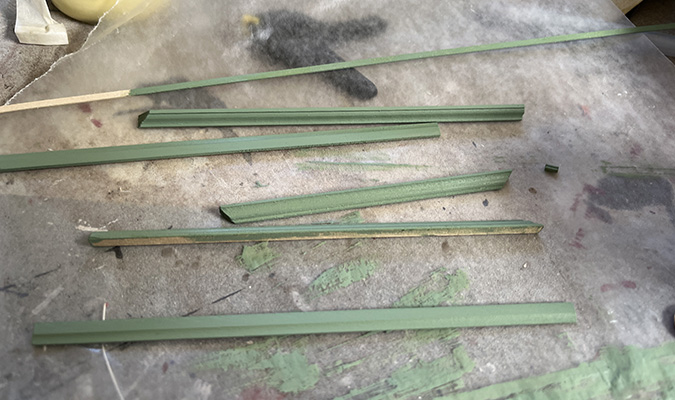
While I was at it, I also prepared crown molding and baseboard.
At this point, I was finally ready to glue in the right wall.
Then I glued the wallpaper flap to the wall. This piece had come partially separated after I scored it too vigorously, and I glued on a piece of scrapbook paper to help hold it on. Even so, you can see the cut line, and I wasn’t sure if that would get covered up by the wallpaper butting up against it.
After what happened in the other corner, I didn’t want to chance it. I wedged a piece of wood against the wall from the other side, pushing in the wall and hiding the cut line, and left it this way to dry.
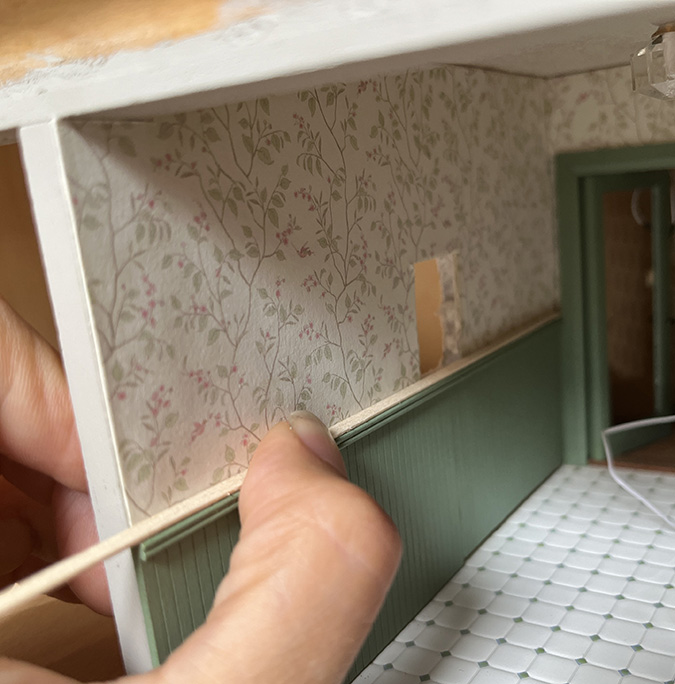
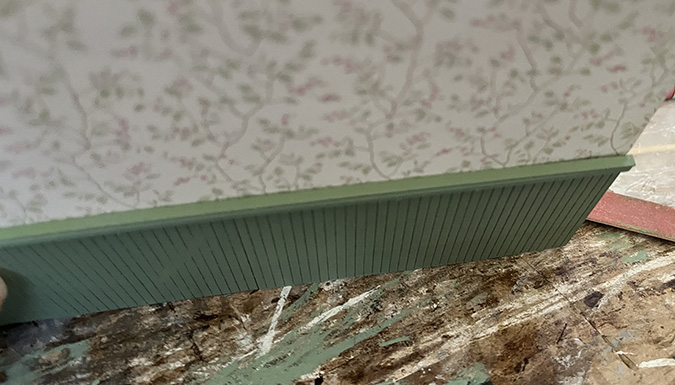
Time to finish up the wallpaper/wainscot piece for the right wall. First I added the double bead.
Then I added the trim piece on top of it. This gives the top a cleaner look than it had before.
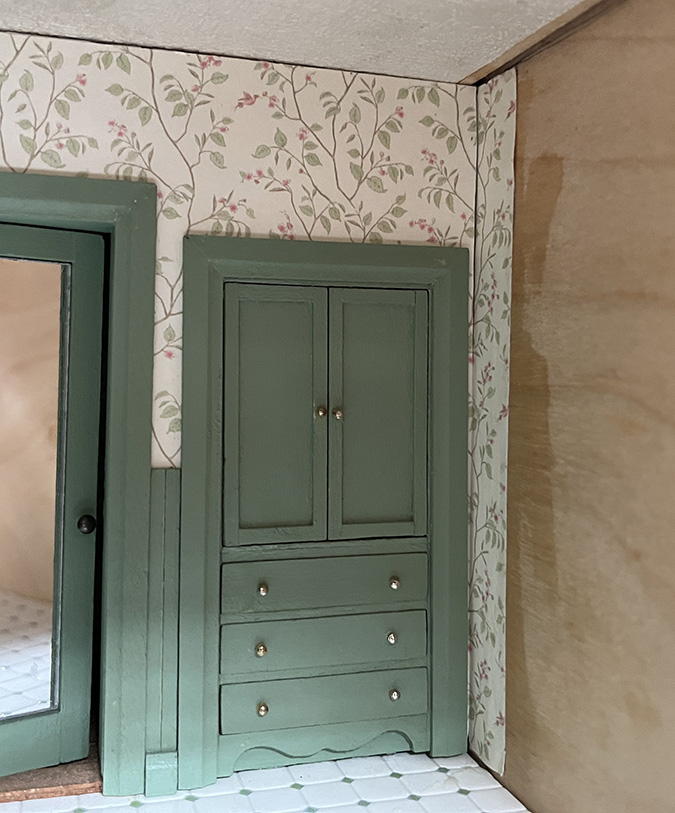
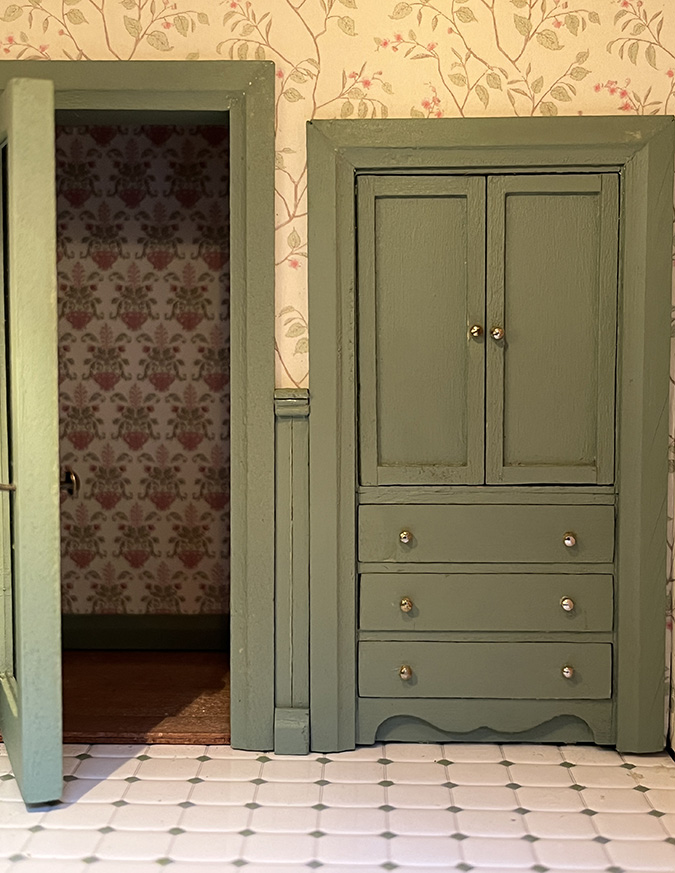
I also added double bead and the top trim to the sliver of wainscot between the door and linen closet. Admittedly this would have been easier if I’d done it before gluing in the right wall, but I was able to push them into place with a toothpick relatively painlessly.
Next I added the trim to the left wall.
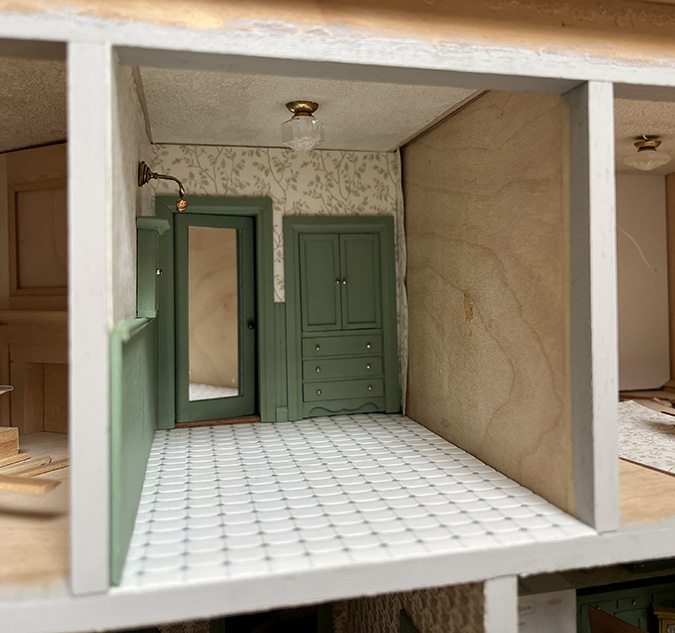
I glued in the wallpaper/wainscot on the right wall.
And then added the baseboard and crown molding.
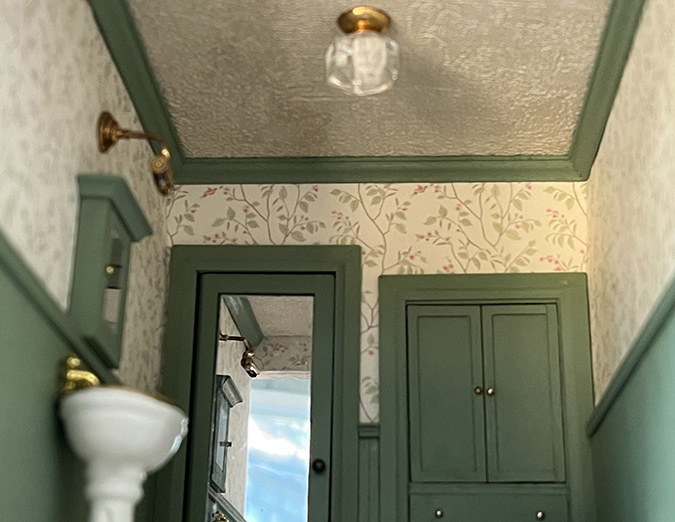
I got a little ahead of myself here — I should have glued the strip of wallpaper to the back side of the front trim *before* doing the crown molding. Rather than pull the crown off, I notched the wallpaper at the sides to accommodate the crown molding.
Technically there should be crown at the top of this, too, but I didn’t want to mess with it. You don’t see an unpainted piece in the mirror anymore, and that’s good enough.
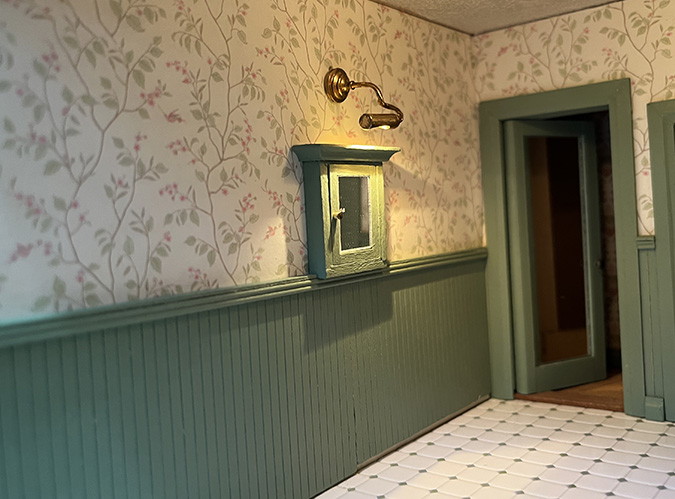
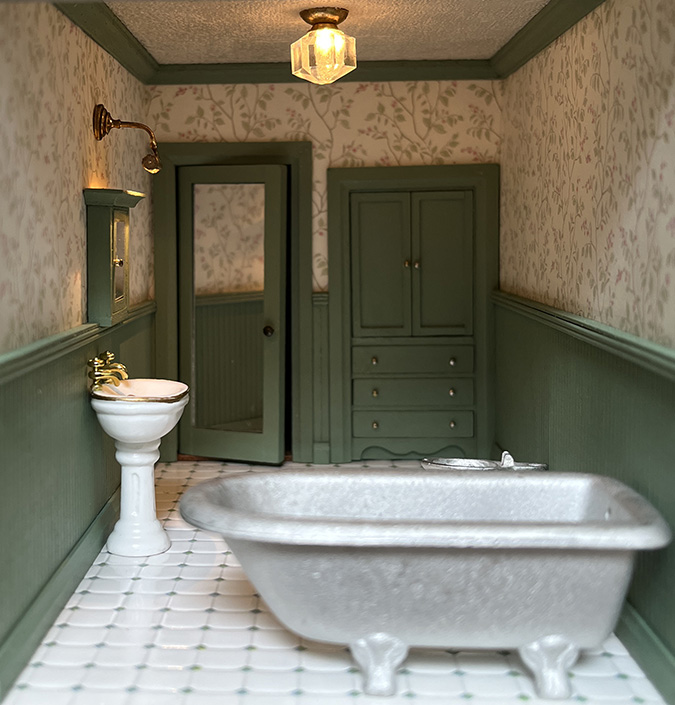
As soon as I glued in the crown molding, I wondered if I should have made it white instead of green. There’s a lot of green going on in here! But there are other rooms where green crown molding makes sense (like in the living room around the fireplace and built-in bookshelves) and I want to be consistent throughout the house.
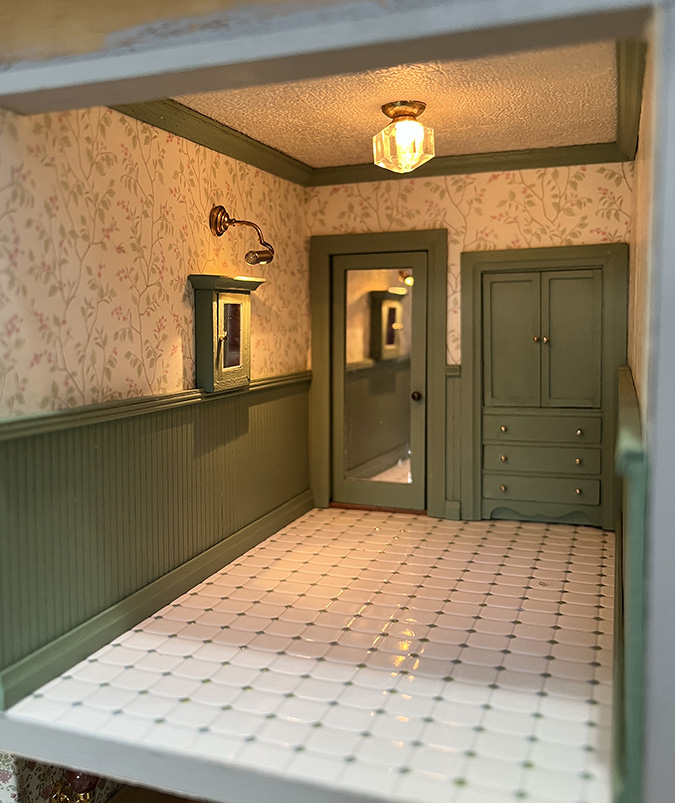
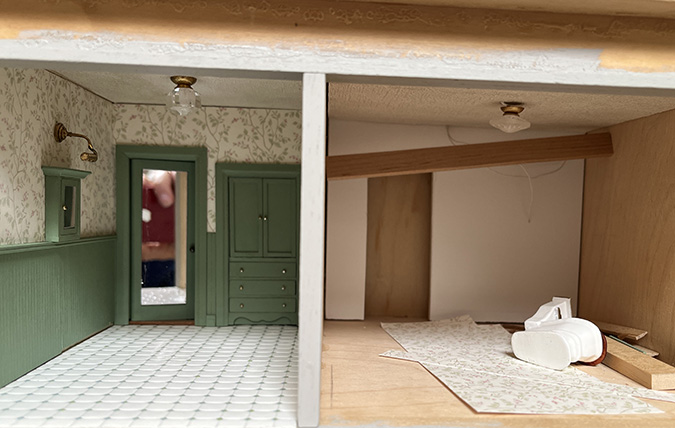
I still have to assemble and paint the Cassidy Creations fixtures for this room. They’re metal, and I’ve never done pieces like this before, so it might take me a while to wrap my head around it. I’ll work on the bedrooms on either side of the bathroom first.
 Emily is a freelance writer, miniaturist, and adventure game enthusiast.


Looks fabulous!
I am in awe at your attention to detail!
So glad Daisy paused her puppy antics long enough for you to share this update. In the interest of possibly helping you find time to also finish your novel, I will share this idea from having been in the kennel business…literally a freezer full of peanut butter stuffed Kong toys. Depending on the ambient temperature, they could last 2 hours or more. Bathroom is super cool!
Haha Daisy tears through a frozen Kong in 20 minutes or less. She has a strong jaw! For my last dog, Rosy, I just stuffed a few cubes of cheese in the tip of the Kong and it kept her busy for hours.
So nice to get your update! Your perfectionism and fine skills continue….what a joy to read (and see the photos, too, of course)! I love the color scheme and fixtures. Thanks for continuing to post your updates!
Your uncompromising attention to detail inspires me, friend! I also appreciate how you show us the reality of how fussy and fiddly doing quality work in a miniature scale can be. Makes me feel less alone! Beautiful work!
Thank you! I’ll post about the Treasure House soon!
I adore all of your work.
Thank you!