I’ve received a lot of comments from readers of my blog thanking me for documenting my mistakes. I never really set out to do that — I guess I just make a lot of mistakes! This is going to be one of those posts.
As of my last post, the Victorianna’s scratch-built kitchen was almost finished. I’ve found that big mistakes often happen when a project is almost finished — I try to tweak one last little thing and the house of cards comes crashing down. In this case it was the floor. In the nearly four years (!) since I laid the hardwood, it had gotten kind of dingy. Dust got into the grain of the wood and so it looked like the wood had white scratches and speckles all over it.
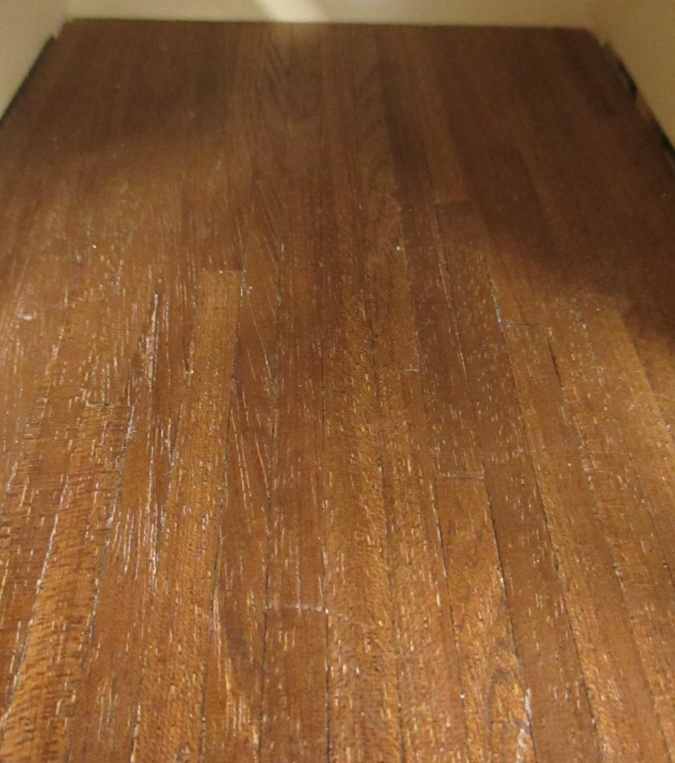
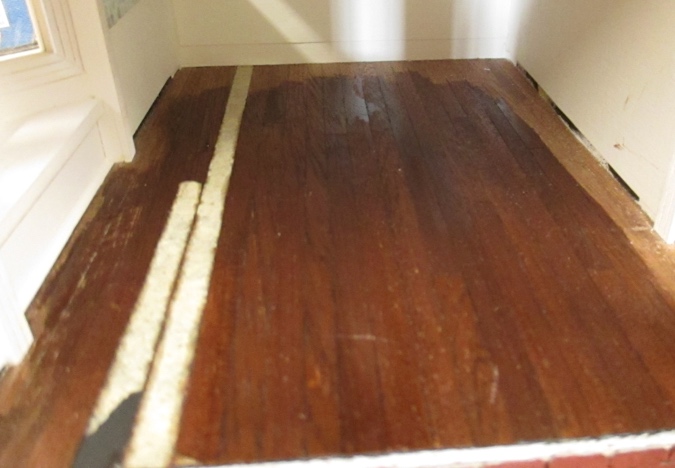
I thought I could fix this by staining over it. In fact, I was so confident in the idea that I jumped right in without doing a test piece first. In my mind the stain was going to match the floor color completely. In fact, it didn’t. (Who could have predicted that?!)
Since the whole house (except for the bathrooms) has the same floors, now my kitchen didn’t match the rest of the house. No way I was going to stain ALL the floors, which would require removing baseboards and very likely messing up the wallpaper… that house of cards is about to topple!
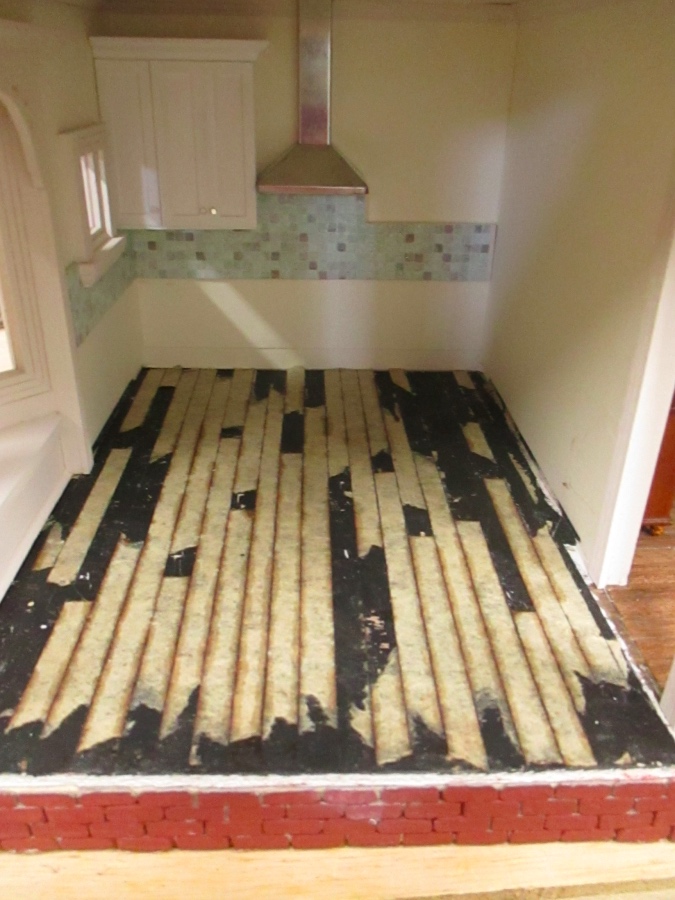
So I did something perfectly reasonable: I ripped it out.
Most of the boards ripped off the paper backing, leaving the sticky part behind. (If you weren’t following along back then, here’s how I made the floors from micro veneer.)
This isn’t my first re-do of the kitchen floor. Originally I’d intended for it to be tiled, but the tile came out crooked. I ripped that out and redid it with hardwood on a whim, but now that I’d ruined it, I started thinking about tile again. Since making a backsplash out of scrapbook paper had turned out well, I decided to try something similar on the floor, but with a bigger tile.
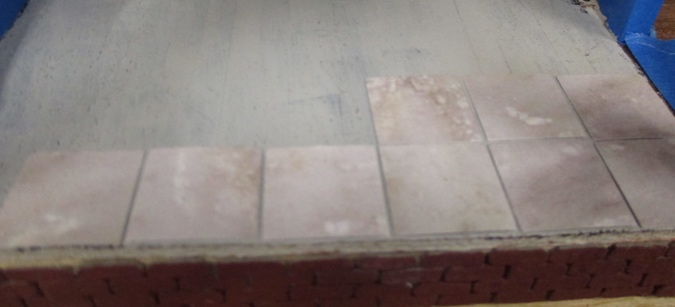
I bought a 3/4″ square paper punch and two scrapbook paper options – one black “chalkboard”, and one marbled white.
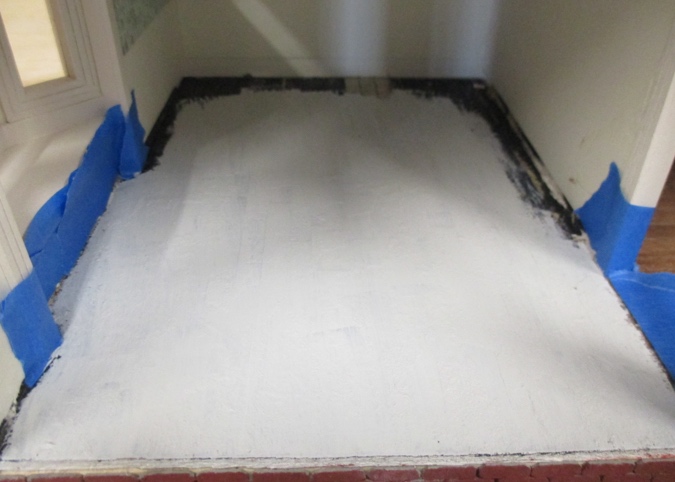
I couldn’t make up my mind which I liked better so I decided to cut both of them up and see how they looked. First I painted the floor gray for the grout lines. I didn’t paint all the way to the back since that part will be covered up by the cabinets.
The marbled paper had some color variation that resulted in two very different shades of tiles.
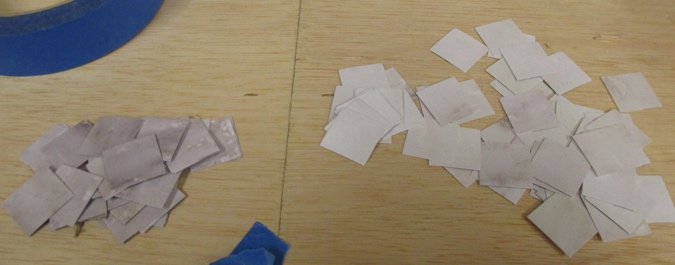
Mixed together, they were too different.
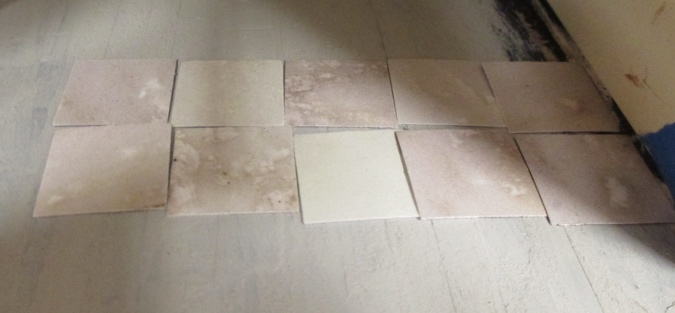
The light ones had some variation within them that didn’t look good to me — some had a pinkish tint and some a greenish tint. I tried laying out just the dark ones, and they look tile-like enough, but I didn’t like how this color looked with the green backsplash.
Next I tried the black. These had white edges from cutting through the paper, which actually works well as grout lines if I put the tiles right up against each other.
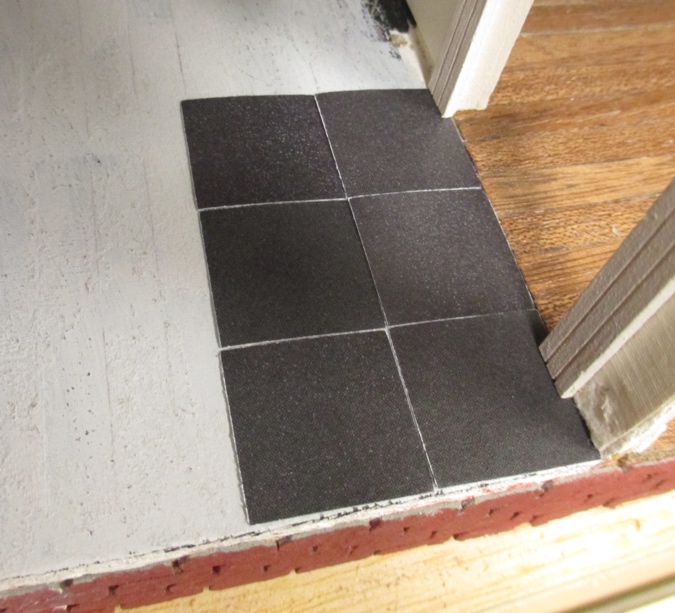
But I still wasn’t sold. I painted some of them with Gallery Glass like I did the backsplash tiles, which did make them shiny, but they weren’t stiff and I was concerned about lining them up neatly, especially farther back in the room. After I’d tried to tile this room once and did a bad job, I didn’t want to waste more time and effort on something that might not work. In other words, I chickened out.
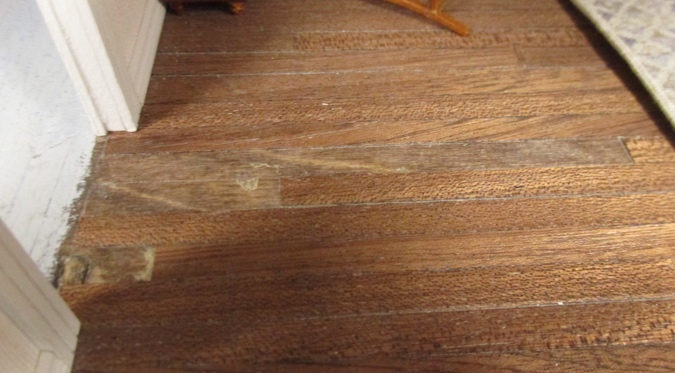
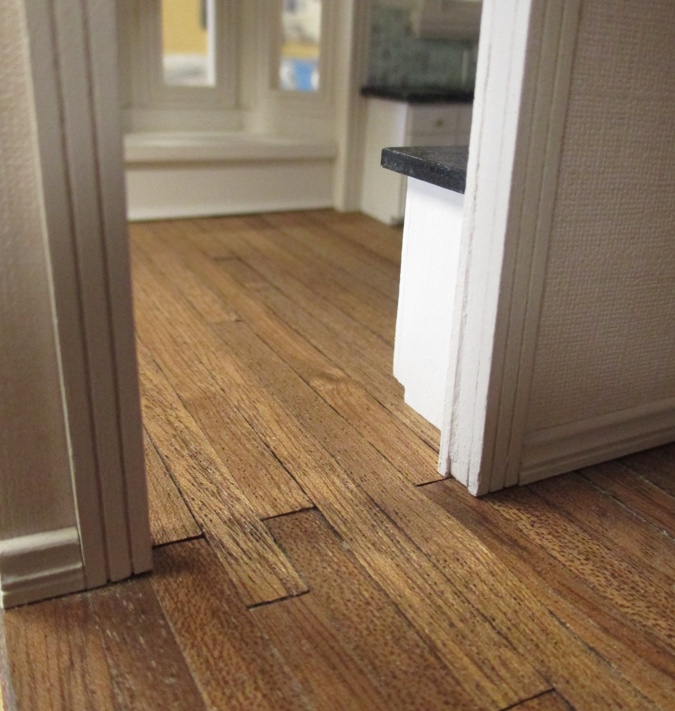
All-righty then, on to Plan B — redoing the hardwood floors. It had bugged me that the boards ran in a different direction than the dining room. I’d done that since I had it in my head that floorboards should run the length of the room. I’ve since learned, after getting hardwood floors installed in my own kitchen, that they traditionally run perpendicular to the joists. So it doesn’t make sense that they would abruptly change direction from one room to another.
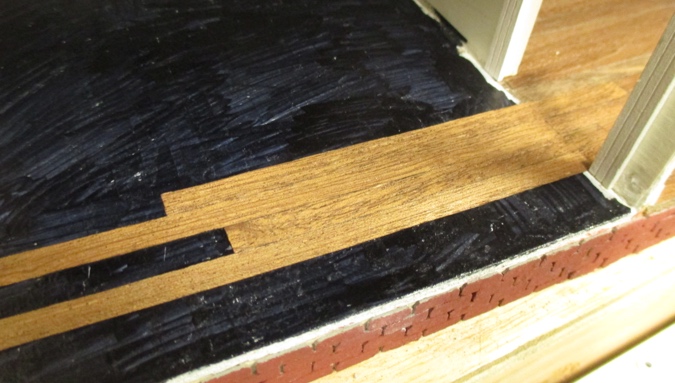
I didn’t want an obvious line of new boards in the doorway, so I ripped up a few of the dining room floorboards to be replaced with longer ones. (The floor under this was stained so it’s a little hard to see.)
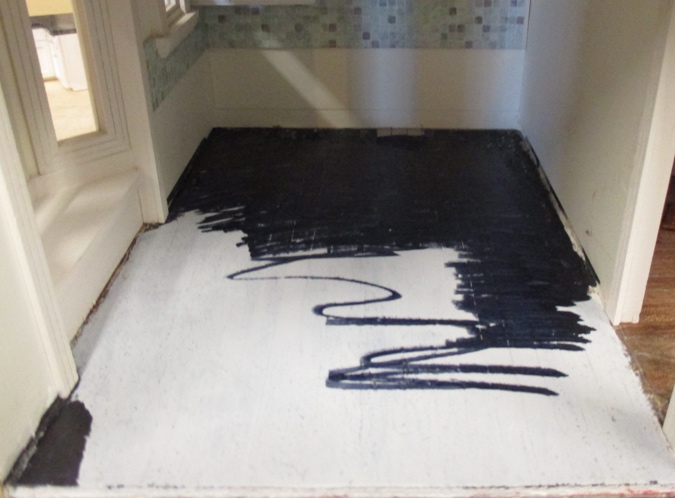
I didn’t want the gray paint showing through gaps in the floors but also didn’t want to risk getting black paint on my walls and trim, so I took the quicker and less potentially disastrous route of coloring over the paint with a black marker.
I started with the boards in the doorway and worked my way forward. The white stripe over the bricks (the exposed edge of the plywood) will get covered up with trim.
Then I worked my way backward.
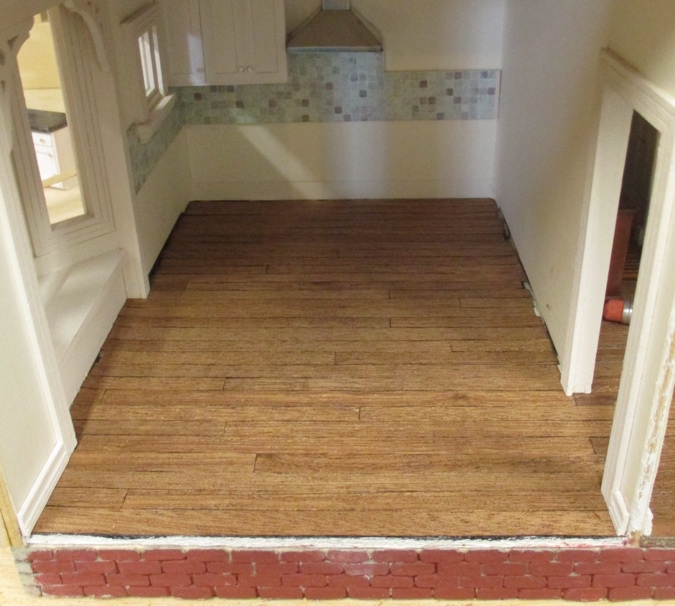
In hindsight I should have pulled up one or two more of the floorboards at the door, but it’s still better than it would have been with a straight line across the doorway.
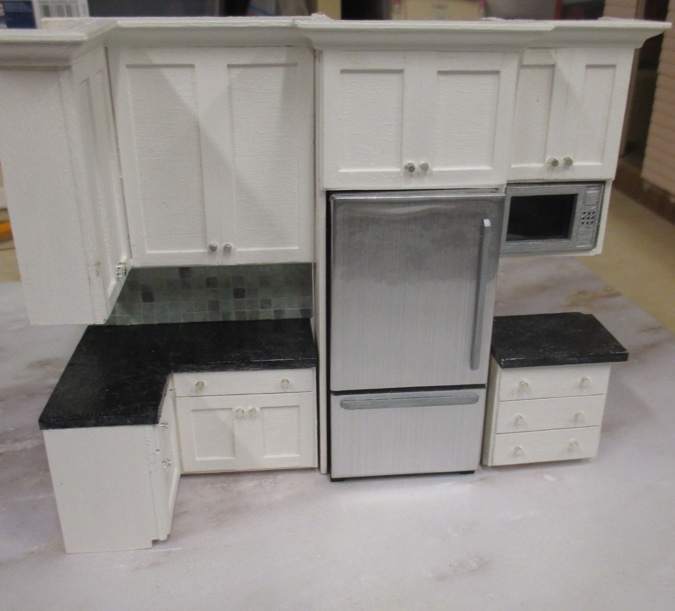
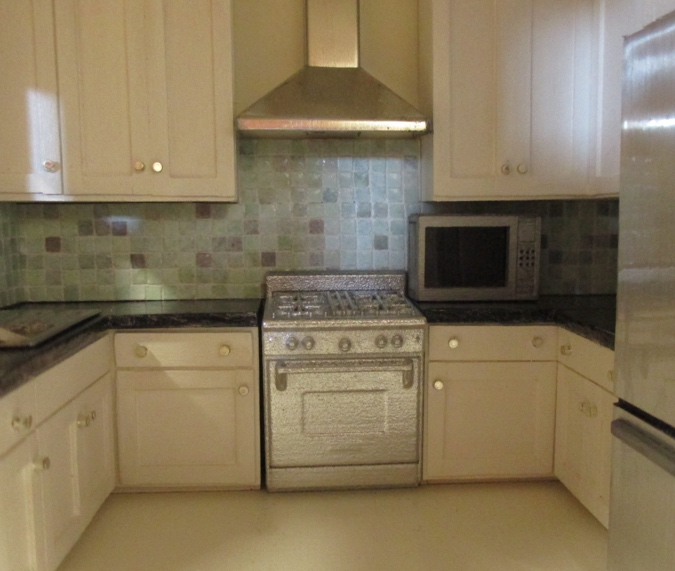
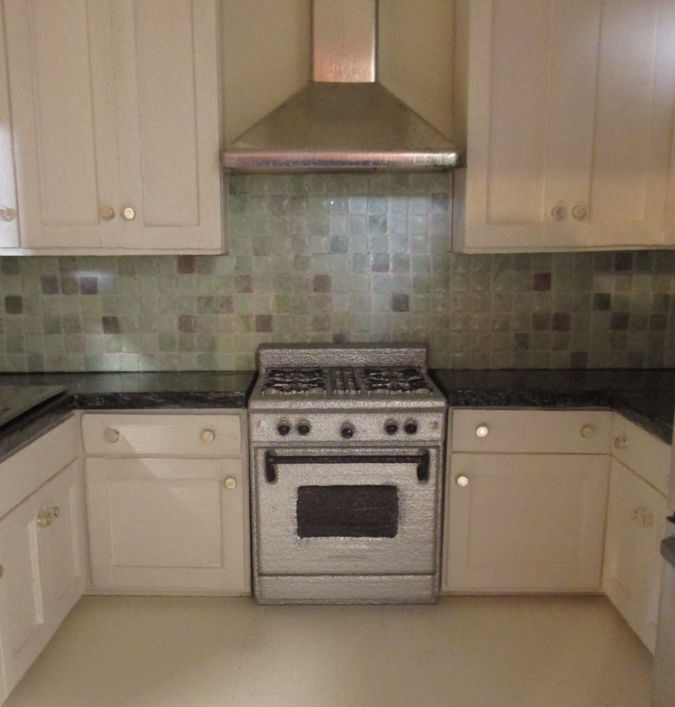
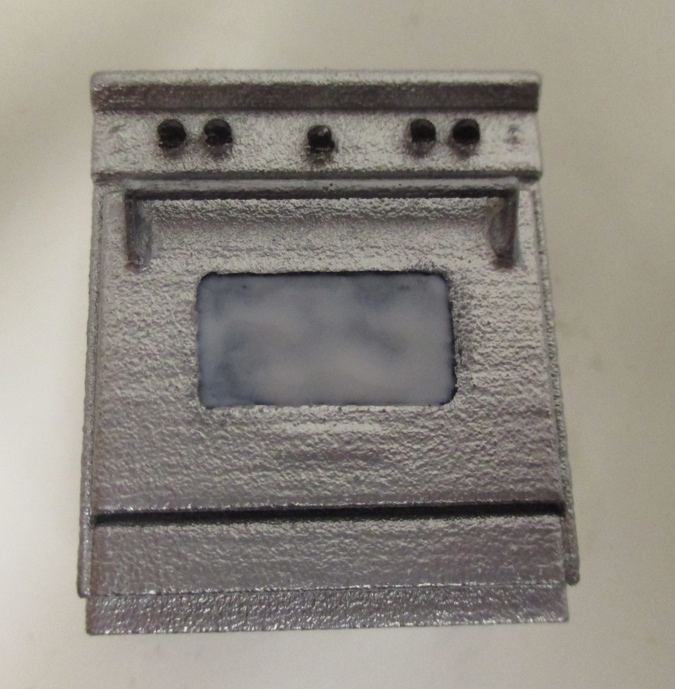
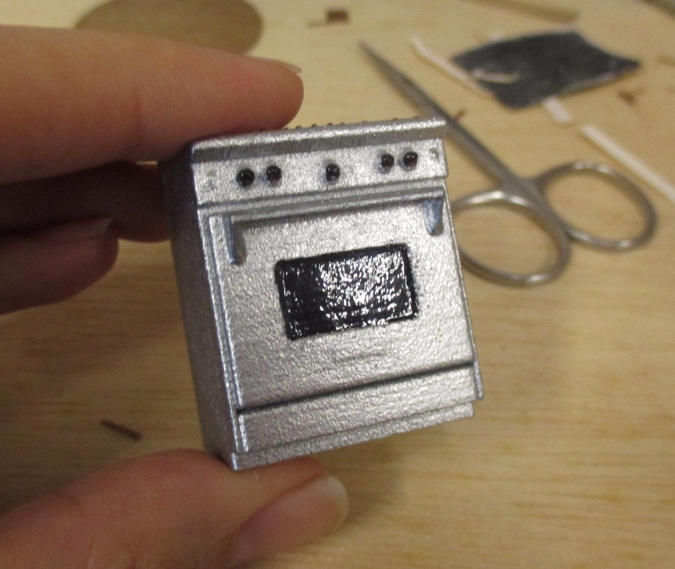
On to the stove. I tend to be over-zealous with spray paint, so I sweet talked Geoff into painting it for me. My initial reaction was yuck. It’s much too shiny! (This is chrome Krylon spray paint.) The stove is 3D printed, so it has that bumpy texture and the paint calls attention to it.
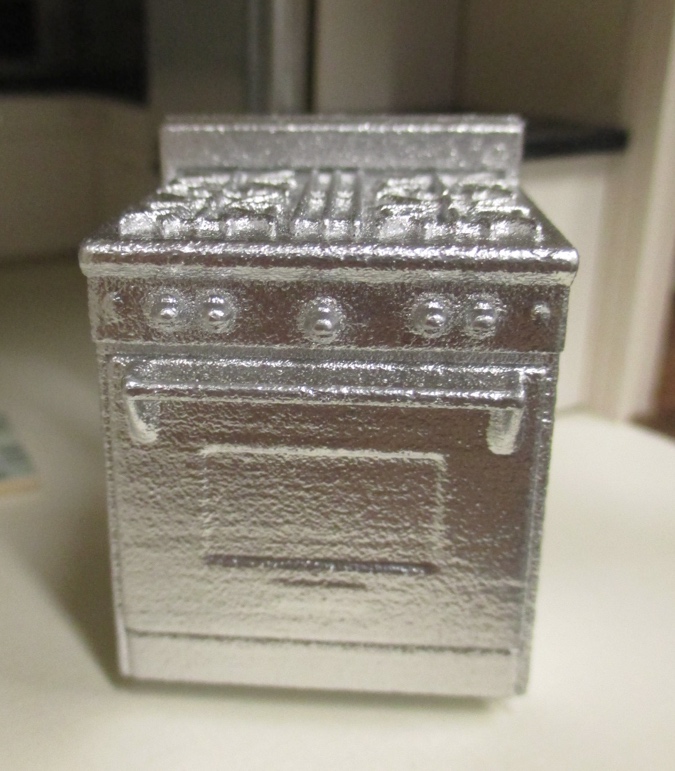
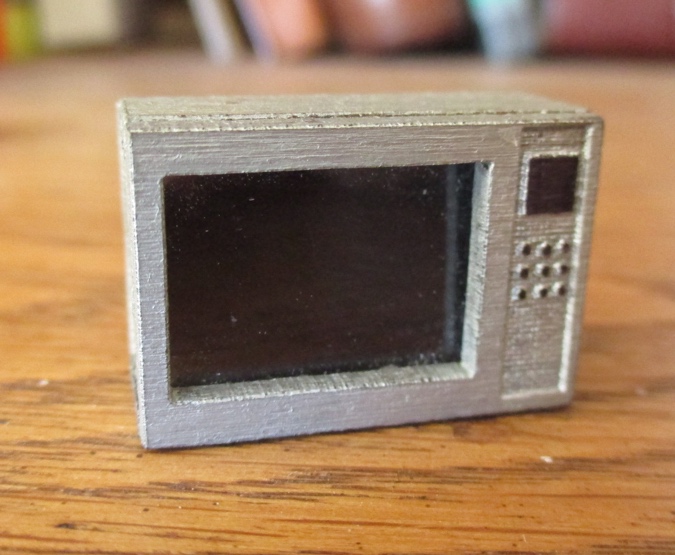
Here it is in place. I wondered if I should have used silver Sharpie instead, like I did on the microwave. Too late now.
I painted it with a coat of satin varnish, which helped bring the shine down a little bit (or maybe it’s in my head). Then I did the burners with a black Sharpie. This was much easier for me to control than a paintbrush would have been. I got a couple of small spots on the stovetop and covered those up with the silver Sharpie — it’s not exactly the same color as the chrome, but it blends in.
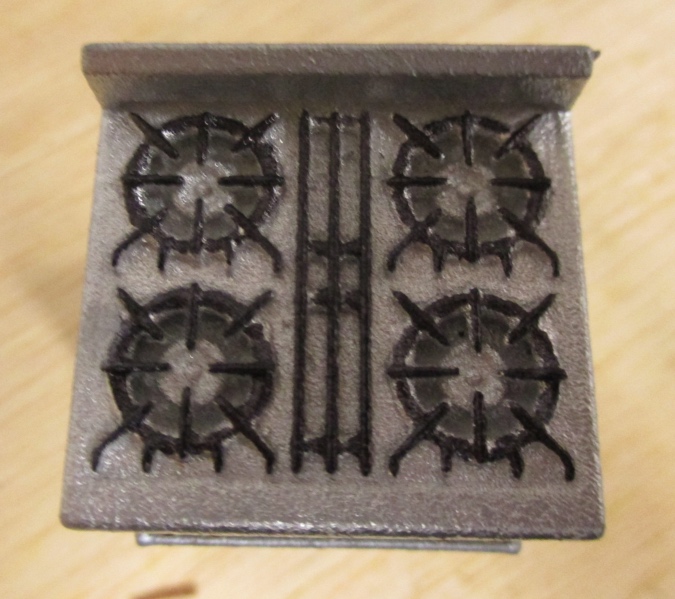
I also used the black Sharpie on the knobs, handle, and window.
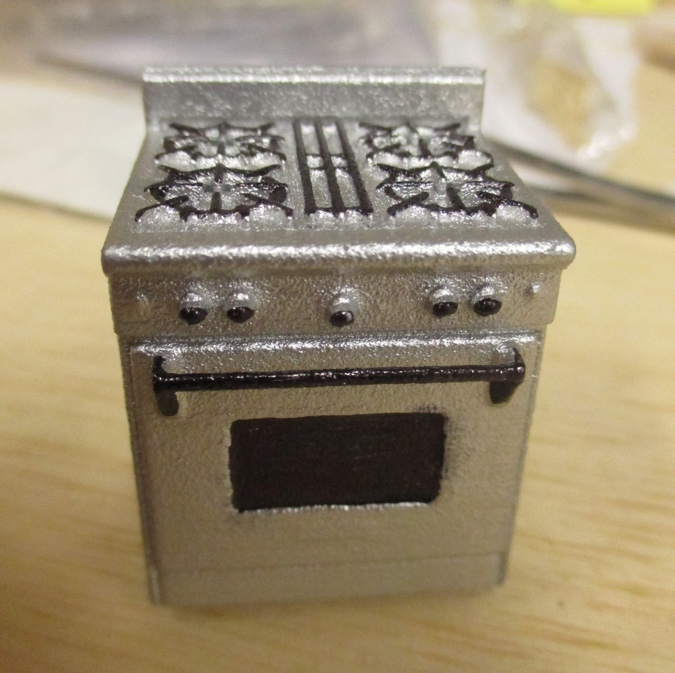
I couldn’t get the top of the knobs without touching the silver part, but it’s not as obvious when you look at the oven head on.
After seeing it in place I decided I didn’t like the black handle, and went over that with the silver Sharpie. Again, it’s a slightly different shade, but this actually makes it stand out a little better than the spray paint.
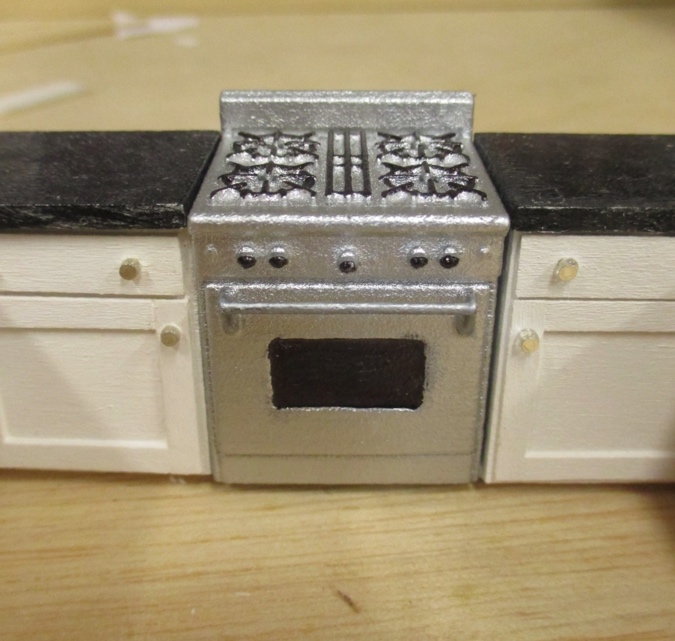
Finally I filled in the window with clear Gallery Glass.
That might not have been necessary, because you can’t really tell when it’s at the back of the kitchen, but it did add a glass-like shine to the window.
One last little thing — I was going to print out a clock to glue to the microwave. It needed to be 1/8″ square. When I looked online I could only find rectangular microwave clocks, and nothing I really liked. Plus I didn’t want this room to be frozen in time. So instead I colored in the display panel with black Sharpie.
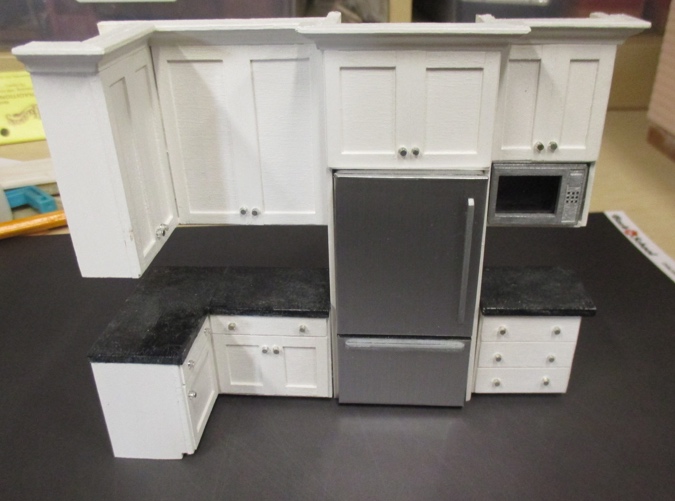
So that’s a wrap on the kitchen! Of all the “stainless” appliances in this kitchen, I think the stove is my least favorite. I still love the detail, the finish just doesn’t look as realistic as the others, and the metal hood over the stove calls attention to the fact that they don’t match. But that’s a small gripe when the rest of the room turned out pretty close to how I envisioned it.
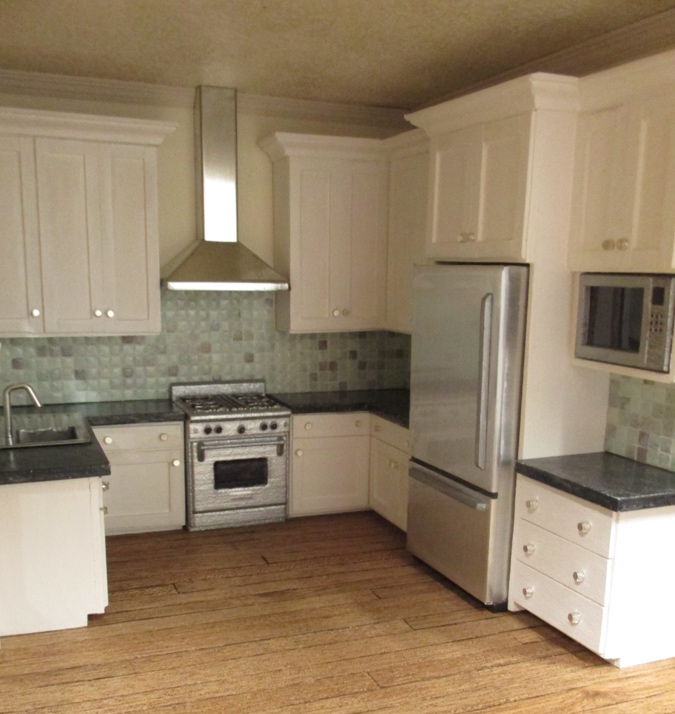
(Okay, okay, it’s not *completely* a wrap on the kitchen. I’m planning to paint the table and chairs, and still need to glue the sink into the countertop. This is why I’ve been working on this house for four years, I tend to get a room 95% finished and then wander off…)
 Emily is a freelance writer, miniaturist, and adventure game enthusiast.


I love your floor, wise chose to go with the wood. Can’t wait to see where you go with this next.
I am so glad to find someone with the same approach to projects!! I love how your mind works! Think..re-think..redo…plan…re-plan…try again…. Your results are spectacular; I hope mine work out as well.
The best laid plans almost always have a hiccup or two (in my case more like half a dozen!)….you tackled the kitchen floor project and have succeeded in making it look as if it was originally planned that way. Kitchen is looking great so far…looking forward to seeing it with table, chairs and accessories!
I’m back. Dust is a real concern with dollhouses–real houses, too. I am wondering if you had been determined to save the floor if oil or wax might have dissolved the dust between the planks? Even something as simple as Pledge? Your thoughts?
Pledge is a good idea, or the Old English scratch cover I used on my Blackbird Bar and real life kitchen cabinets in my old house (described here). I don’t know why my brain went right to stain this time. Clearly I didn’t think it through!
Or you just wanted a change
I love it. Your kitchen looks so realistic. It is really hard to get a smooth finish in the 3D printed items.
Your impromptu floor repairs turned into a major re-do but with Beautiful results!
You segued the planks from the kitchen into the dining room like a Boss!
We all make mistakes and I say let’s celebrate them. We learn from them.
The new floor does look good. It’s hard to do this stuff when we get so picky about the ‘smallest’ things that bug us. ha! I did a tile floor once in the other scale with cut out card, It actually turned out ok as it was different colors. Can’t wait to see what you do next!