It turns out my new house has A LOT of fruit trees. For the past five weeks I have been dealing with a huge harvest of plums and peaches. I’ve made 30+ jars of jam! But it’s dying down now, so I can finally start to break in my new workshop.
The new workshop doesn’t have a sink, so I wanted to start with something relatively small and self-contained that wouldn’t require constant access to water. (In other words, something that won’t turn into a big mess that needs to be mopped up!) So I pulled out the attic trunk roombox that I bought off eBay in March.
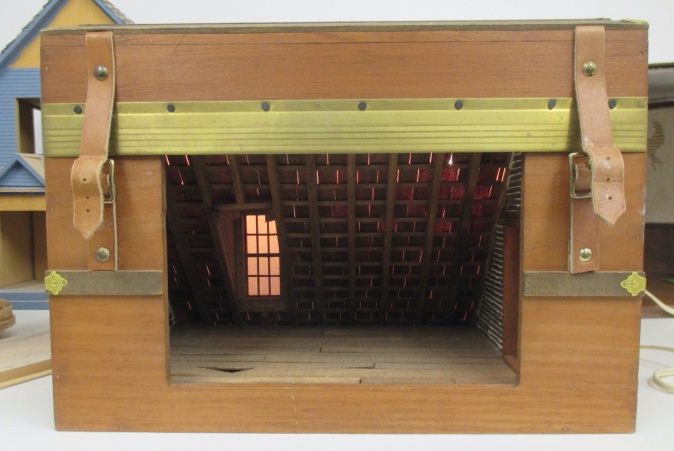
This roombox was from a Bauder-Pine workshop at the NAME 1987 national convention in Atlanta. It’s rare for me to buy something that’s already finished, but I passed up bidding on one of these years ago and didn’t want to repeat my mistake.
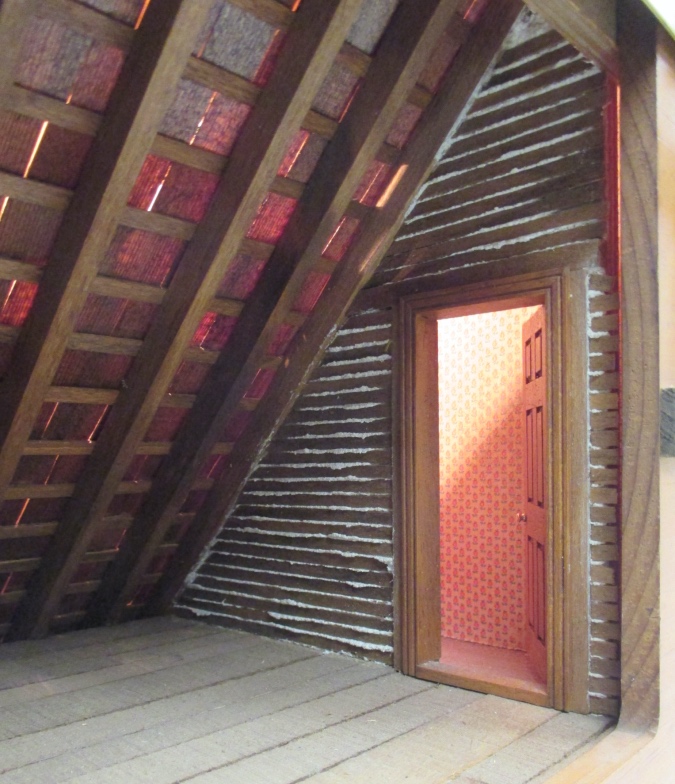
Opening the top of the trunk gives access to lights and the area behind the door and window.

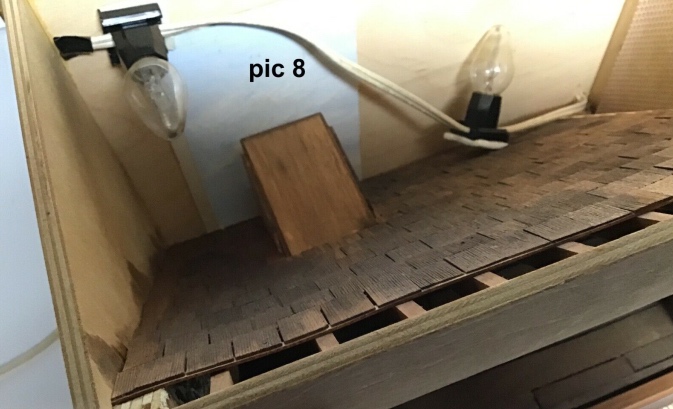
I neglected to take a “before” photo of this view so this picture is from the eBay auction (hence the “Pic 8” label).
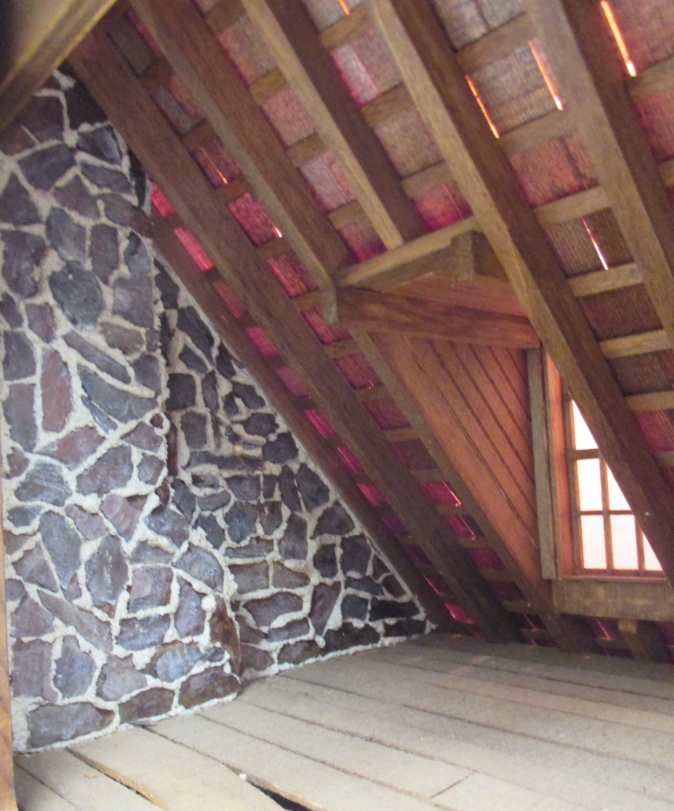
The “stones” on the fireplace are painted wood. I know this because I bumped one of them and a bit of wood flaked off. (I was able to glue it back on.)
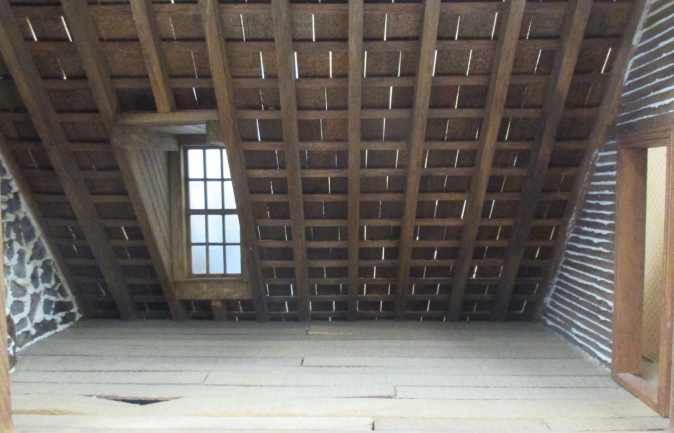
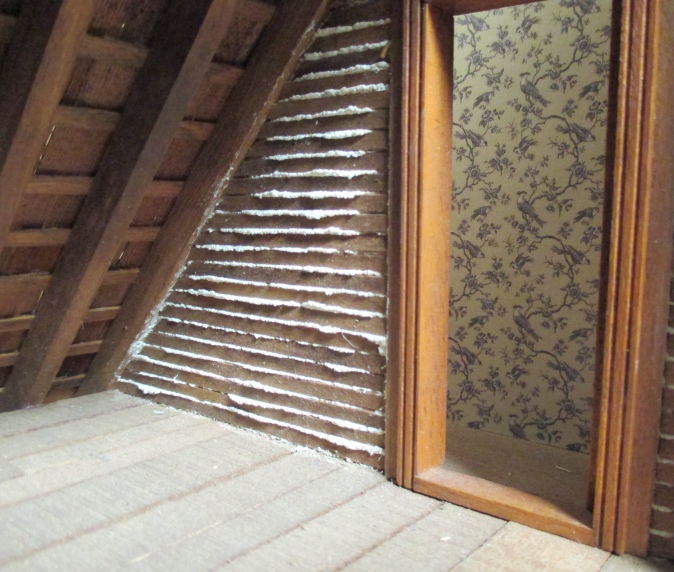
I like how the mortar spooges out between the stones and between the lath pieces on this side. It’s very attic-like. Beyond the door you can see some ugly wallpaper.
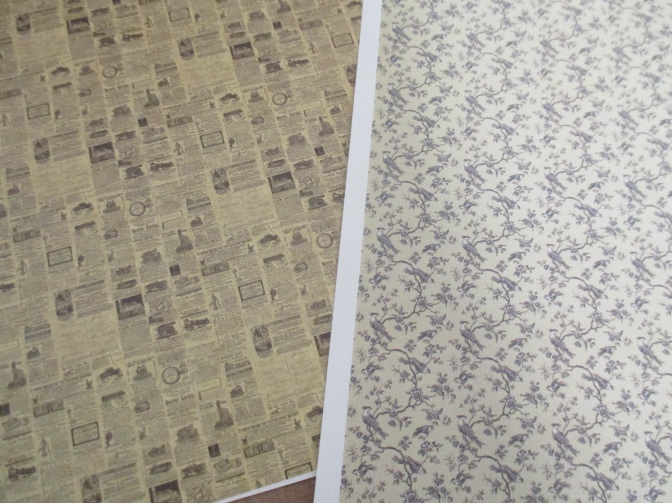
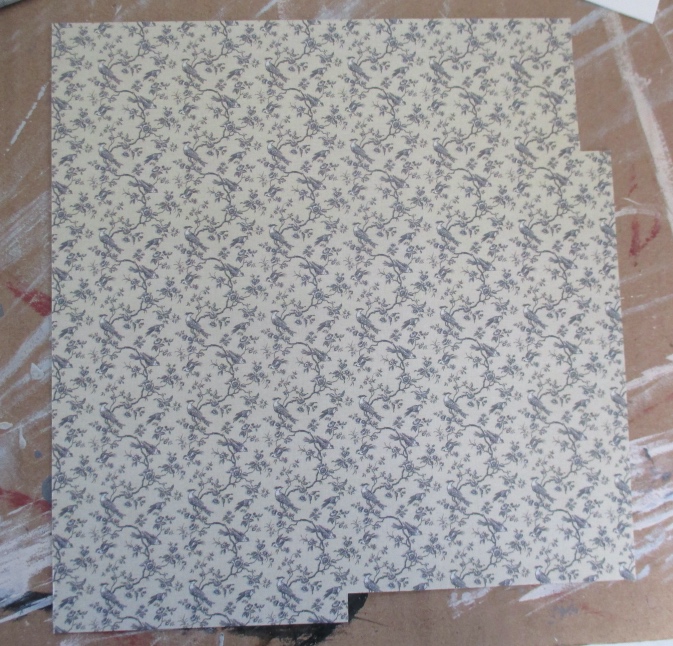
I pulled these out of my stash as possible wallpaper replacements (both are from Itsy Bitsy Mini). The newspaper print might be appropriate inside an attic, but it didn’t seem right for the hallway outside the attic, so I decided to go with the birds.
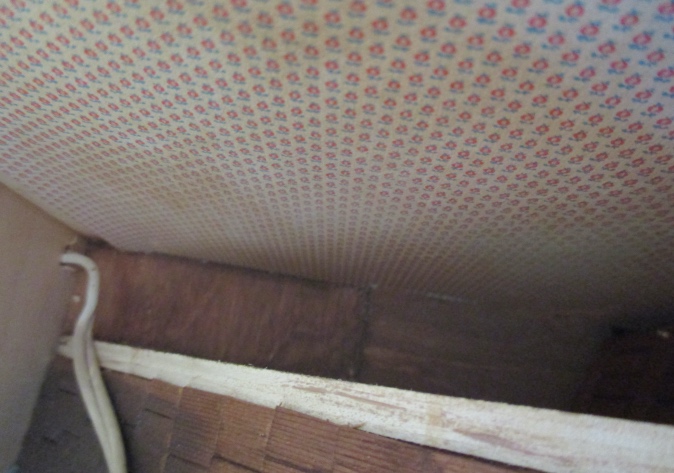
The room is a separate structure that theoretically lifts out of the trunk, but the wire for the lights runs through both the room and the trunk, which prevents me from pulling the room out without disconnecting the lights. This leaves a very narrow space for dealing with the wallpaper. Also, as you can sort of see in this picture, the floor has a step.
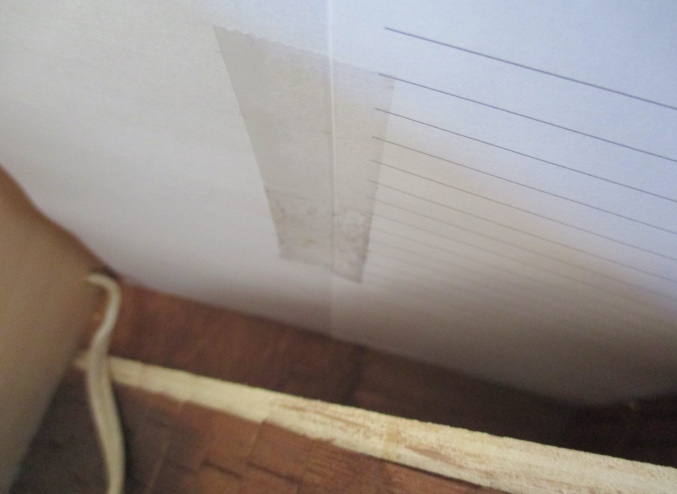
I taped together pieces of paper to make a template.
Then I used the template to cut out the wallpaper. I sprayed this with UV-protection matte sealer before proceeding.
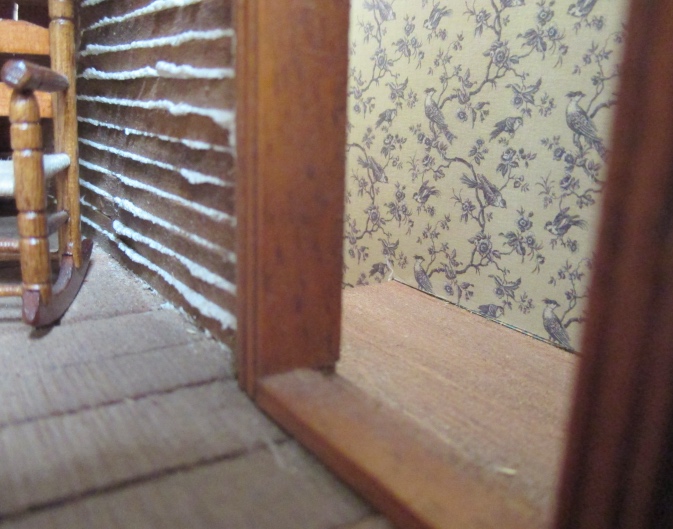
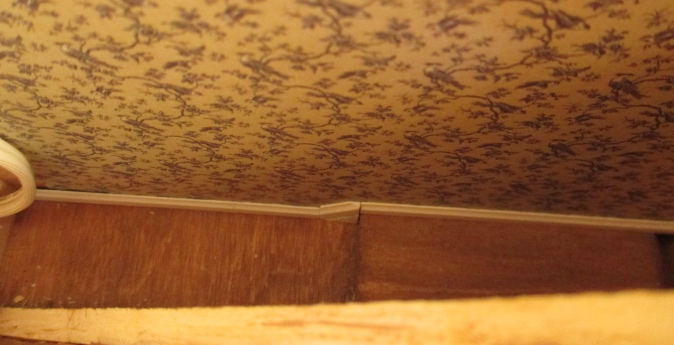
That looks a lot better!
The Itsy Bitsy paper is nice and stiff, and when I did a dry fit it neatly covered up the paper underneath. But when I put wallpaper mucilage on the back of the paper, it softened, and I wasn’t able to push it all the way down to the step. So you can see a bit of the old paper peeking out the bottom. This isn’t that noticeable (it’s behind a door!) but I couldn’t stand to leave it that way.
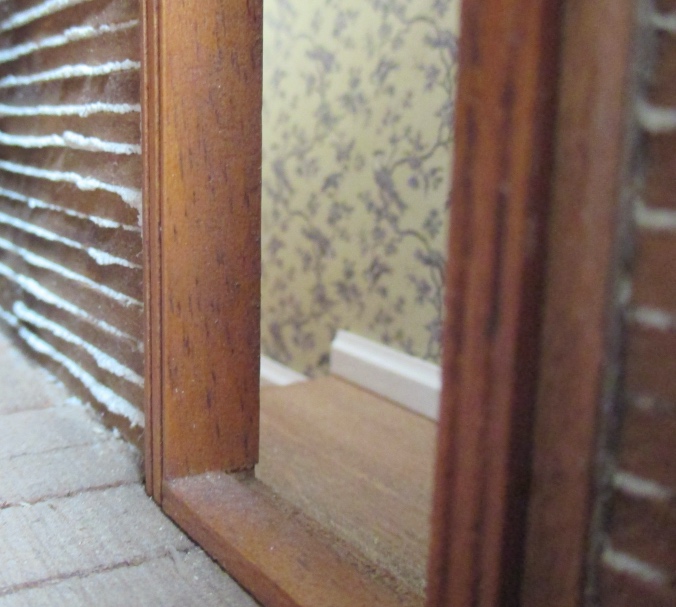
Baseboard to the rescue! That’s better, but I don’t like how the baseboard stops abruptly at the edge of the step. I’ve never liked that in dollhouse stairs and decided to do something about it this time.
I cut a piece of baseboard with 45-degree angles at each end and sanded down the pointy parts to meet up with the baseboard pieces above and below the step. Then I cut a triangular piece of basswood for the angled piece to sit on top of.
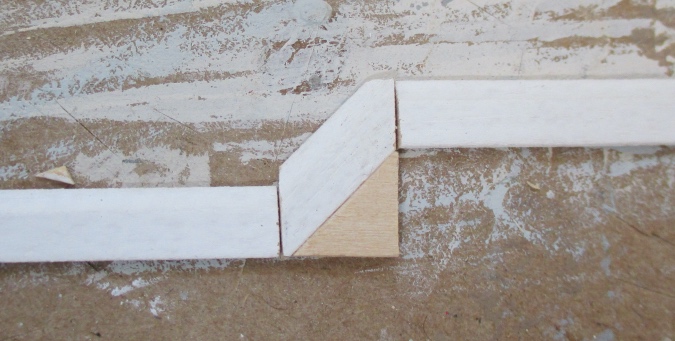
I painted all the pieces with Behr Varnished Ivory.
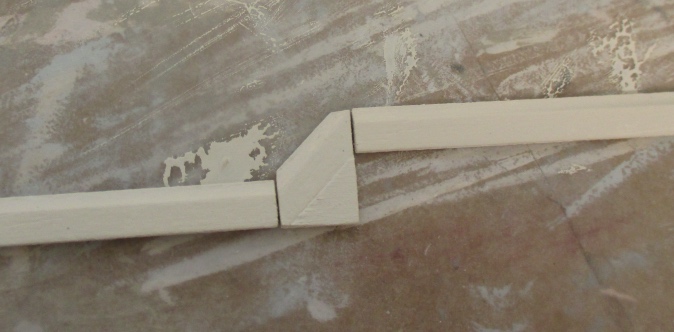
Here’s the top view.
And here’s the view through the door. You can just barely see this baseboard because of the angle. I would have liked to fill in the gap where the pieces meet with wood filler and paint over the seam, but there’s no way to do that in this narrow space.
The other element that needed a little work was the window. It had some kind of opaque paper or plastic over it that had broken off over time, leaving these brittle scraps.
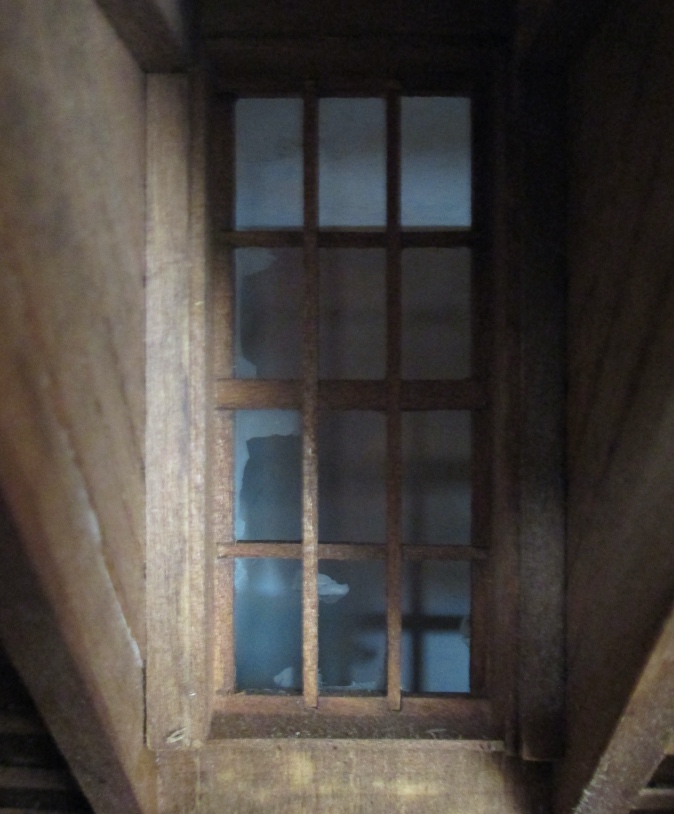
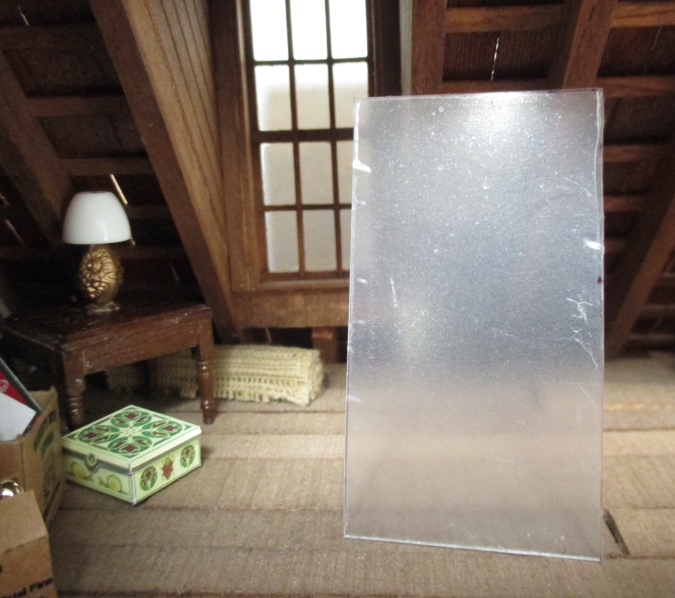
I popped out the scraps with the eraser end of a pencil and then cut a new piece of plexiglass to fit (shown here with its protective wrapper still on). I glued this to the outside of the window.
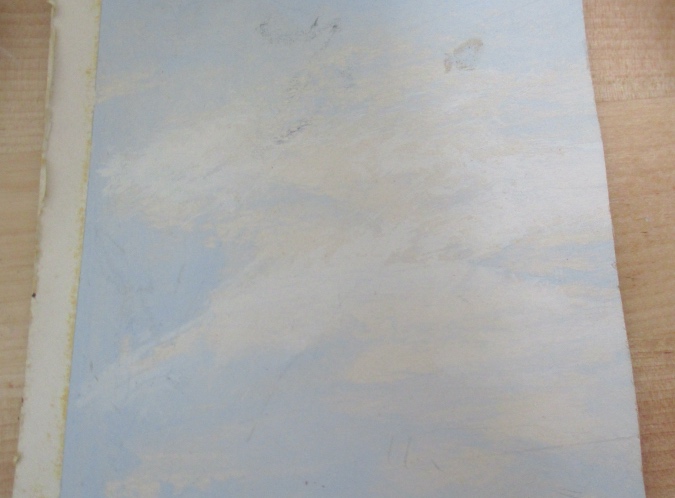
This cloud painting was glued in behind the window. Good idea, but it’s too subtle. With the lights turned on, it just looked white.
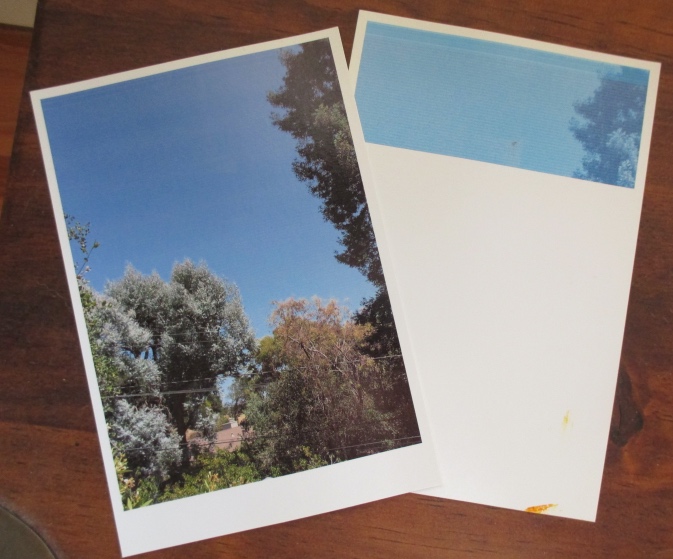
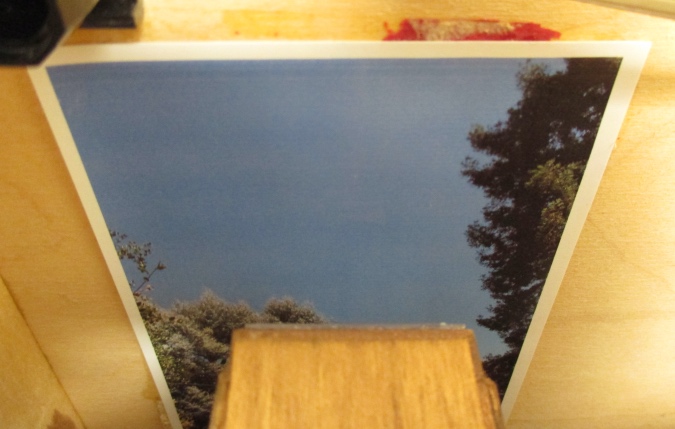
I went out into my hilly backyard and took some pictures that approximate looking out an attic window. This is the roof of my dollhouse workshop. In the distance you can see my neighbor’s roof.

I resized this in Photoshop and printed it out. Initially the printout was all messed up, as you can see on the right. I ran the printer’s diagnostic test and found that the cartridge wasn’t printing any yellow. This really bugged me, because even though the ink cartridge is about a year old, I rarely print in color and didn’t see how I could have used it up.
I was on the verge of buying a new one (for $29!) when Google led me to an awesome tip. Apparently if you don’t print often, the ink on the surface dries up. This can be fixed by removing the ink cartridge and blotting it on a damp paper towel to draw out the dried-up ink, then blotting dry on a dry paper towel. It worked! Now I’m wondering how many times I’ve replaced an ink cartridge with a new one before I really needed to.
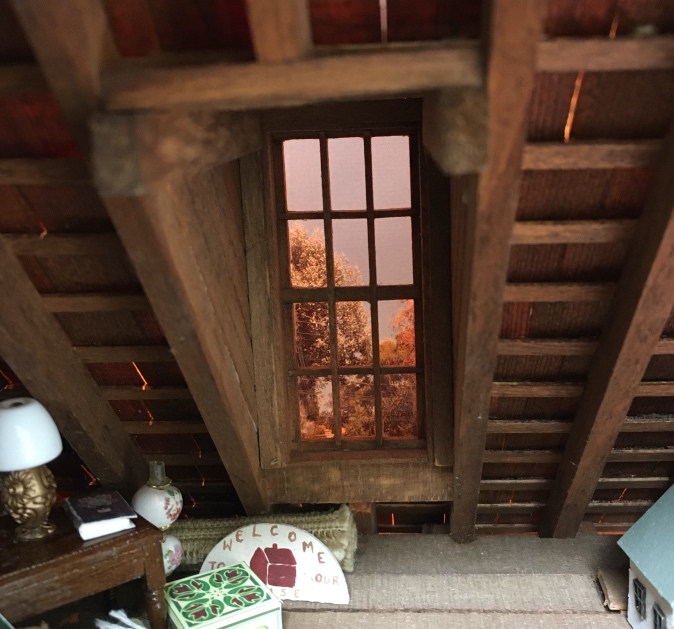
The printout is still a bit streaky (especially the sky), which suggests that the cartridge is still nearing the end of its usefulness, but it looks fine for this purpose. I printed it out on photo paper, sprayed it with the UV sealer, and then glued it in.
Here’s the new view out the window.
The first half scale swap I participated in, back in 2013, had an attic theme, and since then I’ve been putting aside odds and ends that would look good in an attic. Time to dig them out!
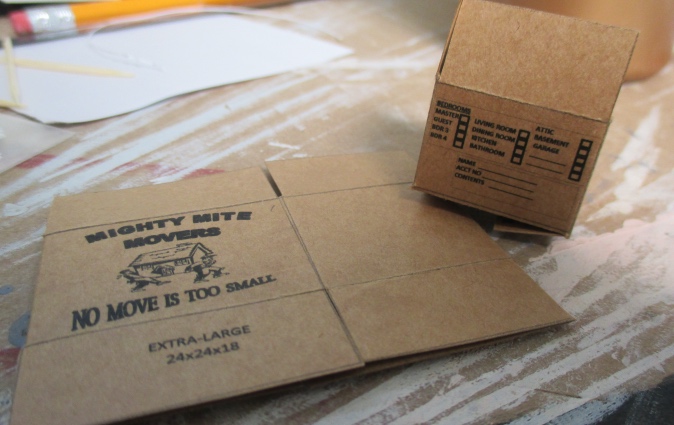
These moving boxes came from the attic swap. They came flattened, but were easy to fold into position.
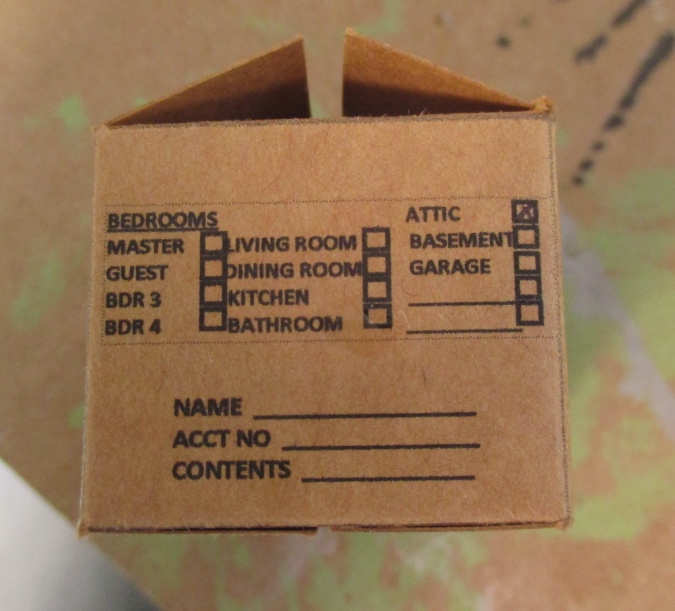
I checked off the “attic” box for good measure.
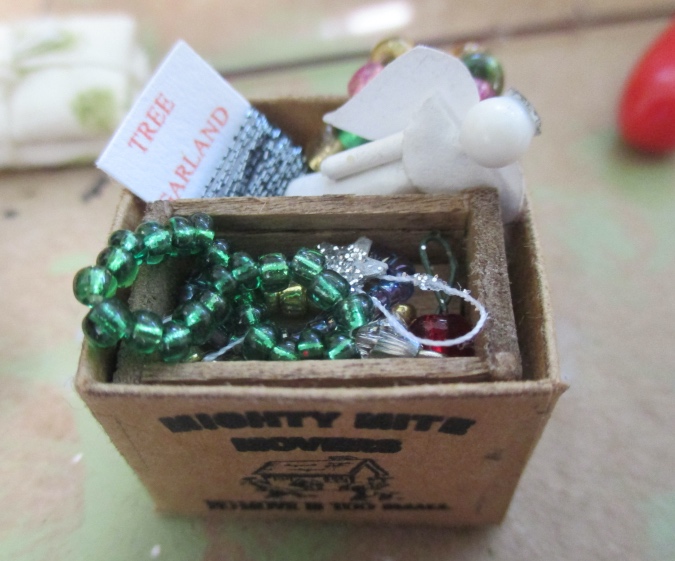
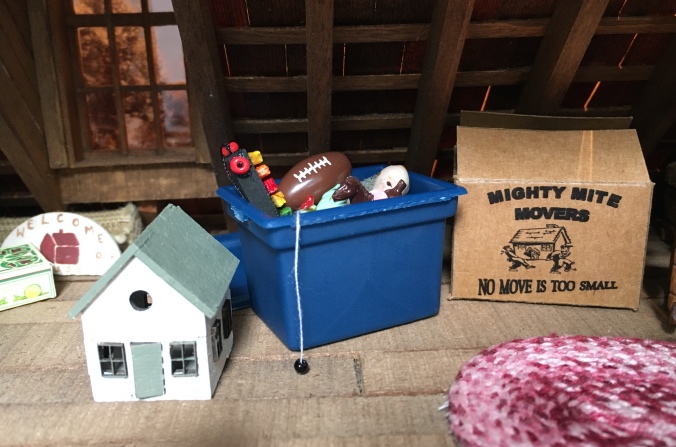
I filled up the smaller moving box with Christmas decorations, an attic staple.
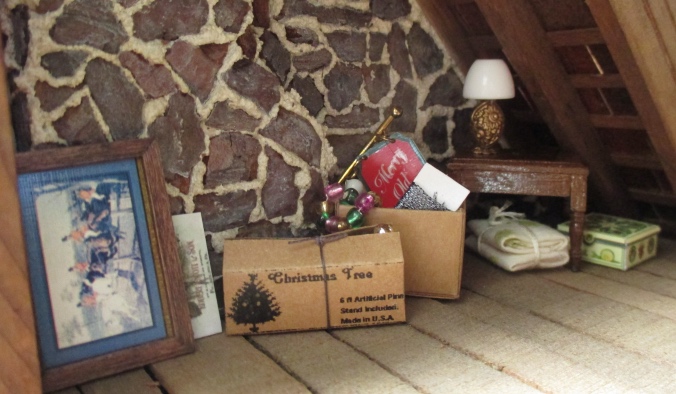
This Christmas tree box also came from the attic swap.
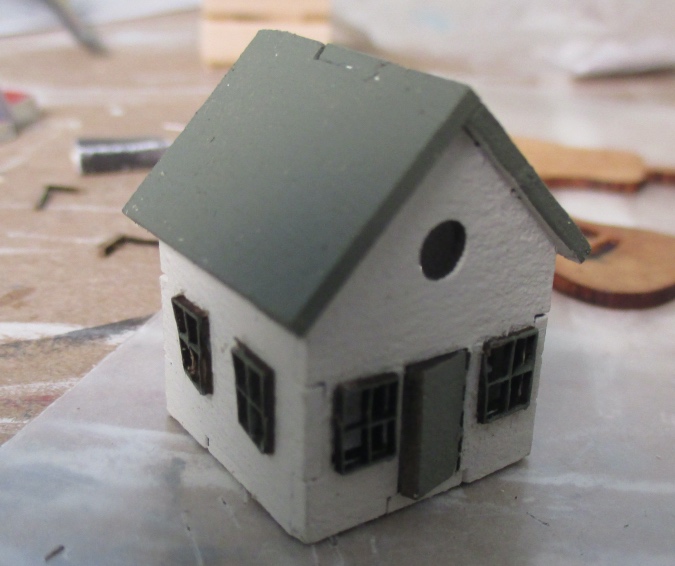
Of course, another attic staple is a discarded dollhouse. This is a 1:12 scale gingerbread house kit from Alpha Stamps. It’s smaller than 1:144 and works as a half scale dollhouse. It’s made out of chipboard — very simple to put together, but the windows got a bit mangled when I cut them off the card they were attached to. But that’s okay, since a dollhouse that’s been relegated to the attic should be a little shabby.
I have several other toys I want to put in the attic, but I didn’t want to fill up the other moving box (I might even tape it shut). Looking around in my stash I found this little AARP container my parents gave me. I think it’s supposed to hold pills.
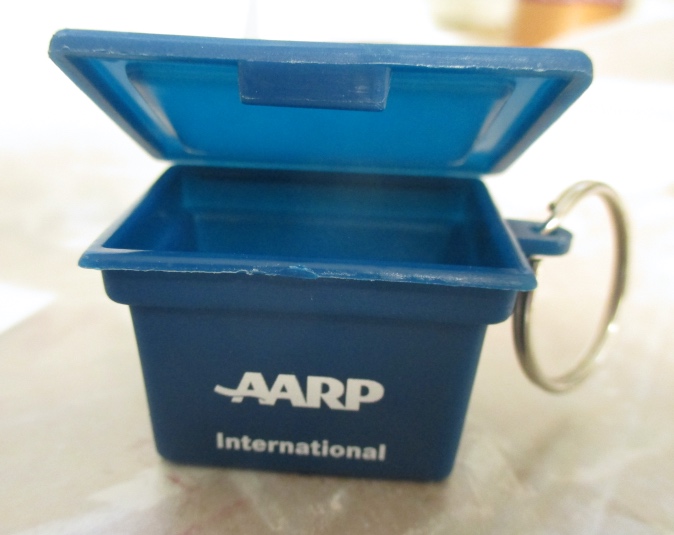
With the keychain removed, the lid separated from the box, and the logo turned to the back, it looks like a plastic storage bin.
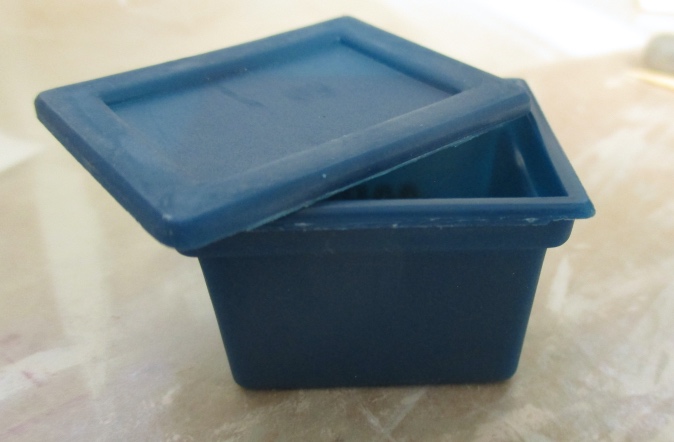
It might be a little too big for half scale? I’ll keep it for now, but I’m still playing around and might change it later.
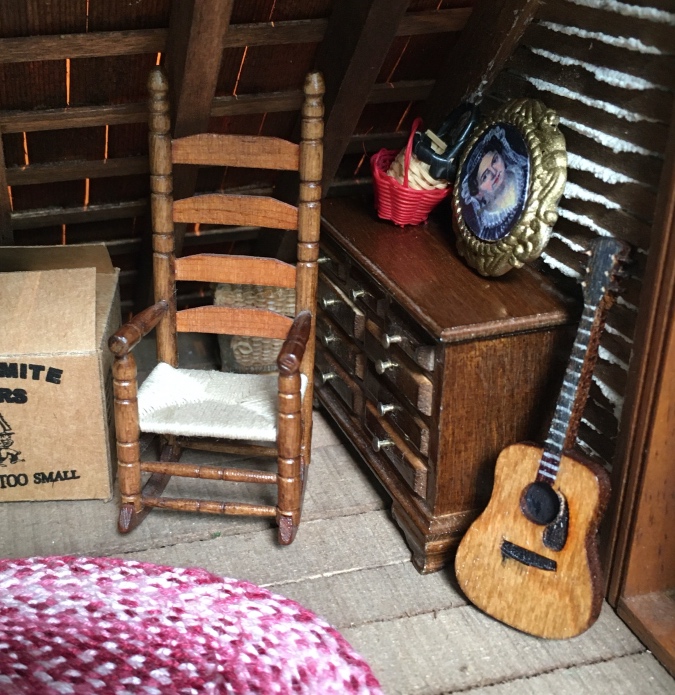
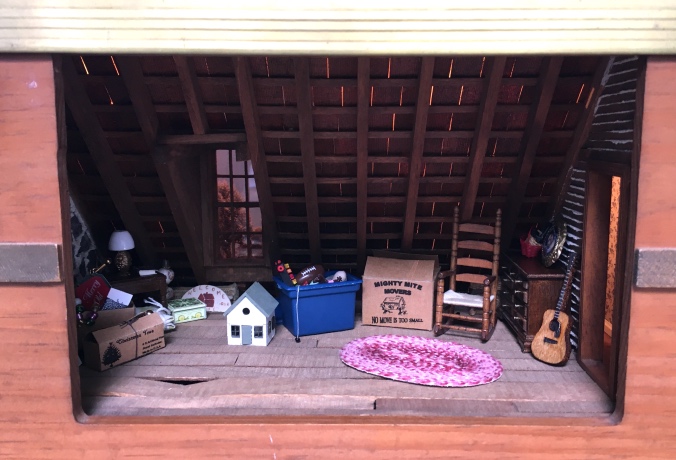
The rocking chair is made by Oldham Studios. It’s a nice piece — too nice to be up in the attic! But I liked how it looked in here. I made the braided rug out of variegated DMC floss (more details here).
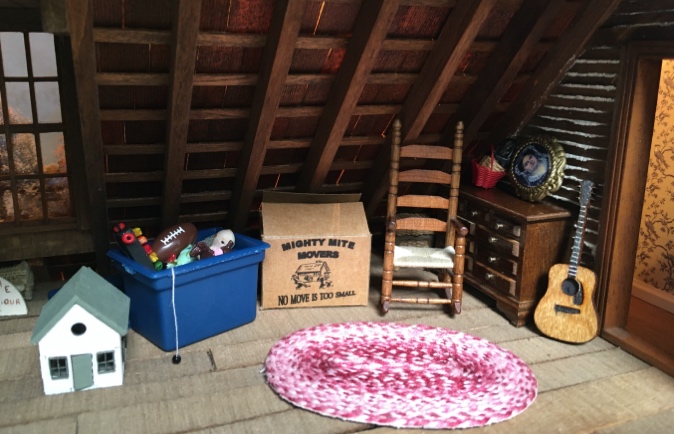
The guitar is a Mini Etchers kit. I used a Sharpie to color in the black parts and a silver gel pen to make the lines on the neck (I don’t know what those are called), and stained the guitar with a Minwax Golden Oak stain pen. It doesn’t have any strings, but I guess that’s why it’s in the attic!
Here’s how the scene looks so far. I think it needs more. What else would you put in an attic?
 Emily is a freelance writer, miniaturist, and adventure game enthusiast.


Looks good. The window is much better. I thought this was a neat project when I first saw it. (The guitar marks are the frets.) some old pictures on walls? Mirror? Cobwebs? Discarded games? Skates?
Frets! thank you. I have some board games from past swaps, and I even have a pair of roller skates! I think they’re packed up with my Fairfield furniture, I’ll go digging. I’d like to add cobwebs but not sure how to go about it.
Looks great! I don’t think the blue “bin” looks out of place either. I’ve seen some of those things in RL that are huge, so your bin looks to scale to me. Can’t wait to see the finished product once you fill the attic up.
Thanks!
This is a very fun project. Your attic could include a trunk or two, maybe with “old clothing” (think hats) visible . Someone has probably been playing dress ups.
How about suitcases, outgrown nursery furniture and toys, rolled up rugs, boxes of Halloween costume stuff, framed pictures and mirrors, spare bed frames , photo albums, books, painting easel and art supplies, and any currently unused furniture.
My RL home doesn’t have an attic, but you can tell that I wish it did.
Great ideas! I have a 1:24 trunk kit that I was planning to build for the Victorianna but I can’t find it right now, it’s not with my other kits and not with the Victorianna stuff. I’ll keep looking, because I think it would be fun to have a trunk inside a trunk.
I like the idea of spare bed frames. I could partially assemble a bed and have the headboard and footboard leaning against the wall or hanging up in the rafters. I also like the suitcase idea. I have a bunch of books I can put in here but have to figure out how to display them, if they’re in a box you can’t really see them.
Just stack them on the floor to hold up that end table with the broken leg?
That looks wonderful!
That looks fun!
As for the fruit, I was just salivating over — I mean reading — this,
https://smittenkitchen.com/2010/07/nectarine-brown-butter-buckle/
That looks delicious! I don’t have nectarines, but I do currently have some plums that are dark skinned outside and yellow inside — they actually look similar to nectarines except the skin is dark purple (and they’re smaller). Maybe they would work as a substitute!
I don’t know how I missed this. Looks wonderful. How about a dress form? Also, you could use a brass bed headboard like from The Littles furniture, and lean that against a wall.