When I bought the Turret House, it was already shingled except for the left side of the small gable. The builder had marked off rows 3/8″ apart and left instructions to “leave space” at the left side and overhang the shingles by 1/8″ at the right side.
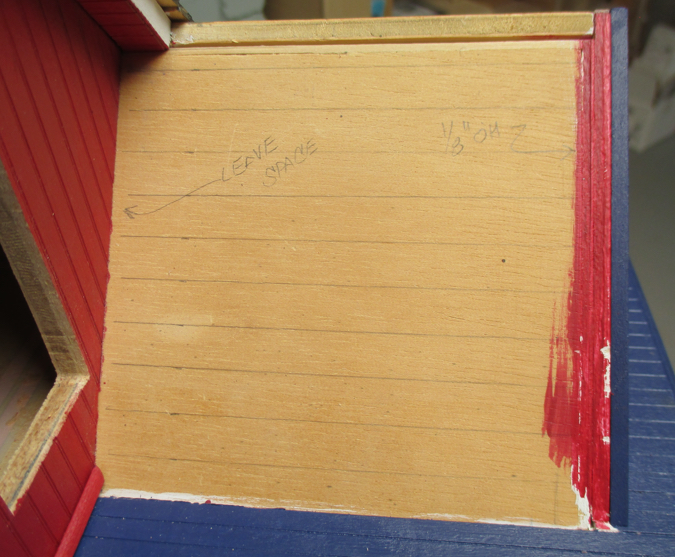
The house came with a spacer for the side where they said to leave space. It’s about 1/8″.
The dormer on the side of the house also has the 1/8″ space between the shingles and the siding. This made the painting and staining easier, so maybe that’s why they did it, but I decided to run these shingles right up to the side of the house.
As for the overhang, last week I added 1/8″ trim to the front of the gable, so I just needed to install the shingles flush with the trim. This is good, because I don’t think my overhang would have been as neat.
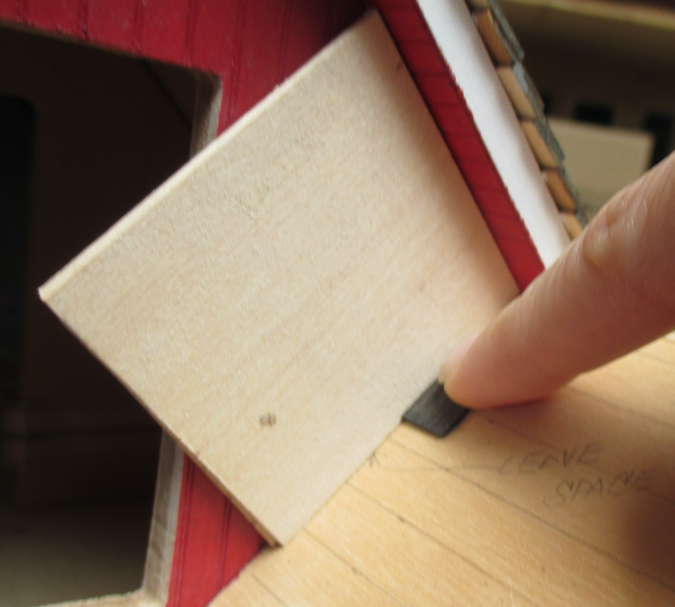
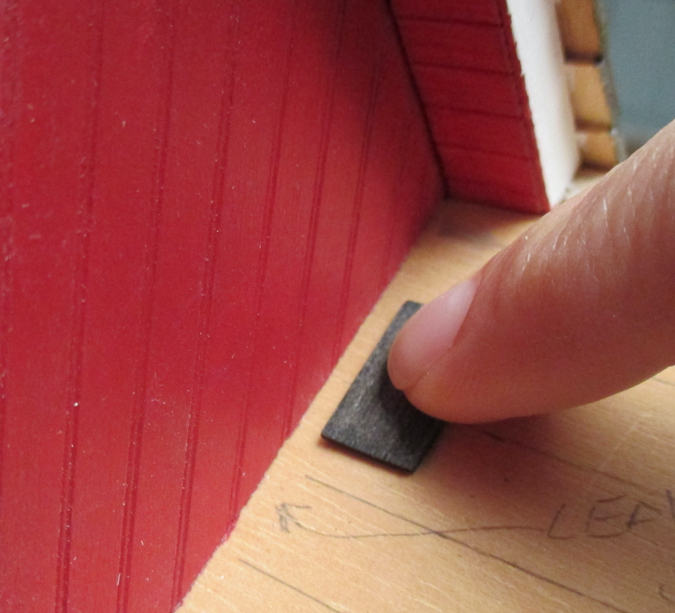
I was intimidated to do these shingles, because the builder did a very neat job and I wanted my shingles to match. I often have trouble with the second row of shingles sticking out more than they should, because the first layer that they’re overlapping is flat against the house instead of slightly angled like the rest of the rows. I noticed that the builder had put a little piece of wood under their first row of shingles so they stick out from the house.
I decided to try this. I also cut down the first row of shingles so they would start at the line the builder had drawn.
The second row overlaps nicely. I think this is partly from the spacer under the first row and partly from the 3/8″ spacing between rows, which is larger than I usually do. In the past I’ve done 5/16″ and 1/4″, but the 3/8″ spacing looks nice, so hopefully I’ll remember this for future houses.
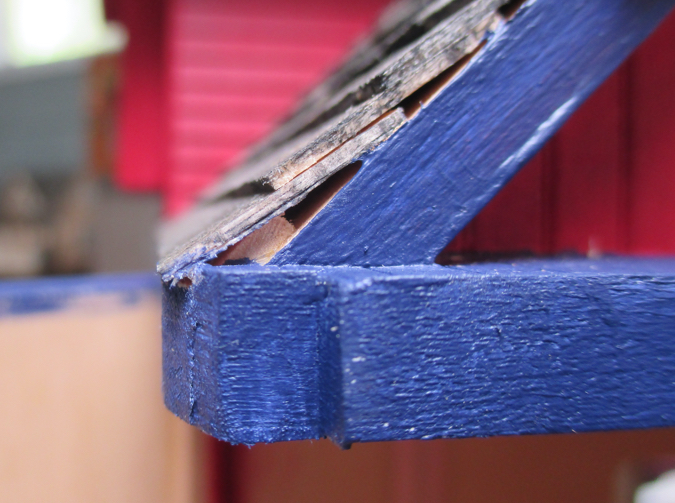
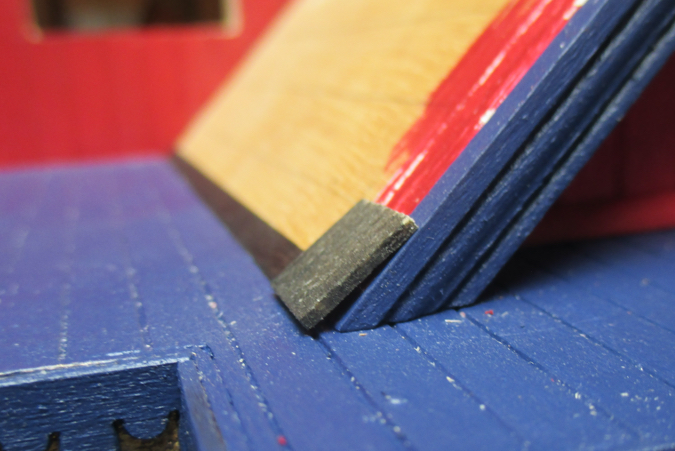
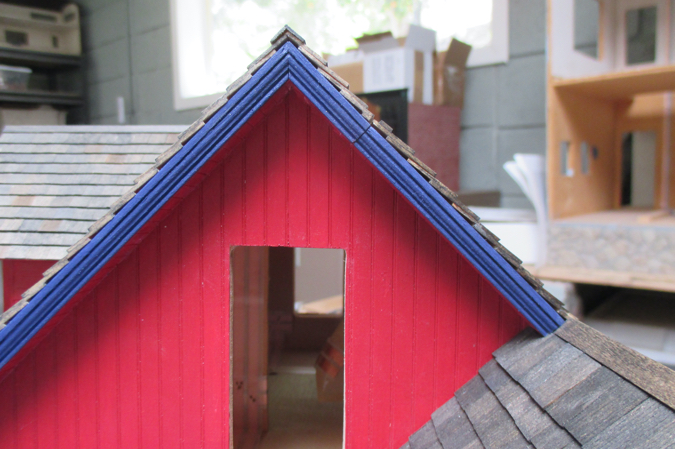
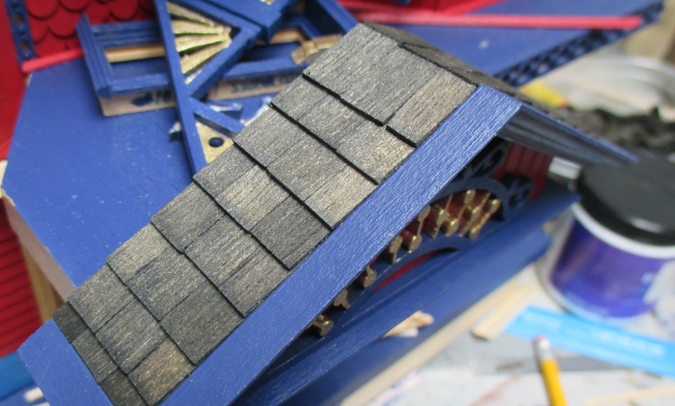
Unfortunately the builder hadn’t left instructions for how to handle the top row. This section of the roof lifts up, so the shingles can’t be glued to the edge of the opposite roof, but I thought I could glue them at the bottom with enough overhang to reach peak. But if I lined up the shingle with the top of the roof edge, this left too much of a gap at the bottom.
I stained a piece of corner trim and set it on top of the peak.
The corner trim is only glued to the side of the roof that lifts up, so the part that overlaps the stationary side of the roof lifts away when the roof is open.
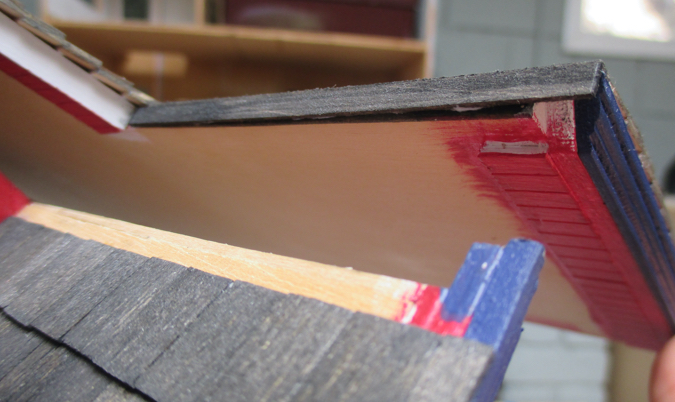
Then I lined up the top row of shingles so the tops just meet the edge of the corner trim.

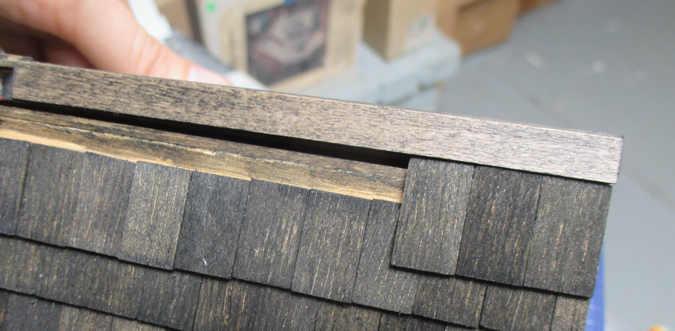
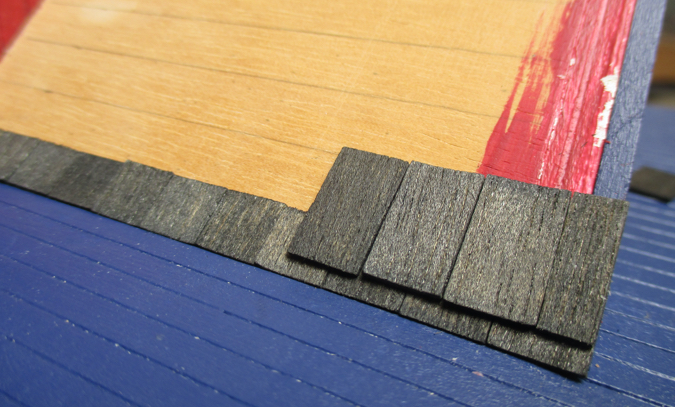
The shingles I’d stained before applying them came out darker than the ones that were already attached to the house, which I’d stained in place. I used a stain pen to do a second coat. (The color is Minwax Ebony.) Here you can see the darker shingles at the bottom as I worked my way up.
As I was doing this, I realized I’d made a mistake. I was probably supposed to add a row of short shingles to the top of the gable roof here, so that row would continue all the way to the edge.
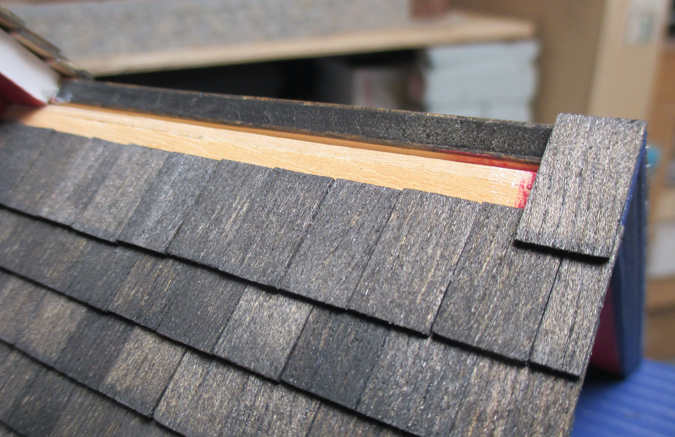
But then I also would have had to add a row of short shingles to the other side of the gable roof to make them consistent when you view the gable from the front, which meant I’d have to rethink how the corner trim worked. Plus I’d already glued the corner trim to the peak and didn’t want to pull it off. So I decided to leave it like this. Right now it’s all I can see — ironic, since I didn’t notice it until it was too late! — but it’s not a big deal in the grand scheme of things.
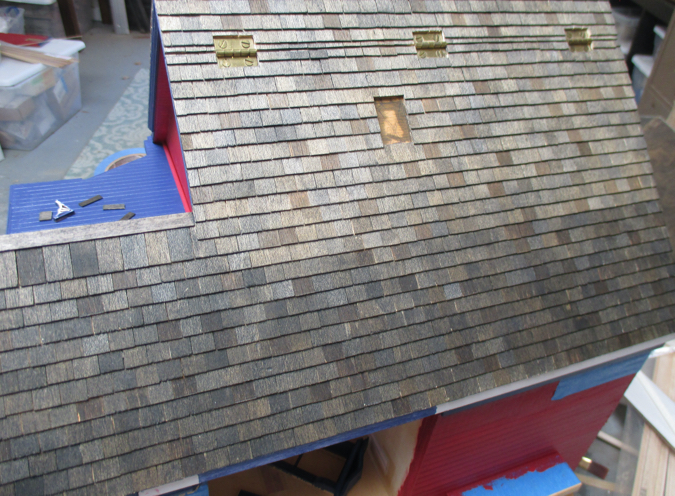
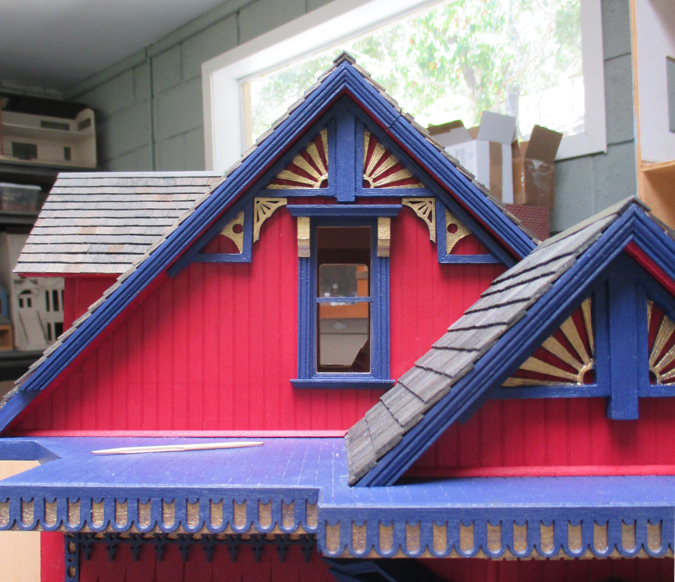
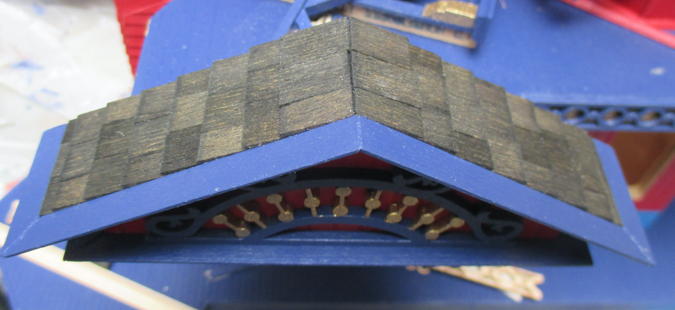
With the shingles installed, I cut down the piece of cornice that butts up against them to fit, and glued it in.
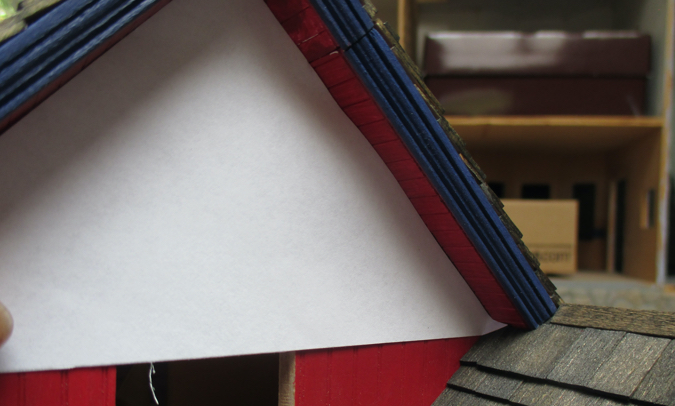
The apex trim also needed to be modified to fit next to the shingles. I made a paper template and folded the corner so I’d know how much to remove.
Here’s the apex trim glued in.
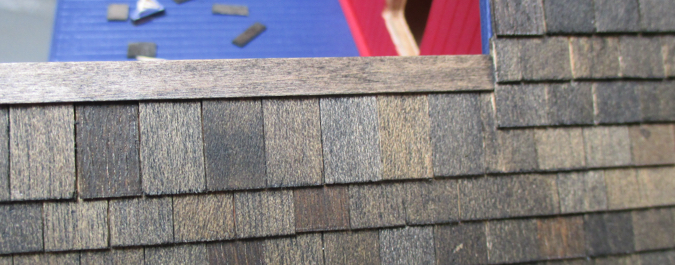
I should have cut down the top row of shingles slightly to maintain the 3/8″ gap between the rows, but I wanted the edge to be neat since it was butting right up against the corner trim rather than being overlapped by it. Again, not perfect, but good enough. I haven’t used the stain pen on the left side of the roof or the turret roof yet, but I think they need it, since those shingles are noticeably lighter.
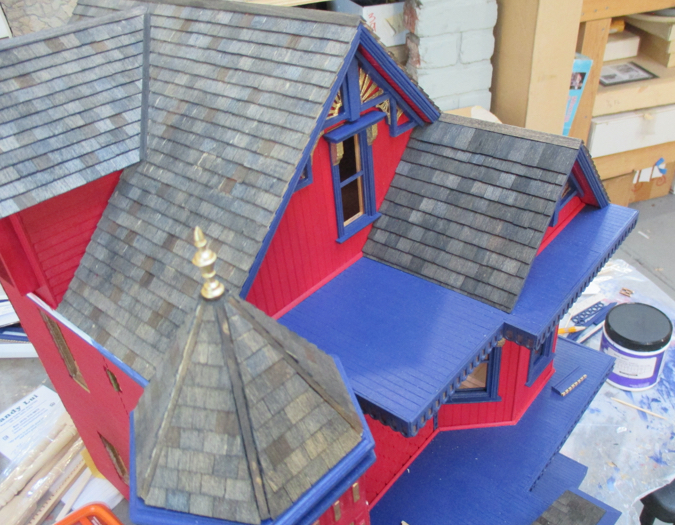
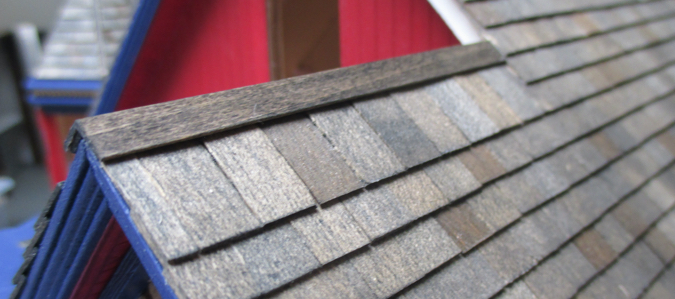
I also shingled the peaked part of the porch roof. The crown molding around the roof edge sticks up a little bit, so these shingles butt up against it rather than overlapping it.
This isn’t a 90 degree angle and the shingles meet up nicely at the peak, so I didn’t bother adding trim here.
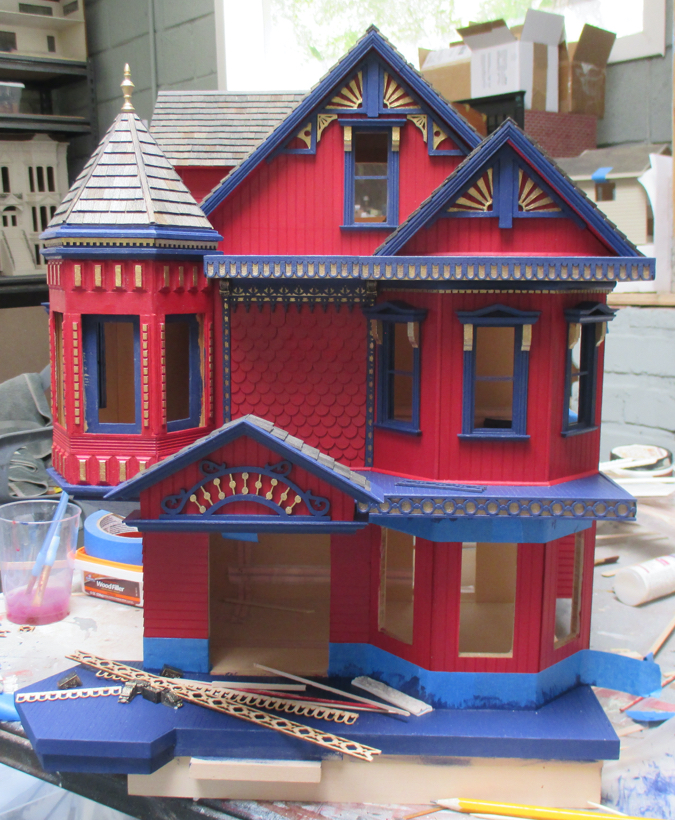
Shingles done! My next task will probably be the porch. I have some ideas but they’re not fully formed yet.
 Emily is a freelance writer, miniaturist, and adventure game enthusiast.


Looks great. I like how the ebony stain came out on your roof. I had used Varathane ebony stain on a roof and it came out pitch black. I might as well have painted those shingles. I couldn’t find minwax at the time.
I used to get Minwax at Home Depot but they stopped carrying it! Luckily my local ACE Hardware still has it. Thanks for the tip on the Varathane, I’ll avoid that one.
Your skills and attention to detail are phenomenal! The roof looks great!
It looks great! I think your trim piece blends very nicely!
Thank you for posting. I have been putting off shingling my roof. Your post has given me the inspiration to get started. Your turret house in amazing!
Shingling is so stressful, and you have don a beautiful job. No one else would notice what imperfections that to you stand out like a sore thumb. Well done.
Fantastic job. I think it looks fabulous.
What a beautiful building this is. Your work is incredible. I can hardly wait to see where you go from here, – Marilyn D.