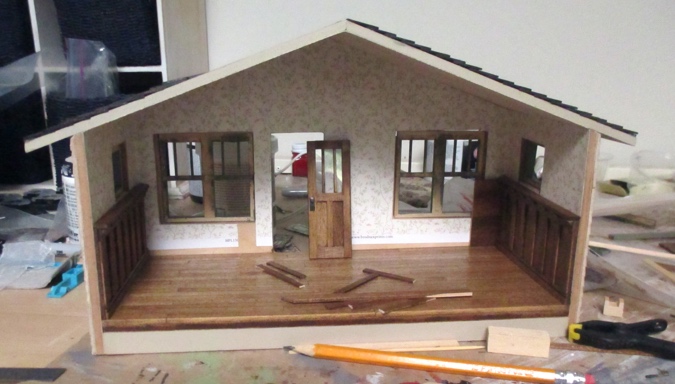
More than a year ago (ouch!), I put the Craftsman bungalow vignette aside because I didn’t have the right wallpaper. When I left off, I had sided and painted the exterior.
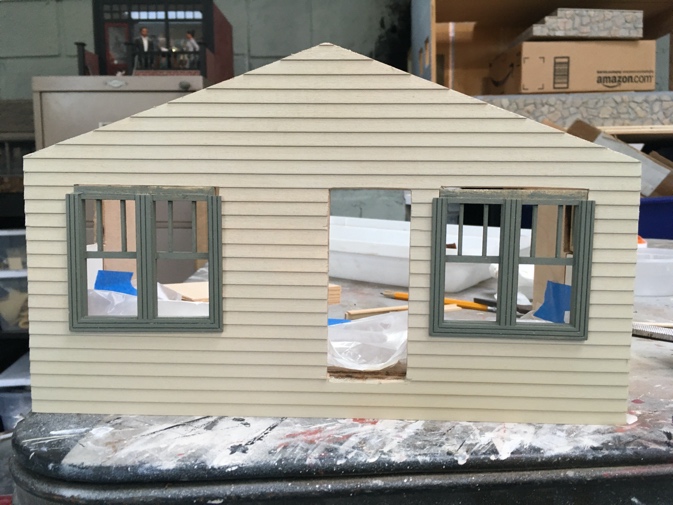
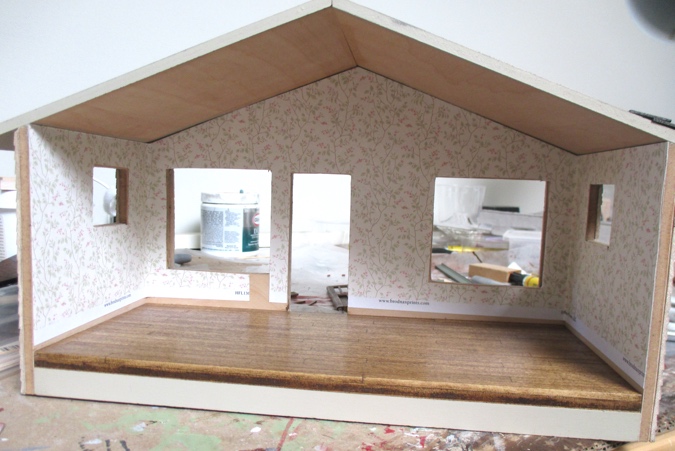
And I made a nice hardwood floor inside. I also glued on the roof, but I’ll save that for a later post.

Before gluing on the roof, I cut out the wallpaper and ceiling paper. For the walls I intended to have craftsman paneling with wallpaper above it. I chose this Itsy Bitsy Mini paper because I thought the colors went well with the exterior paint.
Unfortunately, in my attempts to line up the flowers at the corners, I cut badly and ended up about 1/8″ short on both sides of the big wall. Even with the paper from the side walls wrapping around the corner, I expected the seam to be very noticeable, especially with this busy design that might not match up exactly. I didn’t have more paper to redo it, so I put the house aside.
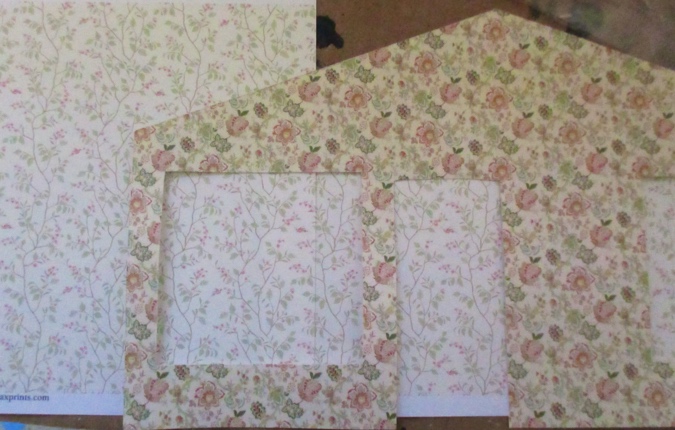
I recently ordered some supplies for the Mansard Victorian, and in order to get free shipping from Miniature Crush, I added several pieces of half scale Brodnax wallpaper.
Here are two of the wallpapers I ordered. They both have a craftsman vibe, but the darker one felt kind of heavy for this little vignette. The lighter one was closer to what I’d originally envisioned with the Itsy Bitsy paper.
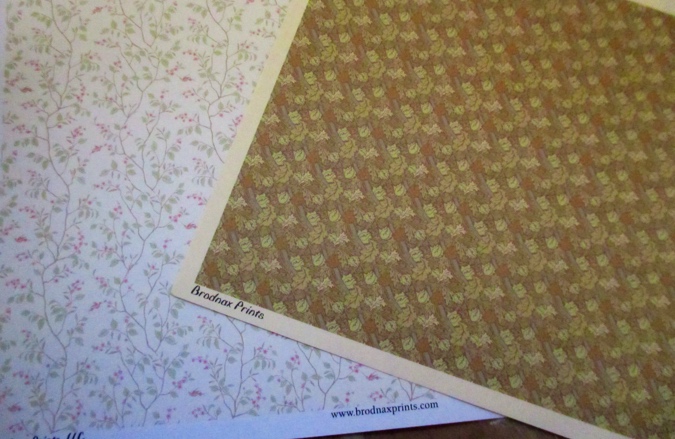
I don’t think I’ve ever used Brodnax paper before. I’ve shied away from it because it’s only 8 1/2″ x 5 1/2″, which is sometimes too too small to fit in a room without a seam. This is one of those times.
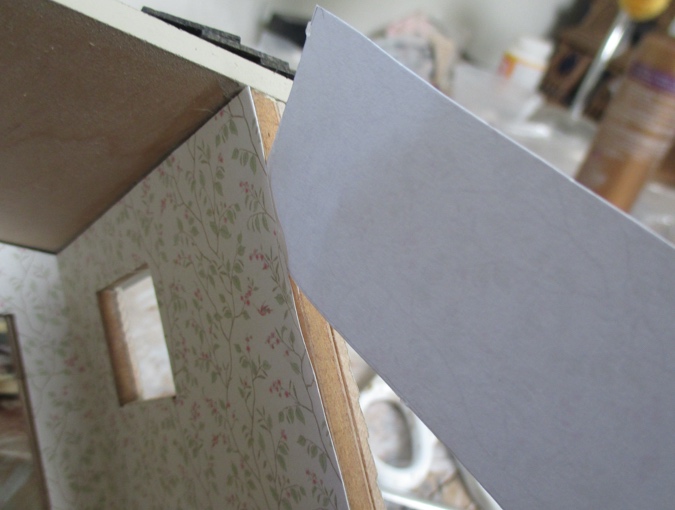
Using the original piece I cut as a template, I cut as much of the wall as would fit on one piece of paper. Then I lay a second piece of paper on top of it and matched up the design. I put a small piece of Scotch tape on the back to loosely hold the two pieces of paper together.
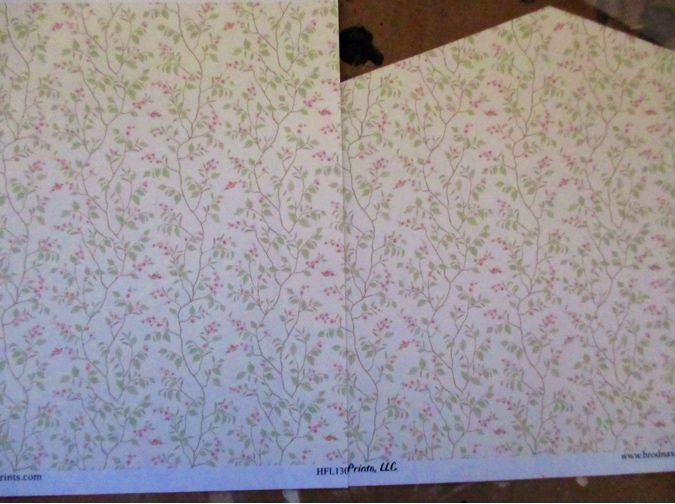
Then I lined up the template piece on top and used this as a guide to cut the rest of the slope.
Still with the pieces taped together, I placed them in the house to make sure I was on track.
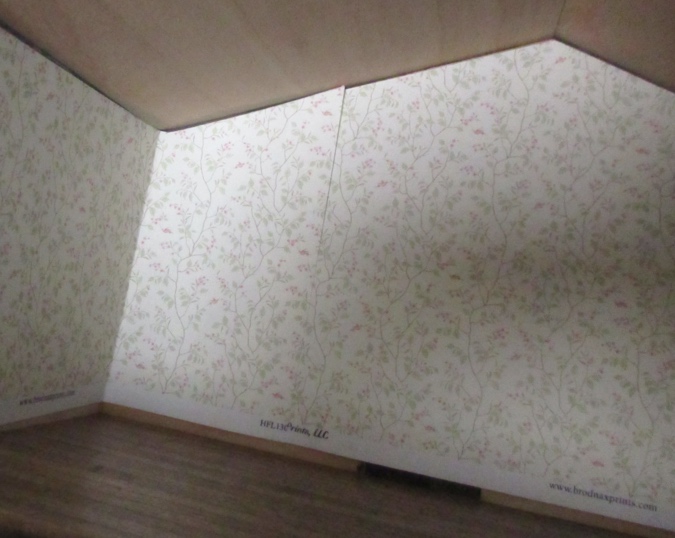
Then I cut out the window and door holes, sprayed the paper with UV sealer, and let it dry overnight. The next day I glued in the paper with wallpaper mucilage.
Here’s the seam. On the plus side, the design lines up perfectly! On the minus side, you can totally see the seam. If I’d used the darker paper with the busier design, it might have been less obvious.
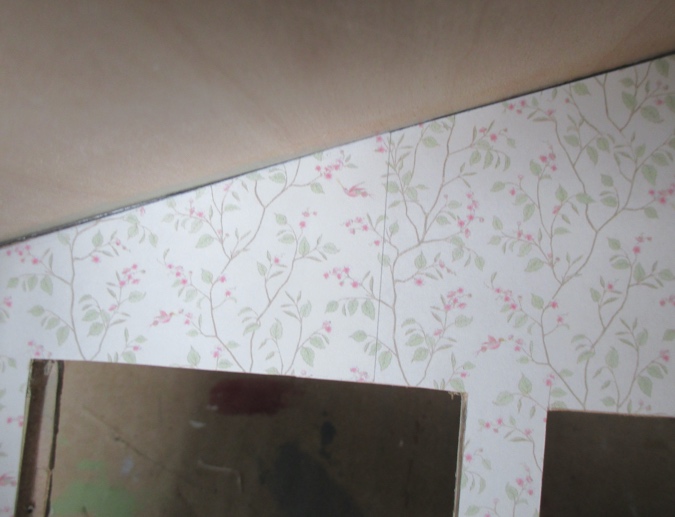
I also pressed too hard when I was pushing the paper into the corner, and my thumbnail poked through it. The Brodnax paper is very thin (just like regular paper), as opposed to the Itsy Bitsy Mini paper, which is more like cardstock. Luckily it’s a small tear that blends into the design.

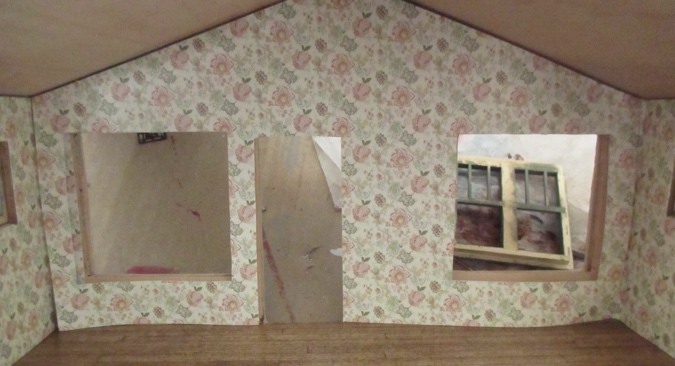
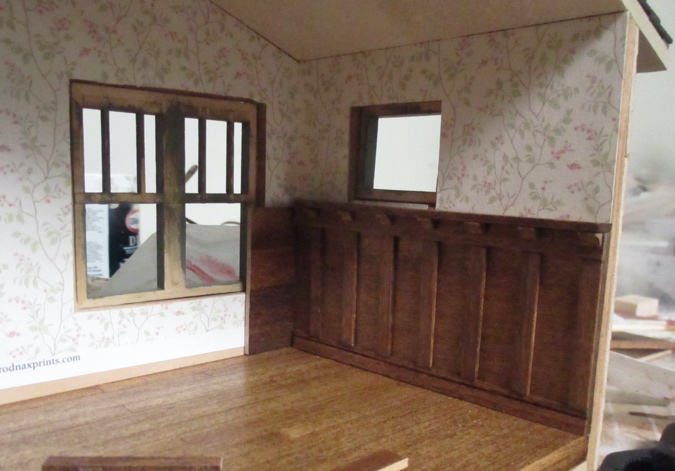
Here’s how it looks with the wallpaper in. I left the border at the bottom of the paper because I’m planning to cover up that part with paneling.
In a few spots the wallpaper was peeling up at the edges and around the windows. I fixed this by putting some mucilage on the corner of a scrap piece, and sliding that up behind the wallpaper.
Next I glued in the ceiling paper, which is a piece of textured real-life wallpaper that I bought a roll of almost twenty years ago and will use on every dollhouse until the day I die.
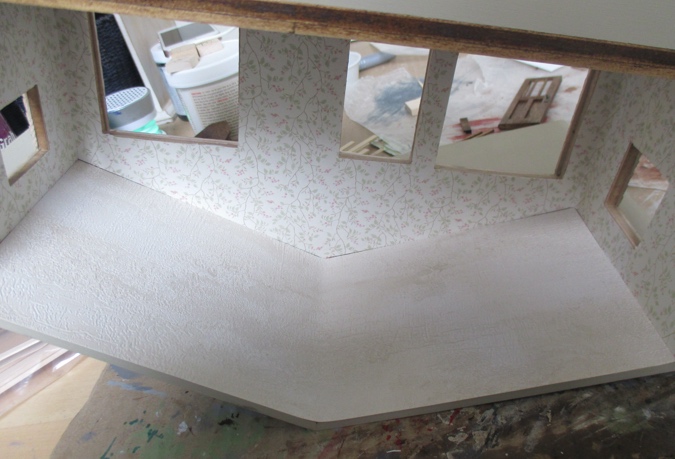
There are some tiny gaps where the ceiling paper and wallpaper don’t quite meet, but I can’t use crown molding because of the peaked roof. I’ll add a small piece of strip wood or quarter round to hide those gaps.
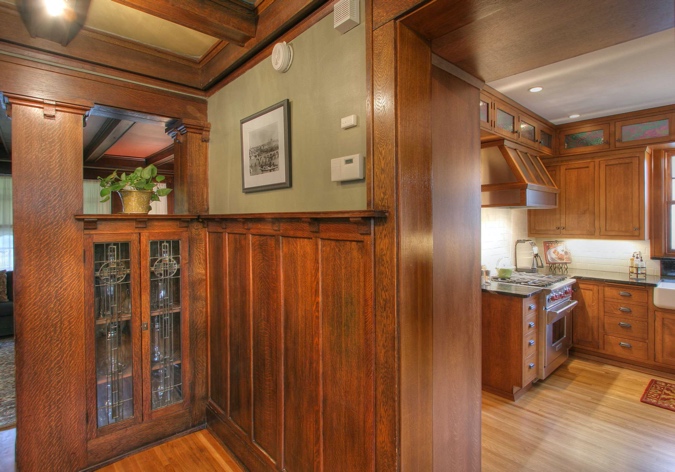
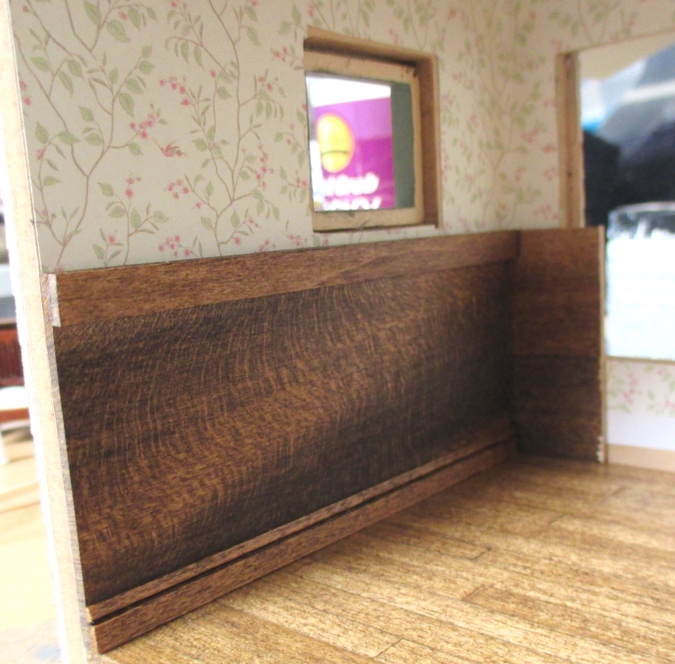
On to the paneling. I googled for pictures of craftsman paneling and really like the look of this one (source).
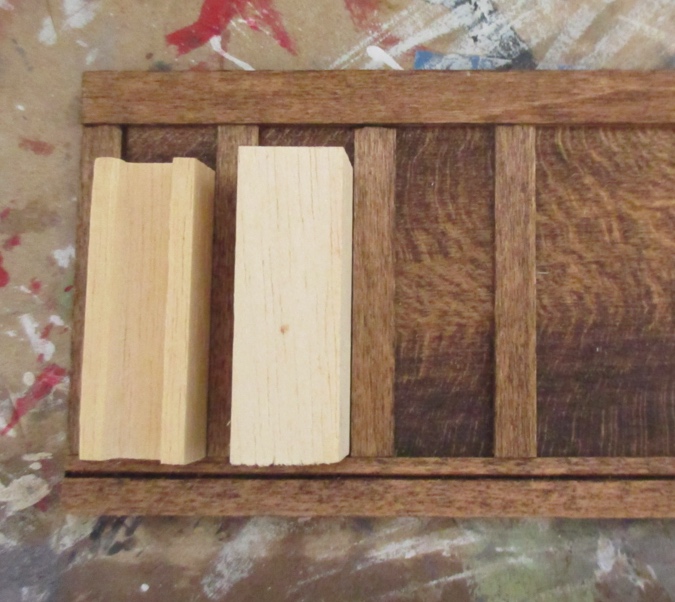
I dug around in my stash and found some 2″ basswood, baseboard, and strip wood.
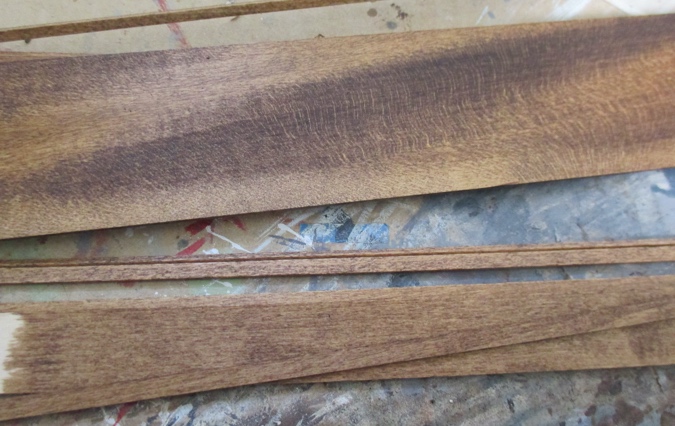
I stained all of these with Minwax Aged Oak gel stain. Hmm, the grain on the 2″ piece is a little funky.
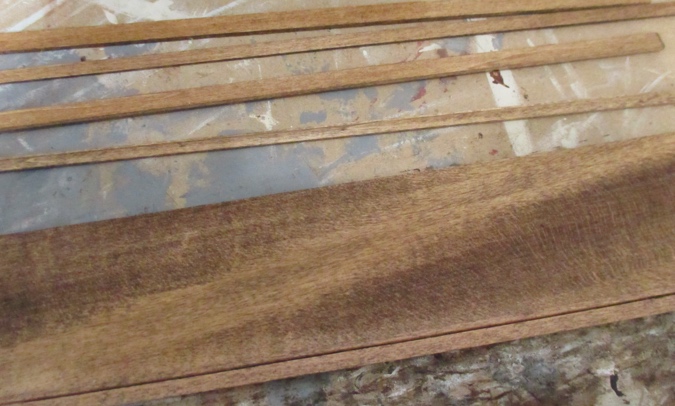
Then I went over them with a coat of Minwax Provincial, which I had also done on the floors. Now that grain’s looking really funky…
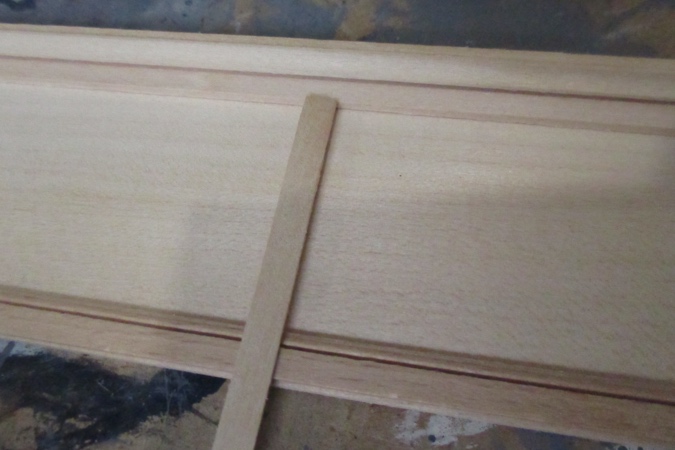
I started by gluing baseboard to the bottom and 1/4″ strip wood to the top. I mitered the corners where they’ll meet up with another piece of paneling.
I haven’t posted about my new table saw yet, but I bought this Proxxon Mini Chop Miter Saw in November when I was working on my contribution to this year’s half scale swap. (A post about that is coming soon!) It has a guide that can be adjusted to cut multiple pieces of the same size. This made it easy to cut the slats.
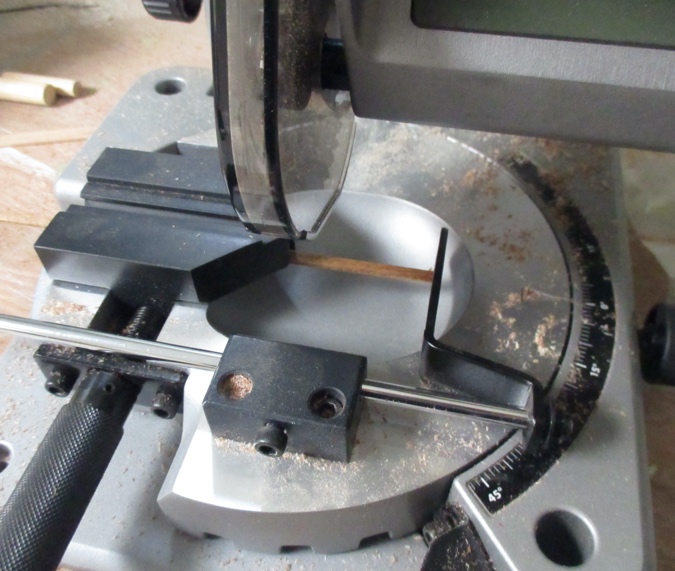
I touched up the cut ends with a Minwax Red Oak stain pen and then glued them in 7/16″ apart, using spacers to keep them even.
I was hoping that funky grain would magically disappear once the slats were on, but no such luck. At this point I decided to start over.
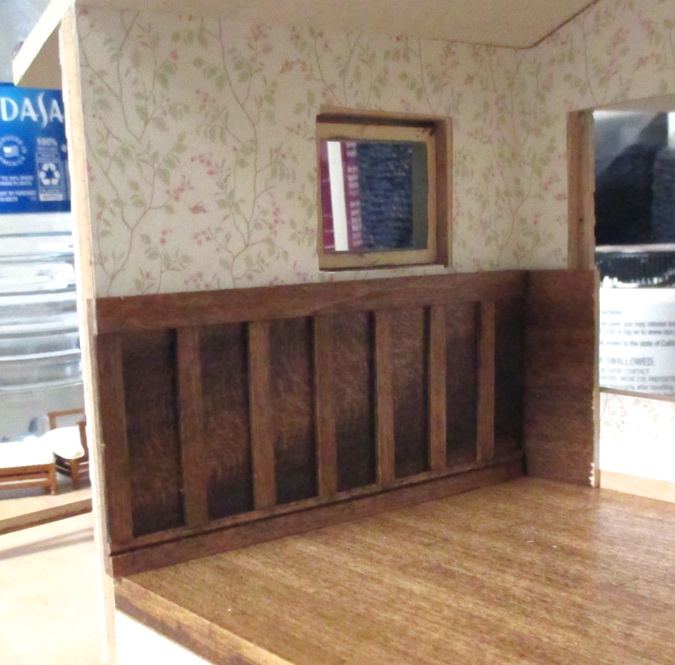
All right, that’s looking much better! The next step was to cut little pieces of cove molding to go above each slat.

I again touched them up with the Red Oak stain pen, then glued them in.
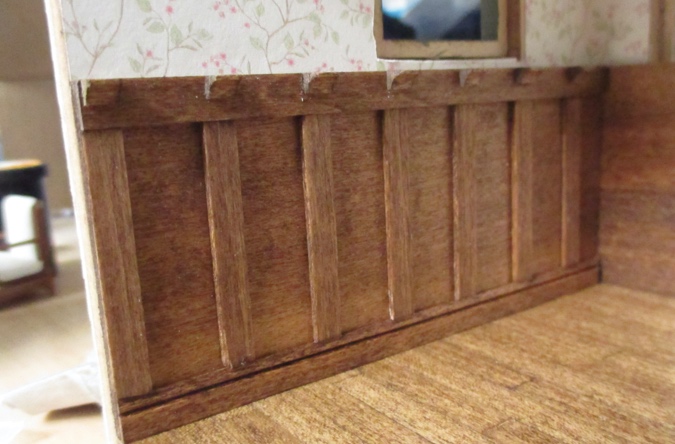
And then I glued in the top piece, also mitered at the corner.
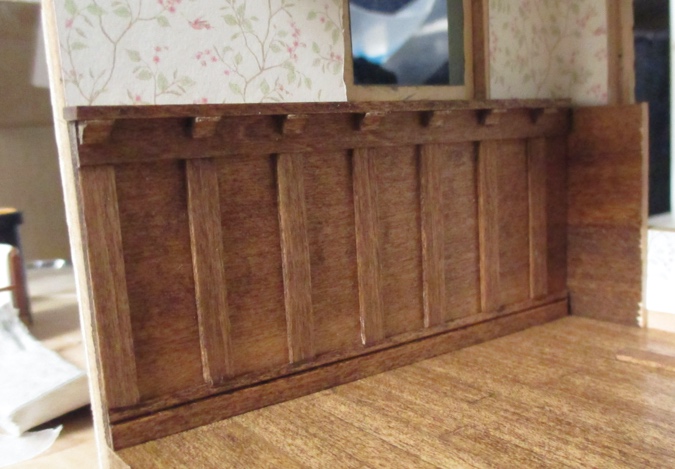
I repeated this process for the other side wall. Notice on this side that a little bit of wall is visible under the window. I made these panels 2″ tall (plus the height of the top piece) because that’s what I had available, and it just happens to come up right below the window, so this will take the place of a window sill. But in order to hide that rogue piece of wall, I’ll have to get a little creative with the trim.
The long wall will be trickier because of the windows. I need to finish those before I can finish the paneling.
 Emily is a freelance writer, miniaturist, and adventure game enthusiast.


That turned out really nice. I do like that first print but the second looks good too. I’ve been having problems lately with not getting corners right with the paper too. Been doing a lot of patching. ha! This will be a nice room when done. Sometimes just a single scene is a a nice change of pace over a full house.
Very nice. I love that wallpaper, I have it in one of my houses. The paneling looks wonderful.
It’s looking good! I like the paneling treatment.
You will never notice any of the minor concerns with the wallpaper. It is so wonderful! What a beautiful Job. Thanks for allowing us to see all the steps! Have a blessed day Lina