Julia Cameron’s The Artist’s Way has been on my shelf for about two decades, but I never read the whole book until recently. It’s sort of a twelve-step program for people who are creatively blocked. I was feeling that way after finishing a big writing project at the end of 2025 and decided to read the book as a New Year’s resolution.
One of the things Julia Cameron swears by is setting time aside each week to do something fun and creative by yourself — she calls it an artist’s date. The first one I did was a trip to a local indie bookstore where I splurged on a stack of new books, followed by lunch nearby. On my way to the restaurant I wandered into a toy store that had a big LEGO display. I didn’t buy anything, but it got me thinking that building a LEGO set could be another good artist’s date.
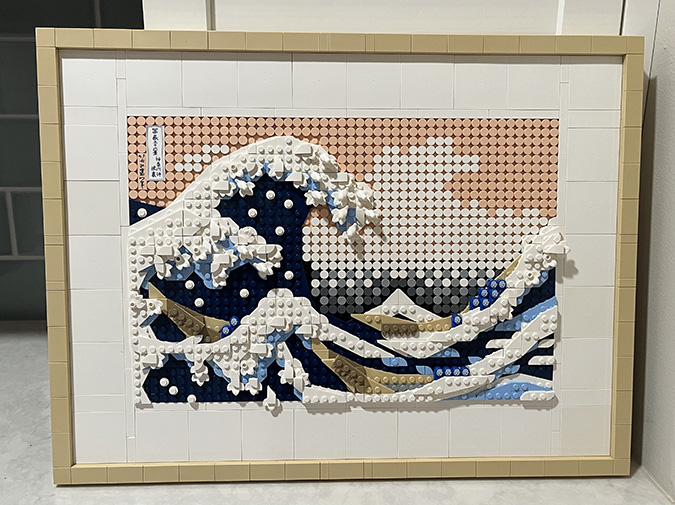
I was drooling over the Neuschwanstein Castle, but I’m already short on space to display finished dollhouses, let alone a huge LEGO castle. So I started looking at LEGO Art, which hangs on the wall, and decided to try The Great Wave. I finished it in an afternoon, and it was fun!
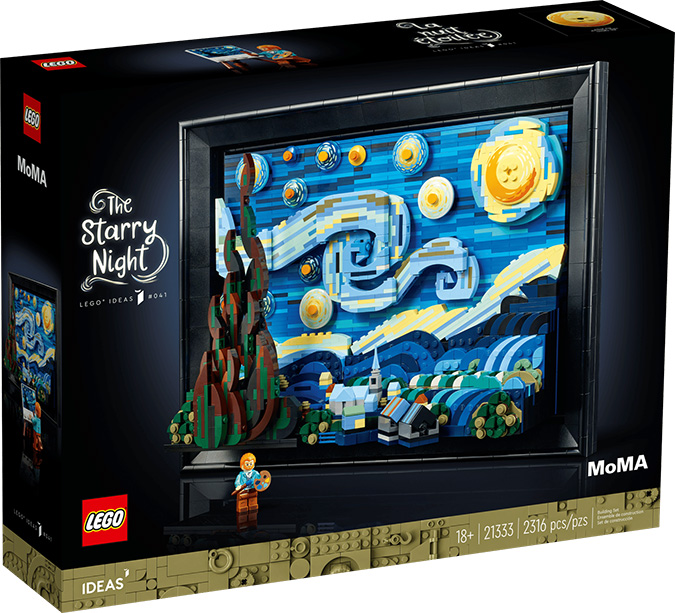
So much fun, in fact, that I wanted to do another one. So I bought The Starry Night.
I mean, c’mon. How cute is this?!
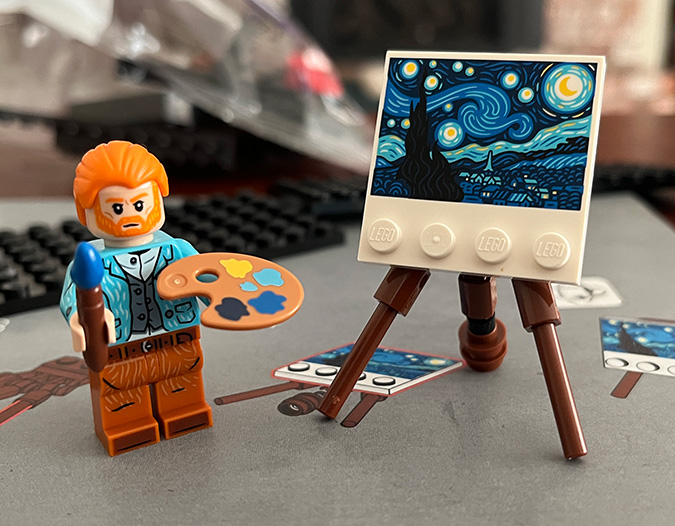
(LEGO figures don’t have ears. Yes, of course, it’s the first thing I checked when I took Vincent out of the box.)
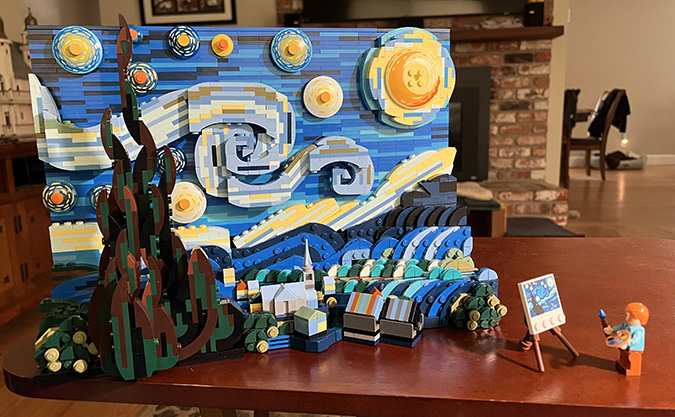
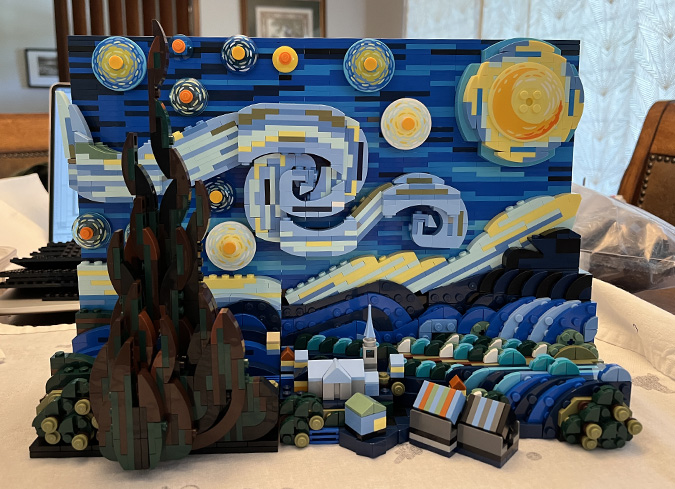
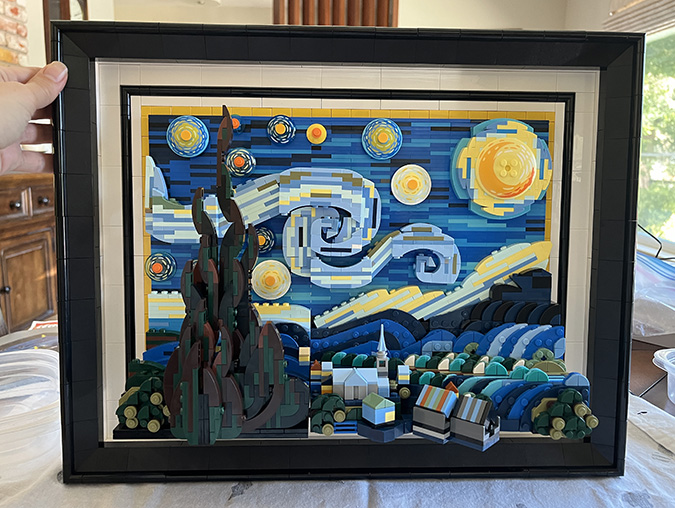
This one’s more complicated than The Great Wave, and took me a few weeks. Here’s the finished piece, sans frame.
When I was looking online for posts about other people’s experiences building this set, I came across a YouTube video where someone showed how he extended the frame to include a mat, more like The Great Wave.
Here’s a screen grab from the video:

Honestly, before I found this video I didn’t think there was anything wrong with the frame, but once I saw it, I needed to do it. Regular readers of my blog know that I like to “kitbash” miniatures. Apparently this urge extends to LEGOs.
The video doesn’t provide a parts list or instructions for modifying the frame, in spite of many requests in the comments. With a bit of googling I found a Facebook post where someone posted a similarly modified frame that I assume they derived from the video.
I spent a lot of time looking at the video and the Facebook picture to figure out which additional parts I would need. The extra parts cost about $50 from the LEGO Pick a Brick store.

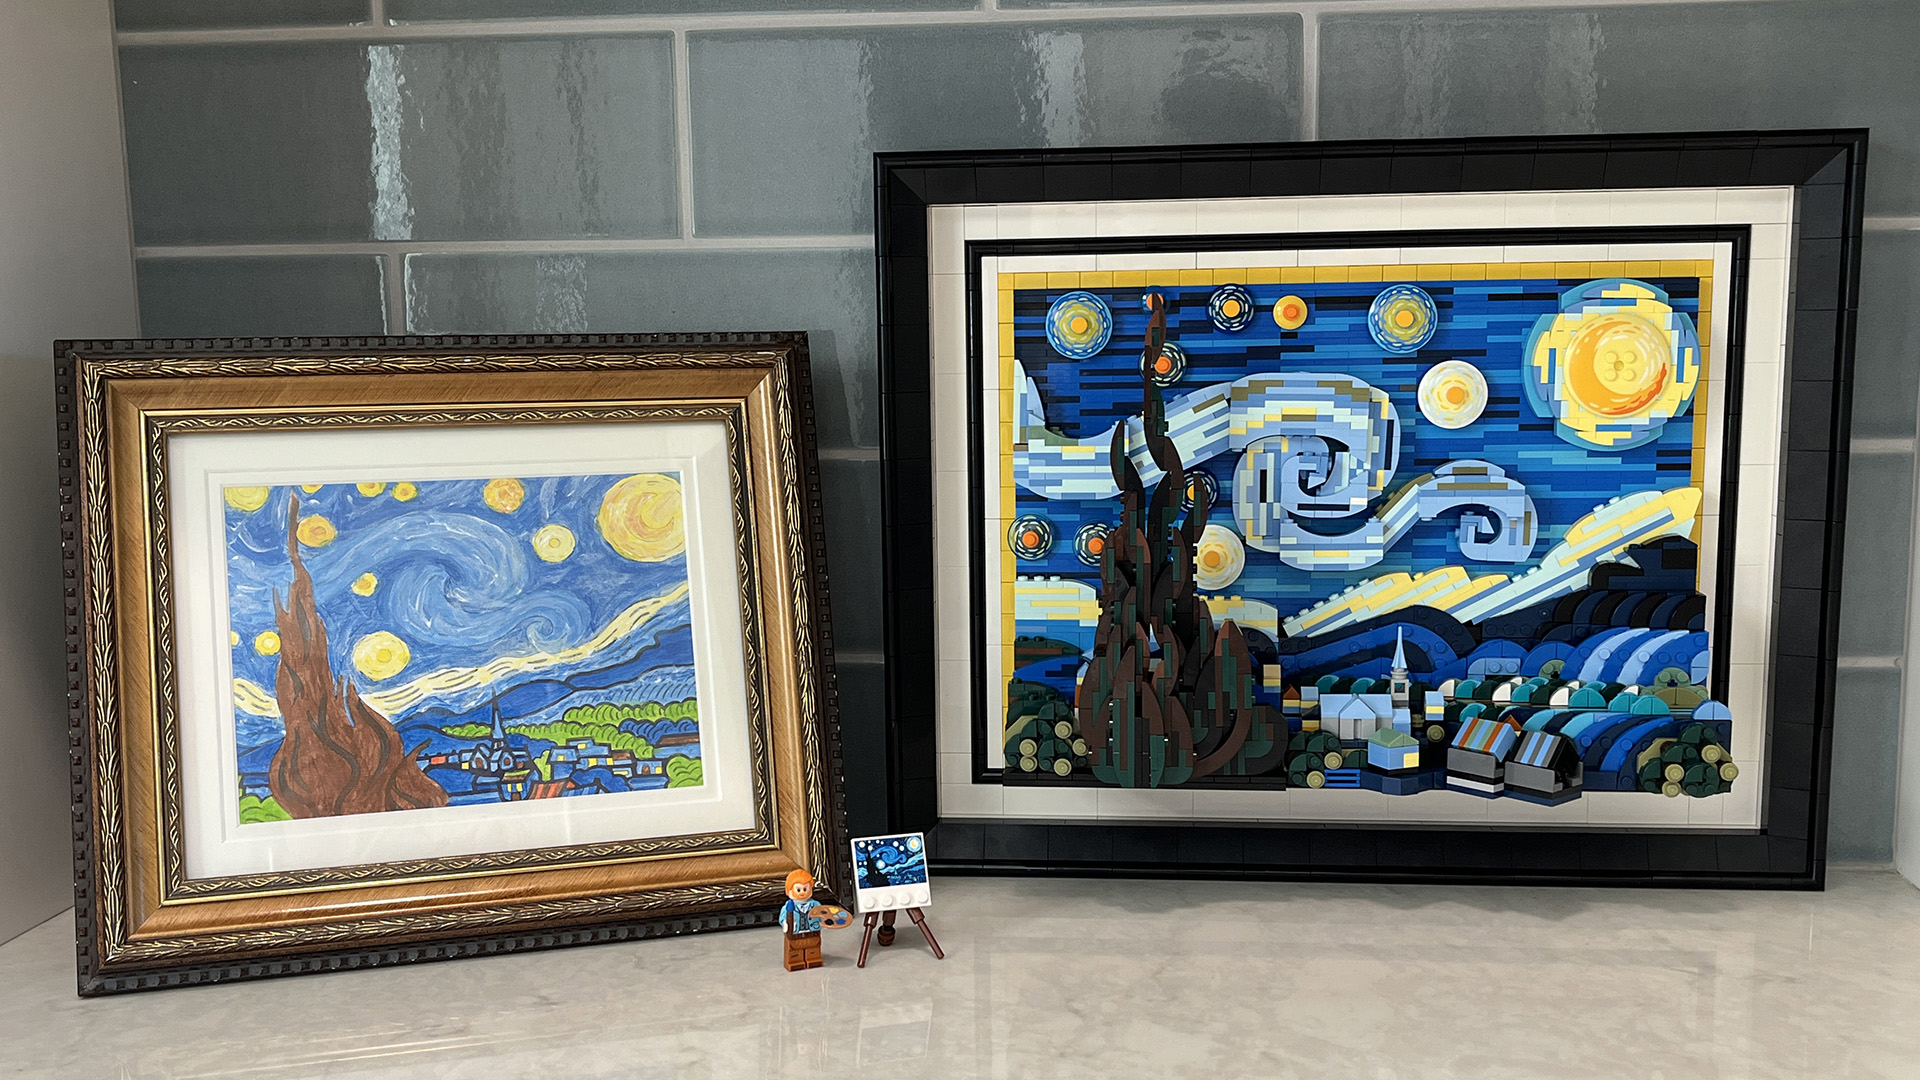
Coincidentally, I spent one of my other artist’s dates doing a Starry Night paint by number. Can’t say I was a fan of that — the colors that came with the kit don’t match the painting that well, and I’m also just not very good at painting — but I did have fun picking out a gaudy frame for it at Michaels. I’m planning to hang these up together in my office.
Since I’d seen several comments from people asking for instructions for the modified frame, I figured I might as well write up how I did it. If your Google search for how to upgrade the frame for the LEGO Starry Night set has brought you here, I hope this post is helpful. If you just want the parts list, jump to the bottom.
LEGO Starry Night Upgraded Frame — Instructions
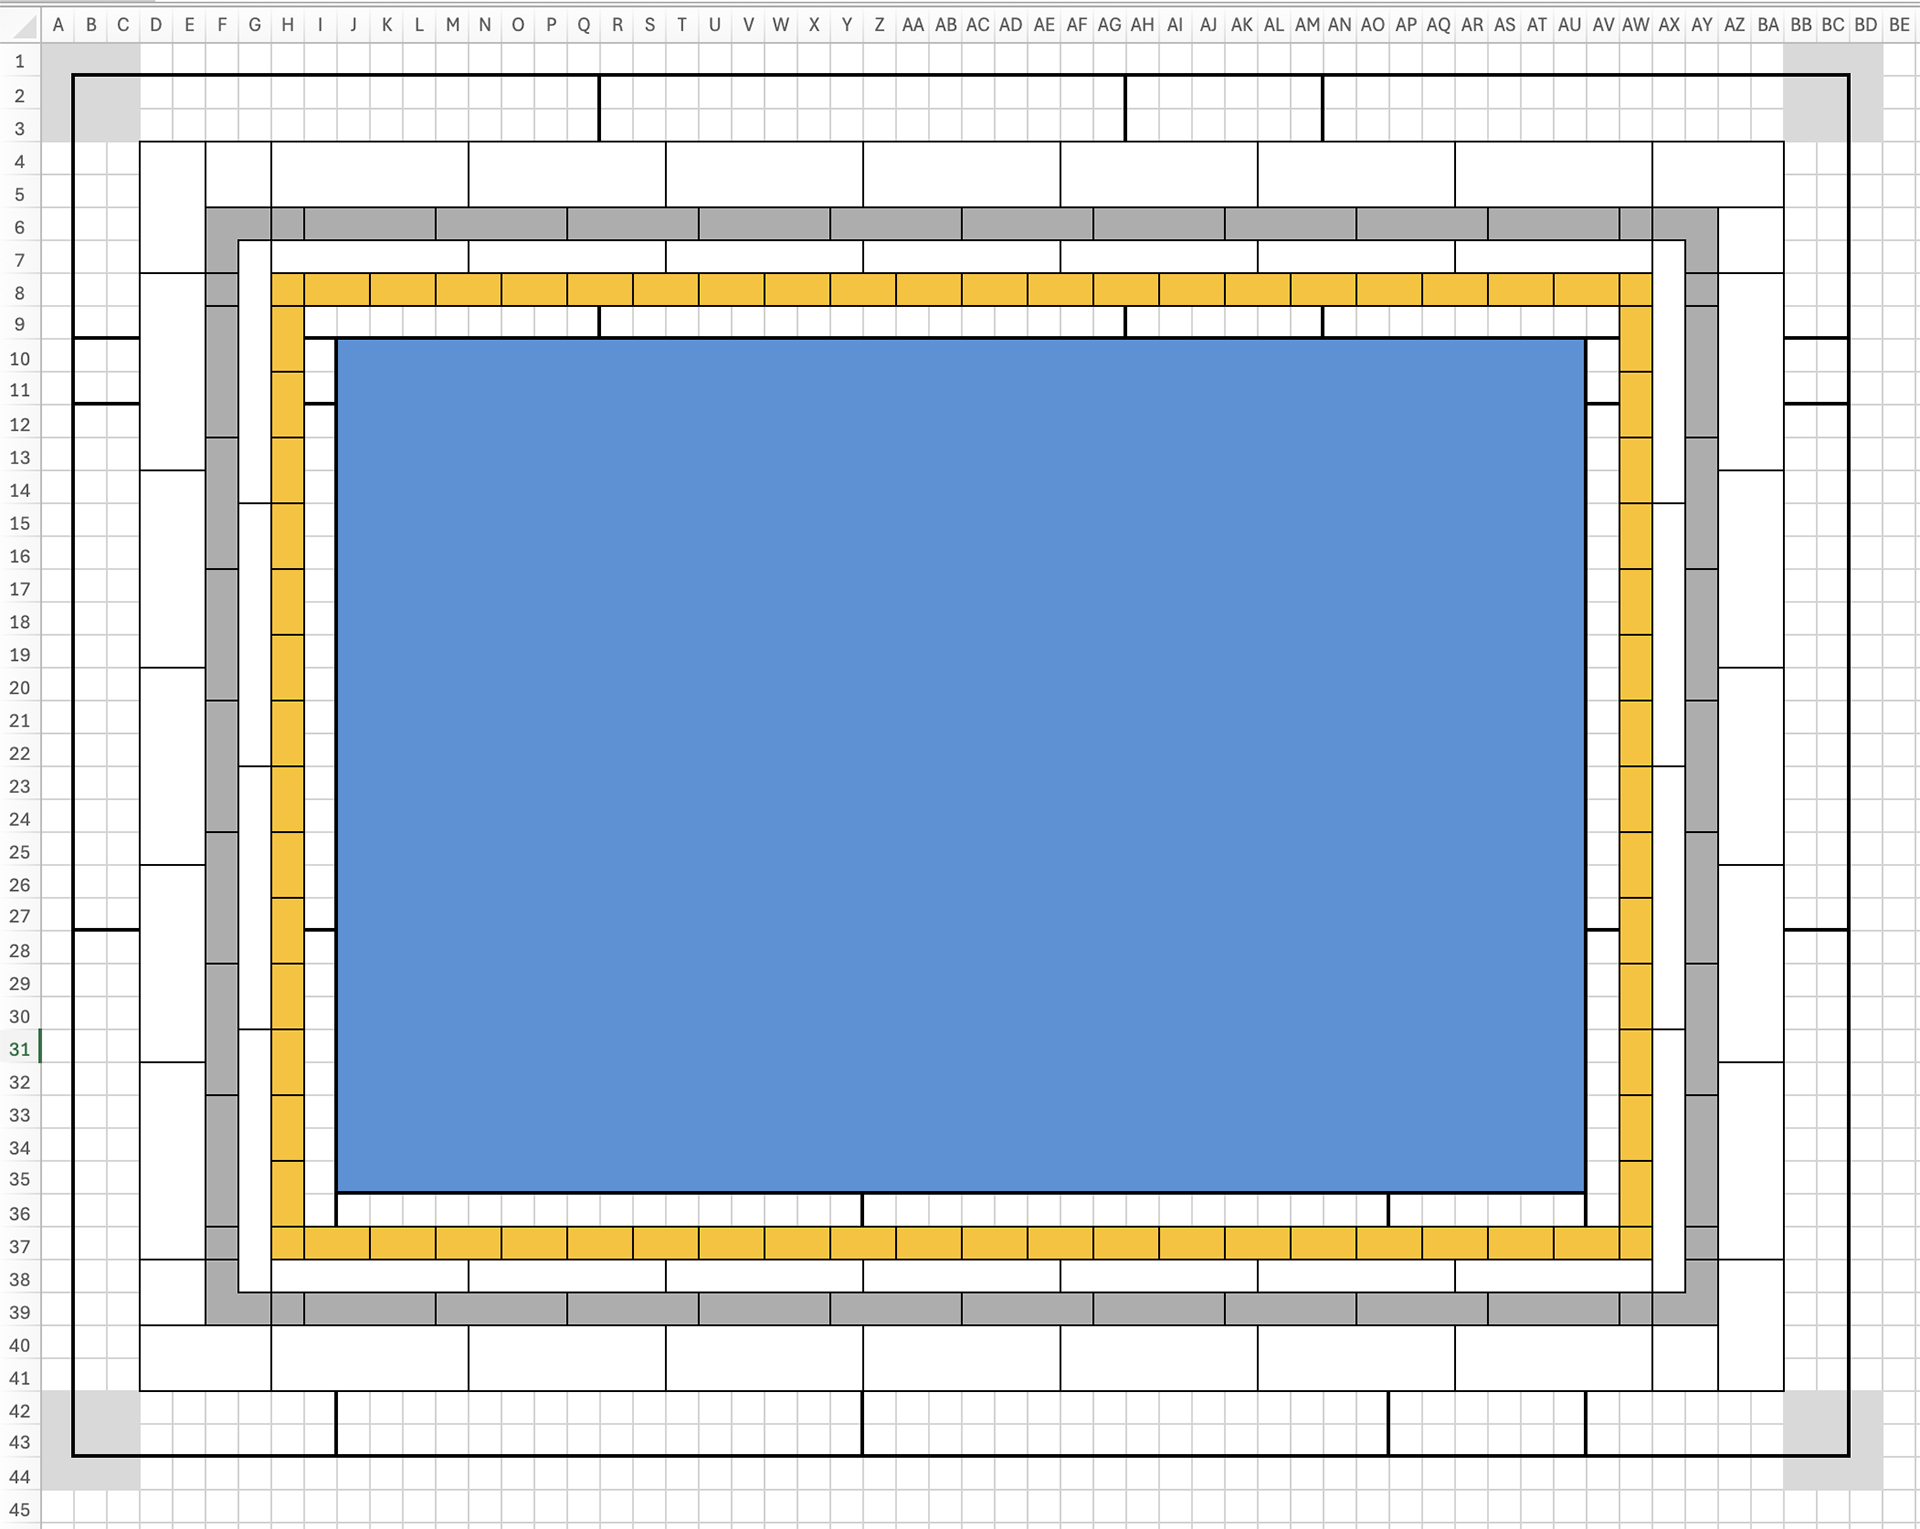
I started by diagramming the frame in Excel. (I actually started by attempting to draw it on graph paper, but that quickly got messy.) Click the picture for a larger version if you want to print it out.
LEGO’s instructions have you add the frame halfway through the build. I skipped over those steps (the #6 bags) and finished the artwork before starting on the frame.
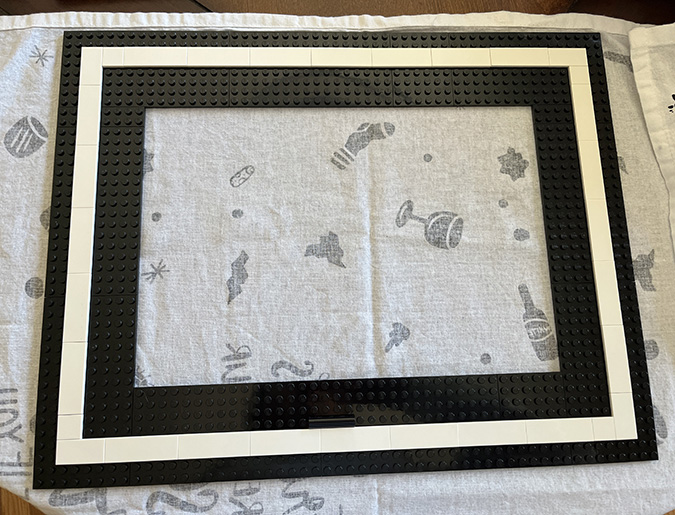
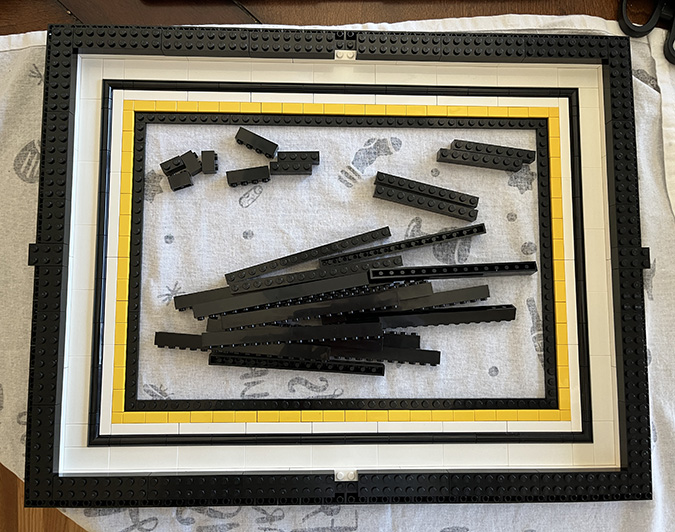
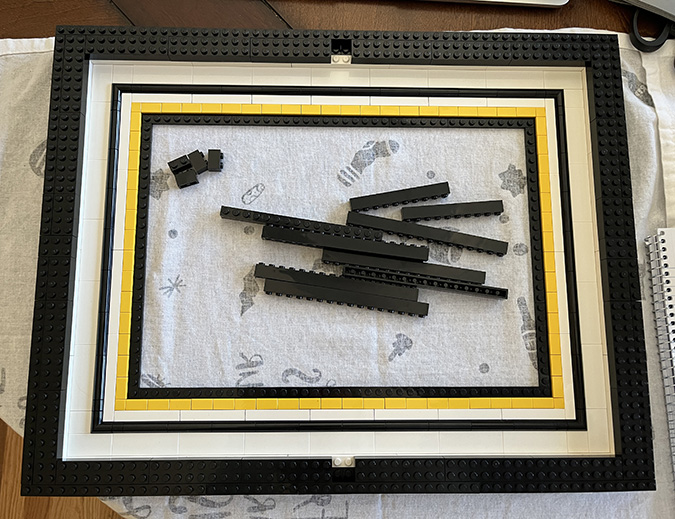
The modified frame starts with nine 8×16 plates, two 6×8 plates, and two 2×8 plates. The 2x8s go on the sides and the 6x8s go on the top and bottom.
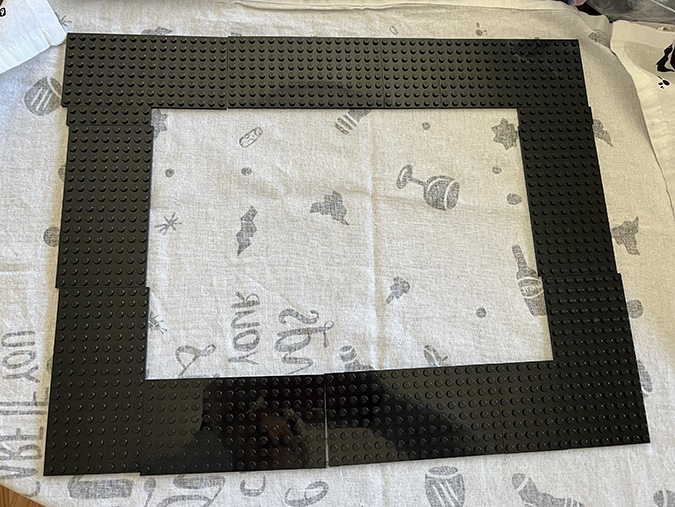
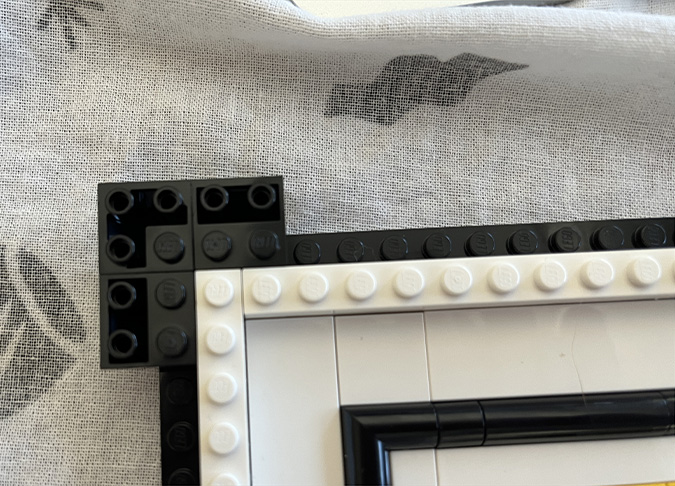
First I laid down the outer white tiles to join the plates together. One 2×4 and one 2×2 are used in each corner. The rest are 2×6.
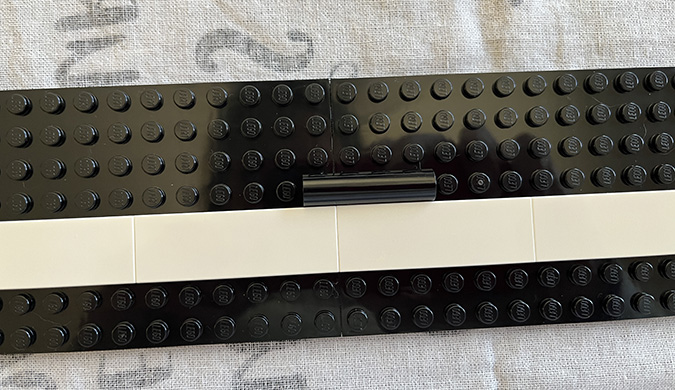
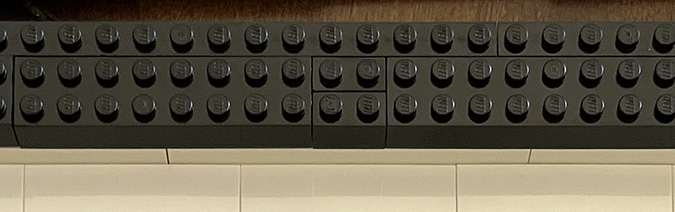
There’s one spot on the bottom where the plate seam and tile seam line up. I snapped one of the black curved pieces over this to hold that seam together.
Next I did the thin white tiles. These are 1x8s on the sides and 1x6s on the top and bottom.
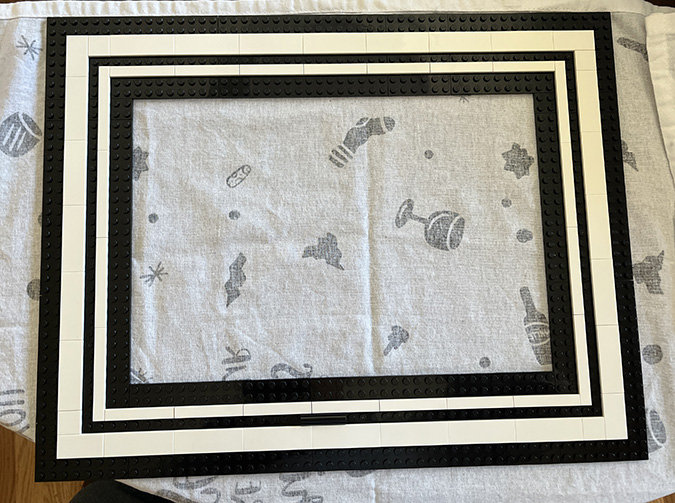
At this point I went into the #6 bags and combined the curved black pieces from the set with the extras I’d bought. I then added the black outline between the two white outlines. 1x1s go next to the corner pieces and the rest are 1x4s.
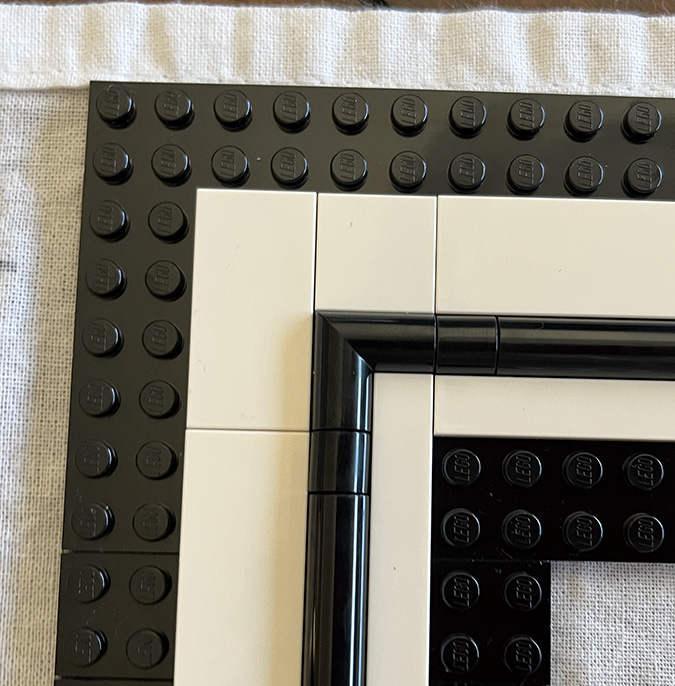
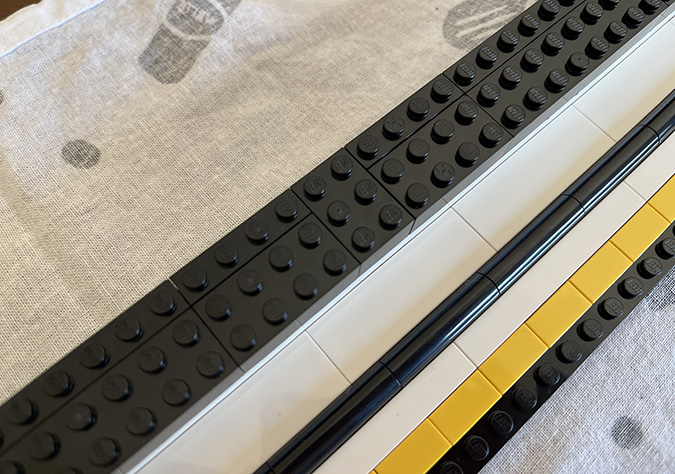
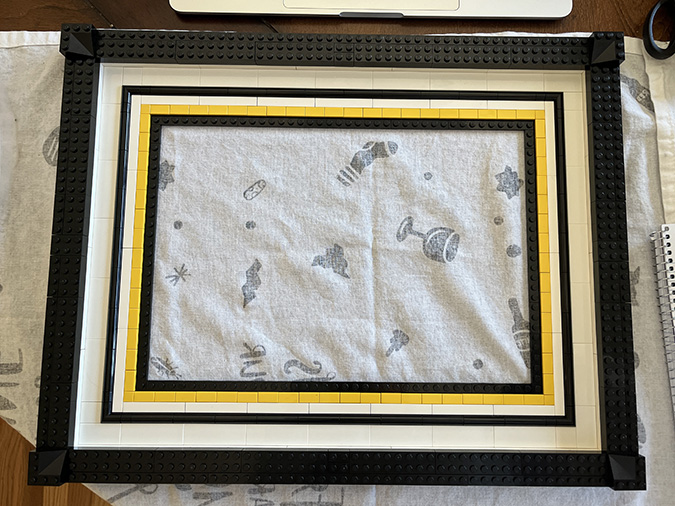
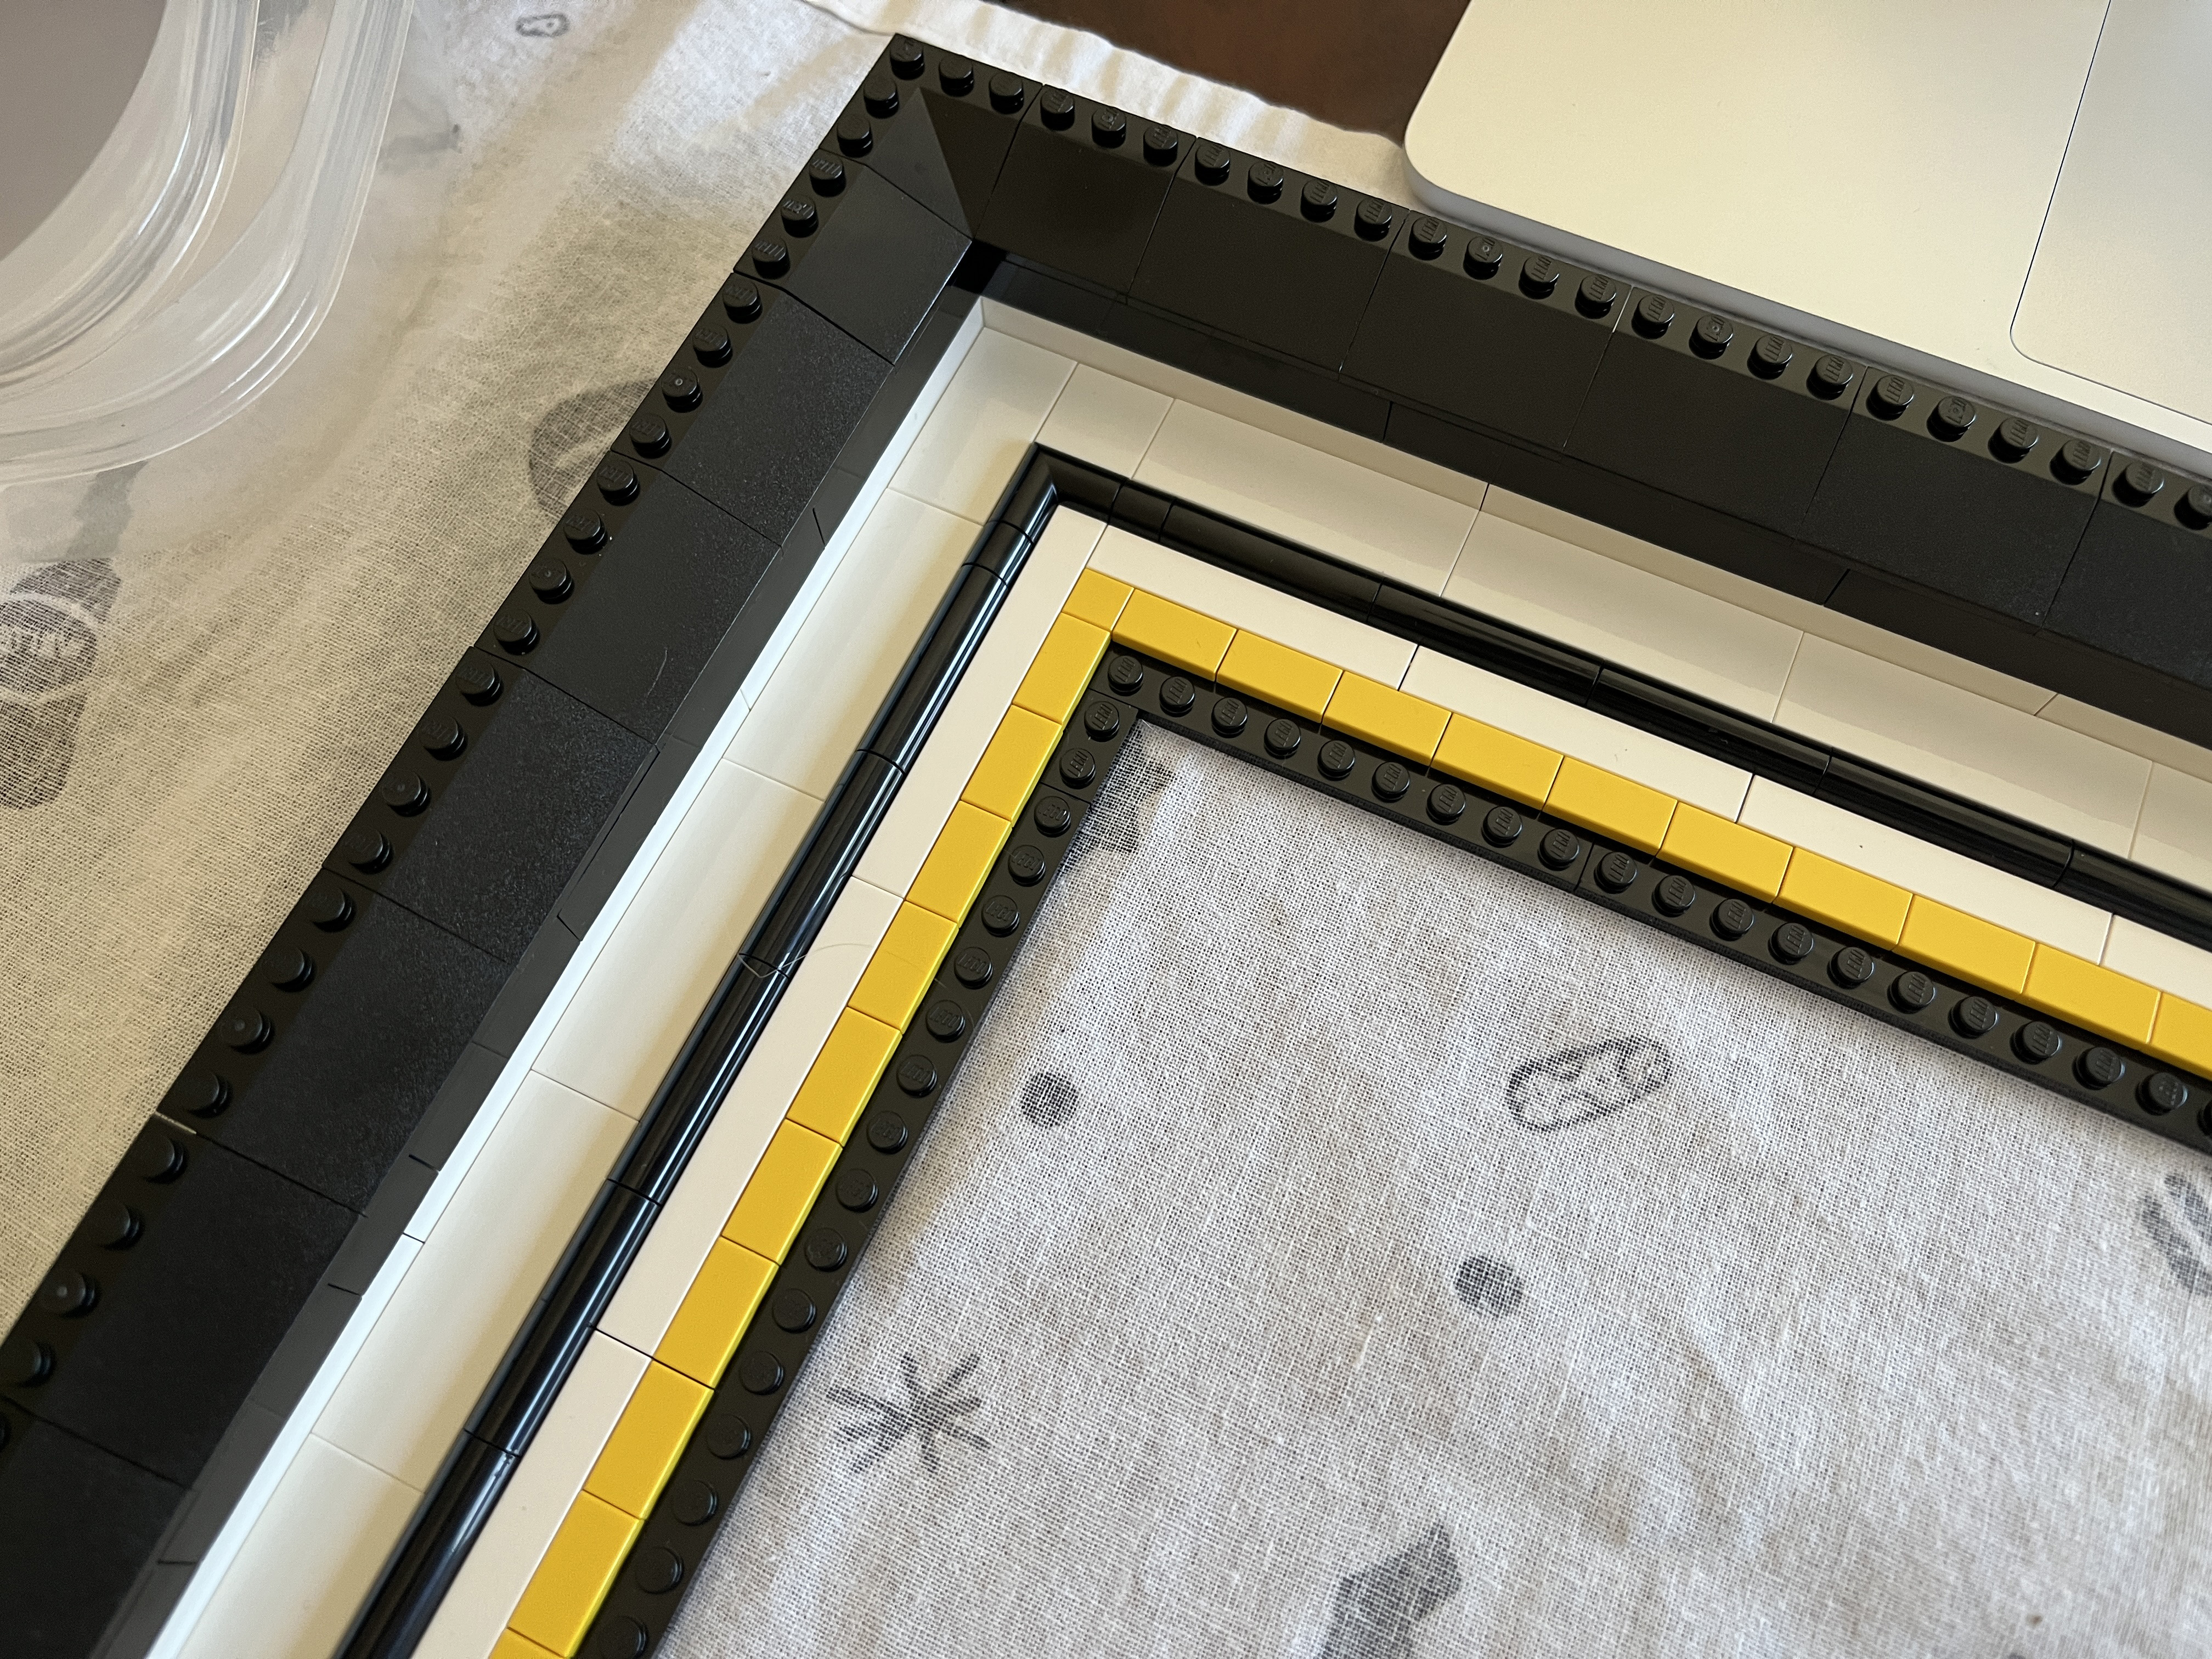
For the border next to the artwork, the YouTube video uses round gold pieces. I chose not to do this for two reasons: 1) they’re *a lot* more expensive, and 2) rounded corner pieces (like the black ones in the pic above) are not available in gold, and I didn’t like the look of the 1/4 circle tiles the YouTuber used in the corners.
The frame I saw on Facebook had yellow flat tiles instead. I considered gold flat tiles as a compromise, but this still would have added about $15 to the cost and the bling wasn’t that important to me (especially since you don’t even see the ones at the bottom where the 3D part of the artwork hangs over it). Yellow it is.
If you do want to try gold, I’ve included the parts you’ll need in the list below. Keep in mind LEGO has two versions of gold. Warm Gold (called Pearl Gold on some websites) is cheaper but also doesn’t look very gold-like in my opinion. The shinier, more expensive gold is called Gold Ink.
At this point I referred back to the booklet (Step 147) to understand how the outside part of the frame comes together. In the original build, this border would have been black, but in the YouTube video it’s done in white. I had to buy new pieces anyway since the black ones that come in the kit weren’t the right orientation for the larger frame, so I bought white ones. These are all 1×10.
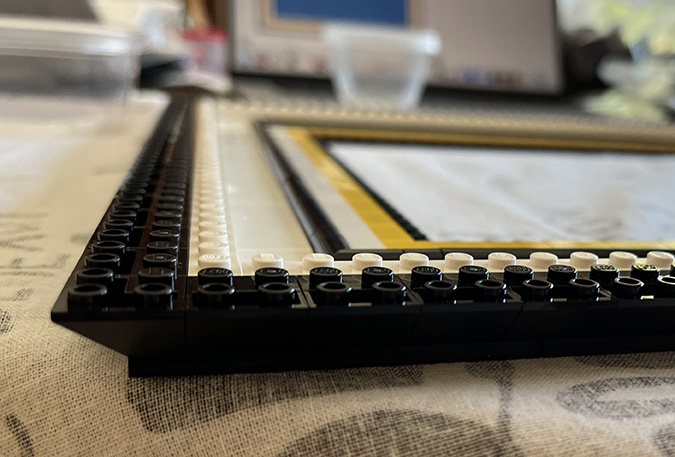
The next step is adding roof tile corners flanked by 2×2 inverted roof tiles. So you don’t waste time looking for your roof corners, they’re in a different bag than the rest of the 2×2 roof tiles.
These project off the side of the frame.
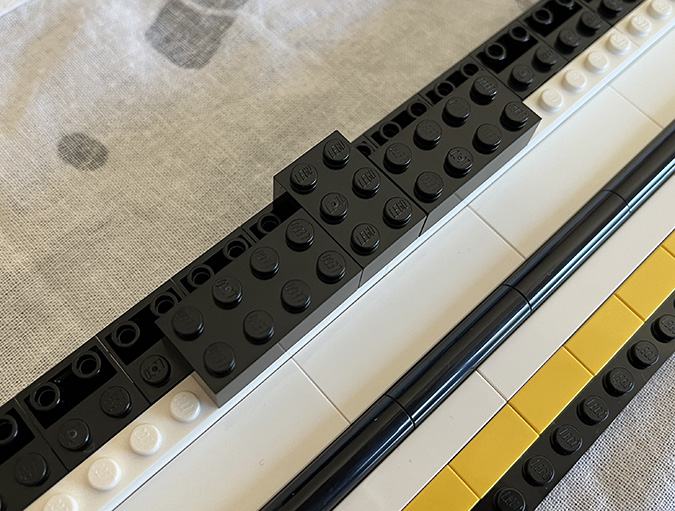
Skipping ahead to Step 166, a 2×3 brick goes in the center of each side.
A 2×4 brick goes on either side of these.
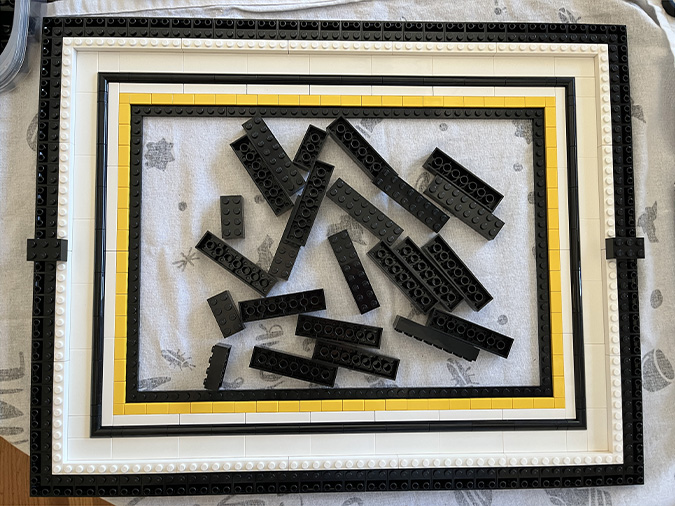
Then add 2×8 bricks, leaving the centers at the top and bottom open for now.
Next add 1x4s on each side of the 2×3 bricks on the sides, and 1x16s to complete the sides.
Use three 1x16s and one 1×8 on the top and bottom. This leaves a 2×2 hole in the center of the top and bottom.
Fill these holes with two 1x2s.
Next we add 3×3 corner bricks to the four corners of the frame.
These each get 3×3 roof tiles next to them.
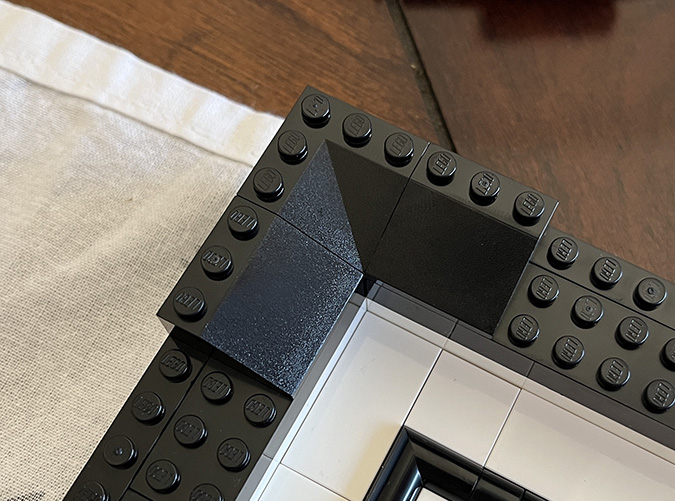
And then the rest of the frame gets 3×4 roof tiles.
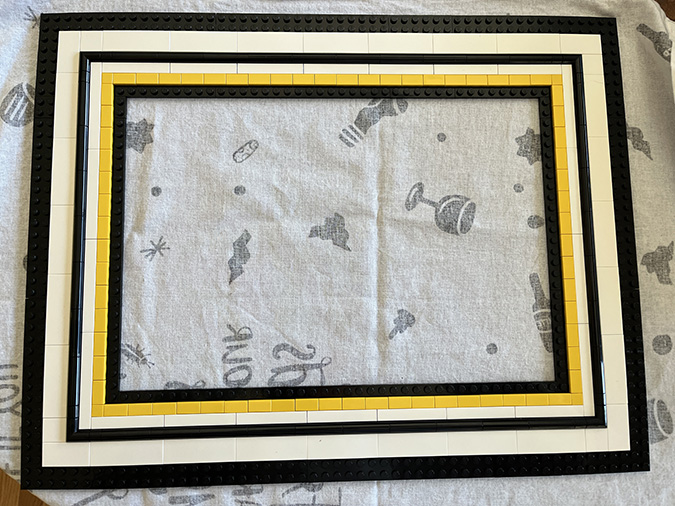
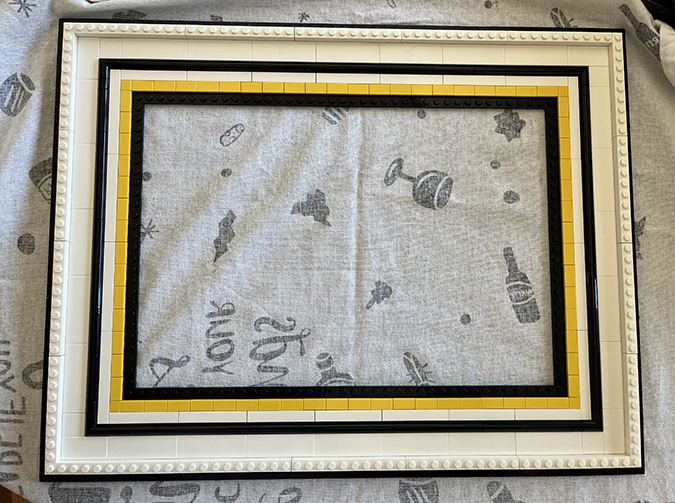
Finally, add the remaining curved black pieces around the outer edge of the frame.
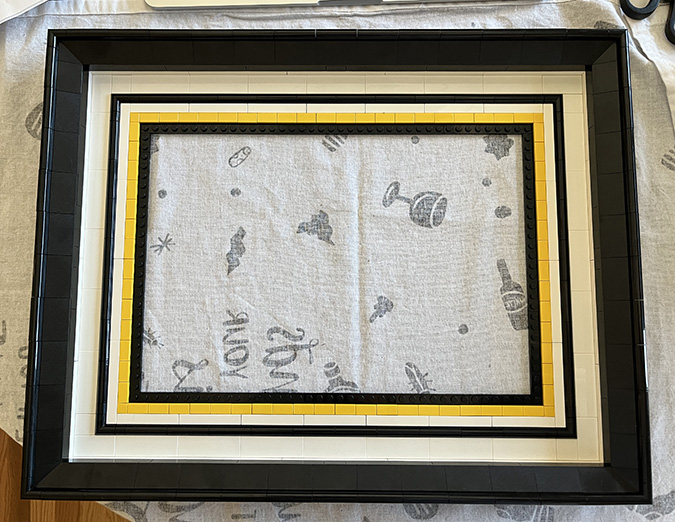
Carefully lay the artwork down on the frame and press the edges to join it to the studs, and you’re done!
LEGO Starry Night Upgraded Frame — Parts List
In addition to parts that come with the Starry Night set, you will need:
2x Plate 6×8 – Black (303626)
9x Plate 8×16 – Black (6094066)
2x Plate 2×8 – Black (303426)
4x Flat Tile 2×2 – White (306801)
4x Flat Tile 2×4 – White (4560178)
24x Flat Tile 2×6 – White (6332042)
14x Flat Tile 1×6 – White (663601)
8x Flat Tile 1×8 – White (416201)
12x Plate 1x4x2/3, Outside Bow – Black (6370959)
18x Brick 1×10 – White (611101)
4x Brick 2×4 – Black (300126)
2x Brick 2×8 – Black (6037390)
4x Brick 1×4 – Black (301026)
2x Brick 1×8 – Black (300826)
16x Roof Tile 2×2/45 Inverted – Black (6425507)
8x Roof Tile 3×4/25 Deg. – Black (6435854)
Flat yellow border, as pictured:
4x Flat Tile 1×1 – Bright Yellow (307024)
68x Flat Tile 1×2 – Bright Yellow (306924)
Alternate gold inner border (flat):
4x Flat Tile 1×1 – Gold Ink (6538102)
68x Flat Tile 1×2 – Gold Ink (6265247)
Alternate gold inner border (rounded):
4x 1/4 Circle Tile 1×1 – Gold Ink (6546116)
136x Plate 1x1x2/3, Outside Bow – Gold Ink (6286351)
4x Plate 1×1 – White (302401)
 Emily is a freelance writer, miniaturist, and adventure game enthusiast.


Wow! Zephyr should be impressed.
I sent him a picture!
So FUN!
I love Legos, too. I build the small buildings, I consider it a mini dollhouse.
Great idea with the frames for the paintings.
I’m on the lookout for something dollhouse-like. There’s a Victorian Mansion on LEGO Ideas that I hope makes it to 10K and becomes a real product! https://beta.ideas.lego.com/product-ideas/ae2d4c42-ebe8-4500-9f06-4149c7f5e4a0
Just got this set for my 49th birthday as a present. Love the frame! Can’t wait to put it together
Have fun! Since I posted this, I’ve also done Sunflowers (with some modifications) and the Milky Way. It’s addictive!