The Good Sam miniature show is this weekend, and for the past two days I’ve been down in Morgan Hill attending one of their featured workshops, the Cypress and Fog roombox. This is my second time taking a class taught by The Guys from Texas; the first was Oak Shadow back in 2006. This workshop was every bit as fun, although a bit more exhausting than I remember. (Probably because the finished product is much more elaborate!)
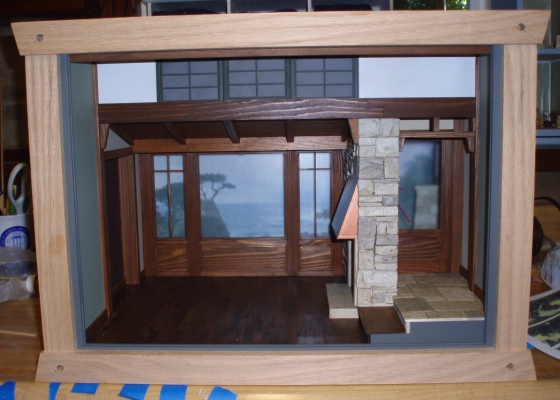
This is how far I got with my roombox during the class.
I still have to finish up the panels at the top and plug in the lights.
At the end of day 2 I’m not 100% finished, but I’m pretty close. Unfortunately I didn’t take any pictures before I loaded the roombox into the car, and I’m staying in a hotel tonight so running out to photograph it isn’t exactly convenient, but for now I’ll at least post my progress pictures.
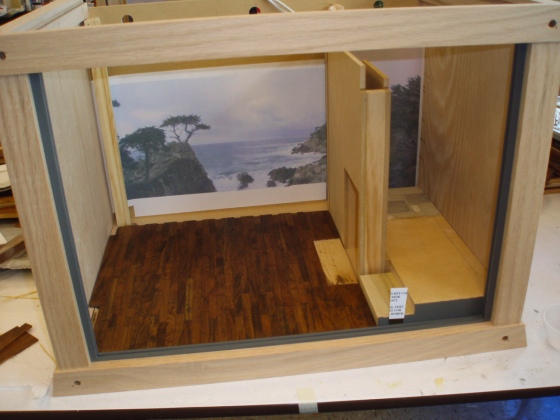
The first thing we did was lay the hardwood floor. I’ve done this before with coffee stirrers and skinny sticks, but the techniques we learned from The Guys put my previous attempts to shame. This floor is absolutely gorgeous. The catch is that in order to do all of the sanding and filling that makes the floor so nice, it needs to be outside of the house—meaning you can’t lay the hardwood directly into the dollhouse as I always do. It’s a brave new world…
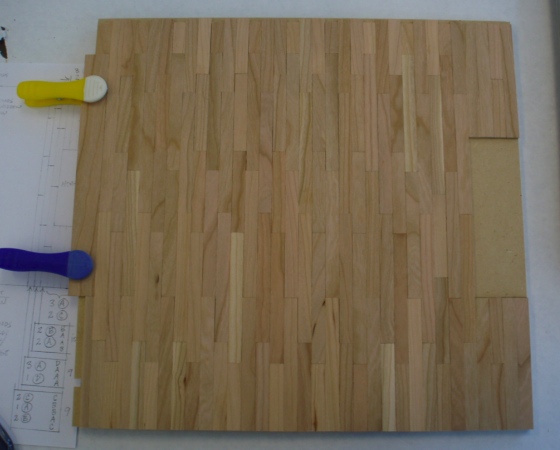
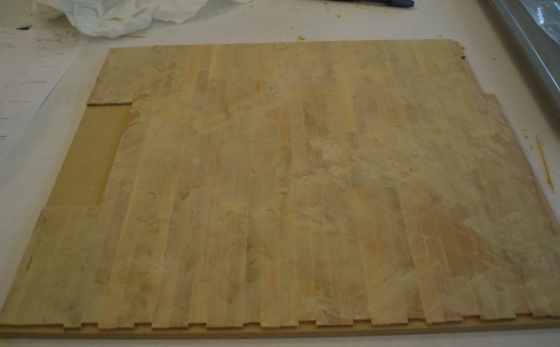
After gluing down all the cherry pieces and sanding the floor nice and smooth with an orbital sander, we used watered-down wood filler to fill the cracks between the boards. I worried about the wood filler messing up my floor, and it did look scary for a little while there (see below!), but another round with the orbital sander took care of it.
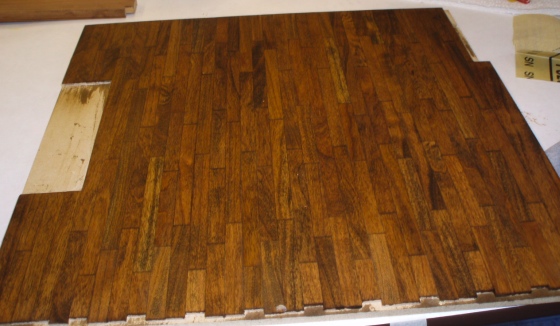
Next we stained the floors a gorgeous walnut color. They dried overnight, and this morning we waxed and buffed them. The finished floor is smooth and perfect. Ironically it almost looks like flooring paper… which makes me wonder just a tiny bit if all the work was worth it. (Yes, of course it was!) In any case, I learned a lot about doing hardwoods well, as opposed to doing them haphazardly as I have in the past. I just I hope I remember the techniques long enough to use them again.
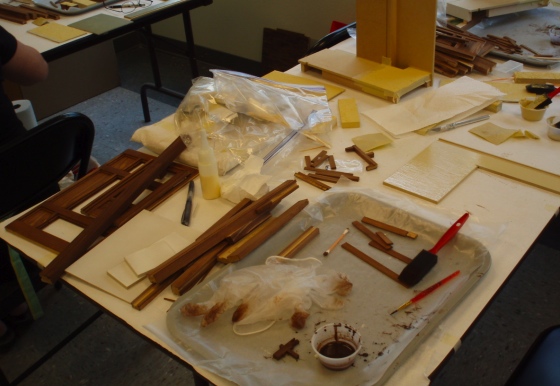
Something I’ve loved both times I took a class with these guys is the amount of prep work they do ahead of time. The box and portions of the inside are already assembled, and high-quality materials are provided for the parts we do ourselves. Cypress and Fog comes with several “stone” panels cast in resin, art deco fireplace details, a number of strategically placed light sources, and (to my amazement) real glass for the windows. The entire roombox has amazing craftsmanship and I definitely got my money’s worth!
After we finished our floors, there was lots of staining and a bit of painting to be done. We used water based stain which was great—otherwise I think we all would have been high from the fumes.
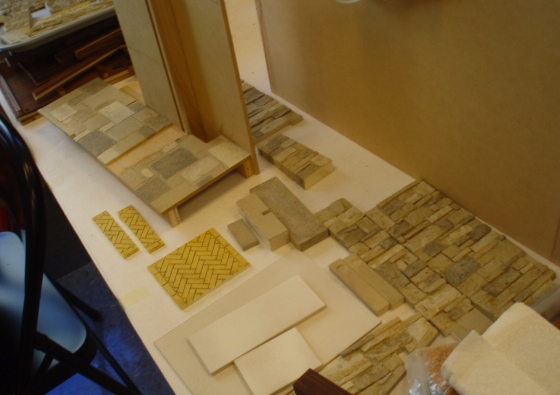
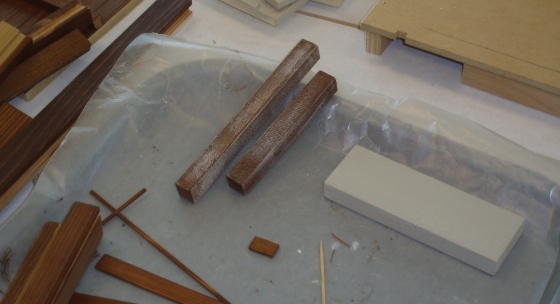
One technique taught, which was also used in the Oak Shadow class, involves making stucco and stone textures with wood filler. The stone walls and floor inside the roombox are cast resin, but the flagstones on the front porch are created using wood filler and a sponge to give it texture. Grout lines are masked off and the masking tape is removed after the wood filler dries.
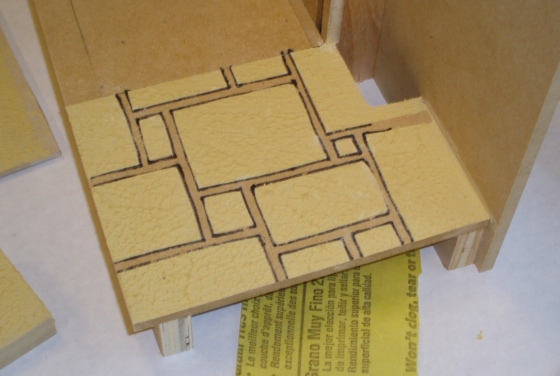
These flagstones, along with all the resin stones, were washed with two different shades of watered-down paint to create a random effect, then coated with an aging varnish. This roombox has a lot more resin stonework than Oak Shadow, and preparing the stones took a couple of hours. I somehow managed to take the longest out of anyone. (Perfectionism may have had something to do with it!)
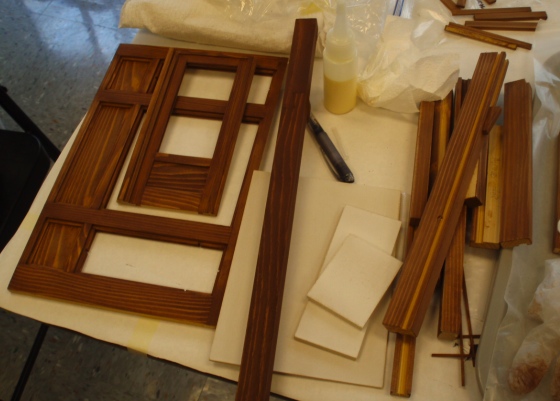
Another painting technique involved applying gray paint with an almost-dry brush to give wood an aged look. The posts below go on the roombox’s front porch and have presumably gotten a beating from the harsh weather on the California coast. They remind me of the salt-damaged exterior of the house we rented last week on Irish Beach!
With the inside components completed, this afternoon was a whirlwind of roombox assembly. I didn’t have time to take a lot of pictures, but here are a couple (sorry for the fuzziness of the second one!)
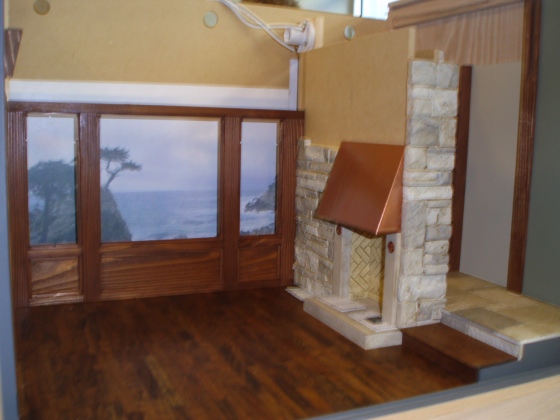
At this point, my roombox is a bit farther along than in the last picture. The ceilings and lighting are in, as is most of the trim. I still have to finish the panels and trim at the very top, and stain the outside of the box (which was not done in the class, so I’m not that far behind). The electrical is all hooked up but I need to attach a transformer. I never ended up finishing the electrical on my Oak Shadow roombox and wasn’t sure how to anymore. Thankfully The Guys explained it to me today so I should be able to hook up both roomboxes now. Let there be light!
I haven’t decided yet how to decorate the room. (Maybe the scads of vendors at the Good Sam show tomorrow will give me some inspiration!) I would like to hang this petit point on one of the green walls—I made it years ago and never had a good place to put it. But the rest is a blank canvas. My Oak Shadow roombox is a bedroom; maybe this will be the living room from the same house?
 Emily is a freelance writer, miniaturist, and adventure game enthusiast.


Its amazing how much I learned from your post on building this roombox… wish I were there to get even more tid bits. The room box looks fantastic!
Thanks! I didn’t want to get too specific and give away their secrets, but if you ever have the chance to take a class with these guys, definitely do!