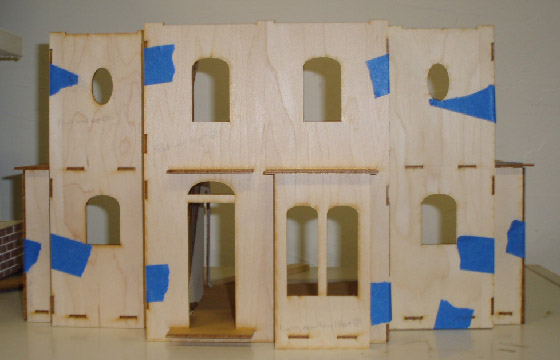
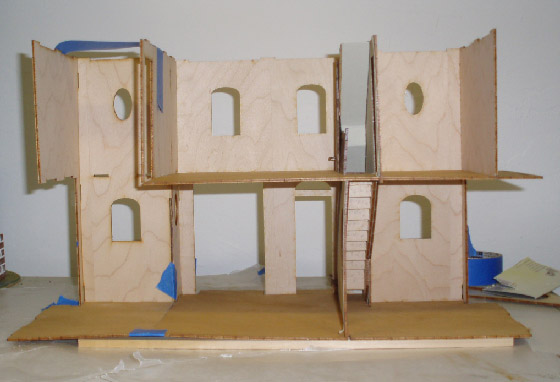
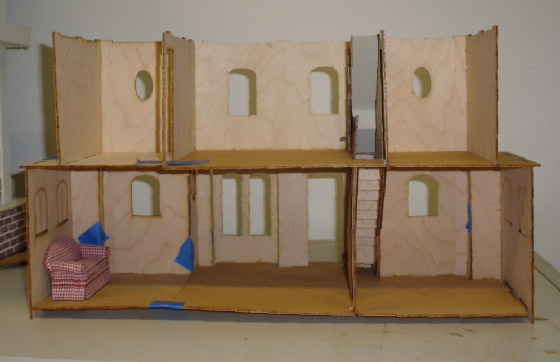
With the Rosedale stairs built, it’s now time to figure out how this house will fit together. I’m calling this “part 1” because I haven’t begun to fit together the new third story and roof yet. For now, here’s the progress I made this afternoon on the first and second floors. No glue yet, just dry fitting!
Normally, the Rosedale right side is a flat, blank wall. (Click here to see it.) Initially I thought I would have to cut two doors into that wall (one upstairs to lead into the small bedroom, and a larger one downstairs to lead from the entry into the living room). As I started playing with the pieces, I realized it would be easier to modify the left stair wall from Kit B, since the upstairs door was already cut and I’d just have to worry about the downstairs.
Here’s how it looks from the outside. (As an added bonus, I’ll get to use the extra oval window from Kit B, without having to cut a special hole for it!)
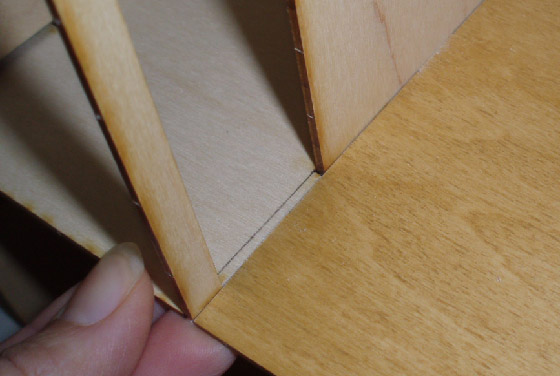
I was able to make the tab at the top fit into the top slot by shaving a small amount off the top. The other three tabs don’t line up with the front wall slots, so I sanded them off after taking this photo.
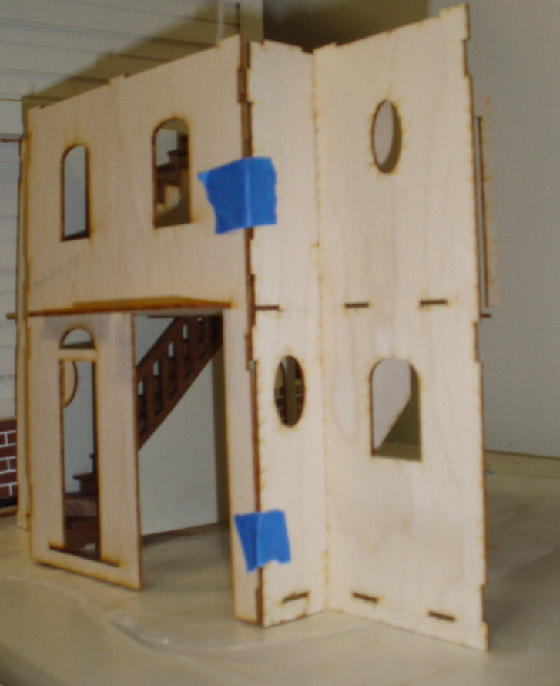
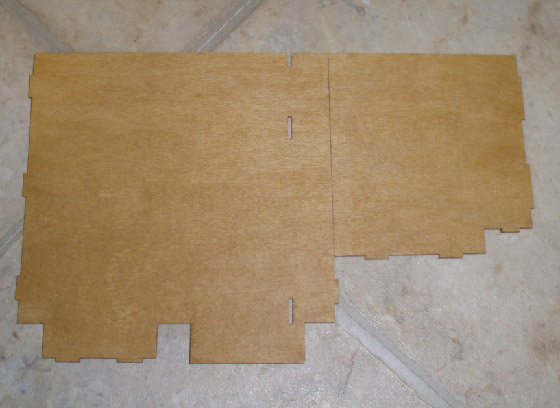
And here’s the inside, before I modified any pieces:
I wanted to separate these two rooms with a double French door, but there isn’t a lot of space to do so. Instead, I decided to cut off the inside part of this wall to make the two rooms into one large room. You may recall from my floorplan that I wasn’t really sure what to do with the two rooms. Combining them into one big living room solves that problem!
This is the portion I cut off:
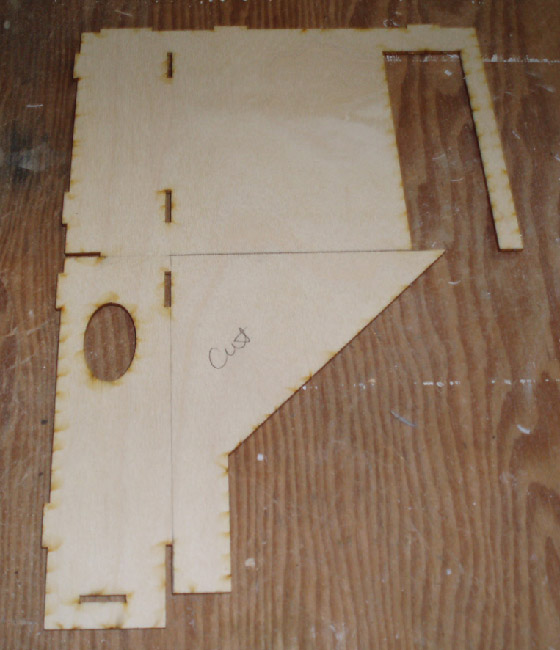
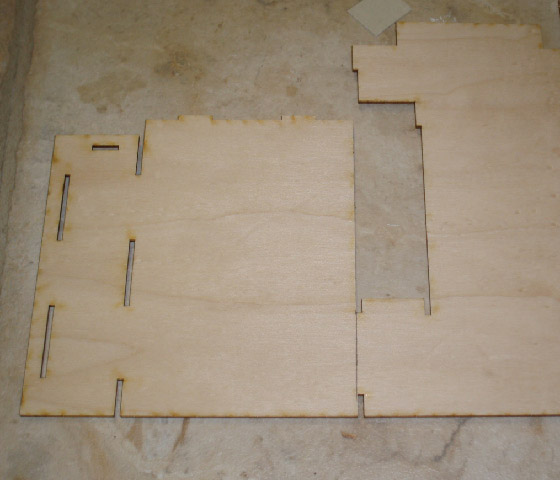
I also needed to cut a floor piece for the new room. I used a portion of the first floor from Kit B:
(The piece is upside-down in this picture; you’re looking at the underside of the floor. I had already stained both sides hoping that would make the piece less warped. Which it didn’t…)
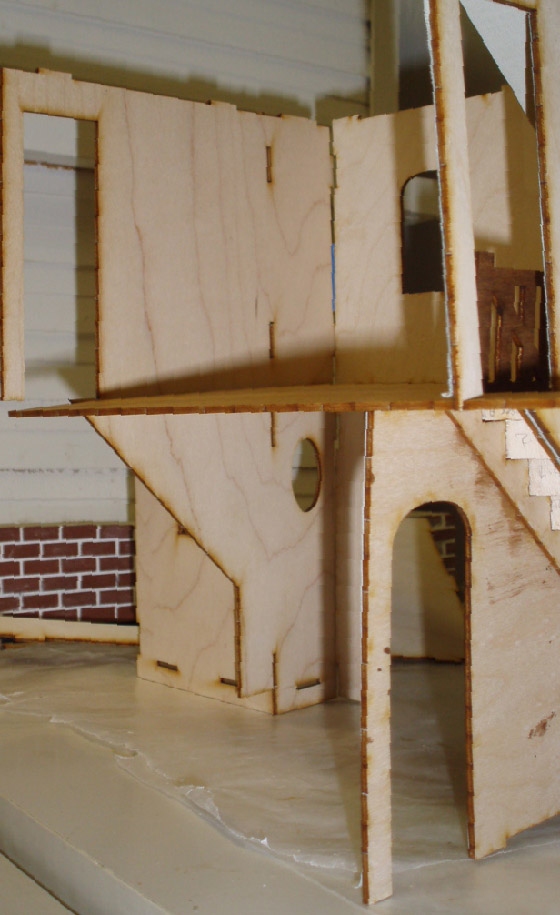
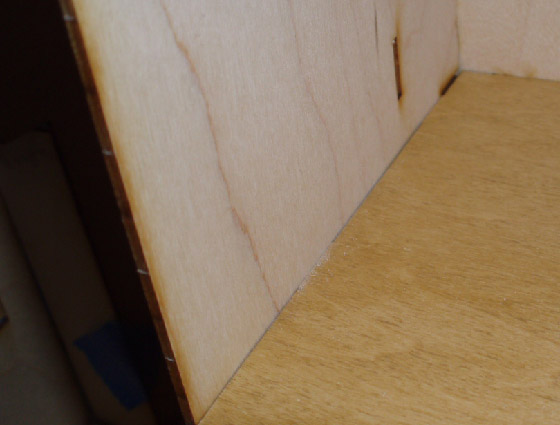
I sanded off the tabs on the edge of the first floor, where it meets the new portion of the living room floor, so they are flush beside each other. With the new wall and floor in place, here’s what we have so far:
Since the new wall piece doesn’t have slots in the same location as the real right wall, I also had to sand off the three tabs on the edge of the second floor. With the tabs sanded off, the floor now fits flush against the edge of the new wall.
Of course, without tabs fitting into slots, the whole assembly will be less sturdy. Hopefully glue will be enough to hold everything; if not, I might have to get creative with support pieces.
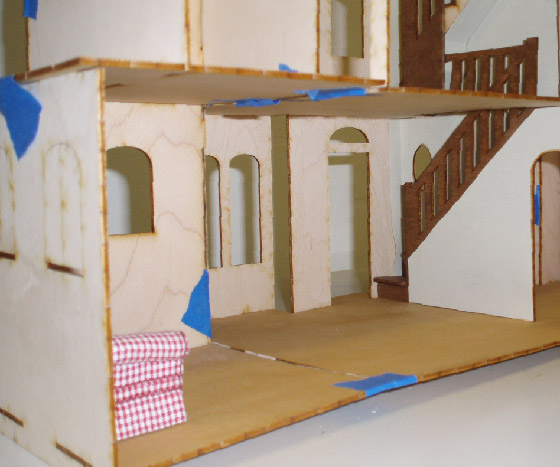
Next I cut the extra floor piece for upstairs by modifying the second floor from Kit B.
Though I drew my pencil line to the left side of the slots, I ended up cutting it on the right side of the slots. This creates a little tab that fits into the door frame.
And here’s what it all looks like… a bit wobbly, but it’s just a dry fit! In general, the pieces snap together nicely, but a few warped parts are presenting a bit of a challenge. Even on the Kit A pieces, which are theoretically being assembled as they’re supposed to be, I have cut off some tabs to make the pieces fit better.
I’m planning to glue pieces of stripwood across the underside of the first floor. This will hopefully help with the warping, as well as adding stability where the new floor meets the old floor. Also it’s looking like my plan to stain the floors isn’t going to work out, due to the seam between the two parts of the living room, so I’ll probably have to lay hardwoods or carpet to hide the gap where the floors meet.
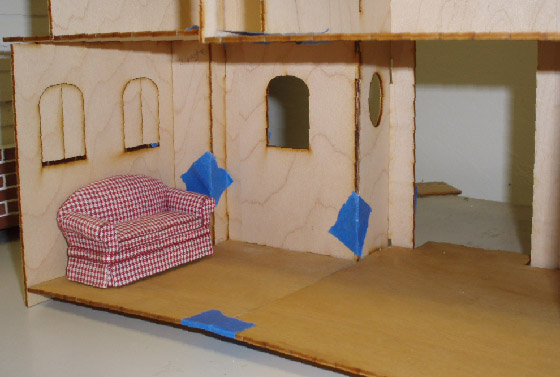
The living room is kind of an awkward, long and narrow shape, but I think this makes more sense than two small rooms next to each other would have. I’m sure I can do something with furniture to divide up the space.
 Emily is a freelance writer, miniaturist, and adventure game enthusiast.


Hi Em,
Your idea for expanding the house is coming out nicely.
How about putting a fireplace on the end wall of the living room and having the sofa facing it in the middle of the room. The bay window could complete the seating area with a chair facing the sofa. The chimney (if you need one for realism) for the fireplace could rise up along the outside of the second floor wall.
You could also glue some strip wood vertically to the wall under the stairs to straighten out that warp. The strips could be made to look like decorative pilasters (columns against a wall) or like a bump for pipes or ducts in the wall.
Love,
Dad
Hi Em,
I looked at the outside and I think the chimney would be a problem at the roof. You could make the fireplace a gas fired one with a small through-the-wall chimney/vent instead.
Love,
Dad
Are you talking about putting a fireplace on the wall where the couch is in these pictures? With the chimney running up between the windows?
I had another idea to turn the big room into a kitchen plus eating area instead, since there’s going to be a family room with couch and TV upstairs. I’ll email you some pictures.