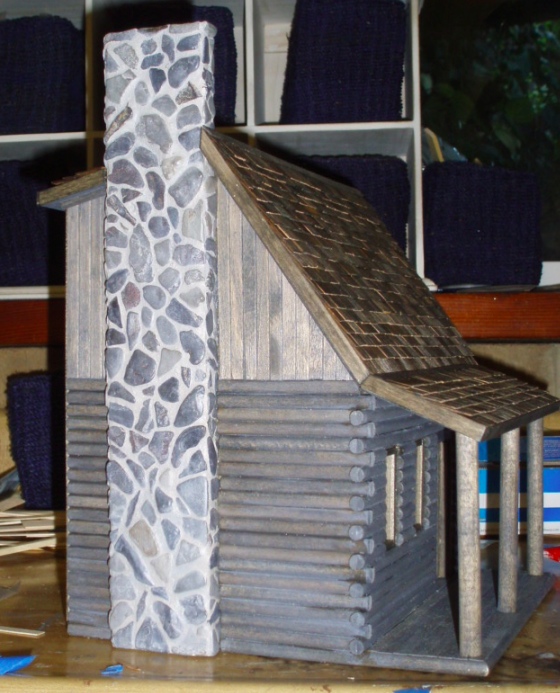
The Little House in the Big Woods cabin is pretty much finished. I added basswood over the exposed edges of the plywood. Now all that’s left to do outside is a bit more weathering, to bring the color of the shingles more in line with the rest of the house.
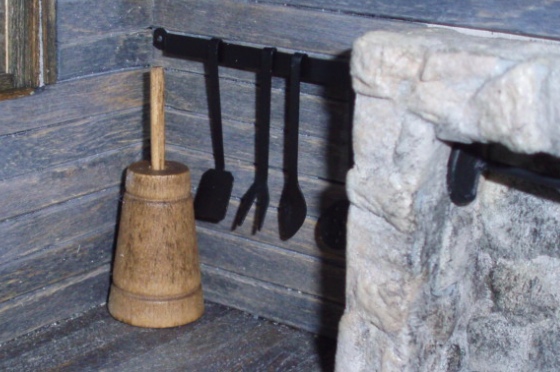
Now I can finally do something with all the accessories I’ve been collecting. I got this utensil rack at an estate sale a earlier this summer. I’m not sure if it’s meant to be half scale, but the size looked okay compared to the fireplace.
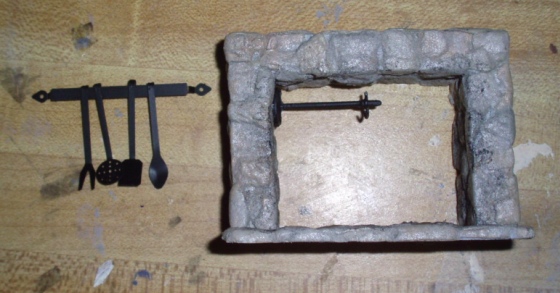
The rack was a teeny bit too wide to fit next to the fireplace (see how the pointy end overhangs the boards by a few millimeters).
I decided to snip off the pointy ends to make it fit. This will be tucked into a dark corner so you’ll never notice that the edges aren’t quite round.
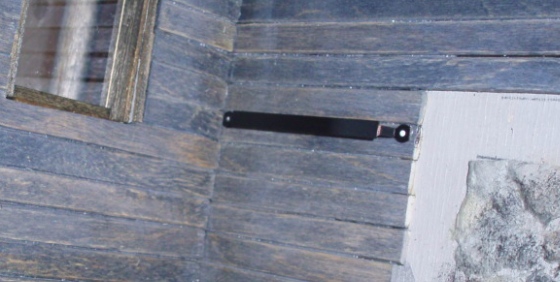
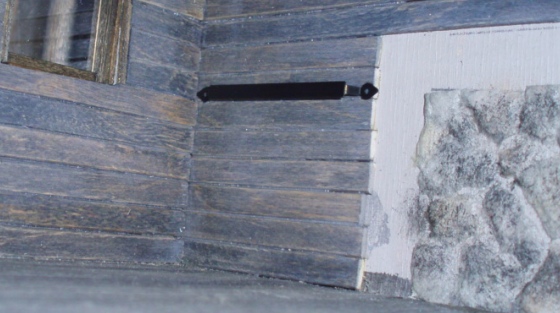
The glue dried clear. Here it is with the churn and fireplace. (I’m planning to replace the churn with one that’s lighter, though, so it’ll be easier to see back there and more in line with the “crockery” churn from the Little House books. I have one on the way…)
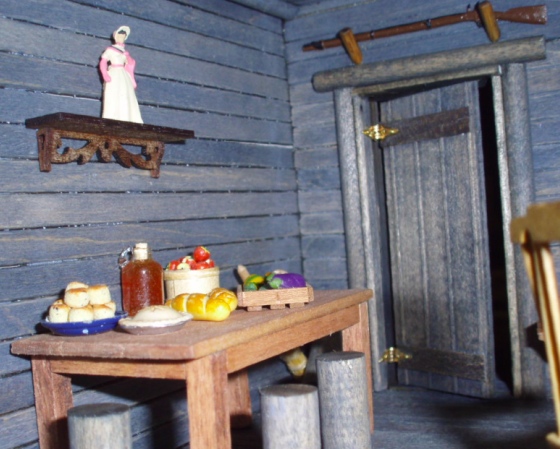
Here’s the area around the fireplace. Still playing with the pots and pans. I think I’ll add a shelf over the utensil rack to hold dishes.

Here’s the other side of the room. Note Pa’s gun over the door. This “china shepherdess” is a plastic train person. I think she’s a bit too big, so I’m going to keep looking for something better. I haven’t made up my mind about chairs yet so for now I’m using logs as described in Little House on the Prairie. I’m planning to add a checkered table cloth.
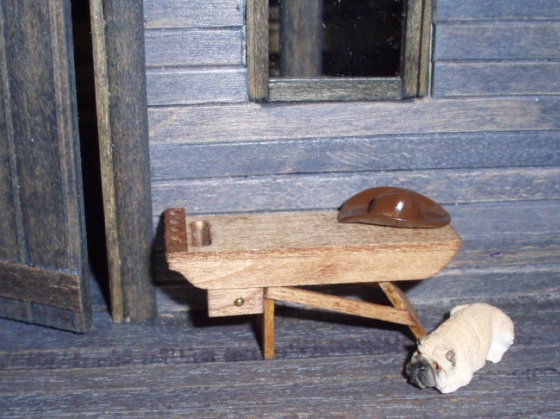
Pa’s bench. This is a “sailmaker’s bench” I built from a Cassidy Creations kit. It’s fancier than the bench shown in the book, but I thought the kit was neat. The dog is a pug, I liked it better than the bulldog that was available. (Jack is always described as a “brindle bulldog” but in the illustrations he doesn’t really look like a bulldog…) I would have preferred a sitting dog and might trade this guy for another if I find one I like better…
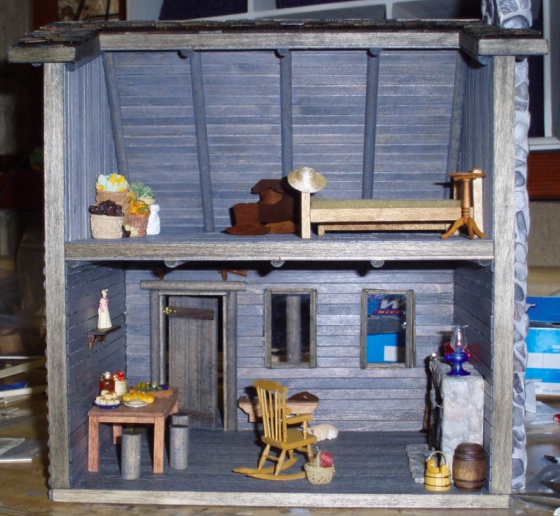
View of the whole house so far. The cradle on the second floor is also from a Cassidy Creations kit. I’m almost finished with the quilt I’m making for Ma and Pa’s bed.
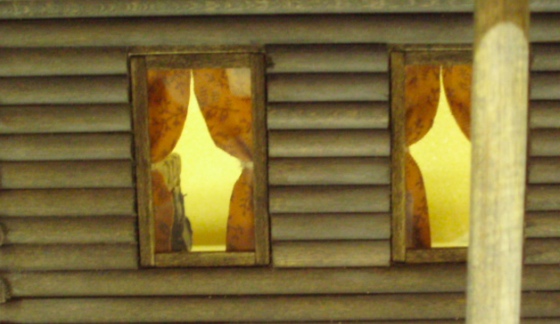
My big task this week was making curtains. When I installed the windows, they didn’t fit perfectly and light showed through some cracks around the edges. Originally I’d planned to add interior trim but couldn’t figure out a way to do it that would both cover up the jaggedy edges and take care of the cracks (keeping in mind that this is a tight space and I didn’t want to get glue on the windows!) So I decided curtains could kill two birds with one stone, hiding the jagged edges and also blocking the cracks so light wouldn’t show through when you look at the cabin from the outside. And Ma was always making curtains out of old dresses in the books.
I picked up some fabric with a small print at Joann’s. Initially I thought making curtains would be a simple matter of tying string around the middle and hanging them with blue putty… but it looked like crap. (No pictures!) So that’s why, in the pics below, the curtains already have some shape to them.
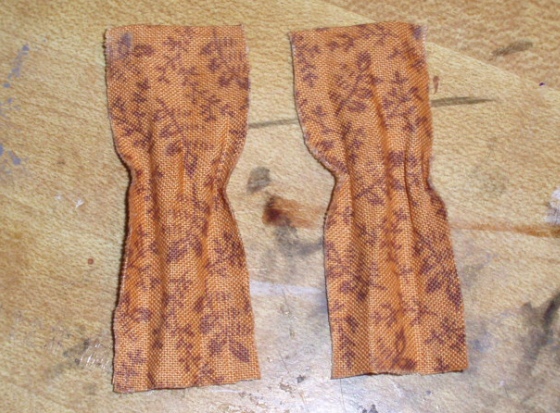
I started by cutting a length of fabric about 4.5 inches long, folding it, and gluing. This way the front of the fabric shows on both sides. I used a glue that’s meant to keep fabric from fraying. It made the fabric a little “crispy” (which is why it held its shape after my initial attempt to do the curtains).
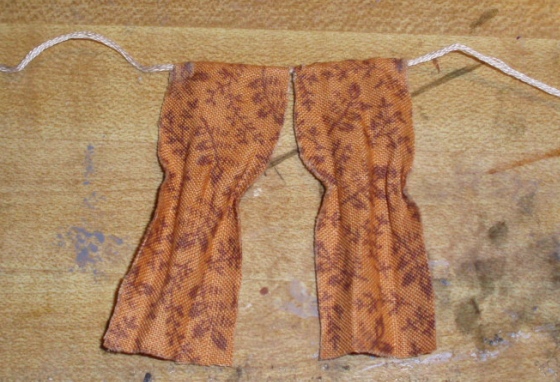
I wasn’t sure how curtains were hung in pioneer times, so I went to the books. On the Banks of Plum Creek makes a reference to Pa “driving nails to hold the strings for the curtains” so this is what I did. Using a tapestry needle, I threaded a piece of DMC floss through the folded-over part at the top of each curtain.
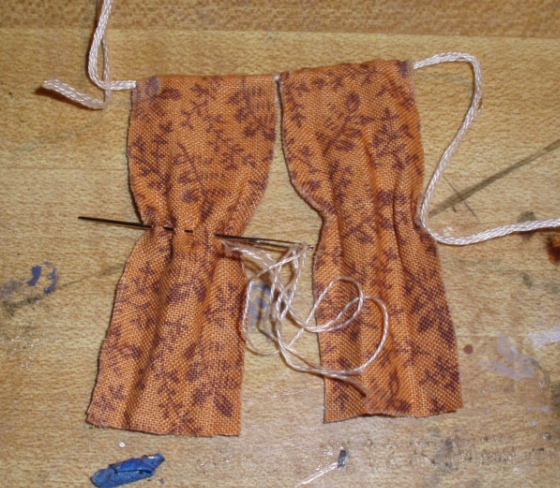
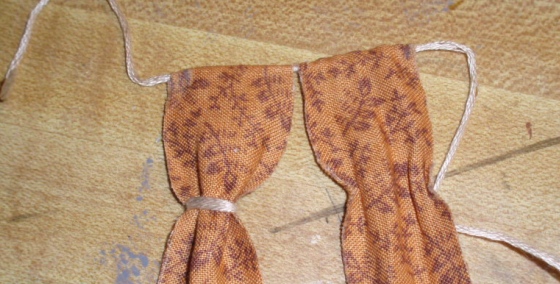
In my original curtain attempt, I’d just wrapped floss around the curtain which gathered it on both sides. It looks more realistic for the curtain to be gathered on the side that covers the window, but more straight on the outer edge. To achieve this, I ran a piece of thread through the gathered part like a drawstring.
Here it is before pulling.

And after pulling. This does a nice job of gathering the curtain.
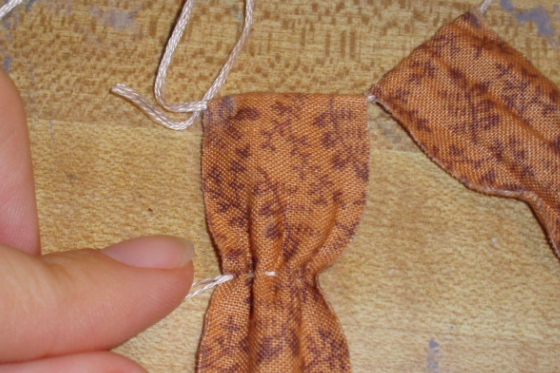
Then I wrapped the rest of the thread around a few times, and tied a knot in the back. (Note the blue smudges in the corners from my failed putty attempt! This is the back, so they won’t show when the curtains are hung.)

I snipped the tied edges, and voila! A nicely gathered curtain. It goes in a bit more on the outside than I wanted, but that might be because the curtain already had that shape from my failed attempt.
I repeated this with the other curtain. Then I tied knots at the top for the “nails” to go into. I started with straight pins since those were longer and gave me something to grab onto. Using a needle to thread the DMC through the knot helped me get the knots as close to the edge of the curtain as possible.
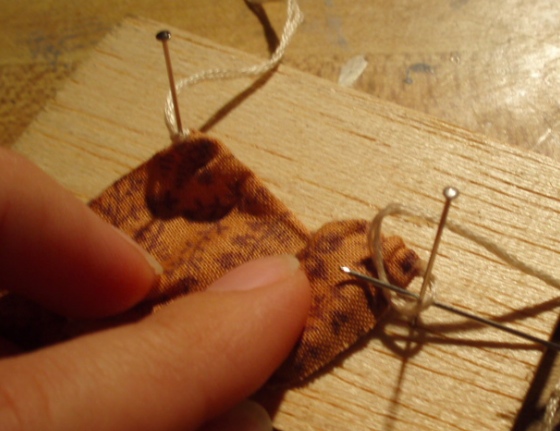
I slipped the pins out of the knots and slipped little brads in where the pins had been. Since the brads are so tiny, the “ready made” hole made it easier to get the brad in than trying to shove a brad through a plain knot.
I used the pilot punch tool to make a hole, then pushed the brad in with my fingers and the back of the pilot punch.
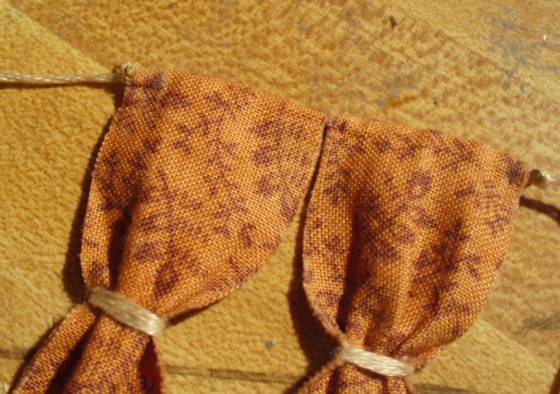
Once the curtains were where I wanted them, I snipped off the tails. Leaving the thread long until the very end made it much easier to get the brads into the holes and to reposition the curtains (which I had to do a few times before I was happy with them). I’m kind of unhappy with the second curtain, I think the thread around the gathered part is too high up compared to the others. But all in all, this worked out. (A good thing, since it took several hours to get this right!)
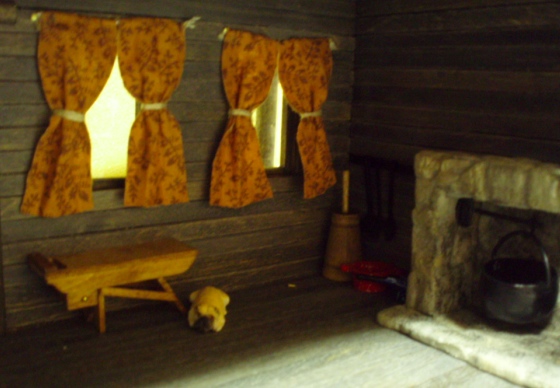
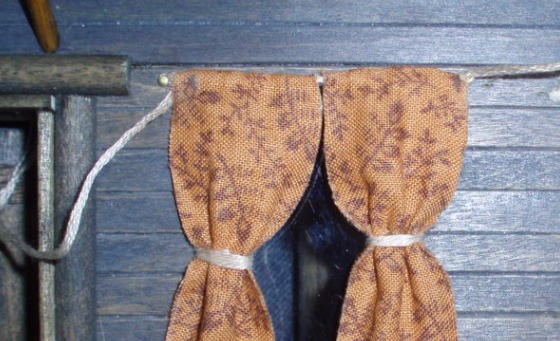
Here’s the view from the outside. The curtains get the job done as far as blocking the cracks where the light showed through.
 Emily is a freelance writer, miniaturist, and adventure game enthusiast.


Very nice and authentic looking. If you want to straighten the sag in the middle of the curtains, you could add a brad there with the string going over the top of it.
Dad
Looks really homey with the curtains up, doesn’t it?