For the second year in a row I participated in the Half Scale Yahoo Group swap. Last year the theme was “treasures in the attic” and I made record albums. This year the voting was very close between “shabby chic” and “kitchens” and since I have several kitchens that need to be filled up, that was my preference. When shabby chic won I figured what the heck, nearly half the participants wanted kitchen stuff, so I’ll make some anyway!
Once again this year we had to make 46 swap items, so I needed to find something that I could easily do assembly-line style without losing my mind (and without costing too much). I found a nice blog about creating miniature canisters out of dowels, with a button + seed bead for the lid.
I went to Joanns Fabrics to get my supplies. Dowels were easy, but I couldn’t find appropriate buttons. I wanted to make two canisters per participant so needed almost 100 buttons of a uniform size, and they just weren’t available — the ones that came in bulk were either too big, too small, or all different sizes mixed together. I would have had to buy 25 of the 4-button cards at a few dollars each, which was cost prohibitive. Then I stumbled across these “cardigan buttons” that were the right diameter.
Turned upside down, the part that normally sews onto a sweater looks like a handle on a lid, which saved me the extra steps of having to fill in the button holes and glue on a seed bead. I’ve thrown out the packages now and can’t find the buttons online, no idea what the brand name is. They were $0.99 for a package of nine (according to the label) and oddly several of the packages had 10 buttons in them. And they were on sale for buy one, get one free — so I spent about $5 on 100 buttons.
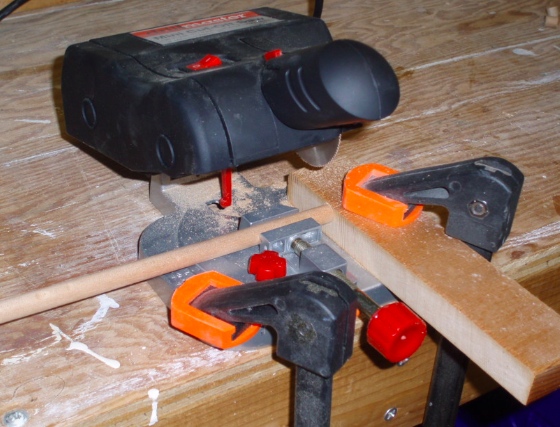
The first step was to cut the dowels. The dowels are 3/8″ in diameter and I wanted to cut them to a 3/8″ length. A while ago Geoff got me this little saw at Harbor Freight. It’s not as good for cutting trim pieces as I’d hoped (hard to line up the blade precisely with the cut line), but it was just what I needed to cut the dowels down to canister size. I clamped a piece of wood to act as a guide, pushed the dowel up against the wood, and cut it.
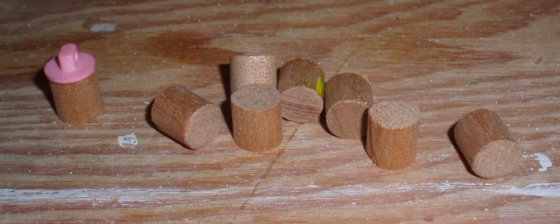
I started with a small prototype set.
My initial plan was to glue the buttons to the dowel pieces and paint the whole assembly. But I didn’t really like how it came out. The paint didn’t cover the button smoothly and it seemed like it would take several careful coats, which is not what you want in an assembly line of almost 100 pieces!

Back to the drawing board. I painted the dowels with an off-white Behr paint named “Sandstone Cove”.
Then I cut them up. I got a bit slap-happy and ended up with more than I needed. Maybe I’ll find another use for them.
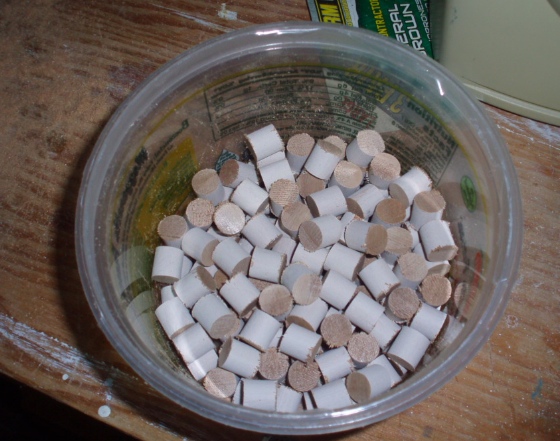
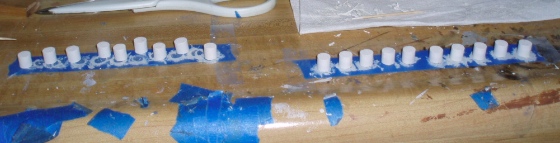
The cut ends were kind of crusty, so I sanded them with a nail file. Then I set the pieces on a strip of masking tape, sticky side up, to paint the ends.

I ended up doing two more coats of paint on each piece of dowel. Still quicker this way than painting each canister individually would have been.
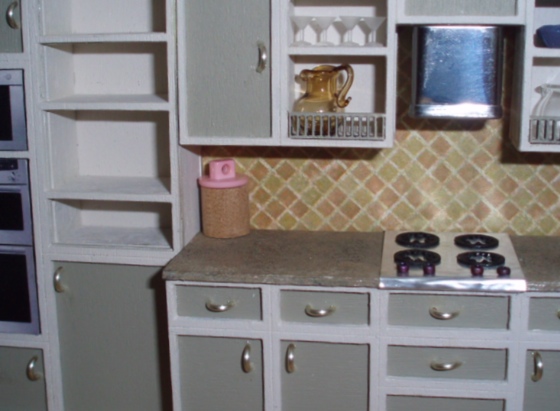
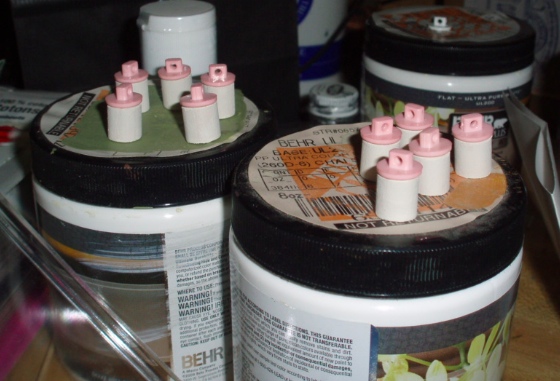
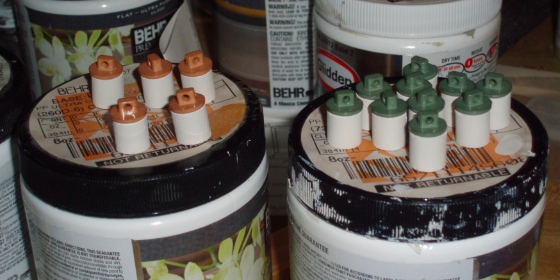
Here are the first few sets with lids. I got pink, brown, and green buttons. The pink ones are probably the only ones that qualify as shabby chic, but I liked the brown and green earth tones for a kitchen.
I made labels from a graphic I found online. If you search for something like “canister labels” there are a lot of nice options, but many were watermarked (pictures of labels you can buy off Etsy, etc.) and others didn’t look great when I shrunk them down so small.
I used Photoshop to add pink, green, and tan backgrounds, trying a few different shades of each since I wasn’t sure which I’d like best once they printed out.
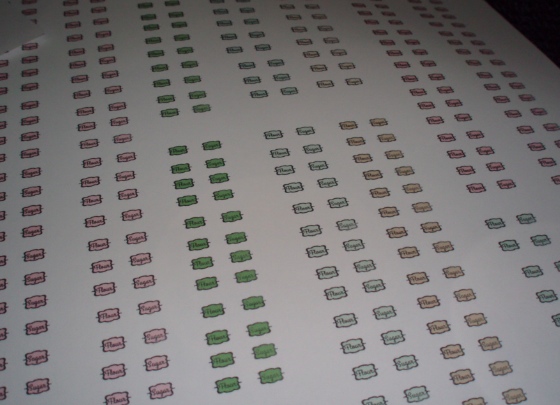
I carefully cut out the labels with nail scissors and glued them to the canisters with tacky glue. Each swap contained a Flour canister and a Sugar canister. Since I had a few different shades of each color label, I “yolked” each pair together with a toothpick so the shades wouldn’t get mixed up.
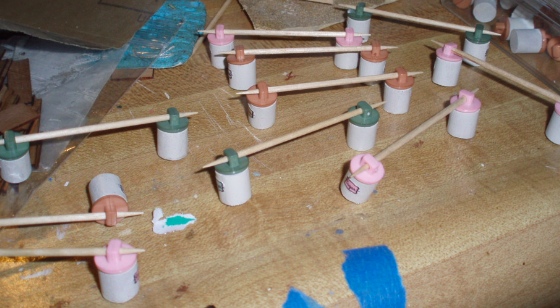
Finally I painted the canisters with satin varnish to give a protective finish and a bit of sheen. I kept them on the toothpicks during this stage in order to varnish them without getting fingerprints on the canisters.
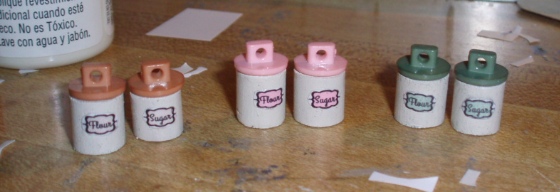
Some of the dowel pieces came out a little smaller than others. In pairs where one was shorter, I tried to remember to make that the sugar, since flour always seem to be the largest canister in a set.
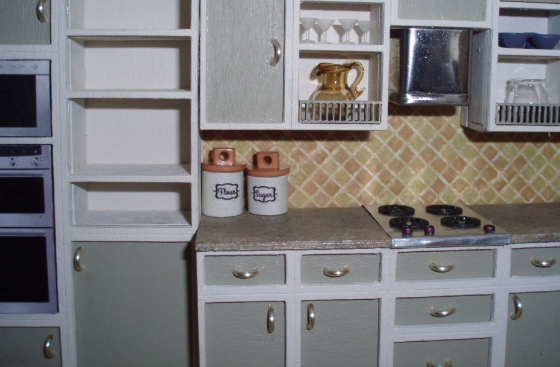
(Apparently my stovetop lost a knob sometime during this process, oops…)
 Emily is a freelance writer, miniaturist, and adventure game enthusiast.


I was lucky enough to be in the swap and i love my canisters. Thank you.
Great idea, I’ll have to try that, thanks,
They are really cute! What a clever idea :D
Thanks for sharing your ‘how to’. I’m a lucky recipient of your cannisters and they will go in my kitchen.
Love my little cannisters! They qualify as both kitchen and Shabby Chic, so you satisfied both catigories! Thank’s so much! Kay
Love them! Can always use these and I hate cutting dowels! In Miniature Style II – GIRL Z: My Life as a Teenage Zombie
I was also a fortunate recipient of your cannisters and they will go in my kitchen as well. Thank you for the ‘how to’!