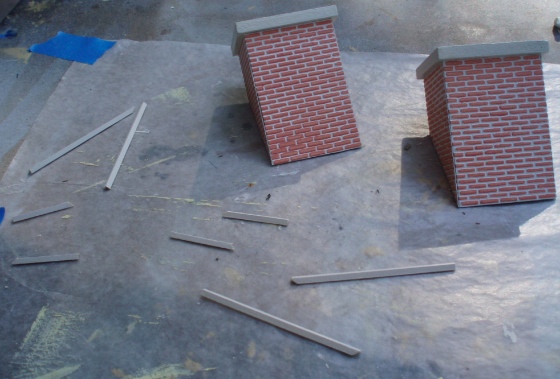
While waiting for a replacement trim piece to come in the mail, I took a break from the Gull Bay porch to do the chimneys. The chimneys are made from blocks of wood, and get covered with the same vinyl brick sheet as the foundation. Skinny trim pieces go over the corners to cover the seam where the brick sheets meet.
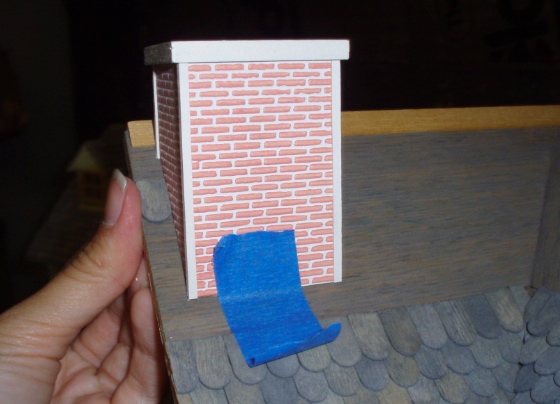
I glued them onto the roof positioning them so they’d back right up to the trim at the top of the roof (or so I thought — my next post will show how I messed this up!), and one shingle’s width from the edge of the roof to make shingling around them relatively painless.
Here they are glued on. Very pink!
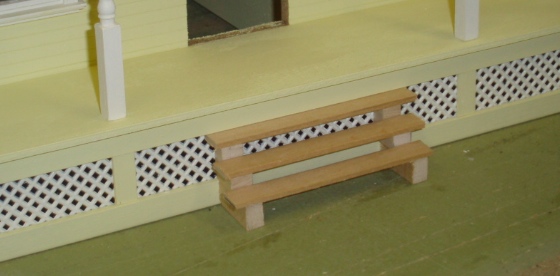
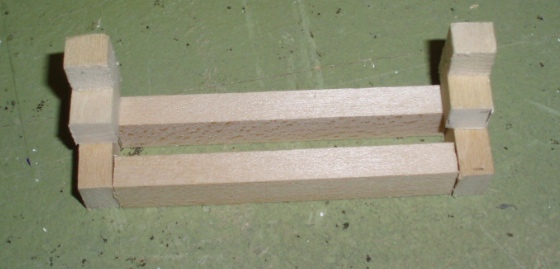
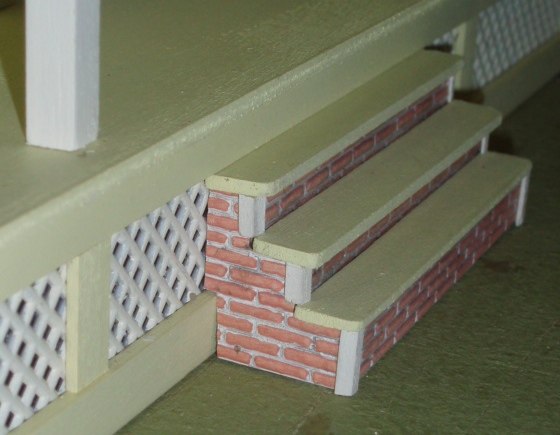
The house didn’t come with porch stairs, but it needs them — the porch is way too high for a little person to step onto! — so I made a set out of scrap wood. The idea for how to do this came from the deck I built for the Hillside Victorian.
At the bottom, the wood is slightly taller than the other pieces (so it will clear the top of the foundation trim) and is also set forward slightly, due to the foundation trim.

The treads are 1/4″ (?) basswood laid on top of the side pieces.
Finally I added wood between the two side pieces. In addition to connecting them, this also forms the front of the riser. I used two pieces on the bottom for stability, but then just glued in one piece for the second and top steps that are flush with the front.
I laid the risers on top to make sure everything looked reasonably to scale.
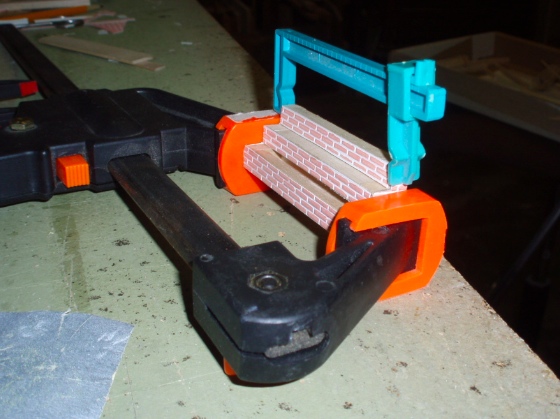
Next I glued on bricks that I’d cut from the foundation and chimney leftovers. The side pieces were bowed and needed to be clamped before the glue would take.
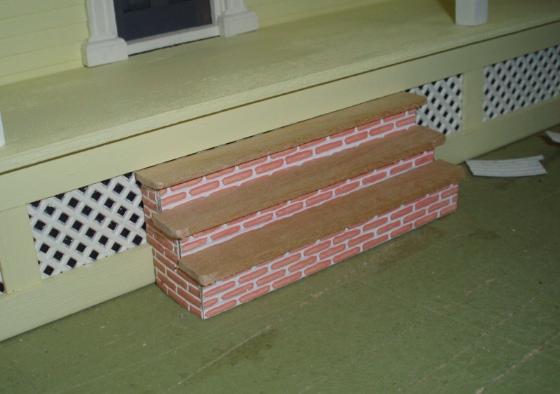
I’m not sure if brick stairs with wooden treads exist in the real world (as opposed to the treads also being made from brick, which I didn’t have enough of the vinyl sheet left to do. Anyway, I like them like this.
As I looked at the front of the house with the chimney and stairs in place, I started to think the brick was just too clean and pink. When I first glued on the foundation I liked it, but as I got farther along with the porch and the house started to look more finished, the brick just looked unnatural to me.
I wanted to dirty it up in a way that didn’t introduce a new element to the color scheme, so I tried wiping a scrap piece with the same gray stain I used on the shingles. In the pic below, the left sheet is clean and the one on the right has had stain dabbed on it with a paper towel.
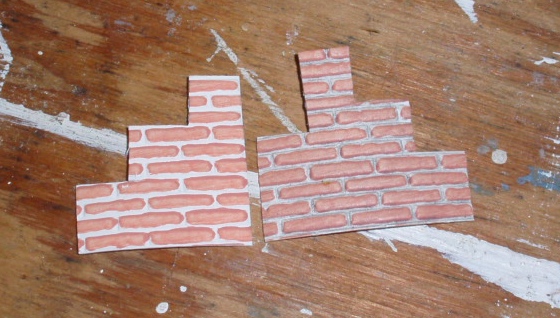
Satisfied with the effect, I got to work staining all of the bricks on the house, careful not to get stain on the painted wood (but not always successful). As I went around the foundation, I noticed it was coming out even darker than my test piece had been – maybe because I was using more stain, or taking longer to wipe it off, or both. In any case, I still liked the look. (Good thing, because there was really no turning back from this!)
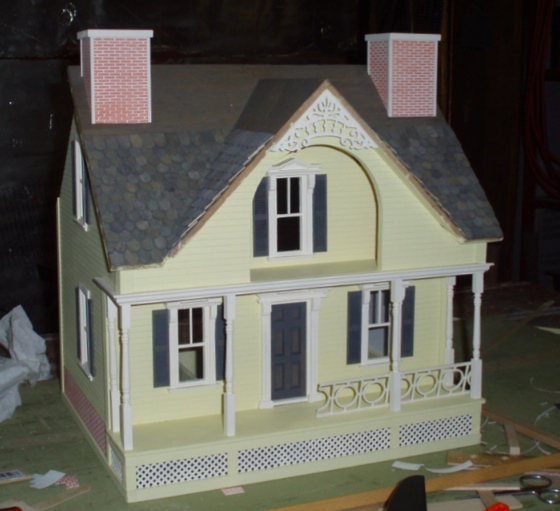
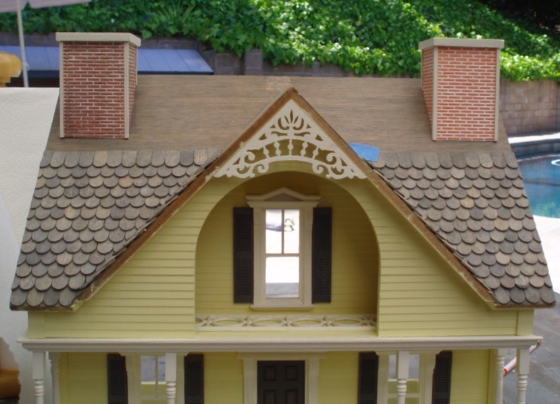
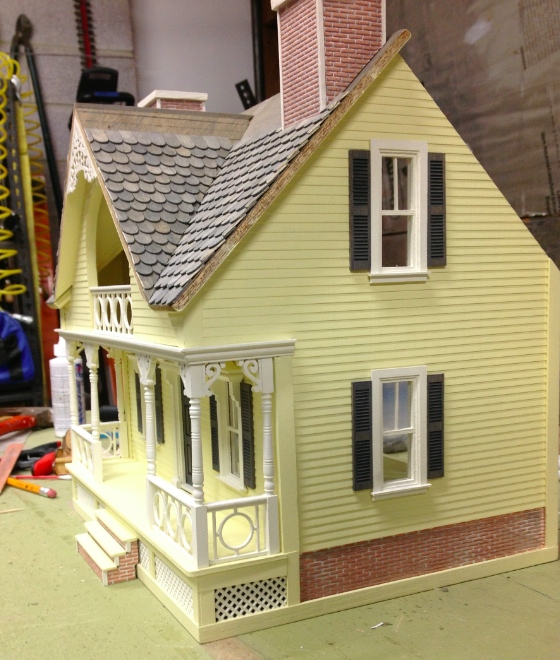
Here’s the left chimney stained compared to the right chimney unstained. I think the gray stain succeeded in tying the bricks in with the rest of the roof. The stained chimney looks more like it belongs here.
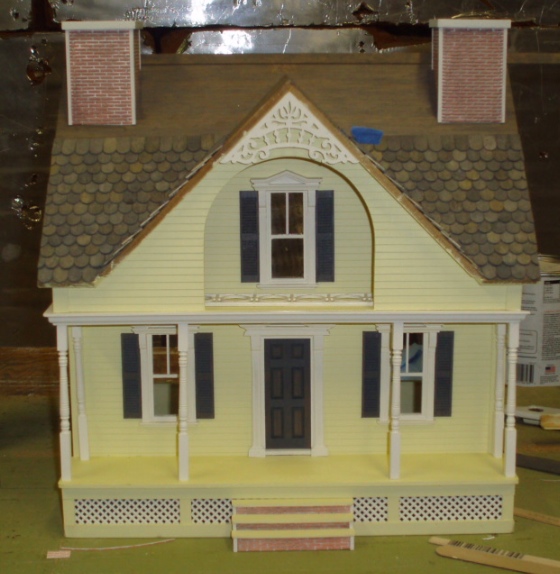
My reason for doing the stairs this way (besides to use up brick scraps that otherwise would have gone in the trash) was to balance out the brick chimneys on the top left and right of the house with the brick stairs at the bottom center. There’s a neat triangular thing going on, with the gable creating a triangle that points up and the chimneys and brick forming a triangle that points down. (I can see it in my head, can you?!)
The stairs are a bit brighter than the rest of the brickwork, but I’d already glued on the treads so I decided not to tempt fate. I did go over all the brick with matte sealer after the stain was dry, which gave it a nice smooth finish.
I used the leftover corner trim from the chimneys on the edges of the stairs. They look good from the front but on the sides there’s a small gap where the trim meets the treads (most obvious in the pic below underneath the top piece of trim).
Thankfully it’s not something your eye is drawn to when the house is at a normal viewing distance — as opposed to an inch away from your face like it was when I was working on it!
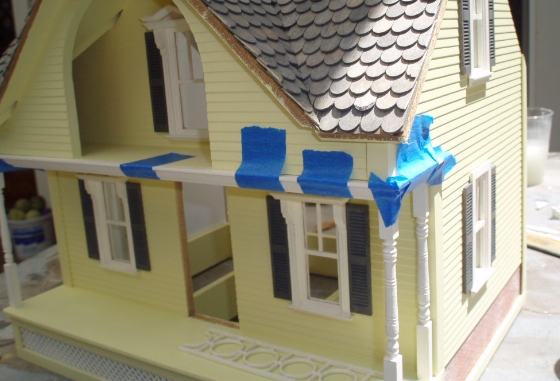
Just as I was finishing all this up, USPS dropped off my replacement trim (a day early!), so I could finish the porch. The problem arose when I realized that the center trim was too long and I cut off a smudge too much. I then messed up the right side piece trying to fix my mistake. (Because, obviously, if one piece is too short the way to solve that is by making the piece perpendicular to it too short…)
For some unclear reason I glued the center piece on even though it needed to be replaced, but was able to remove it without too much damage. Rather than scrapping it (and to save time on painting), I cut a new right-side piece from the mangled center piece. I then used the replacement piece to make a new center piece, exactly the right length, with nice mitered corners.
I thought it all fit nicely before gluing, but once I got the pieces in position the corner didn’t want to behave, so I forced it in place with a lot of masking tape.
Came out okay, if I do say so myself!

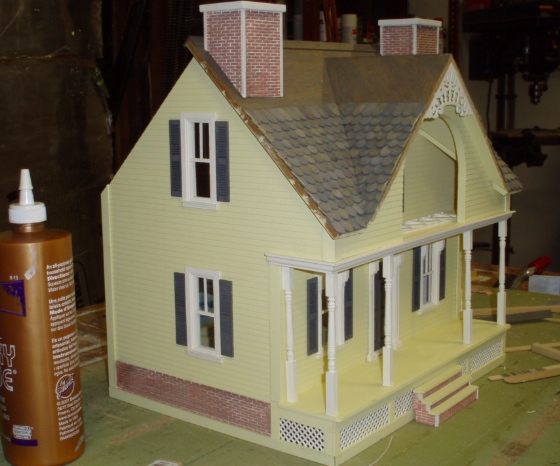
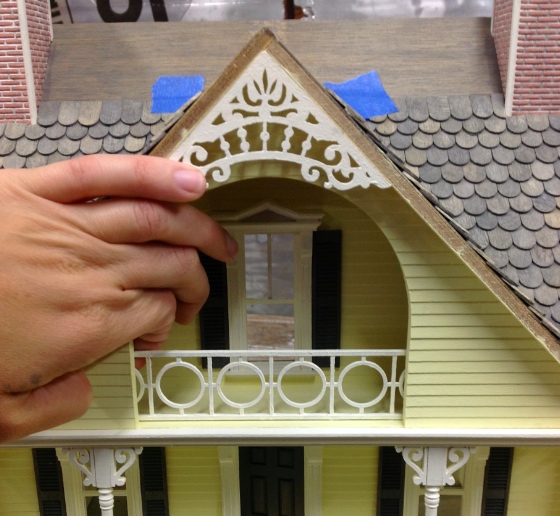
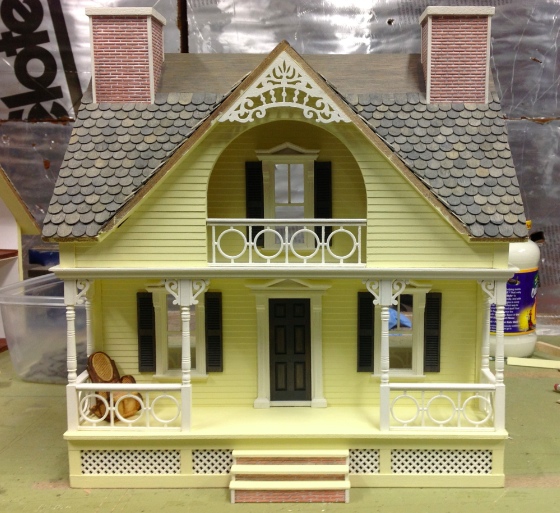
With that glued in, I could finally finish putting together the porch I’d started a week earlier. I glued in the porch posts, followed by the decorative doodads on either side of them. At some point I’ll go over all the seams with white paint so they won’t be so obvious.

(At this point my camera stopped working due to an issue with the lens, so I had to start using my iPad… kind of awkward, so I took way fewer pictures of the rest of this than I usually would.)
Next I did the porch railings. I had to cut these down — something I probably should have done before I painted them, but I wanted to wait until the porch posts were glued in to make them exactly the right size.
For each of these, I first held it in place to figure out where to make the cuts.
Then I cut out what needed to be cut using a craft knife, and sanded off the nubs with a metal file. I used the electric disc sander to shave the edges down so the railings were exactly the right width.
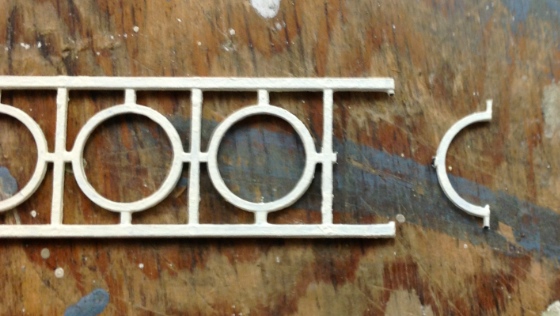
Once everything fit correctly, I painted over the areas where paint had scratched off due to cutting and sanding, and then went over all of the railings with a coat of matte sealer. I also cut and painted skinny sticks to go on top of the railings… without a wider piece for you to rest your arms on, it looked strange to me.
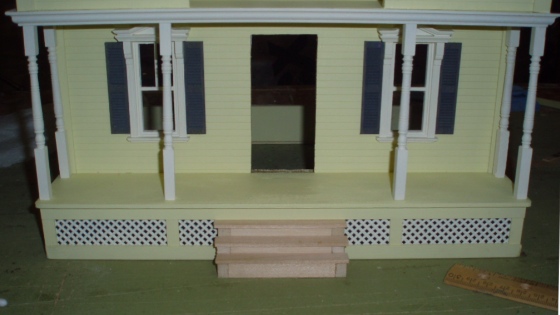
Here it is, all finished! (The stairs are not glued on, so it’s okay that they’re not centered in this pic…)
 Emily is a freelance writer, miniaturist, and adventure game enthusiast.


The porch looks FABULOUS!! The brick color is just right and looks like dirty weathered brick. You could paint the porch steps to look like stone. Brick steps with bluestone treads are a common sight.
Thanks! I hadn’t thought of stone treads. Looked up some pictures on Google and I like the look, but I’m not sure if I could do it now without messing up the stairs. I’ll think about it.
Love the decorative doodads!! And the weathering on the brick is very nice.
The weathered look on the brickwork is much more realistic and attractive. Love the porch railings and the decorations on the porch (verandah?) posts. Looking good!!