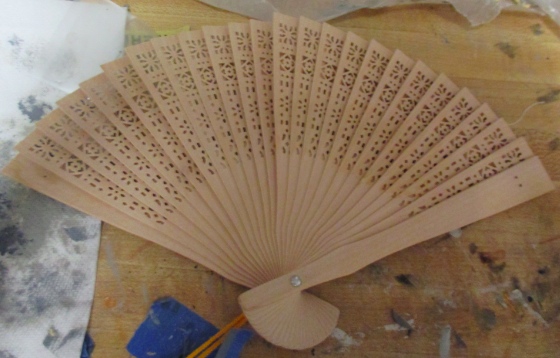
I recently bought two embossed box boxes from Pier 1 with the plan to make them into half scale roomboxes. The black one has about 9 1/4″ of vertical space inside — big enough to break into two stories in half scale. I had been wanting to try making a spiral staircase out of a fan as shown in this tutorial, and as luck would have it, Pier 1 sells fans too!
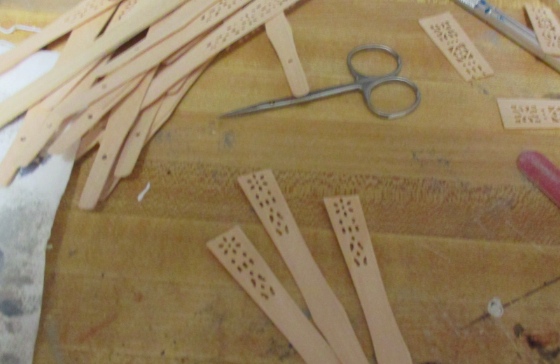
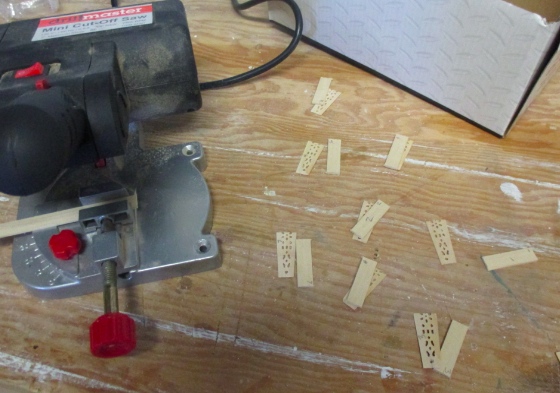
I started by taking apart the fan and cutting off the slats about halfway up the design. I used nail scissors to cut them, then sanded with an emery board.
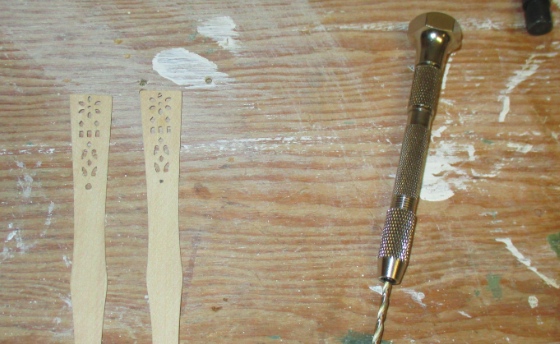
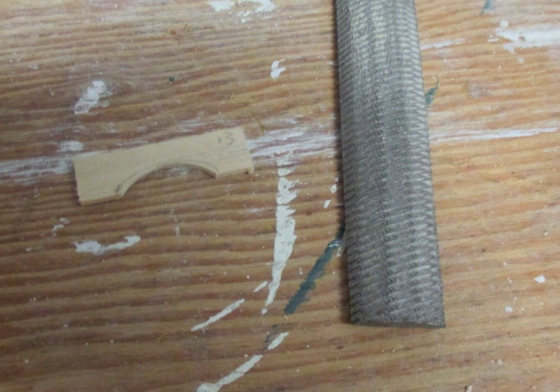
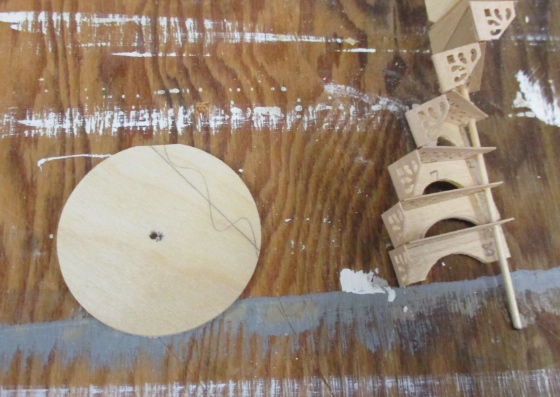
At the bottom of the design, I made a hole to accommodate a 1/16″ dowel using my new micro drill. (This was actually larger than any of the bits that came with the set, but I was able to use one of the bits from the power drill in the micro drill.) Below on the left you can see a slat with a hole, and on the right a pencil mark for the next hole.
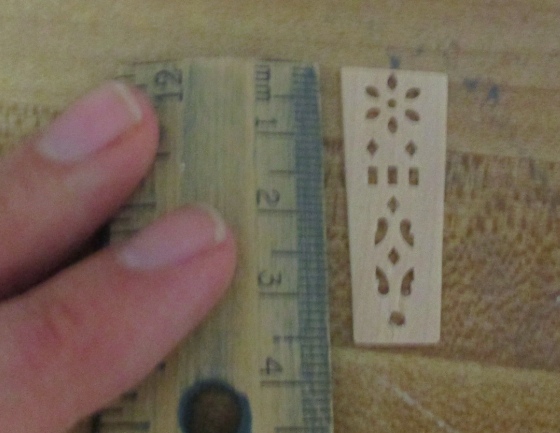
I then cut a few slats below the hole and measured them to make sure they would fit in the roombox. This was easier to visualize in centimeters. The roombox is exactly 6cm deep, which meant my slats couldn’t have more than 3cm between the dowel and the outer edge, since the spiral staircase goes all the way around.
(Does that make sense? If the complete staircase is a circle with a diameter that can’t be larger than 6cm, then the radius has to be 3cm or smaller.)
Anyway, the slats I had cut were a bit too large.
I cut them down a little bit more. It’s not as pretty with the flower at the edge cut up, but now the space from the hole to the edge was just 3cm, which meant the staircase would fit in my 6cm box.

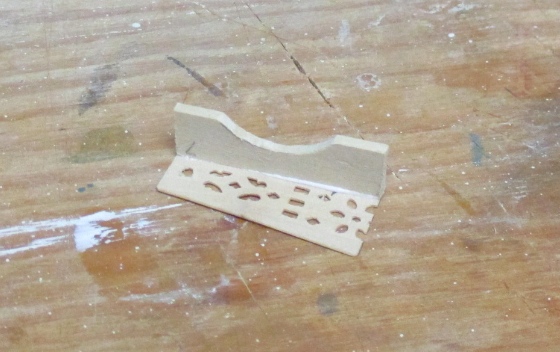
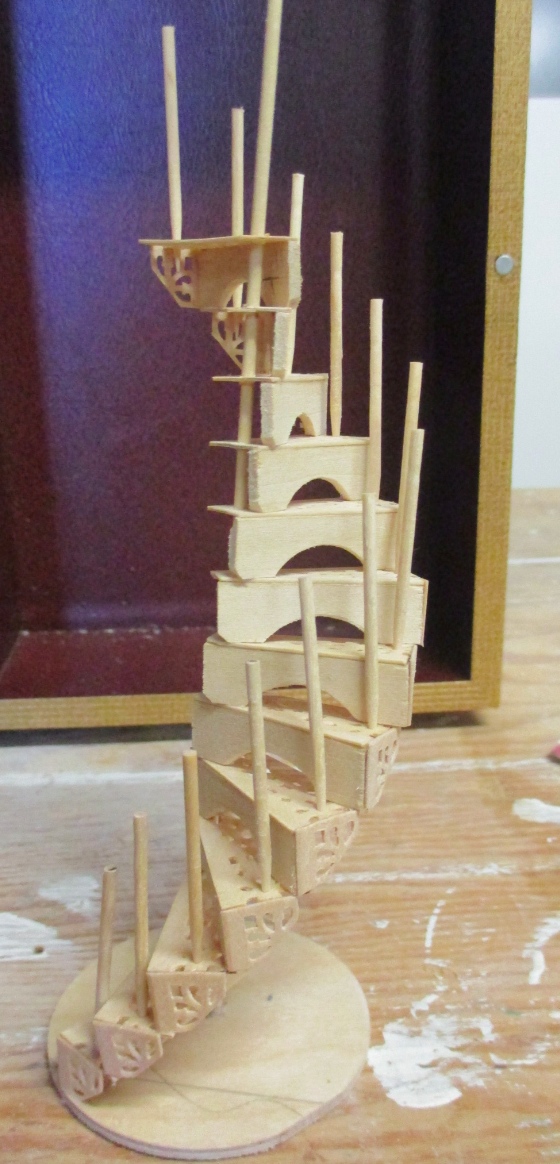
Once all the slats were cut to size, I cut risers to go with them. The risers are made from basswood 1/16″ thick and 5/16″ tall — 5/16″ being the same height as a riser on a Houseworks half inch staircase.
My holes weren’t exactly in the same spot on all the treads, but I cut the treads so they would all be the same distance from the hole to the edge, which meant that some came out slightly longer than others. I cut each riser to go with a specific tread, and numbered them to keep them the pairs together. This might have been overkill but it worked out okay.
(After doing all this, I realized that in the tutorial the risers are smaller than the treads, so each tread hangs over the riser slightly on the left and right side of the step. That might have looked nicer but I didn’t realize it until after I’d already prepared them all, and didn’t want to start over!)
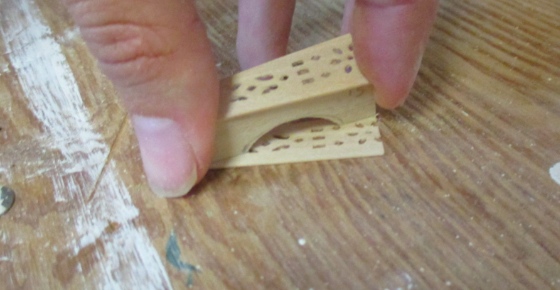
The next step is to cut out a portion of the riser, so it doesn’t totally cover up the design on the treads.

I used the belt sander to do a sloppy job of removing some of the wood.

Then I used this semi-circle file, which I found in Geoff’s toolbox, to sand out the rest of the area.
Put together, the riser and treads look like this.
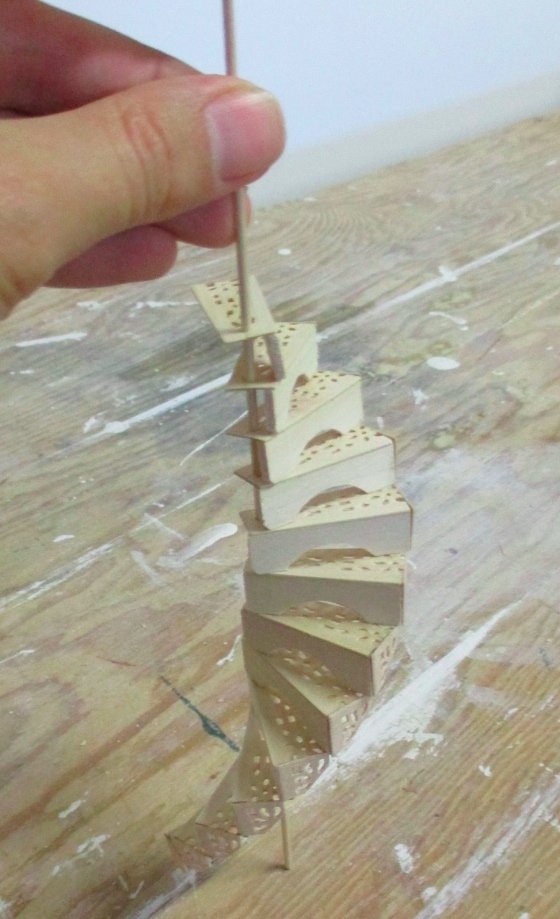
I did this for all thirteen risers. Thirteen steps gives the staircase a height of about 5 1/4″, which would be a 10 1/2′ ceiling in half scale.
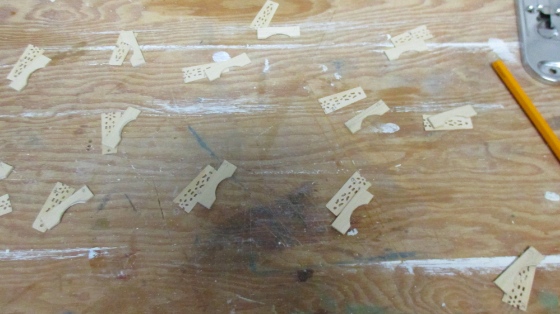
Next I glued the risers and treads together.
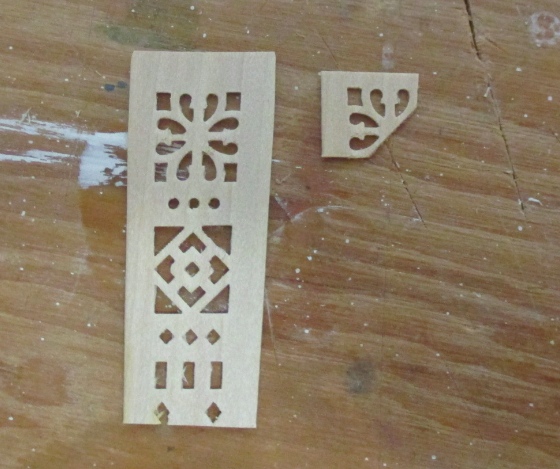
I made a corner piece from a discarded area of the fan. This was tricky — a lot of them broke during cutting and sanding, and a few just went flying out of my hands never to be seen again. I think I only had one fan slat left over in the end.
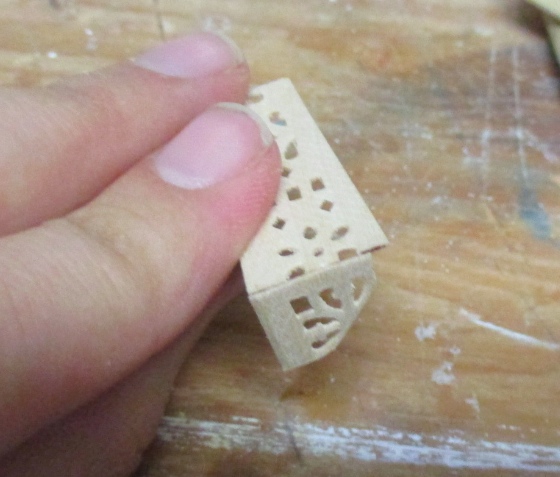
I glued the corner pieces to the edge of the riser/tread assembly.
I didn’t have a circle handy to use for the stair base and Geoff wasn’t around to help me with the power tools, so I glued the stairs together without the base, thinking I could add it later. This worked out okay but I think it’s one reason my staircase ended up kind of tilted.
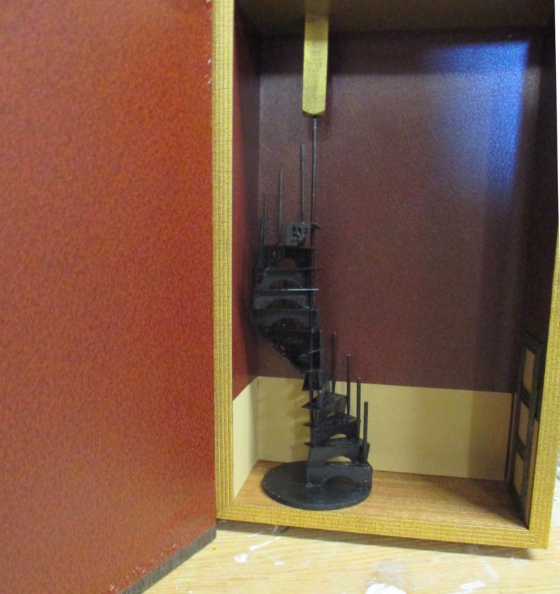
Geoff later made me a circular base with the drill press. This was a little tricky because the base needed to fit inside the box (6cm = 2.36″) and my size choices were 2″ or 2.5″ due to the bits he had on hand. A 2″ circle would have been too small, though, because the diameter of the staircase is larger than 2″ — either the bottom stair would have hung over the edge, or the post would have been too far off center and some of the stairs in the middle would have hung way over the side of the base, which I feared would make the whole thing look crooked and off balance.
We ended up doing the 2.5″ circle, and he sanded it down to about 2.25″ using the belt sander, also flattening the back edge a little bit where it butts up against the wall. To figure out where to make the hole, I drew on the bottom of the dowel with a Sharpie, held the stairs so they fit inside the box, and pressed the dowel bottom against the base to mark it.
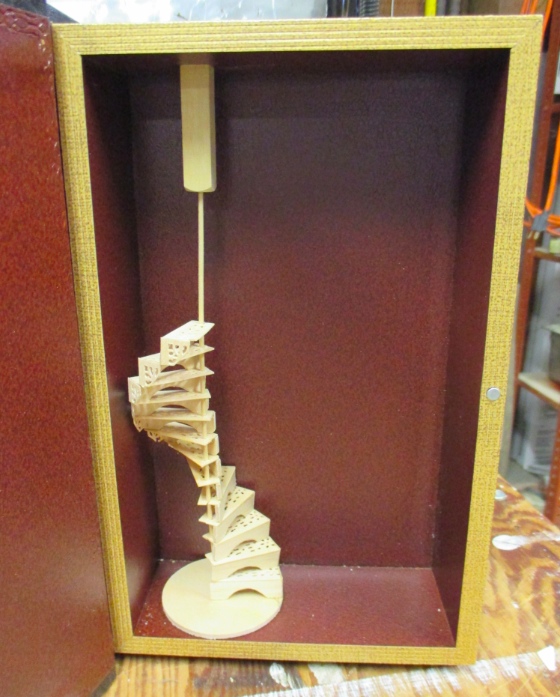
The dowel is a little off center, but not too obviously. The bigger problem is that the staircase is nowhere close to standing up straight. When I cut the dowel I didn’t consider that I’d need to anchor it at the top of the roombox, so it’s too short for that.
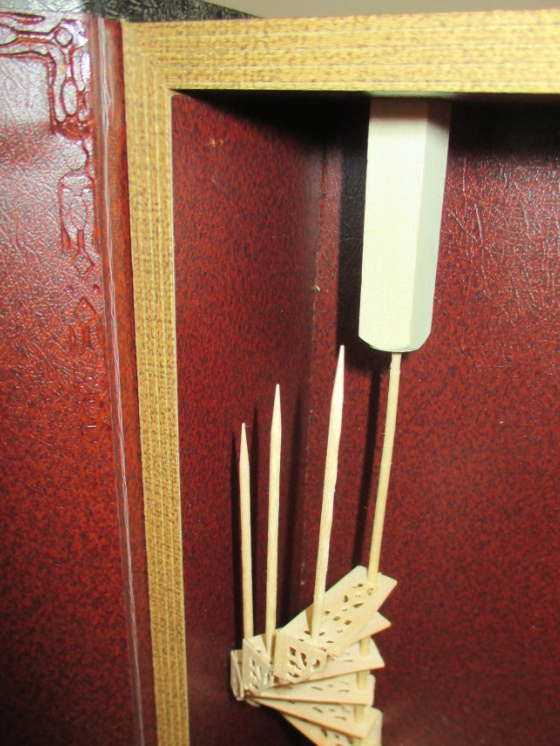
I ended up using a piece of wood with a hole in it — love that micro drill! — to anchor the post. I don’t have pictures of it yet, but I made a “shade” to go over the anchor piece out of leftover fan parts, so theoretically it’ll look decorative and like it’s intentional.
Now for spindles. There happens to be a hole right at the edge of each step in the perfect position for spindles, and the tip of a toothpick fits right in. This is good because I don’t think I would have had much success trying to glue spindles onto the steps.
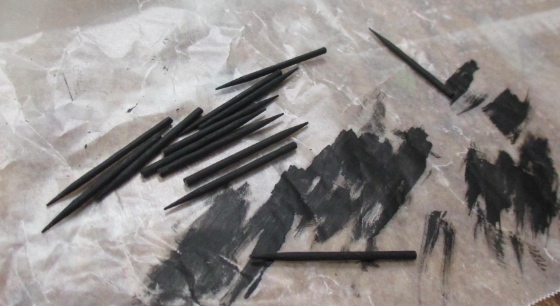
Measuring against a Houseworks stair spindle, I cut thirteen toothpicks down to size.
I still wasn’t sure how I was going to make a railing, so I decided to paint the stairs before gluing in the spindles. (Actually, Geoff graciously did this for me because I didn’t want to make a big spray paint mess.) The tutorial uses matte black, which I like the look of, but we only had semi-gloss on hand. It’s okay – the shine gives the illusion of metal. In fact, I was surprised by how much the paint transformed the stairs… in a matter of minutes they went from looking like a funky cut-up fan to an actual iron staircase!
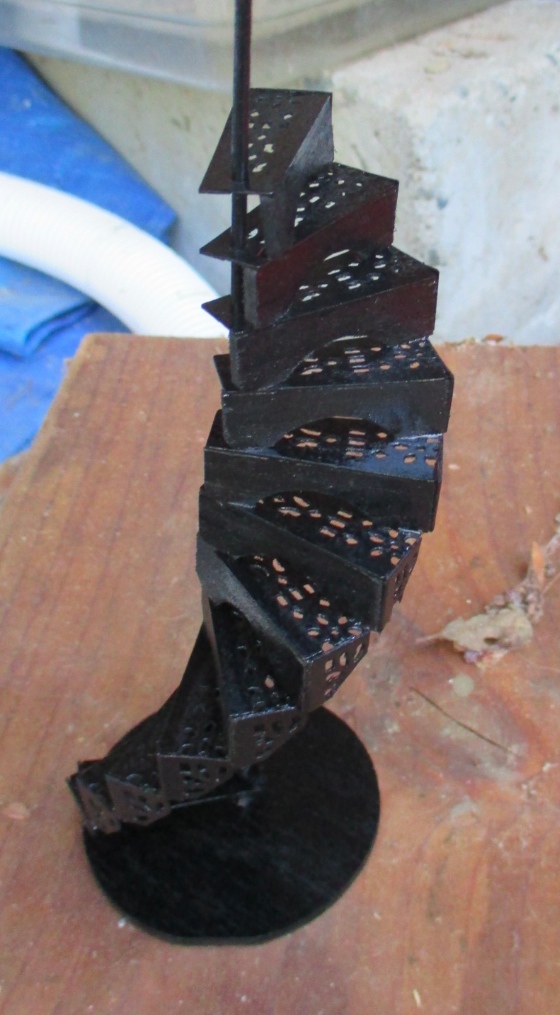
I painted the spindles separately. I only had matte black, so I also painted them with a coat of gloss varnish before gluing them in (after taking this picture).
It’s a good thing the stairs have those holes in them, because even after the glue dried these are very wiggly. But with the toothpick tips sticking through the holes, they’re not going anywhere.
I went to Joann’s and got some suede necklace cord to use as a railing. I also got a round, braided cord that I liked the look of better, but vetoed it when it turned out to be too hard to glue to the toothpicks.) I started from the top and attached the cord to the toothpicks with Super Glue, one spindle at a time.
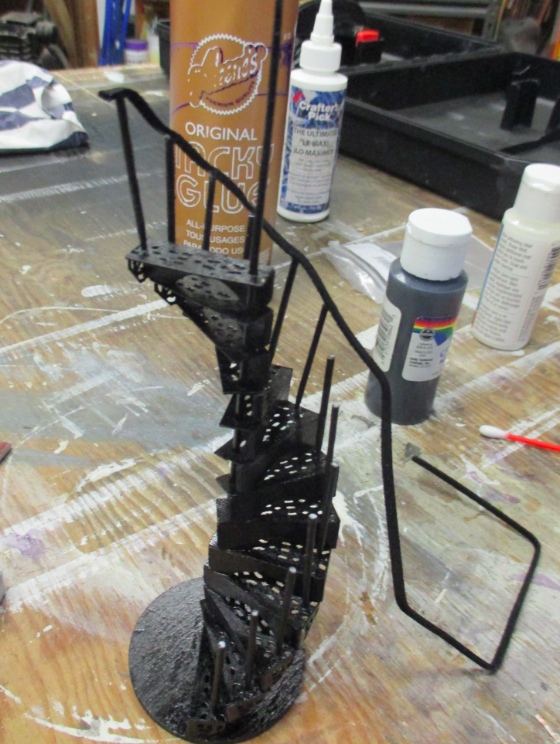
I then coated the railing, including the underside, with Mod Podge to stiffen it and reinforce the glue joints on the spindles. I ended up getting (matte) Mod Podge on some of the spindles, which negated the coat of glossy varnish I did earlier. Maybe I’ll do another coat of varnish on the spindles and railing at some point.
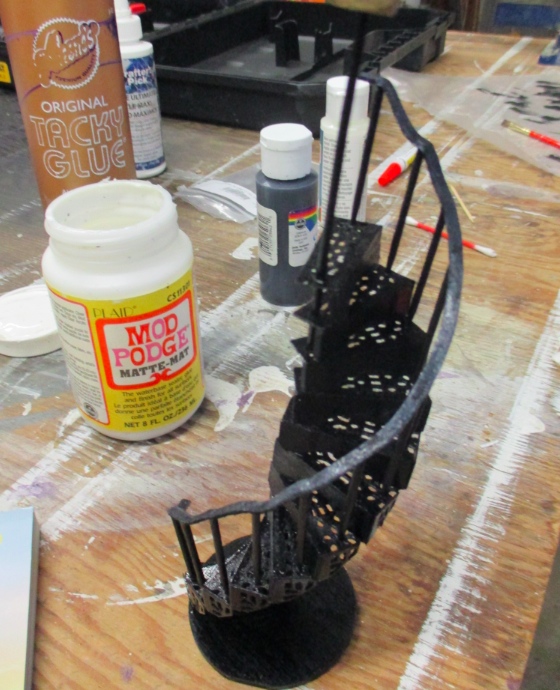
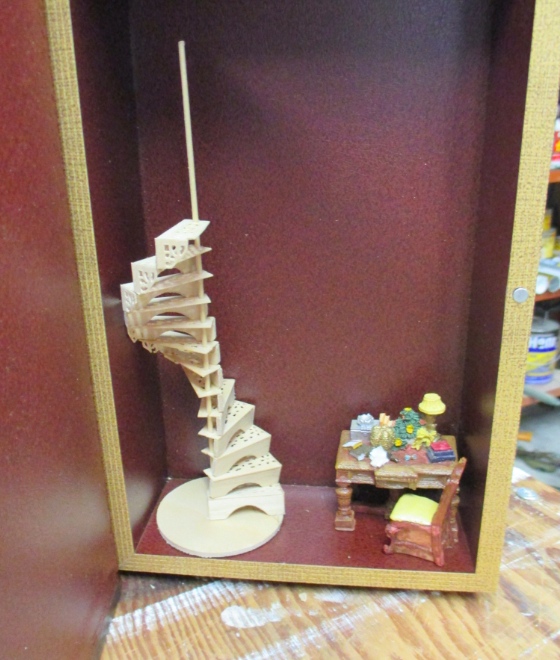
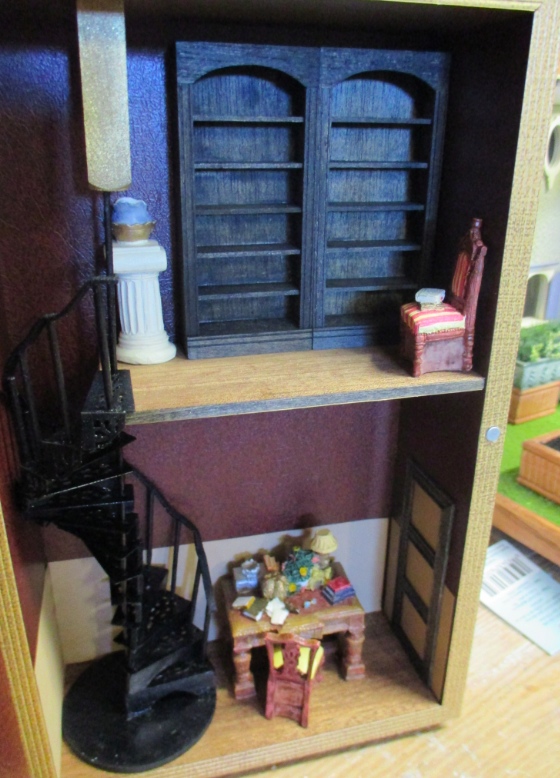
I put the staircase in the roombox, straightened some spindles that were leaning over, and left it alone to dry. The railing doesn’t exactly have the graceful curve I hoped for, but it gets the job done. I’ll post more pics of the inside of the roombox in my next entry, but here’s a sneak peek.
 Emily is a freelance writer, miniaturist, and adventure game enthusiast.


Wonderful job Emily thank you for sharing this with us.
Great job Emily! I love the stairs and I think I have a
fan that I bought years ago. Maybe I’ll try to duplicate your work. Thanks for sharing.
glenda
I have that fan too… and this has me thinking of making this since I hate how the regular stairs take up so much room. I made a frame around the top stairs railing with the fan pieces….
They look good!
Thanks everyone! I bought another fan at Pier 1 after making this and the design is the same except the hole I used for the stair spindles is missing (so that part of the design is like a circle instead of a flower). Just a heads-up for anyone who wants to try this.
If your fan doesn’t have that hole you can probably make one with the micro drill, but make sure to do it before gluing the treads to the risers!
This is a great idea to make a lovely staircase. You were fortunate to find a fan in timber instead of plastic like the ones I have seen. It certainly looks like wrought iron when painted. Well done, thanks for sharing.