I recently added email alerts to the blog. If you want to get a brief, non-spammy email when I post a new blog, please sign up on the right sidebar.
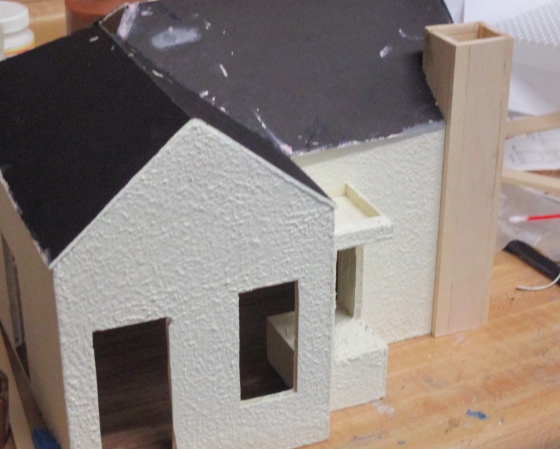
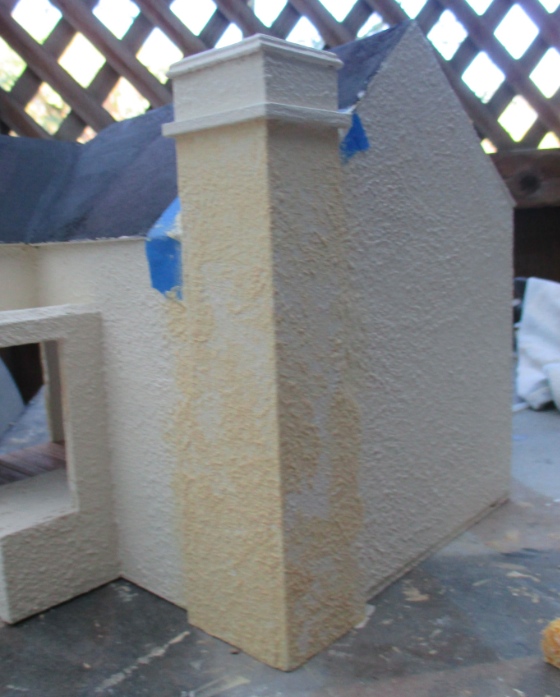
Following the not-so-great roof experience, I made a chimney for the Artist’s Cottage and it turned out pretty well. I feel like I’ve redeemed myself. :)
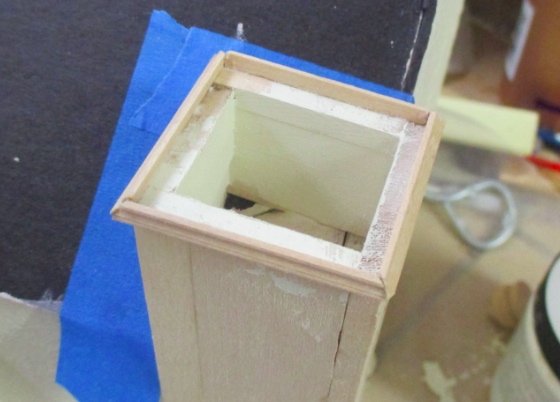
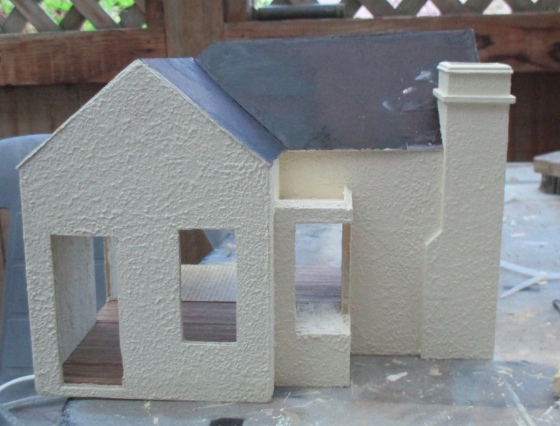
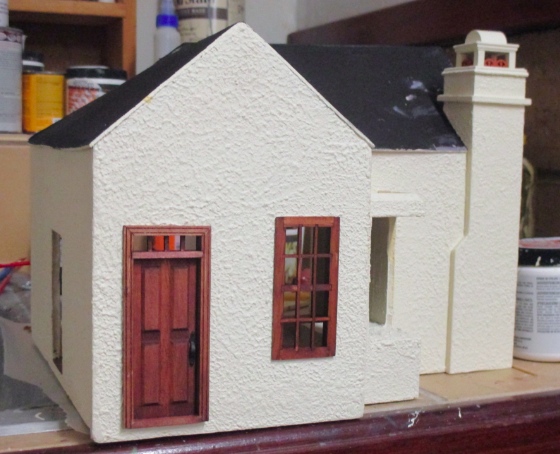
 The reason for the chimney, as you can see here, is that the Braxton Payne fireplace I bought extends past the roof line. Originally I thought about cutting the top of the fireplace down, but decided that cutting a hole in the roof and enclosing the visible top part with a chimney would be less likely to result in disaster. (Not to mention more realistic!)
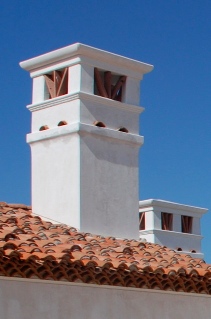
I Googled “spanish revival chimney” and found a bunch of good pictures. The one on the right (from Houzz) is the one I kept coming back to. It seemed like it would be easy to create with basswood and moldings.
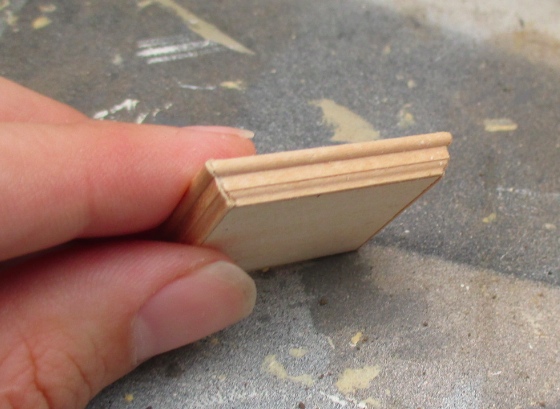
When I went to the store to buy my basswood, I forgot to bring measurements with me, so I ended up with pieces not quite wide enough that needed to be glued together.
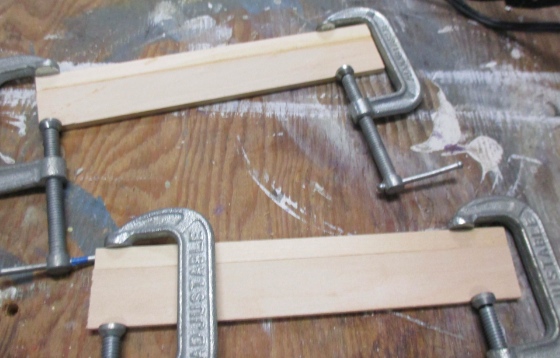
The two long pieces go on the outside of the house.
I cut a smaller piece to go on this side.
And this last piece finishes the rectangle, with a beveled bottom edge to meet the roof.
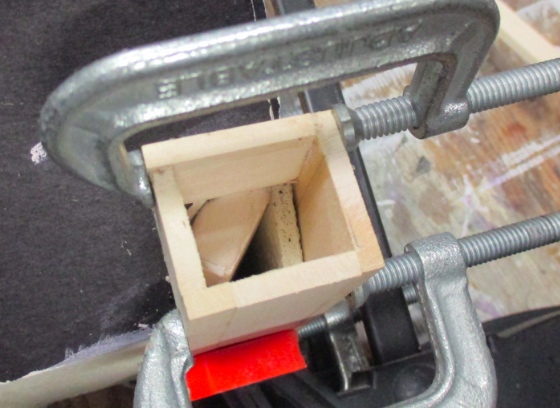
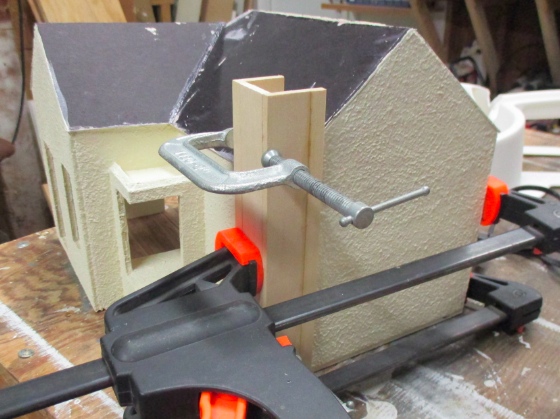
I left them clamped overnight while the glue dried, and in the morning my chimney looked like this.
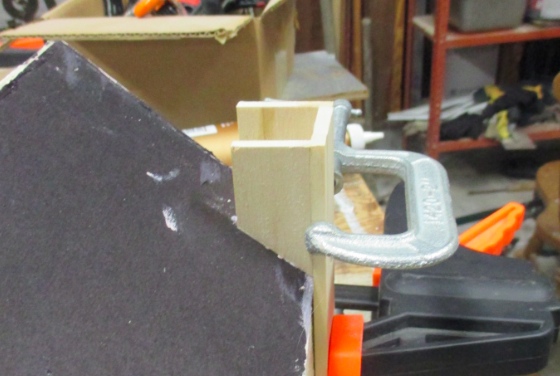
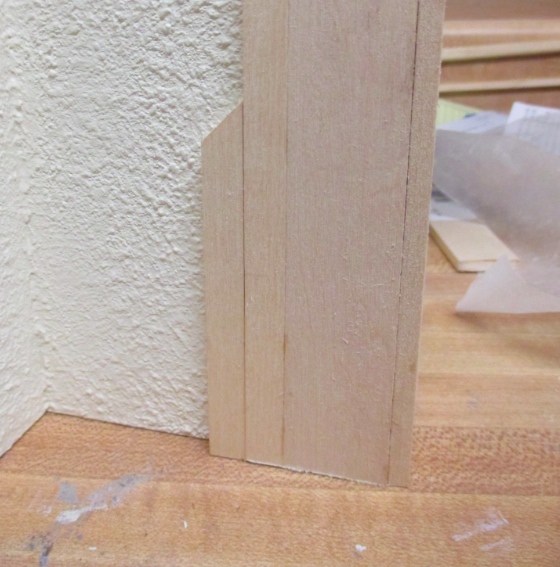
I had some of the small piece of basswood left over, so I used it to create a “step” on the sides of the chimney.
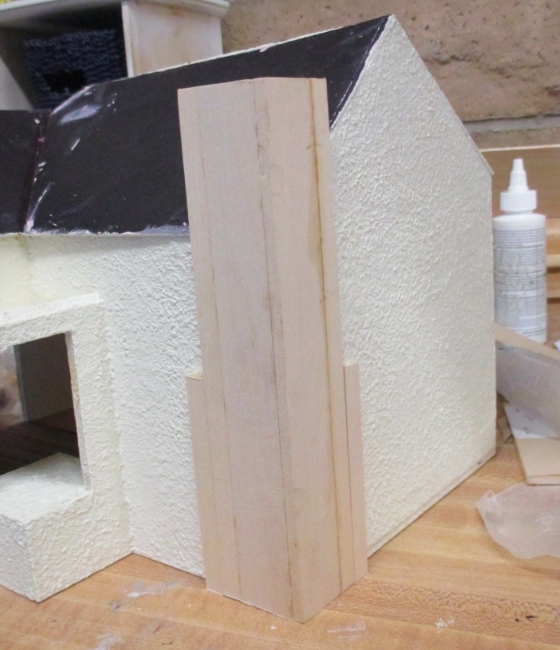
Before gluing them on, I angled the tops of these pieces 45 degrees.
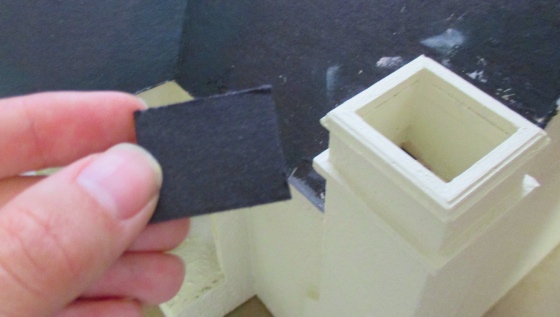
While the glue on the small pieces was drying, I moved on to the molding at the top of the chimney. I dug through my stash to find scrap pieces that would work well. This is a small crown (or picture frame?) around the top edge of the chimney.
Below it I added a plain, straight piece of basswood.
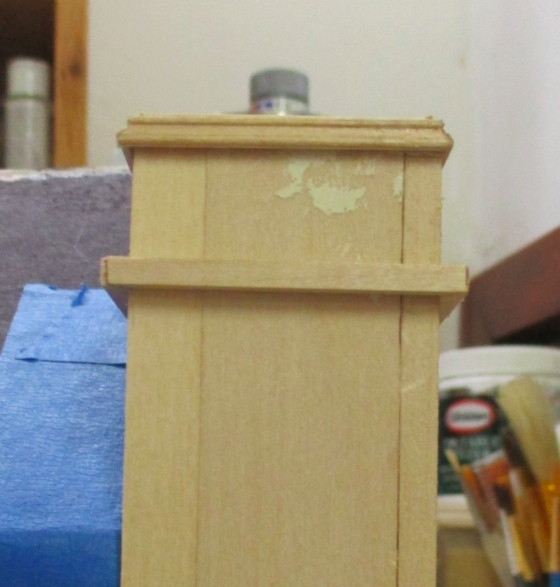
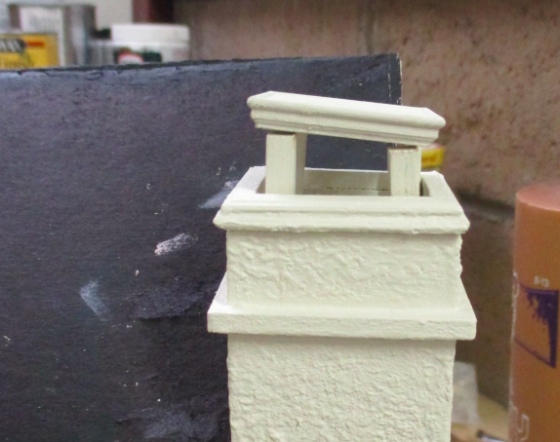
And then, worrying that the crown / picture frame perched on top of the chimney wasn’t going to stay put, I added a support piece around the top for the crown to attach to. It looks more finished this way.
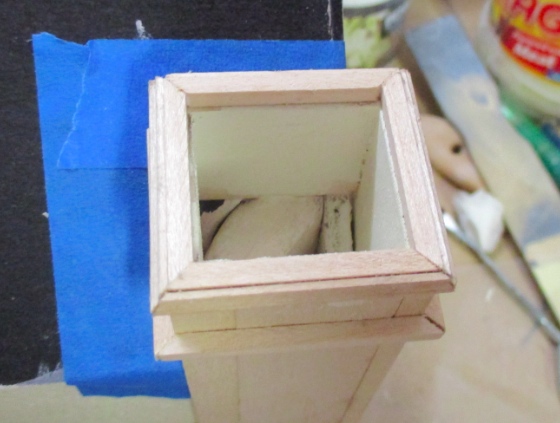
With the main part of the chimney complete, I brought it outside to stucco and paint.

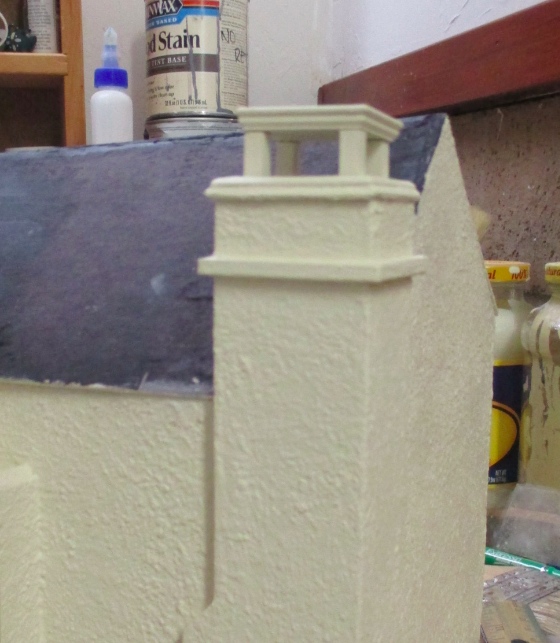
For the stucco I used watered down wood filler and a sponge, just like on the exterior. I was careful not to get it on the trim. After it dried and I painted it, I wasn’t completely happy with the look (some basswood seams were showing through), so I did another round of stucco.
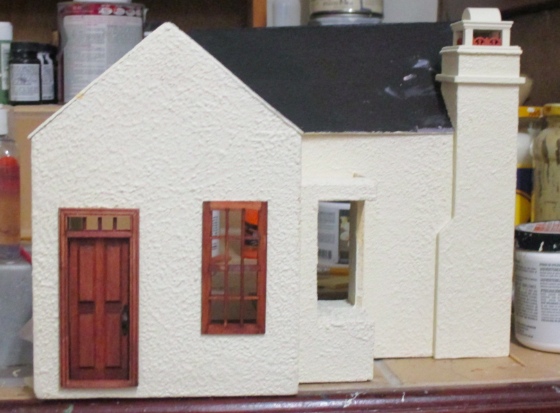
So far, so good — if you ignore that crooked roof!
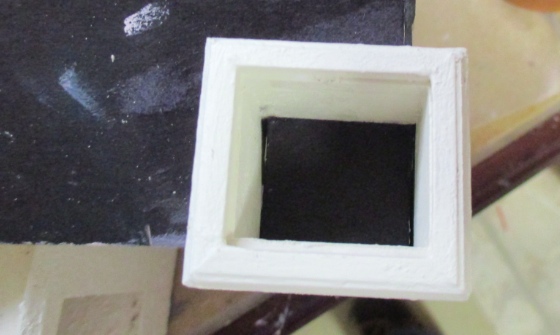
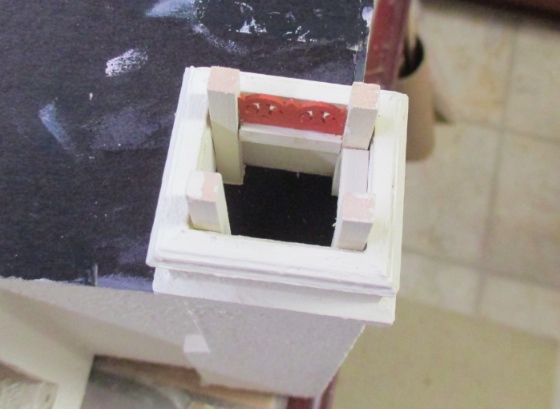
The inside of the chimney was still open, and I didn’t want it to stay this way for fear of losing things down behind the fireplace. I cut a piece of leftover presentation board to make a “floor”.
I glued this in. As an added bonus, there were a few cracks of light showing through where the roof hole isn’t snug against the fireplace neck, and this blocks them.
To create the decorative top of the chimney, I planned to glue four posts inside the chimney and add a “hat” on top of them. I made the so-called hat by gluing another style of crown around a basswood rectangle.
Here’s the basic idea… a little drunk.
I used a scrap of basswood as a guide to glue the posts in at the same height.
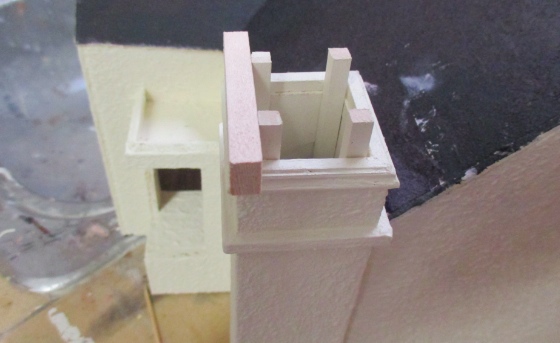
Then I placed my hat on top to see how it would look. It’s basically like the inspiration picture, but I felt like it lacked some oomph.
I had this little decorative thing out of a block set I’ve been pilfering right angle pieces out of for years (I use them as supports on the undersides of foundations). I liked the concept, but there was something about the sudden transition from right angles to a circle that was bugging me.
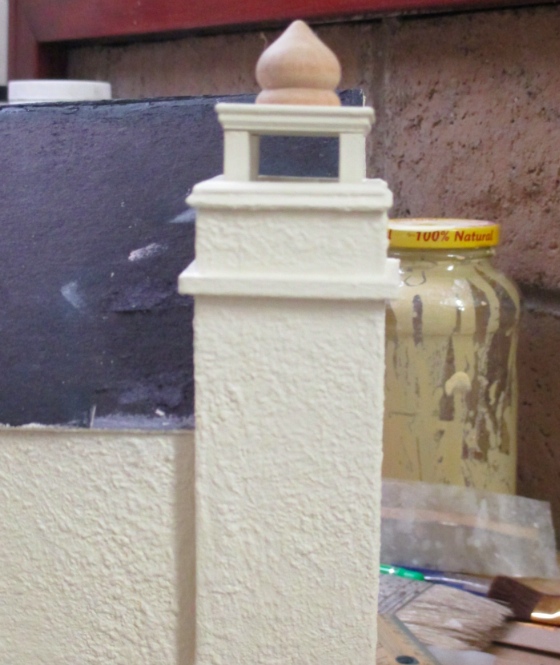
Then I tried this piece, out of the same block set, which just looked “right” to me. Let’s hear it for never throwing anything away!
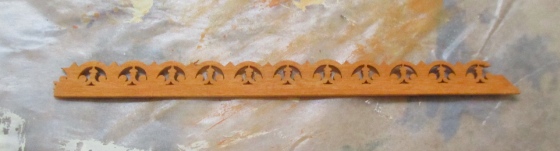
I glued the block onto the hat and painted it, then moved on to the decorative part that goes between the posts. For this, I used a scrap of gingerbread trim left over from the Gull Bay.
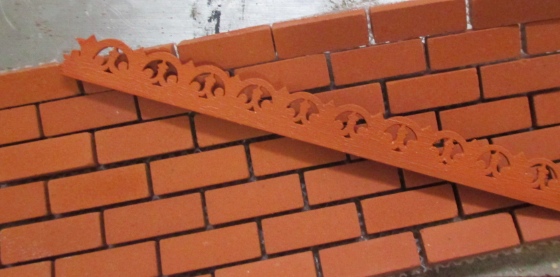
Whatever I came up with for the embellishment on the chimney would also be used for the barrel tiles on the roof. I had two orange-y paints at my disposal: a lighter one named Spiced Chai (shown below), and a darker one named Autumn Leaves. I tried each and then held up the trim next to things that are terra cotta, and wasn’t really satisfied.
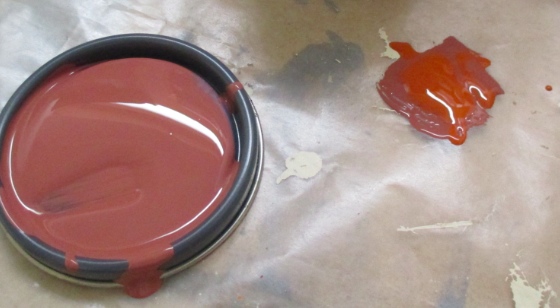
Looking at a piece of Southwest-like pottery that I’m planning to use somehow with this house (maybe as a planter), I saw that the orange wasn’t just orange, but had some pink to it. This gave me the idea to mix Autumn Leaves with a light pink paint I had lying around.
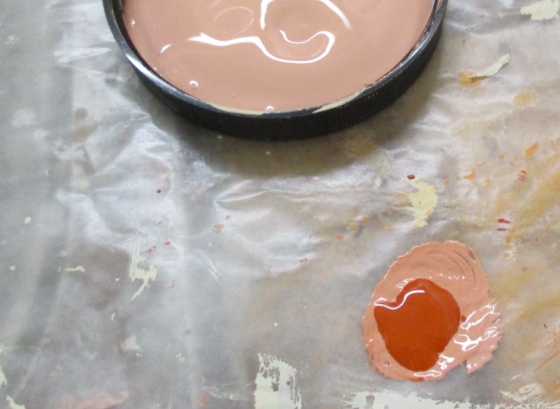
This makes me think of the color you’d get if you mixed ketchup and mayonnaise. (Yuck.)
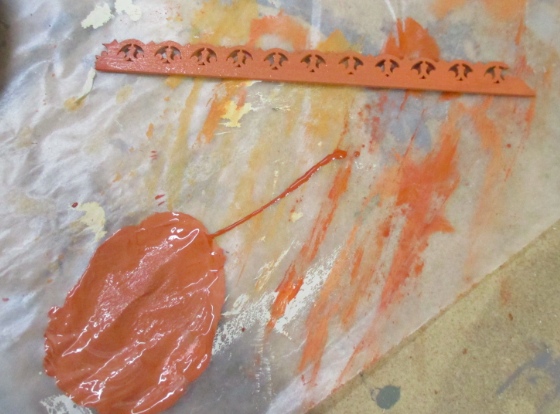
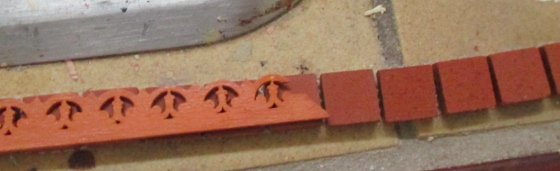
The orange I ended up with is actually very close to some orange clay bricks I have, so it’s a passable shade.
But, it’s not close to the red clay bricks I’m planning to use as the floor in the artist’s studio (an addition I haven’t built yet). The studio has a brick foundation that I’m planning to paint with this same paint, so I didn’t want to be too far off from the floor color.
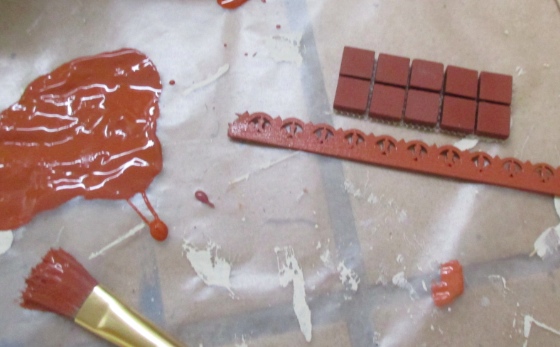
Next I tried mixing a darker pink with Autumn Leaves.
Though not quite as red as the clay bricks, this combination is closer, and I decided to go with it. Hopefully I’ll be able to reproduce it when it comes time to paint the roof tiles!
Gluing in these little pieces was way more finicky than I expected. For the trim pieces to be wedged between the posts, they needed to be set back from the edge of the chimney, which meant I had very little surface to glue onto (just the skinny edges where the sides of the trim touch the posts). I had visions of the trim pieces dislodging and falling into the chimney, where they’d be hard to extract once the chimney hat is attached.
To resolve this I added horizontal pieces between the posts, for the trim pieces to sit on top of. At least this way they’re glued at the bottom as well as the sides.
This took way longer than it should have, but here’s what I ended up with.
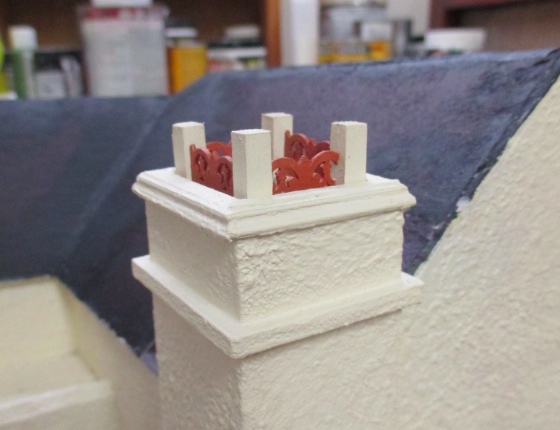
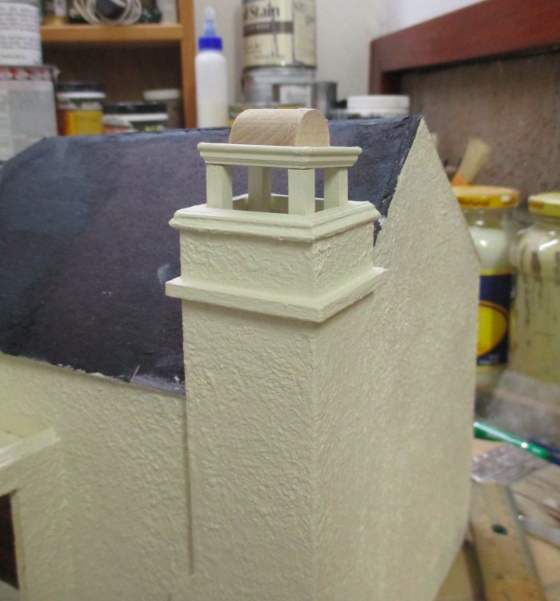
Finally, I glued the hat piece (now with decorative doodad!) on top of the four posts.
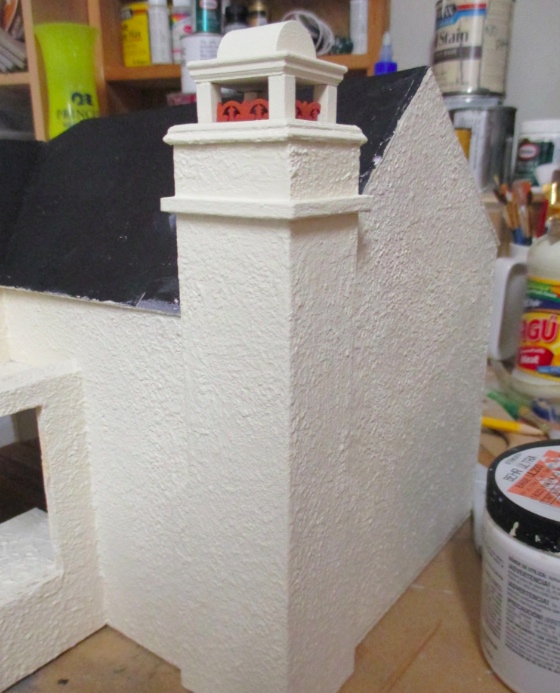
Ignoring the crooked roof — which I’m totally going to fix when I add the shingles — I think it looks pretty good!
I may add pieces of barrel tile above the bottom piece of trim, as in the inspiration photo. We’ll see once I get around to painting those tiles.
 Emily is a freelance writer, miniaturist, and adventure game enthusiast.


The chimney looks great! Don’t obsess too much about he crooked roof. How old is this house supposed to be? Old houses have roofs that sag especially if it has a roof with four planes connecting and no direct support below. (You can do a little adjusting along the peak if you want. Have you decided what you are going to do a the triangular “window” opening? You could close that opening with a triangle that is in the same plane as the short roof–angled back along the long roof peak, and while you are at it extend a piece along the peak to level it some. Or not.)
Dad (Electrical engineer–remember there is wiring in the little Belle.)
Can’t help obsessing over the crooked roof… I inherited perfectionism from *someone*. :P
I’m waiting to decide about the triangular opening until after I do the shingles. If I alter the roofline then I thought I could put a (new shape) triangle outside, and an (old shape) triangle inside, and you won’t necessarily be able to tell that they’re two different triangles. In that case it won’t be a window but a solid piece (white inside, and either white or tiled outside). I think that’s sort of what you’re saying.
ps But I am adding skylights to the roof, so even without the triangular window you’ll be able to see in through the roof.
Great job with the chimney.