Sometime between when I bought the gatorboard house and now, tiny houses have become a thing. After seeing some episodes of Tiny House Nation and Tiny House Hunters I decided that the Spanish Revival artist’s cottage qualifies as a tiny house.
With the addition I’m planning to add it’s something like 460 square feet, so its footprint is bigger than some of the really tiny houses I’ve seen on TV. Even so, I decided it doesn’t need a full kitchen.
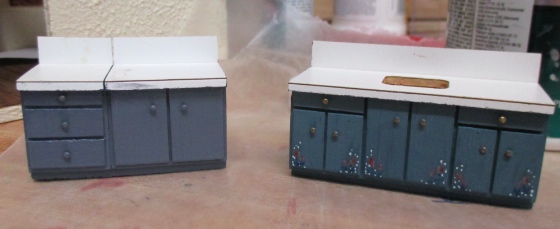
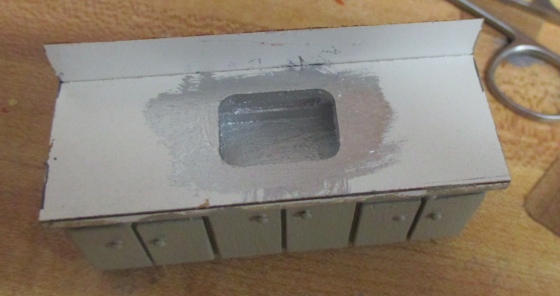
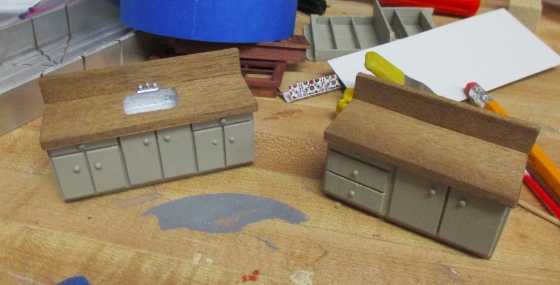
I got these handmade cabinets a few years ago for cheap at a mini flea market. They’re made from blocks of wood, with non-opening doors and handles made from pins. They started out bright blue with flowers on them. I painted a coat of grayish blue (left) before deciding to go gray/green instead.
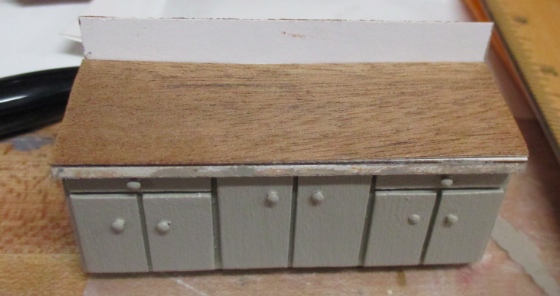
Originally the countertops were a white Formica-like material. I covered them with wood veneer I bought in a big batch off eBay last year.
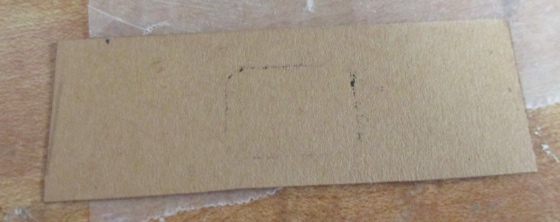
Before gluing this down, I went around the edge of the sink with a Sharpie, then pressed the piece of veneer I’d cut against it so the ink would transfer onto the back side of the veneer.
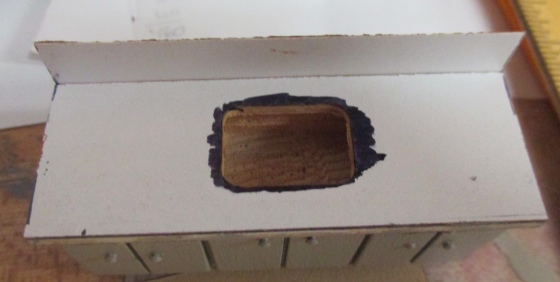
This way I knew where to cut the sink hole.
Then I painted the sink and the edge around it (in case any showed through the hole) with silver paint.
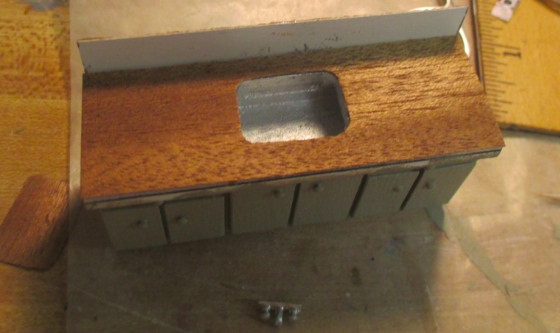
Here’s how it looks with the countertop glued on. I also painted a gold half scale faucet silver, which you can sort of see at the bottom of this photo.
I used my paper cutter to cut a narrow strip of the veneer, and glued this around the edges of the countertop.
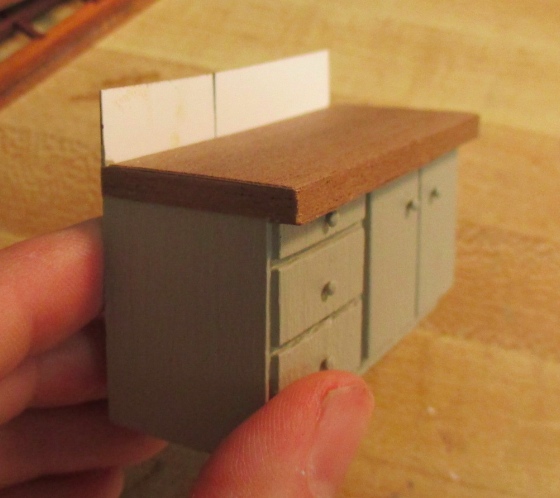
Same thing on the bottom edge.

The backsplash on these cabinets was very thin, so I glued on strip wood before covering the backsplash with veneer. Here are how the two cabinet pieces turned out.
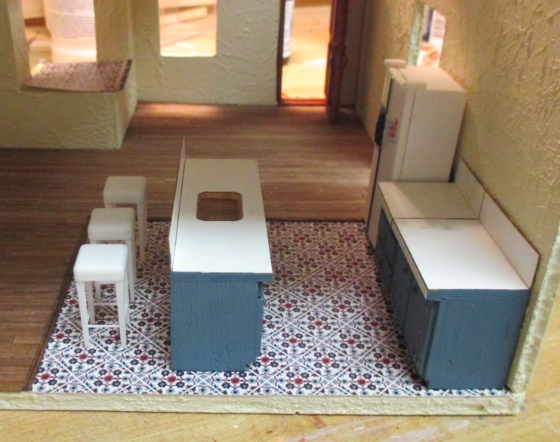
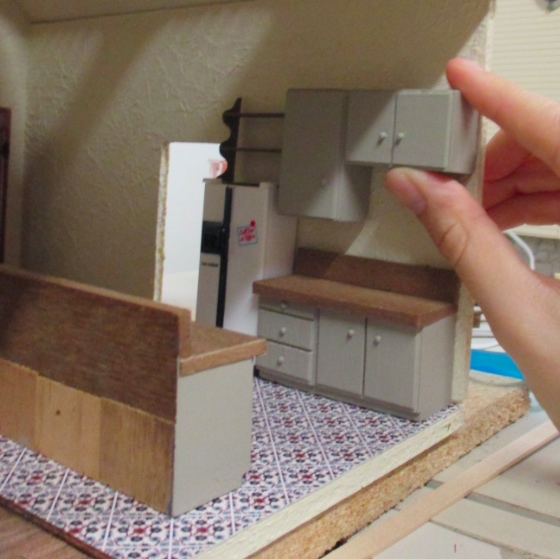
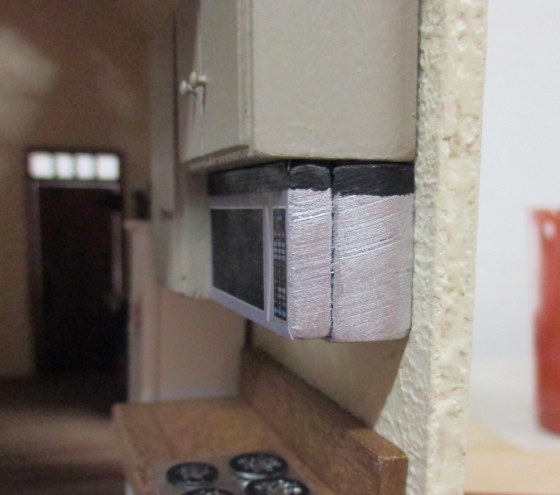
An upper cabinet will go over the unit on the wall.
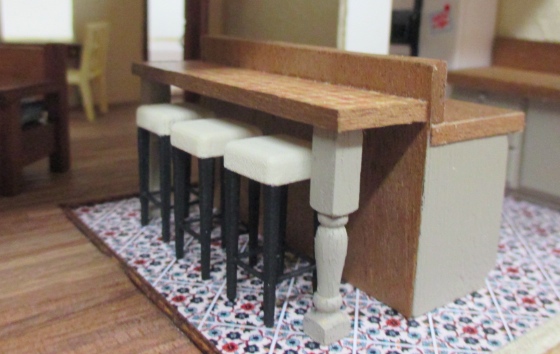
Next, I built a breakfast bar into the back of the sink piece. I cut a piece of basswood the length of the cabinet unit. The stools are 3D printed, purchased from Shapeways.
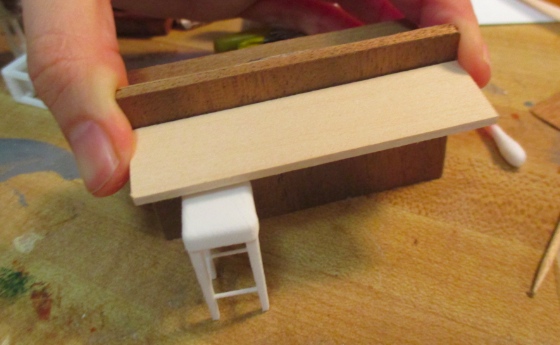
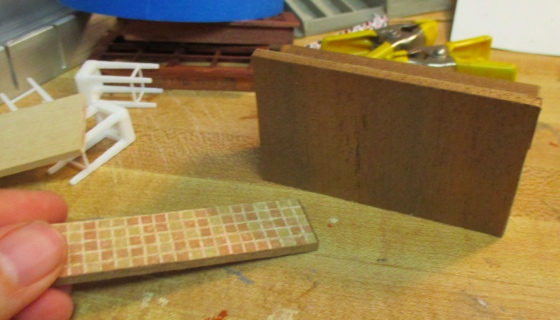
I covered the top of the breakfast bar piece with tile paper, and the sides and bottom with the same wood veneer as the counters.
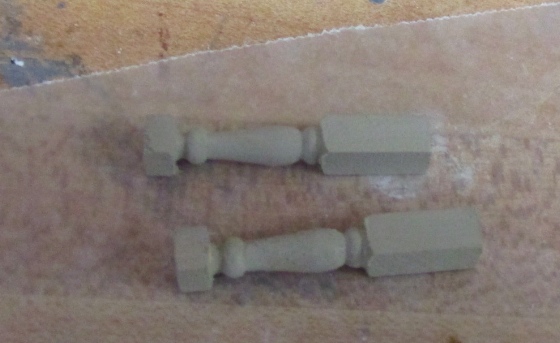
I cut down two half scale newel posts and painted them the same color as the cabinets.
Glued these to the bottom front corners of the breakfast bar.
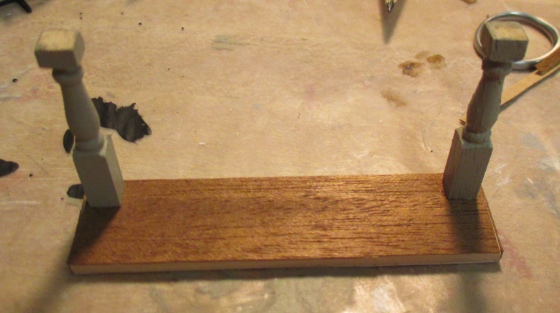
And, glued the edge of the breakfast bar to the back of the cabinet unit. I painted the stool legs black, and the cushions the Navajo White I used for the cottage walls.
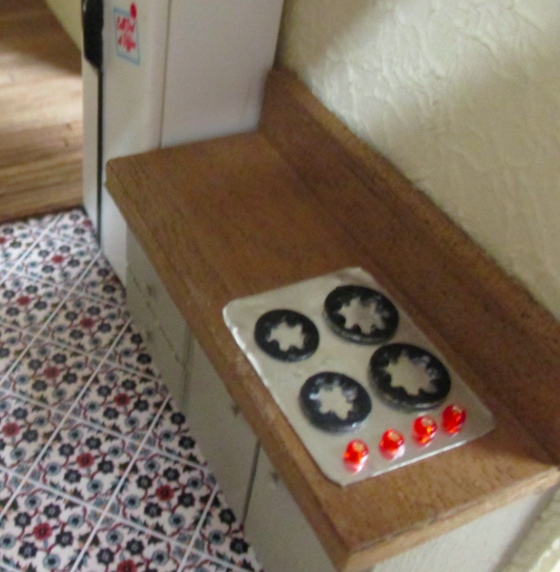
On the other cabinet unit, I made a stovetop out of a piece of aluminum sheeting, lock washers painted black, and seed beads.
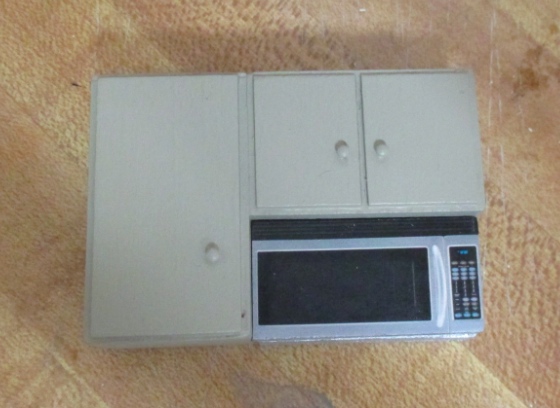
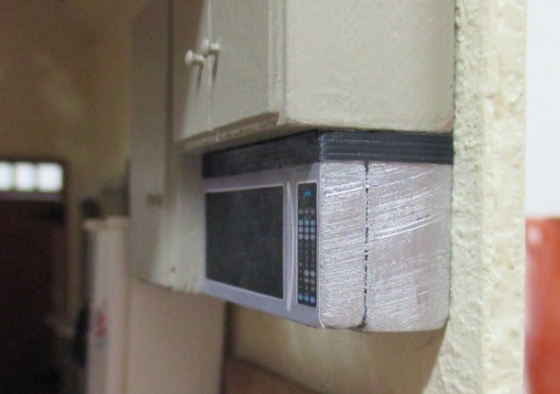
This tiny house won’t have an oven, but it will have a microwave over the stovetop. The space under the smaller cabinet is 1.5″ x .75″ I cut two pieces of wood to fill this space — the thinner one is supposed to be the door.
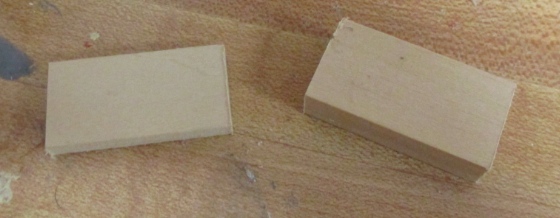
I glued these together, painted the visible edges, and glued on a picture of a microwave that I printed off the internet (resizing it first to the desired size).
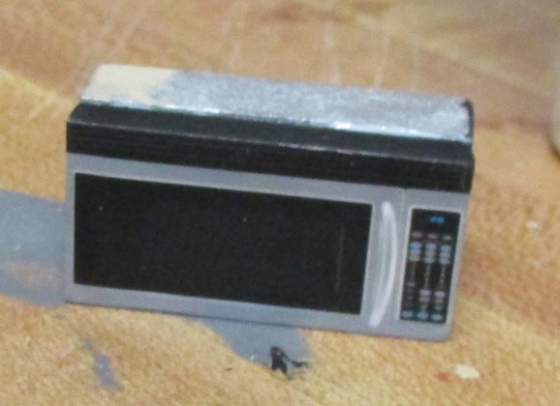
Here’s how it looks from the front. Pretty realistic!
From the side, not so much. I painted the top edge black to match the black vent at the top of the microwave picture, but despite my best efforts, it looks sloppy.
I had printed out two copies of the microwave picture, in case one got messed up. I cut the vent off the second one and glued it to the side (painting over the bottom of the black paint with silver first, so the transition would be sharp). It’s not perfect, but at least not as noticeably fake.
The last kitchen piece is this hutch, which I got in a Freecycle haul over the summer. It’s handmade (apparently from coffee stirrers), which seemed fitting for this handmade house. I painted it with the same gray/green as the cabinets.

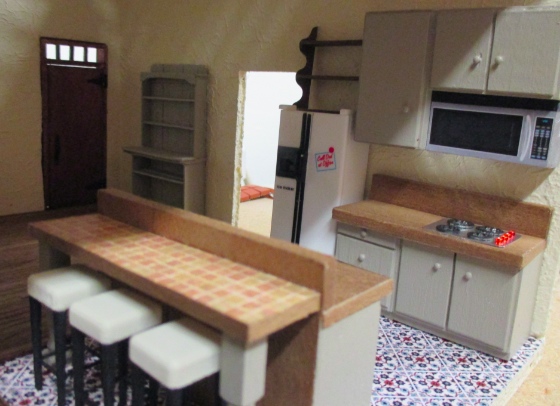
And here’s the finished kitchen. The plate rack over the fridge is something I had lying around, I can’t remember where I got it. It’s just resting on top of the fridge (an Acme magnet) right now, but once I add the trim to the doorway I’ll probably glue it in place. (Same with the upper cabinets, which are just stuck to the wall with putty right now.)
Although the cottage lacks an oven, I do plan to add a grill to the yard so the artist who lives here can have meat grilled tofu from time to time!
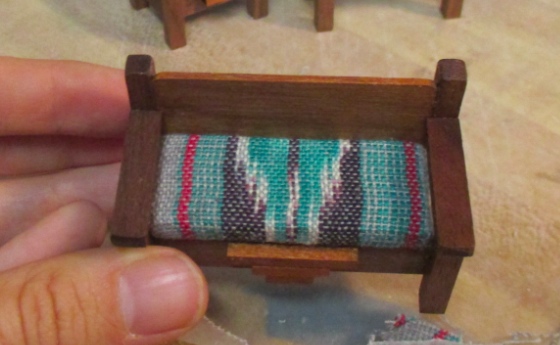
While I’m at it, here’s some more furniture. I made this sofa, chair, and table from “Mini Construction” kits from Maureen O’Donnell, which I bought off eBay. The kit instructions weren’t great and there was no photo of the finished pieces (just line drawings), so I’m not 100% sure I built them right.
On the plus side, the wood in these kits is really good… I think it’s cherry or walnut or some combination of both. I used Cherry Minwax stain on it and the color came out nice and rich.
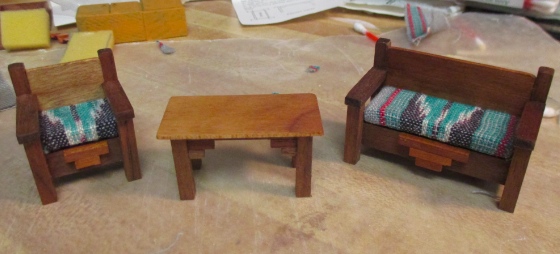
The step design was supposed to go on the back/top of the sofa and chair but I didn’t like how that looked so I put them on the front/bottom instead.
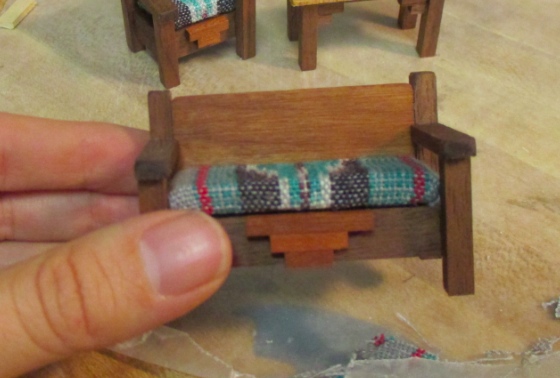
The kits came with foam for the cushions, but couldn’t make it look neat so I glued the fabric to pieces of wood instead. Uncomfortable, but hey, I won’t be sitting on them…
Here’s the new living room furniture in place. The rustic coffee table was another flea market purchase.
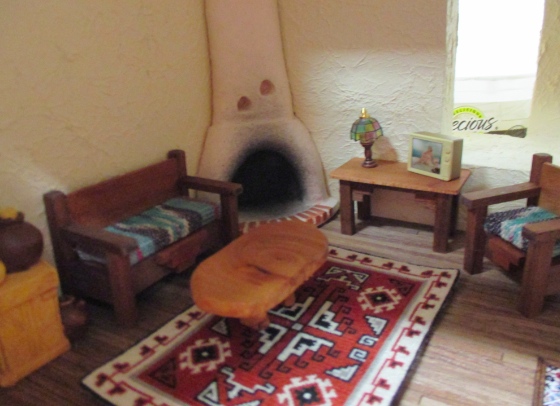
I cross stitched this rug from the leaflet Miniature Needlepoint Rugs for Dollhouses. It’s stitched over-one on 36 count fabric, for a finished size of approximately 2.75″ by 4″.

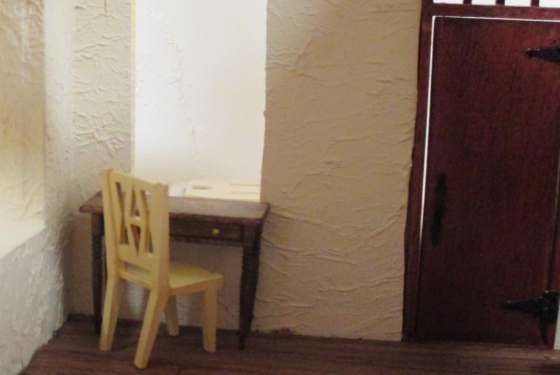
Finally, here’s a hall table I built from a Cassidy Creations kit. I’m usually happy with those kits but for some reason the instructions in this one just didn’t make sense to me. I ended up building the drawer first, and then laying it on the (upside down) tabletop and gluing on the rest of the pieces around it.
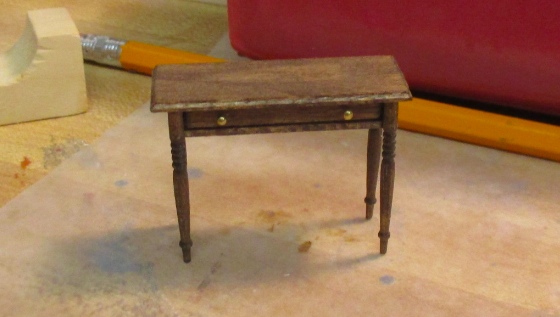
I plan to use this under the window like a desk. The chair came from last year’s Half Scale Yahoo Group swap.
 Emily is a freelance writer, miniaturist, and adventure game enthusiast.


Nice! I love the efficiency kitchen. And I love all kinds of tiny houses :D
Yours is turning out great!
I just ran across your blog as I have recently started to research putting together a 1/2 scale dollhouse. Your Spanish revival is ahhmazing. It looks like a home that you would find in Tucson around the UofA like maybe the Sam Hughes neighborhood. Congrats madam. Your “Sam Hughes” house is my inspiration.
Wow! You have got a move on with this house, and it’s looking wonderful. Great work. The rug is really dramatic.
This is not Maureen O’Donnell’s work I am her daughter and I can certify that so I’ll be letting her know fraud
Hi, thanks for your comment. The couch, chair, and table were kits that I bought on eBay. I don’t have the packaging anymore, but my recollection is that they said something like “Mini Construction by Maureen O’Donnell” on the front (I wouldn’t have known her name otherwise) and might have also included an address in a Southwestern state. The fabric I used was included in the kits. If your mother has any other information, please let me know.
By the way, you and your mom might be interested in this Reddit post, if you haven’t seen it yet: https://www.reddit.com/r/Dollhouses/comments/1kav4uu/we_found_this_at_a_rental_clean_out/