In one week (gasp!) I will be moving back to San Francisco and leaving the suburbs behind. The past six weeks have been busy with packing and de-cluttering and moving things to the (considerably smaller) new house, including everything that once lived in my beloved dollhouse workshop. The new house doesn’t have a dedicated dollhouse room yet — although Geoff promises we can create one in the garage someday — so for now there are a bazillion bins filled with furniture and supplies and the houses are all over the place. It’s pretty overwhelming.
(If you’re wondering, this is what the staged dollhouse room looked like when we put the house on the market. It *never* looked this nice the entire time I lived here. I spent about two hours cleaning paint off the sink and tabletop and then the woman staging the house walked in and said “Oh, you washed off all those paint spatters! I thought they were cute!” Grr.)
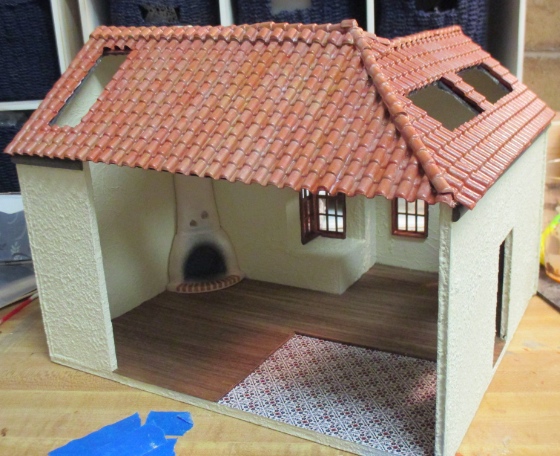
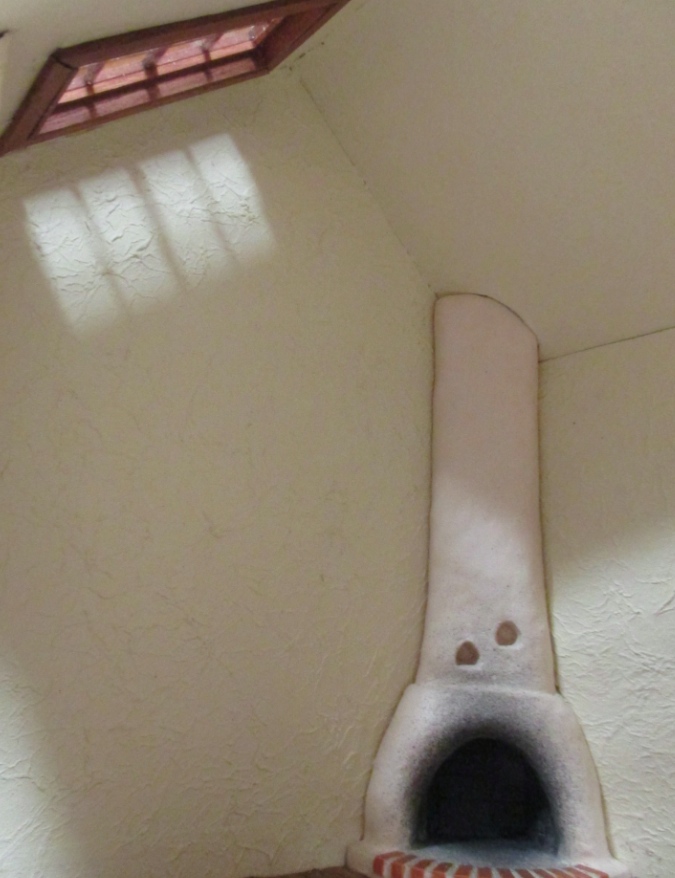
Anyway. Before packing up all my stuff, I finished a few projects that were close to being done, thinking that if the stuff stays packed for months/years (noooo!) it would be too hard to pick up where I’d left off. One of those projects was the windows on the Spanish revival artist’s cottage. But before I get to that, I have to go back even further, because I never posted a follow-up to my questionable barrel tile roof, finished almost a year ago.
Among other things, I was unhappy with how the top row of the back part of the roof looked. I had replaced an entire row of tiles to cover up some that had melted from glue, and didn’t like how obvious that replacement row was.
In an attempt to blend in the patch job a bit better, I cut several varied lengths of tile to add to the back roof, and theoretically make the top replacement row less noticeable.
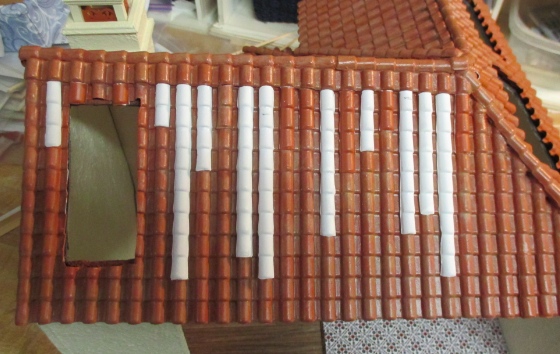
After painting and gluing on the new pieces of tile, I added wood filler to the tiles under the replacement row to make the gap less obvious.
Here’s how it looked before I added the washes.
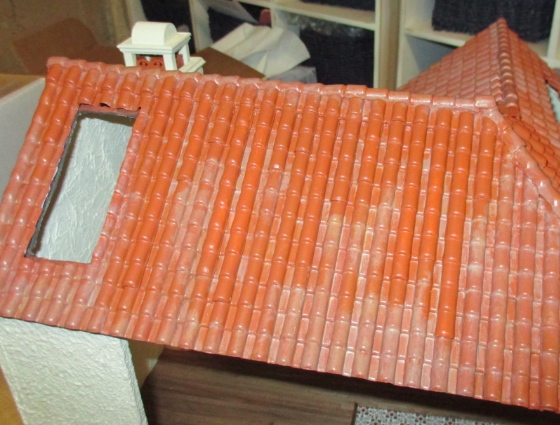
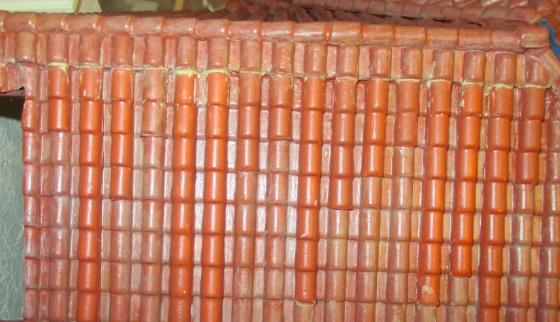
And after. There’s still something funky about it but I think it looks more like an old roof and less like a styrene hack-job now.
Unfortunately, as you can see on two of the bottom tiles, the paint still scrapes off incredibly easily. I also dinged some putting the house into the car to move it to San Francisco, so whenever the new dollhouse workshop materializes the roof is going to need another touch-up. This is probably my last time using styrene tiles…
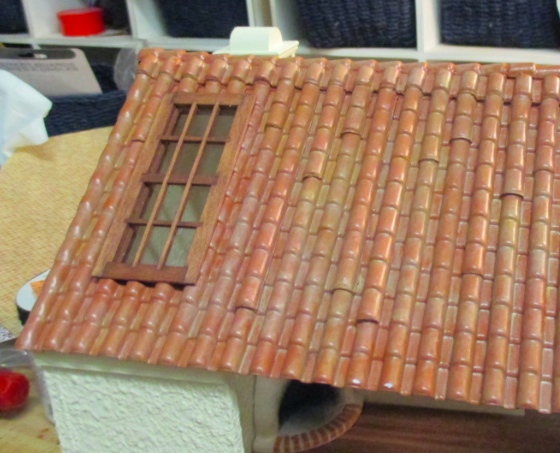
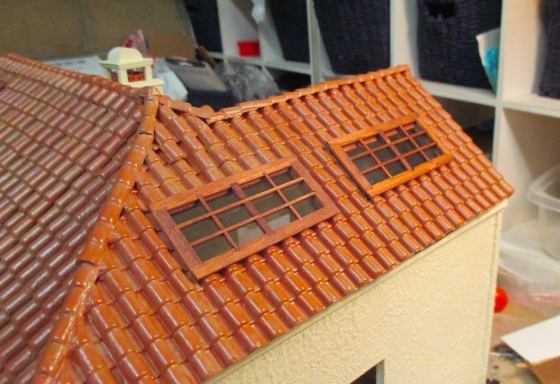
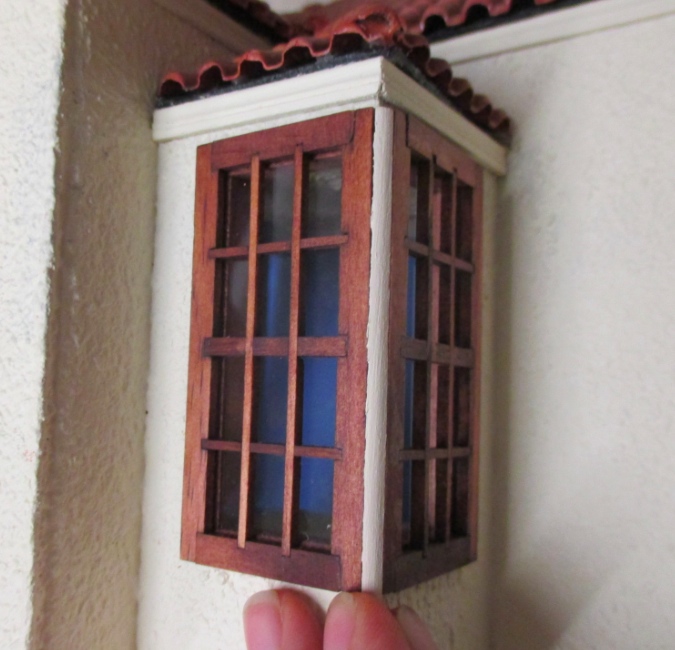
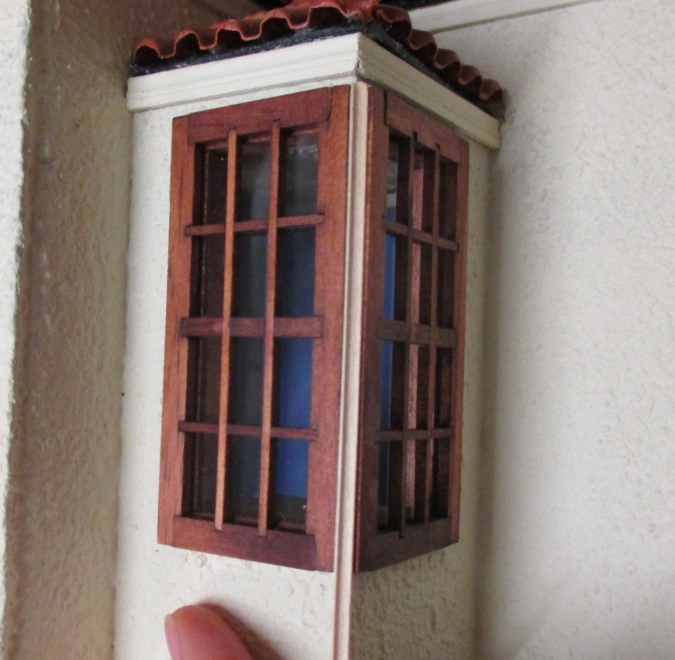
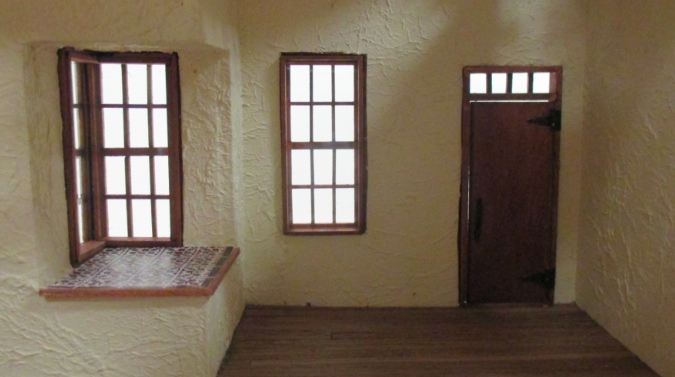
Moving on to the original purpose of this blog… windows! The gatorboard shell came with three windows cut into it and I added three skylights to the roof. These are all Houseworks 12-light windows.
For some reason this style of window doesn’t come with interior trim, but I had some leftovers from other houses where I’d changed the trim.
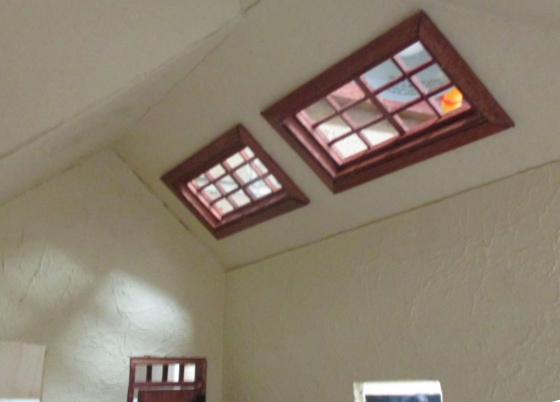
I love how the light streams through!
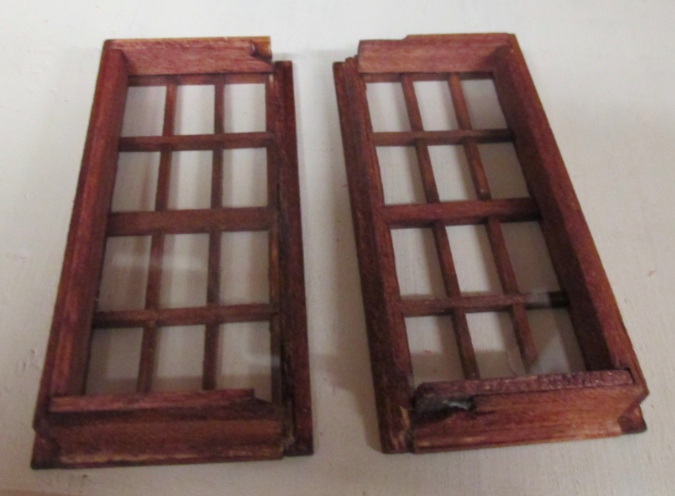
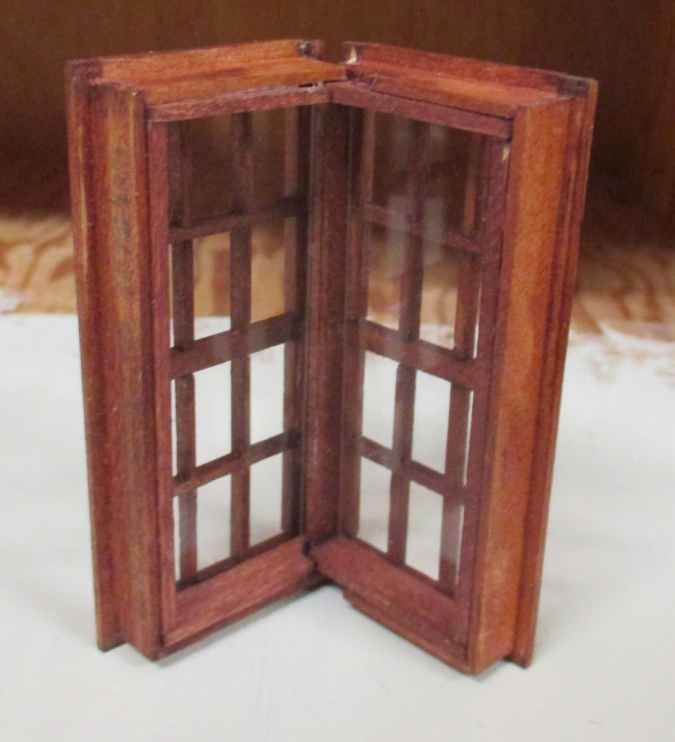
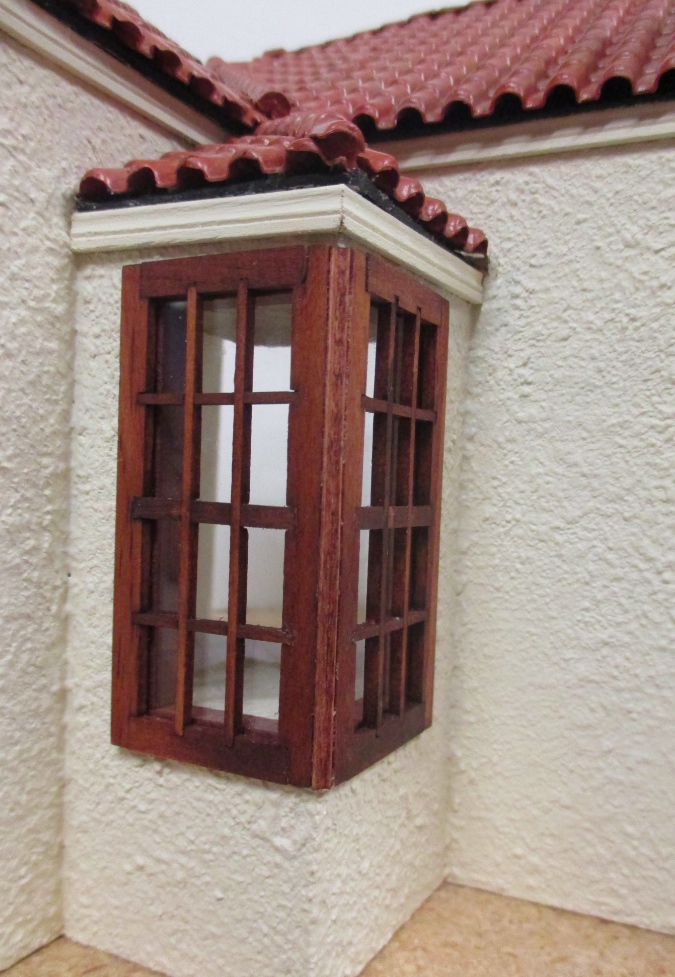
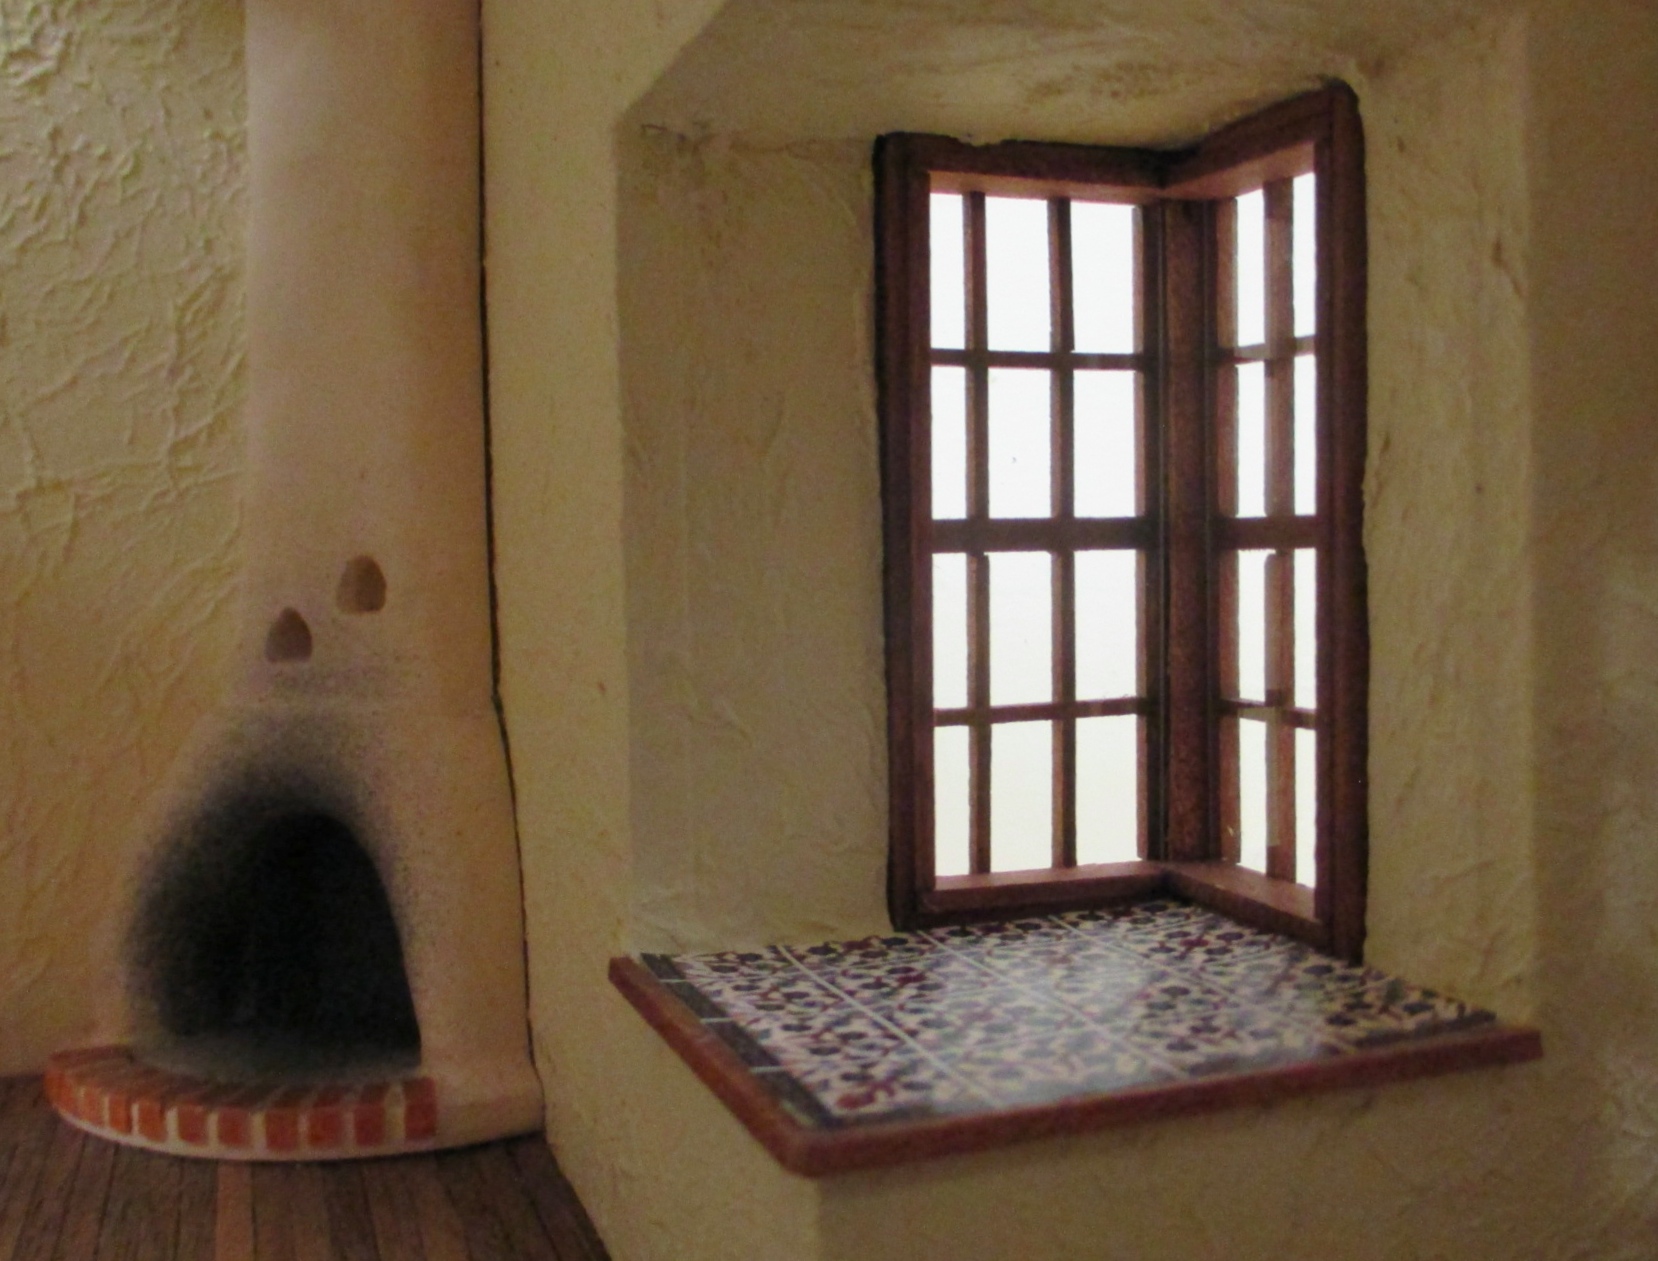
The corner window on the front was a challenge. (This is the part I’d been putting off for such a long time and knew I’d never be able to figure out again if I just packed away the pieces without finishing it…) To fit into the bump out at the front of the house, I needed two windows to meet at a right angle. I had to shave down one side of each window and cut into the top and bottom pieces, so they’d fit snugly.
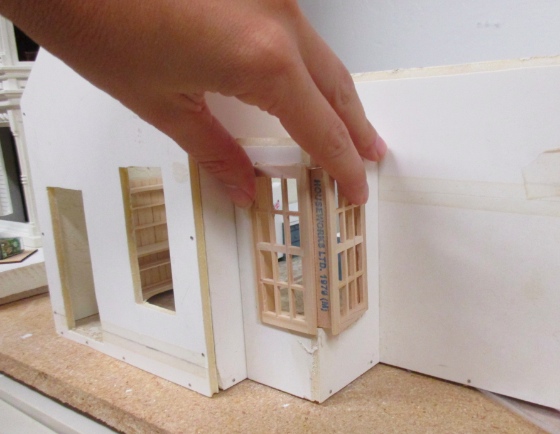
I didn’t think it through super carefully and ended up hacking a bit more than necessary, especially at the top and bottom of the window on the right. These windows have plexiglass held in with narrow pieces of strip wood that fit snugly within the window frame. I replaced those with flat pieces to cover up the gaps.
Looks a little neater now.
On the outside there was a gap that needed to be covered up. I really wanted to use quarter round to create a curved edge but the only piece I had was already painted, and going to the dollhouse store to buy more seemed against the spirit of packing and cleaning up, which was what I was *supposed* to be doing. (Oh, how I am going to miss having Dollhouses Trains and More five minutes away!)
Instead I scrounged up a piece of cove molding that fit.
Cut it, stained it, and glued it in… not too bad?
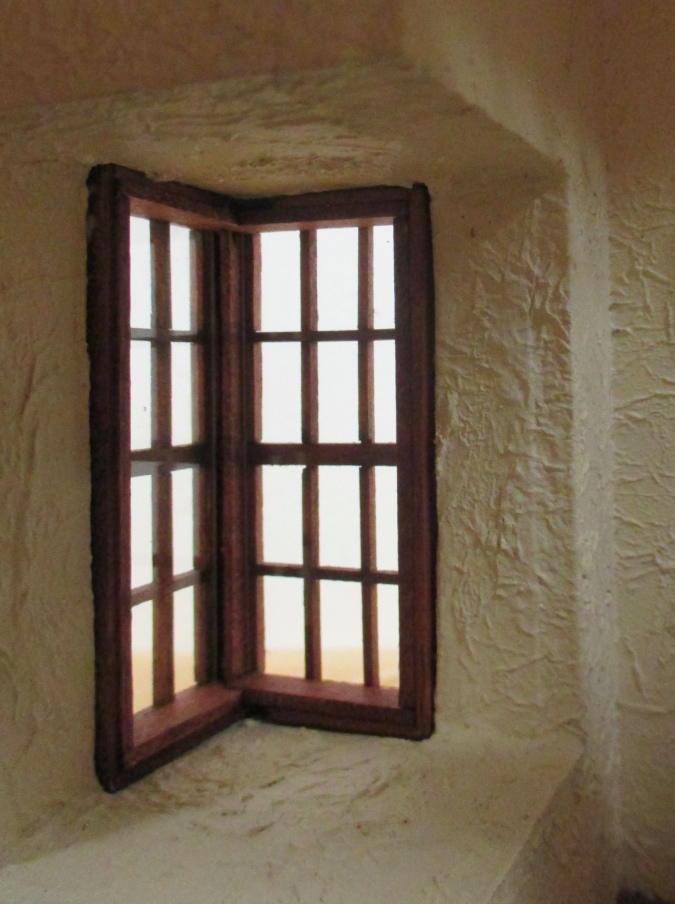
Here’s how it looks on the inside. I haven’t decided if I’ll add additional trim around the edges or just leave it like this. There’s still a visible gap where the two bottom pieces meet, but it’s in shadow and hard to see.
I added tile to match the kitchen floor and trimmed out the edge with a couple of the pieces that came with the windows to hold in the plexiglass, that I hadn’t used. This shelf will be a nice place to display plants or pottery.
Finally I glued in the other window and the door. These do need some kind of trim — particularly the window, since the hole is cut a little too big at the top. But that’s a job for some future date.
 Emily is a freelance writer, miniaturist, and adventure game enthusiast.


You are definitely SUPERWOMAN! Packing and moving is a daunting task alone; I can only imagine how you were able to finish up projects in the process. This house is precious, and I love reading about how you solve problems as you go along. Best wishes with your move, and I hope you’ll soon have a lovely dollhouse room in your new home!
Thanks!
Glad to hear that the move is underway! You could consider using wood filler to “stucco” the gap inside at the windows instead of adding trim. It looks like the window frames are deep enough to serve as the edge of the stucco wall and I think the concept fits well with the Spanish cottage theme.
Dad
I like that idea but I’m not sure if I could do it neatly, without getting wood filler & paint on the window…
Ugh – the stress of moving. I moved 3 times last year. Finally have a house with my own mini room again.
Your window and roof looks amazing!