I have a love / hate relationship with windows. I hate them because there are so many trim pieces to prep… but I love them because once they’re up, the house starts to really look finished. Something about dressing up those gaping holes turns the house from a mere shell into a house.
I started with the exterior window trim and sills, along with the trim that goes on top of the bay windows. I neglected to take a picture of them after painting, but here are the pieces I started out with. Like the fascia, I’m painting these with Glidden Sandy Feet.

The shutters and window cap pieces are painted with Antique Purple, also Glidden. I like the Glidden paint because the samples are pre-mixed (no need to wait at the paint counter), and they use symbols to identify colors that will theoretically look good together.

Before gluing in any window trim, I did some more stucco touch-ups, this time to the area above the center fascia piece and the bottoms of the windows.
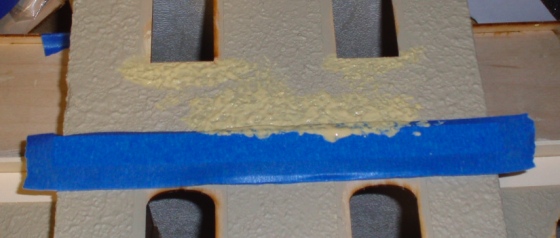
You may or may not be able to tell from this picture, but the center joint looks better now. Not perfect, but it doesn’t bother me as much as before.
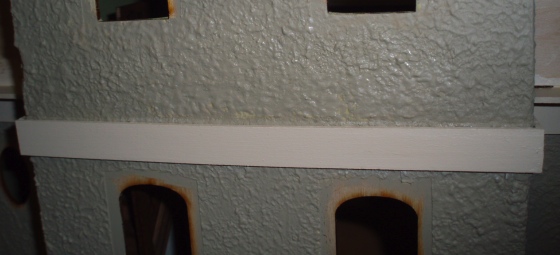
Window trim glued in. It’s looking better already!

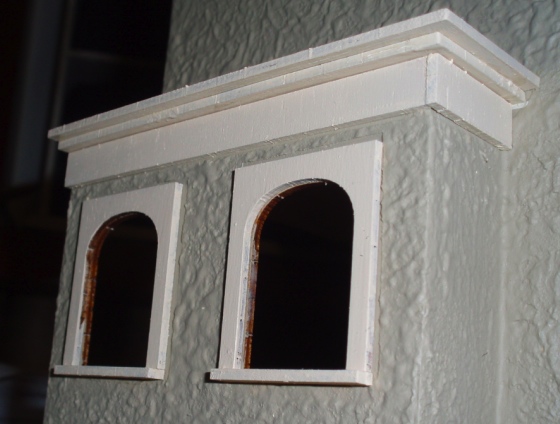
The Rosedale doesn’t have the frilly gingerbread of most dollhouses, but it does have some interesting trim. In particular, I really like the layered effect on the bays—the trim piece, edge of the bay roof, and fascia work together to form a sort of pediment. Now that it’s glued on, I wish I’d thought this through a bit better… it might have looked nice if the middle layer were the purple accent color, instead of all three being the same. Oh well.
Before I could glue on my shutters, I needed to paint the inside edges of the windows. But first I laid a couple of shutters down on a window to see how the colors would look together. I like it!

I waited to paint the inside edges until the windows were on because there are two layers to paint (the edge of the window trim and the edge of the window hole), and I thought painting them together would result in a smoother finish than doing them separately. But I didn’t anticipate how hard it would be to reach inside some of the holes with a brush—particularly the oval windows on the first floor. I ended up tipping the house sideways, placing it at the very edge of the table, and sitting on the floor with the paintbrush pointed up to get inside those oval windows!
Here’s the house in a slightly less precarious position, on its side, as I painted inside the front windows (starting with the one in the bottom left corner in this picture). This house is very easy to turn on its side and even upside down, thanks to the flat roof, which made it pretty easy to get inside the rest of the windows.

On die-cut houses like the Fairfield, I first add wood filler to the inside of the window to blend the two edges together and make the surface nice and smooth. Since the laser cut Rosedale’s wood is smooth already, that turned out not to be necessary, although the trim on the living room bay window wasn’t quite flush so I did fill the gaps between the trim and the house with wood filler before painting that one.

Here it is with the shutters and window caps on. Pretty!

I’m considering adding trim under the window sills. The first floor windows will probably get window boxes, but not the ones upstairs, and I’m thinking a bit of trim might make them look more real. I’ll wait until I get the rest of the trim up before I decide on that.

Next I’m planning to do the brackets (I’m waiting to attach the last piece of fascia until I have some brackets ready to help stabilize it…), and the front and porch doors. Then I’ll start on the roofs. But first, I need to order shingles…
 Emily is a freelance writer, miniaturist, and adventure game enthusiast.


Leave a Reply