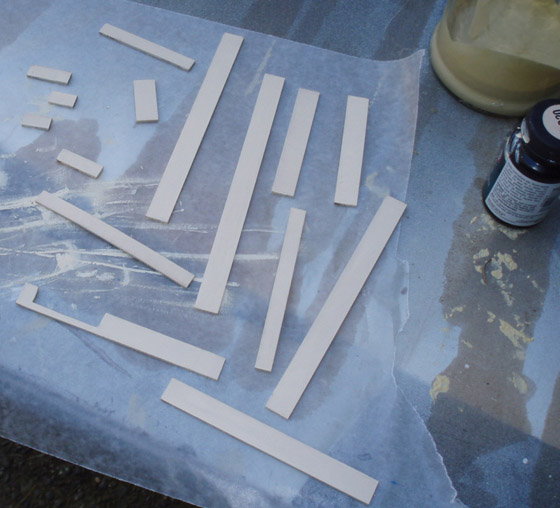
With the house assembled and stuccoed, I moved on to the fascia. (A fancy word for trim! I’m not exactly sure if this is the correct usage of the word “fascia,” but that’s what the Rosedale’s instructions call it…)
I first had to decide on trim and accent colors. Since I accidentally painted the house darker than I originally had in mind, I wasn’t quite sure what to do for the trim, so I painted some swatches on the house in an area that will eventually be covered up.
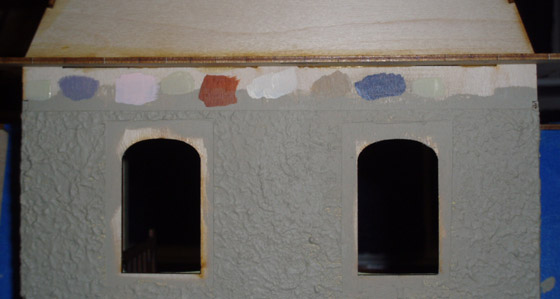
To keep the house from looking too dark, I decided to go with my old friend Sandy Feet (sixth from left) for the trim, and I think I’m going to use the lavender (second from left) and navy blue (second from right) for accents. (I initially bought the lavender and blue to redo the trim on my infinite possibilities porch, but haven’t done it yet.)
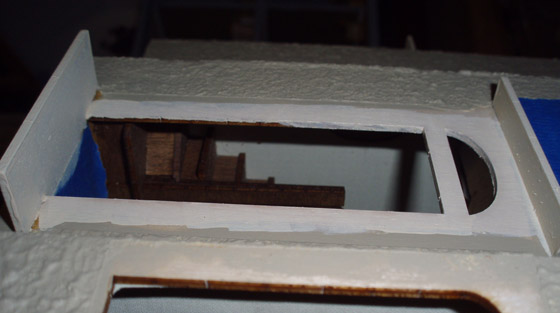
Before painting any fascia, I needed to cut a hole for the new porch door.
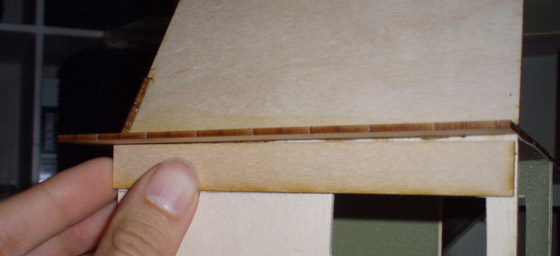
Step 1: Hold fascia over the hole and draw a line on the back side with pencil.
Step 2: Get Geoff’s help cutting a hole with the dremel.
Step 3: Sand until it fits. It’s a little crooked at the top. I’ll have to fill that in with wood filler or add some strip wood above the door.
I reserve the right to change my mind on the accents once I’m in the thick of it, but I’m committed to the Glidden Sandy Feet for the main trim color, so I went ahead and painted my fascia pieces.
While those were drying, I fixed a few stucco areas that needed help. I opted not to try to fix the ugly joint on the front of the house and instead to cover it with fascia. (A decision I may live to regret… read on to learn why!)
Here’s how it’ll look. I like the colors together!
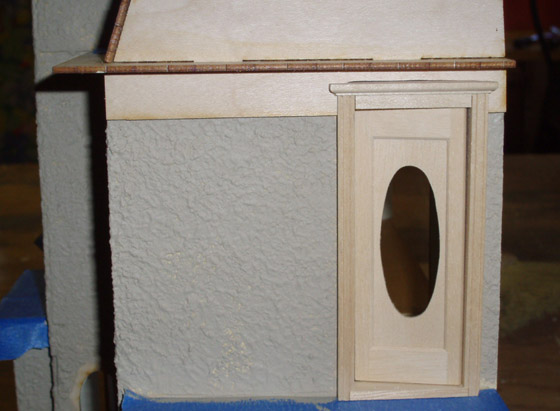
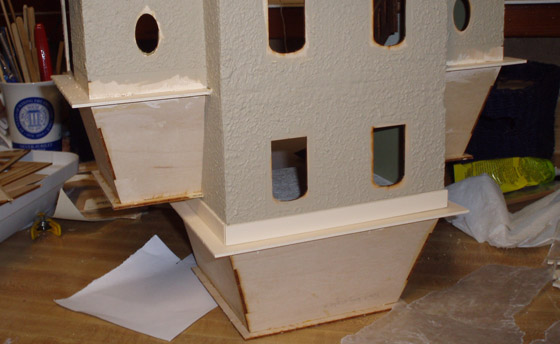
Before gluing on the fascia I painted the eaves, also with Sandy Feet. I flipped the house over to more easily paint the undersides.
I also painted around the doorway, since a tiny bit of this wood shows through inside the trim. (The door trim is kind of complicated. I’ll be covering that in a future blog!)
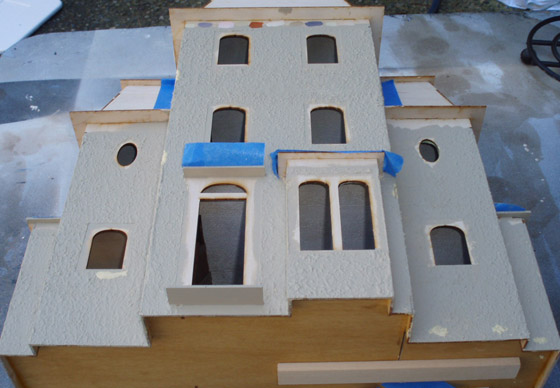
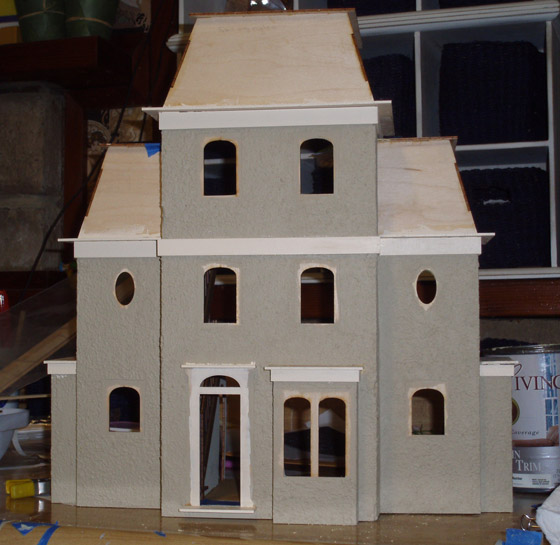
Here’s the house with the eaves painted.
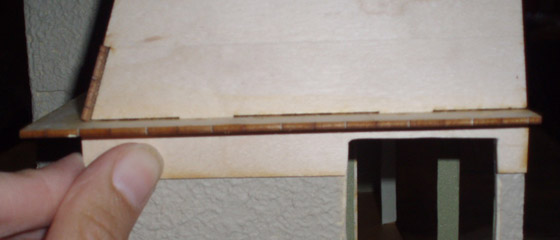
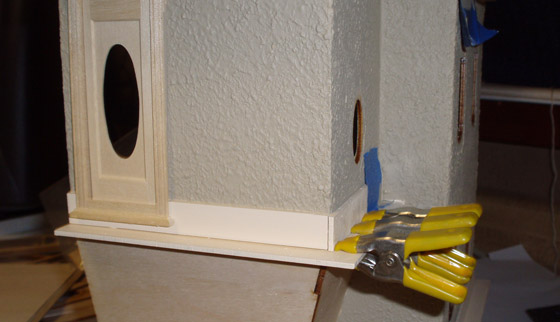
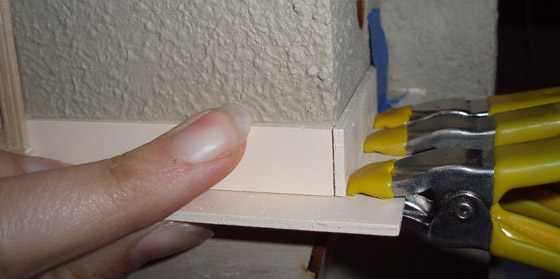
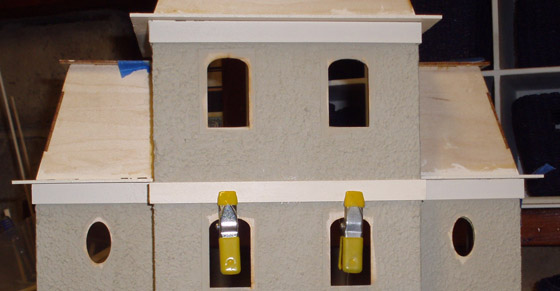
I flipped it over again to glue on the fascia, starting with the top floor.
These pieces are slightly warped and didn’t want to glue on flat. I used clamps to push them into place, and also inserted the porch door to ensure the hole was lined up properly.
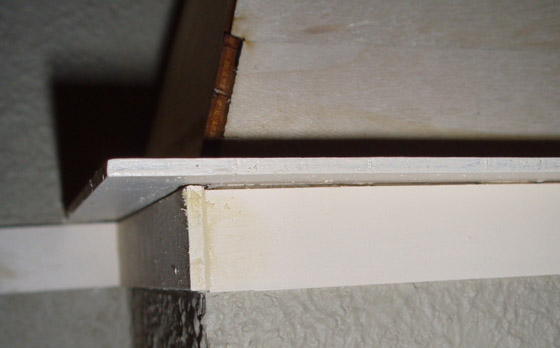
Due to the location of the door hole, I couldn’t push the trim over quite enough to make the corner flush. Some of the other corners also had this problem. This is easy to fix with a little wood filler.
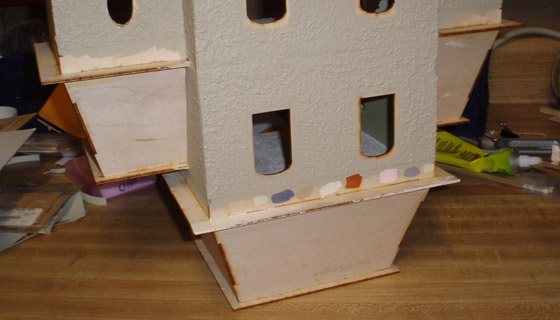
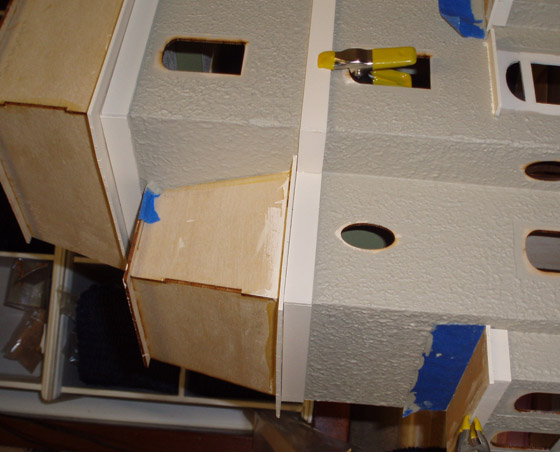
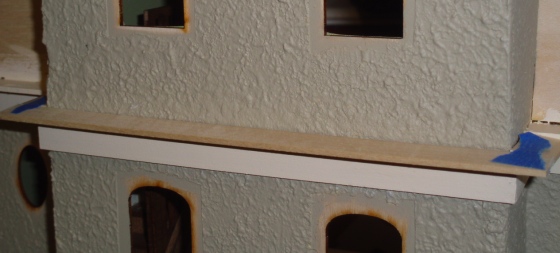
As mentioned above, I decided to add fascia between the second and third stories to detract attention from the joint between them. Since I wasn’t originally planning to do this, I didn’t mask off the area before applying stucco, which means the pieces aren’t being glued down to a flat surface. I was able to use kit pieces for the sides, but had to cut a new, slightly longer front piece from strip wood to accommodate the extra bulk.
I used Tacky glue for most of the pieces, and added The Ultimate glue (which is quick drying) to the back of the new fascia piece between the two stories, since the warped wood combined with the uneven surface was preventing a good hold.
Tape and clamps held the fascia in place while the glue dried.
I went around and added wood filler to several of the corners, to get rid of small cracks where the trim pieces didn’t quite meet up.
Then I painted over the corners and also covered up some scratches and imperfections left behind by the clamps.
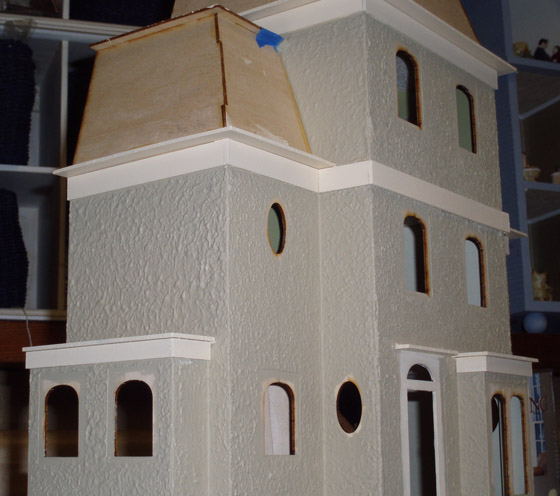
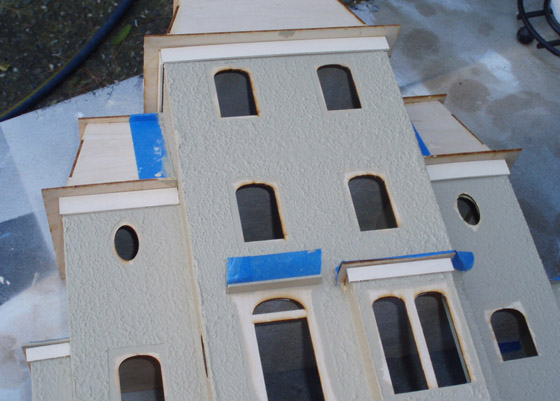
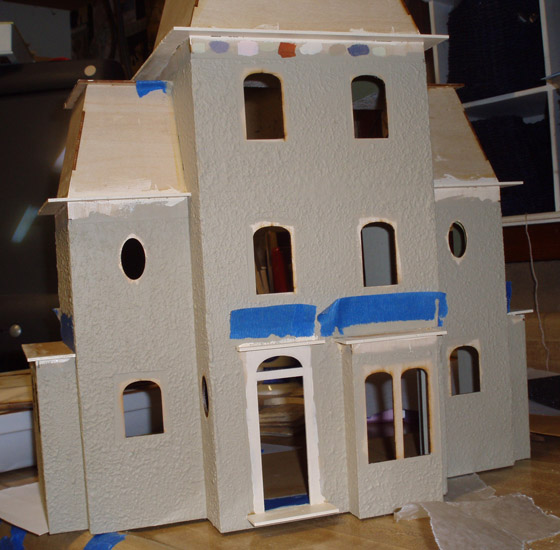
So here’s how it looks. And when all’s said and done, I’m not happy with that fascia in the middle. Looking back at the original concept for this bash, one element that I really liked is how the center part is in front of and taller than the two wings, like it’s growing up from in between them. In my zest to cover up the ugly joint between the two floors, I didn’t anticipate how adding fascia would “stunt” the house. It looks short and squat to me now, rather than tall and impressive.
After staring at it for a long, long time last night, I decided to try to rip off the fascia and fix the joint. (What’s the worst that could happen?) Perhaps luckily for me in the long run, by this morning the glue was totally set and the fascia wasn’t coming off without a fight. I didn’t fight too hard, since tearing it off would probably have turned it into an even bigger problem, but now I have to reset my expectations. Note to self: next time, just fill the joint between the floors with wood filler before starting the stucco, and this won’t be an issue at all. (Ha, as if there will be a next time!)
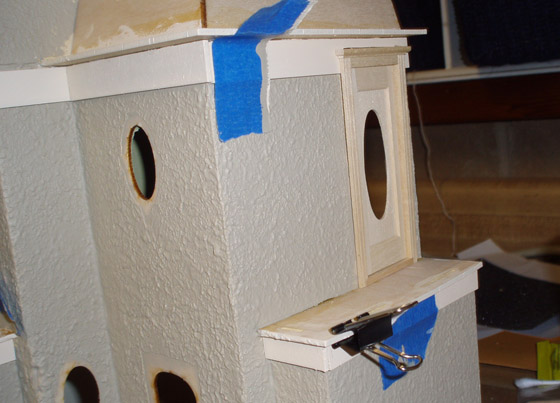
On my previous blog, my dad had suggested continuing the trim that forms the eaves of the side roofs around the house, above the new piece of fascia. Initially I wasn’t sure if I wanted that, since there isn’t a roof there to go with it, but this morning I mocked it up with basswood and I think it looks better than the fascia alone.
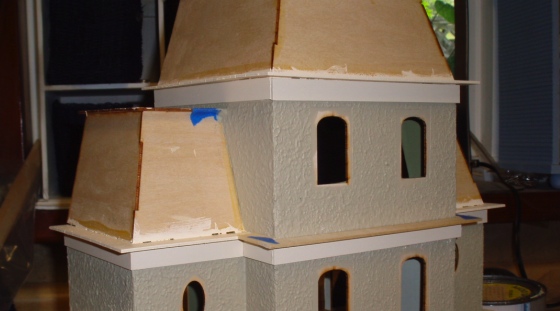

Ironically, even this doesn’t hide the stucco mess near the joint. I’m not sure if you can tell in the picture, but the texturing is significantly flatter and less good right above the joint (almost as if I kept tapping at the wood filler the whole time it was drying in a desperate attempt to cover the crack!)
Before I glue in this trim, I’ll mask off the fascia and try doing a little touch-up above it. And then I’ll remind myself that when the house is done, no one will be standing two inches in front of it looking for imperfections!
Next up, window trim…
 Emily is a freelance writer, miniaturist, and adventure game enthusiast.


I love the “dad” suggestion…looks GREAT!!! :)
Looking good! I am really liking your stucco!