I’ve been doing small stuff on the Victorianna that hasn’t really been blog-worthy, including a lot of thinking and looking at pictures to figure out how I want to handle the porch. Like with everything else in this house, I’m not following the directions.
CatColorado’s Victorianna gallery on the Greenleaf forum has some good pictures of how the porch roof is supposed to be assembled. The porch roof wedges up against the tower in a way that crowds the windows, which I’m not crazy about since I want to add lots of frilly embellishments to the bay windows.
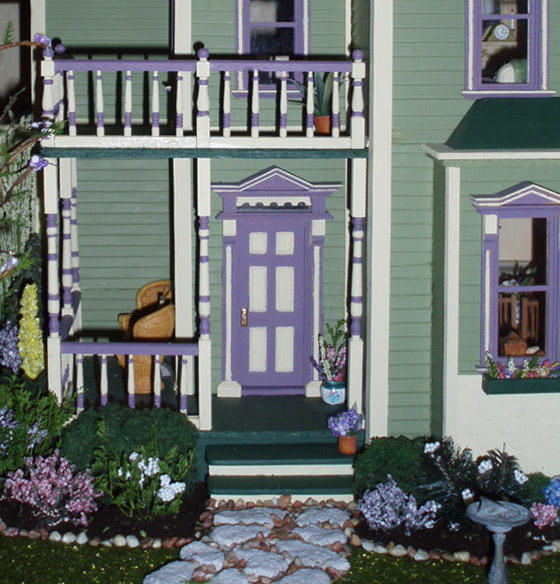
Looking at pictures of real Victorians got me thinking about turning the porch roof into a second story balcony so I can have more pretty railings and trim. I did the same thing on my Fairfield, leaving off the roof pieces so the intended base of the first story porch ceiling became a second story porch floor.
I made that decision near the end of the build, when it was too late to add a balcony door. With the Victorianna I still have time to add a door.
Here’s the front of the house before I made any porch modifications. The porch roof assembly has a bottom piece with tabs that fit into the open slots, including at the base of the triangular support piece. There’s also a top piece rests on the slant of the triangle.
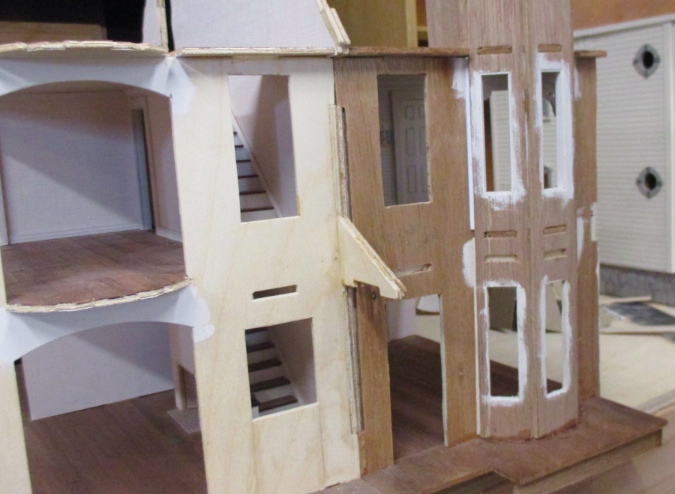
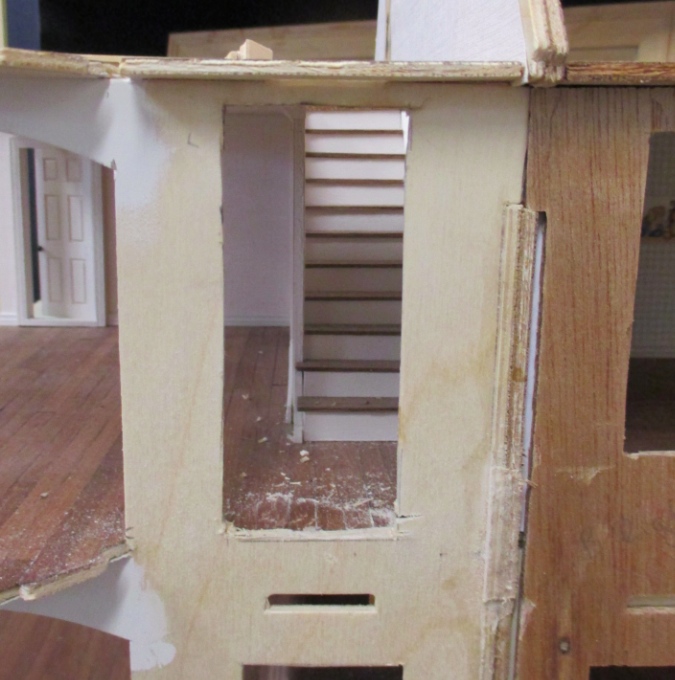
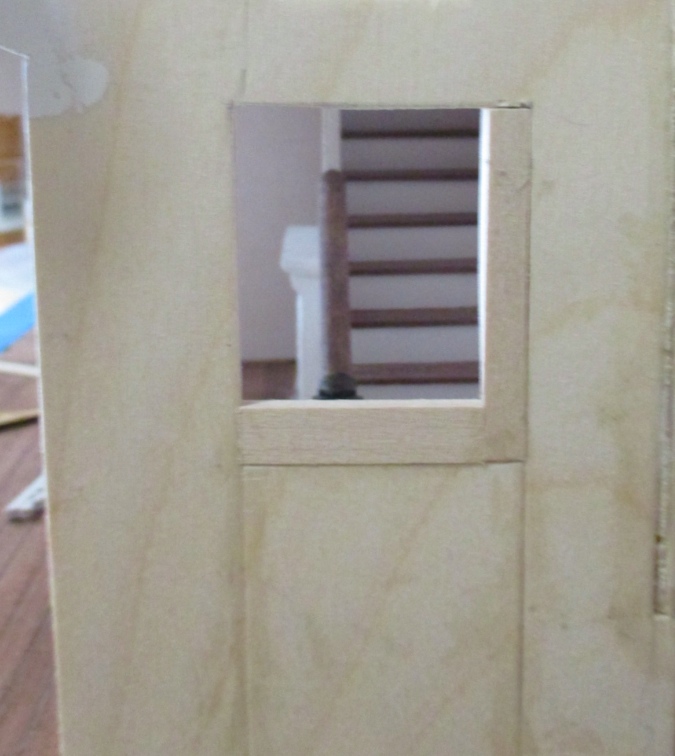
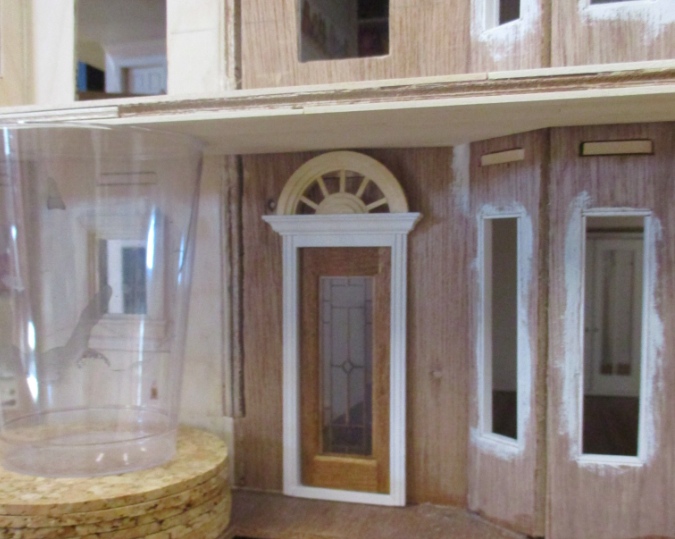
Geoff used an oscillating multi tool to cut off the triangular support, and to enlarge the window hole into a door hole. This gives a nice view of the stairs I worked so hard on. Notice the slot about an inch under the door. This is where a tab on the bottom porch roof piece would normally fit. Keep that in mind for farther down in this post.
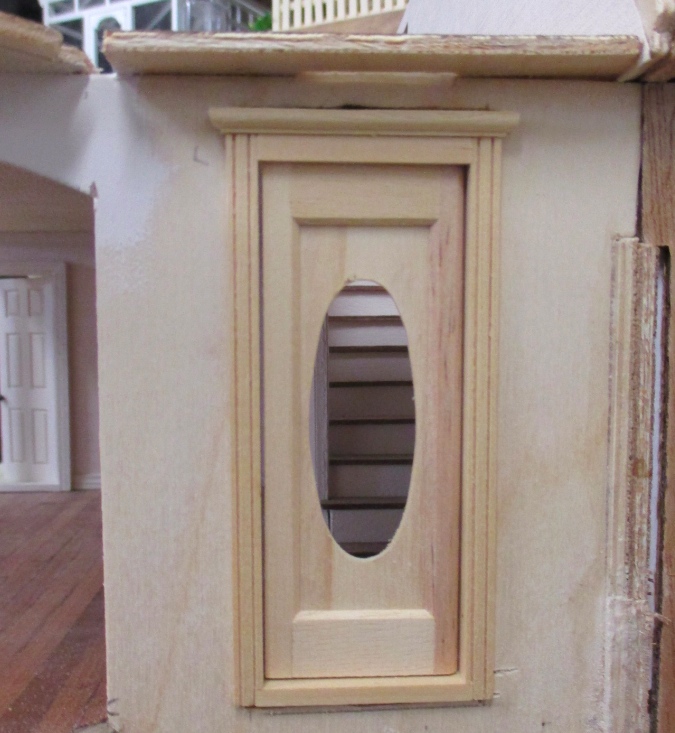
This door is a Houseworks Victorian oval door with the pediment removed. I did the same thing on my Rosedale — it’s easy to cut off with a utility knife. On the Victorianna, instead of using it right side out I think I’ll flip it around so this is the interior trim, and make new exterior trim to match the windows on the front of the house.
Based on the placement of the door, I used strip wood to fill in part of the too-large window hole downstairs so the window will be centered under the door.
Next I wallpapered the inside of this wall, glued in the bay windows, and got to work on all the trim. This is the “not exciting enough to blog about” stuff since it’s basically all the same as what I did on the other side.

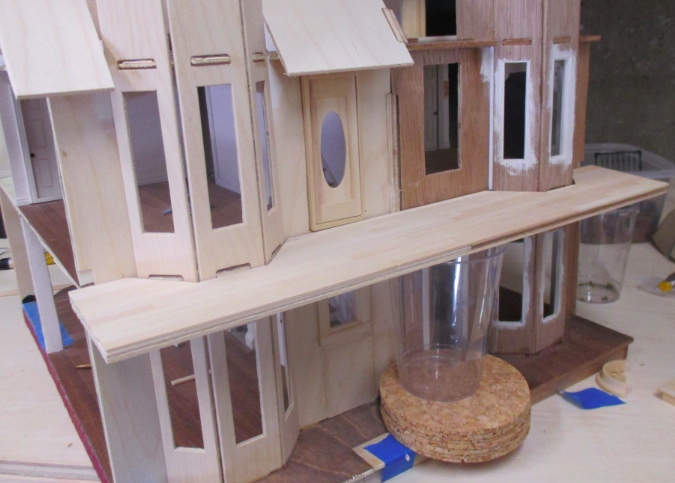
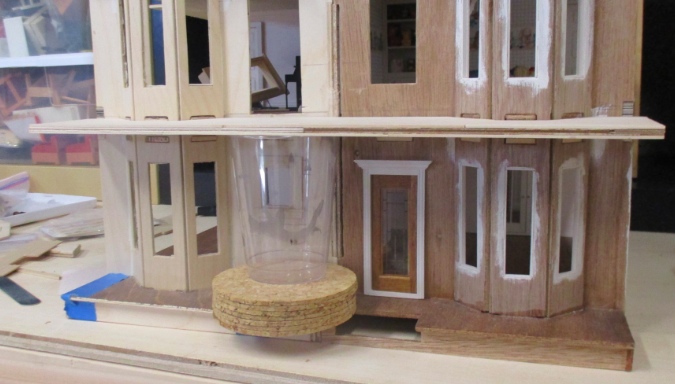
On to the porch ceiling (or floor, depending what story you’re on). Remember that slot an inch under the new door? If I’d built the porch roof the right way, the base of it would be an inch lower than the bottom of the door, so I couldn’t use that to form my porch floor like I did in the Fairfield. Instead I decided to modify the top roof pieces so they’ll fit over the towers perpendicularly instead of on a slant, and glue them in a bit higher than the porch ceiling is supposed to go, so they’ll be level with the second floor and line up with the base of the new door.
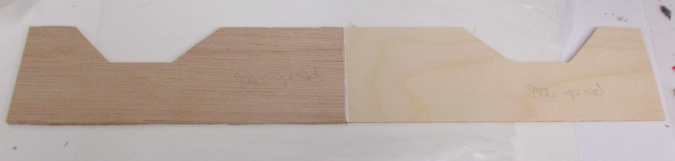
To make this work, I needed to cut some wood off the backs of these pieces and also to modify the angles around where the tower fits. I neglected to take pictures of it, but it was basically trial and error, cutting and holding the piece up to the tower to check the fit, then cutting again. (The tower walls meet at 45-degree angles, so I could have just done math, but pfft, math.) I did one piece first, and then traced it on the other piece so they’d be the same. Then I glued them together.
With no expectation that this skinny little seam would hold, I reinforced the piece by gluing on floorboards. These are pieces of 1/4″ wide x 1/16″ thick basswood left over from the deck kit I built for the Hillside Victorian.

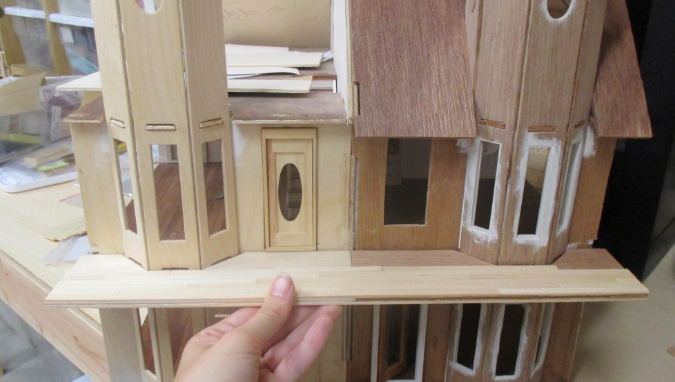
The fit isn’t totally snug around the towers, but once the piece is glued in I can add trim to cover the gaps.
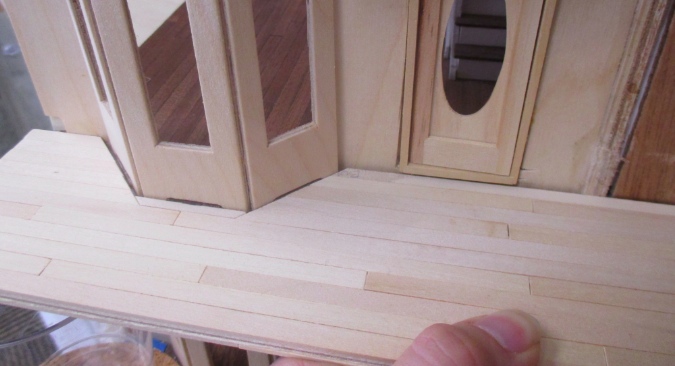
After gluing floorboards on both sides, I went over the porch with the Mouse sander to give it a smooth finish. The outside edge will get covered up with 1:12 crown molding.
The porch ceiling is now higher, which leaves a noticeably empty area above the front door. It’s not horrible, but I have the space to go grander, and once I started thinking about it the idea wouldn’t leave me alone.
If I’d known this sooner I could have used a taller Victorian door, like this one. I already put money and effort into my front door by adding the decorative mullion and re-hinging it to open on the other side, so I didn’t necessarily want to replace it. I also didn’t want to hack in a hole with the wall on the other side already wallpapered (although I have to admit Geoff did a really good job on the porch door hole!)
I Googled Victorian front doors and pictures like this got me thinking about the top portion of the Houseworks Palladian doors and windows. I have two half scale Palladian windows that I got for $2 each at a flea market — cheap enough to justify an experiment. I used the utility knife to cut off the round part. (For the sake of having something to call this, I’m going to call it a pediment, even though I don’t think that’s really the right word for it.)
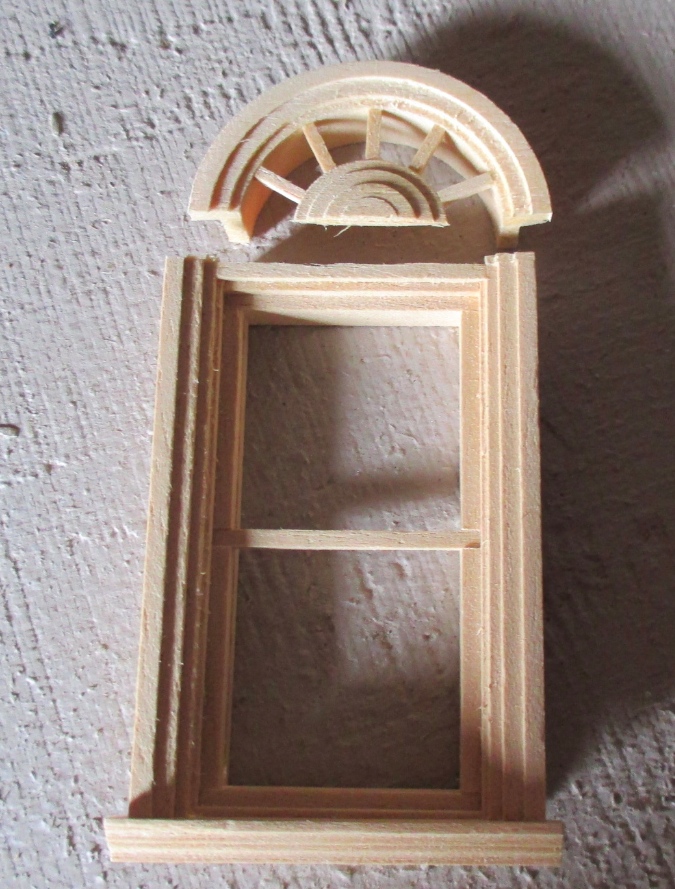
Here’s how it looks on top of the door. It reminds me of Bespaq’s Cambridge door, which I’ve always liked.
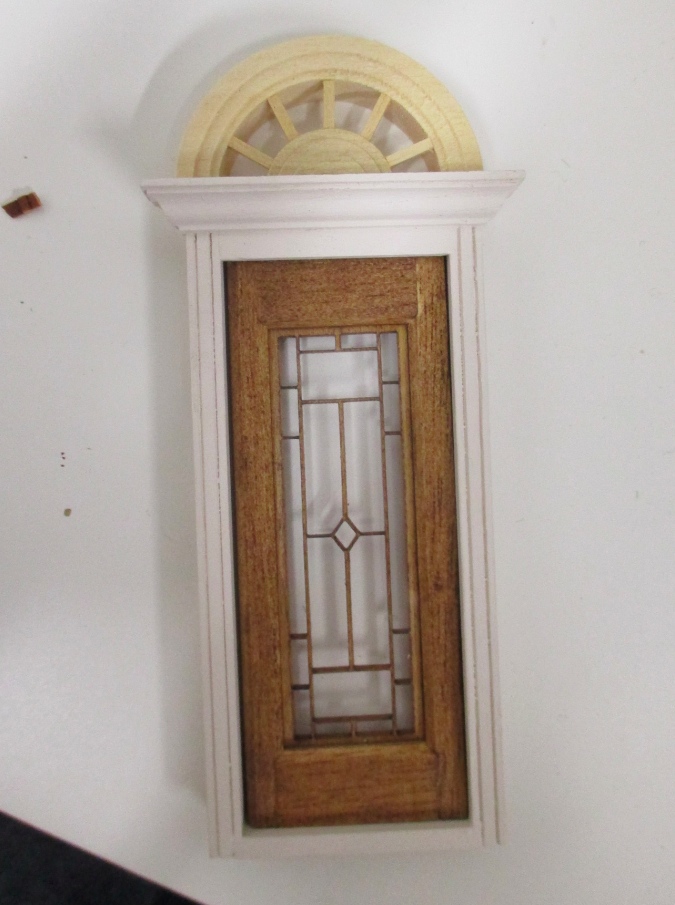
The door will be sticking through the hole but the pediment will be up against the plywood, so which made it stick out bit too far compared to the door trim. To fix this, I sanded the back of the pediment down with the drum sander. I’ll paint the pediment the same beige as the door frame, and the area behind it with an accent color.
So that’s the current state of the porch. I’m tired of the one style of porch post available in half scale so I’m going to make my own, with railings and brackets from Victorian Doll House Wood Works. But first I have to get siding on and do the first floor windows, since those will be too hard to access once the porch is glued in.
 Emily is a freelance writer, miniaturist, and adventure game enthusiast.


Great ideas for both the porch and the door detail. I think calling it a half-round spoked pediment would do (see Google.) With more spokes it would be a “sunburst” pediment.
Now that I have a wood lathe, custom porch columns are not out of the question.
Love, Dad
Oh yeah, I forgot about the lathe! How skinny could you go? Half scale posts would only be about 1/4″ wide.
I was thinking I could make something like this by adding trim to square basswood.
Given enough patience and extra stock carving down to toothpick size is possible. The square columns are certainly Victorian and acceptable (maybe even preferable) for this house.
The modifications to the front of this house are looking excellent…love the way you have not been afraid to rearrange the kit to meet the desired result. The second floor porch is a wonderful idea and it will be great to see how this looks as you progress. The front door modification is lovely with the addition of the half round pediment…thanks for sharing the creative process!
Thanks!
Great solution to the top of the door, and the porch upstairs looks really good too. I’m sure your mini people will enjoy stepping out there to relax. I’ve spent a very enjoyable few hours reading through the posts on your Victoriana, and look forward to seeing how it progresses.