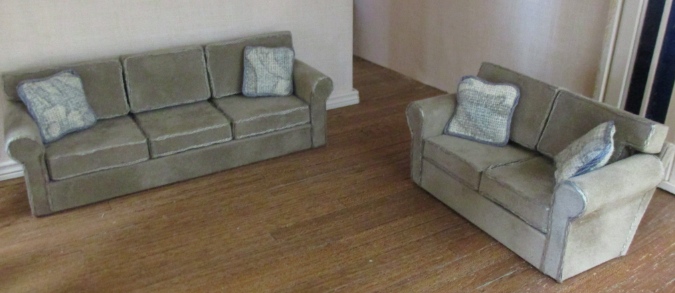
My Victorianna has a deep living room in need of a couple of modern couches, but the pickings are slim in half scale… so I made my own! These are made with wood and suede scrapbook paper that looks just like the suede/microfiber that’s so popular on couches lately. They’re kind of time intensive, with a lot of steps, but the end result sure is pretty.
After making the larger one as a prototype, I perfected the process with the smaller one and took oodles of pictures so I could post a tutorial. These are 1:24 scale, but of course you can use the same method for a 1:12 couch if you double all the dimensions.
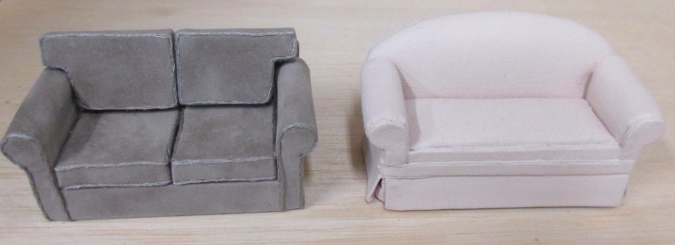
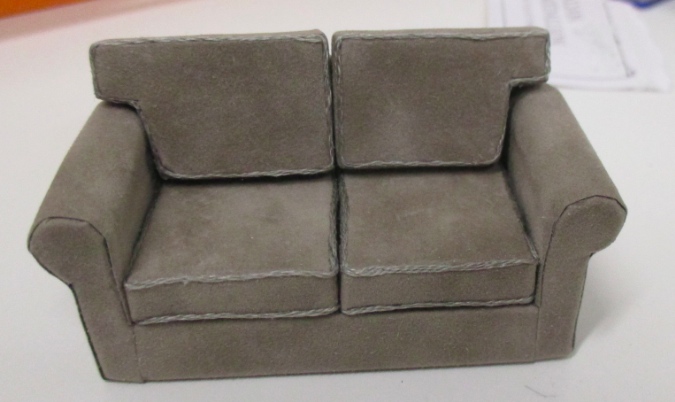
Here’s the smaller couch with a Lee’s Line sofa for a size comparison. Most half scale couches are loveseat sized; that’s why I wanted to make a bigger one as well. (I actually started out planning to make a sectional, but mis-cut something early on and abandoned the idea…)
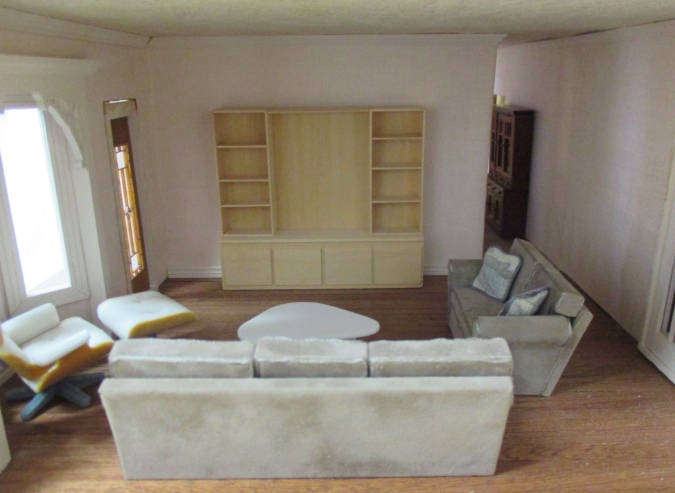
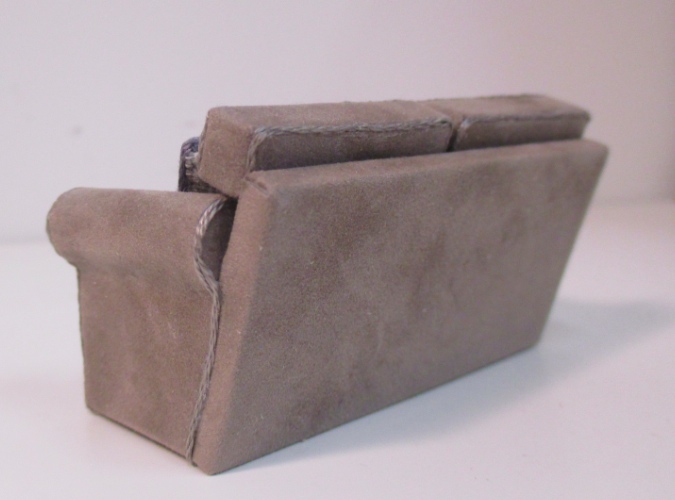
This is how they’ll be positioned in the Victorianna. Since the back of the larger one is on display, I had to make sure it looked good from every angle.
Read on for the tutorial, then go make your own!
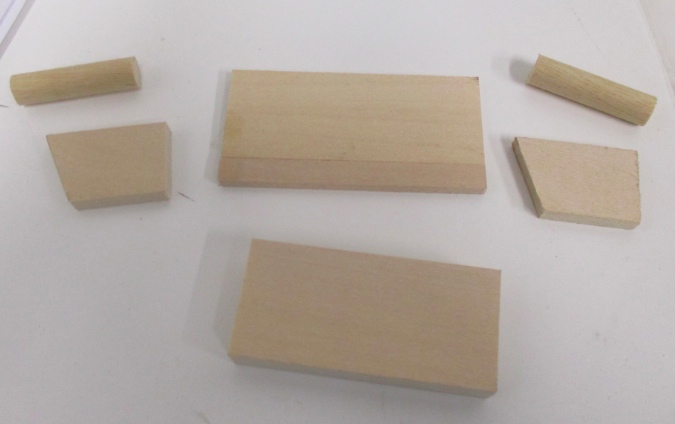
Parts needed:
Strip wood in the following sizes:
- 1 x 1/8″ (back)
- 1/4″ x 1/8″ (back)
- 1″ x 3/8″ (base)
- 3/4″ x 3/16″ (arms)
- 5/16″ diameter dowel (armrest)
- 1″ x 1/4″ (cushions)
I used balsa for the cushions and basswood for everything else. The balsa was because that’s what I had available. Normally I’d use basswood for everything since it’s sturdier. But I ended up liking the balsa because it’s very easy to cut and sand, which you’ll have to do with the cushions. It’s up to you… if balsa isn’t available, basswood or even foamcore should work fine for the cushions.
Suede scrapbook paper — one sheet is more than enough for one couch. If you can’t find it locally, try Frantic Stamper.
DMC floss or another thick-ish thread in a color that complements the scrapbook paper
You’ll also need glue (I used Aleene’s Tacky Glue), scissors, a utility knife, sandpaper or emery boards, wood filler, and a couple of toothpicks.
1) Assembling the Frame
Here are the pieces that form the frame of the loveseat. Alternate dimensions for the larger couch are at the bottom of the tutorial. (Or, make up your own size!)
- Back pieces: 2-9/16″
- Base: 2-3/16″
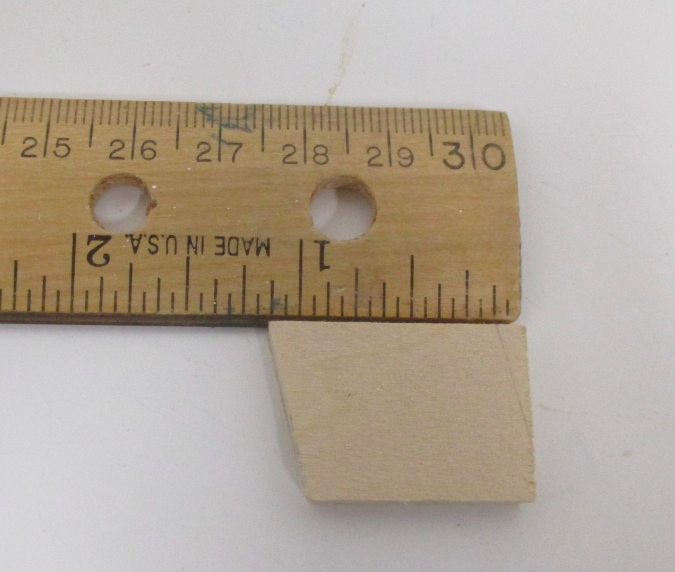
- Arms: 1-1/8″, with one side angled (see below) — cut two
- Armrests: 1-1/8″ — cut two
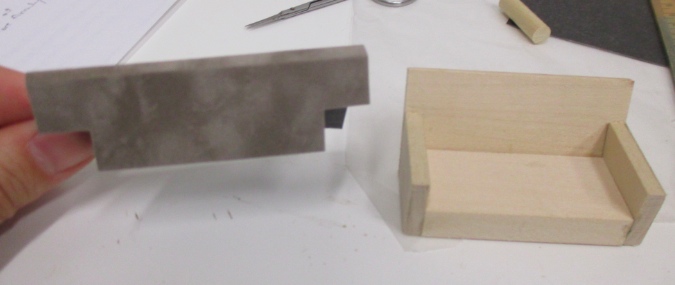
The 1-1/4″ tall back (shown at the top center above) is created by gluing 1″ strip wood to 1/4″ strip wood. You can cut both pieces to the correct length first and then glue if you’re only making one couch, or glue first then cut if you plan to make multiple couches. Whatever floats your boat.

The arms are cut on an angle. Cut the piece to 1-1/8″, then mark the bottom at 15/16″ with a pencil, and use a utility knife or power sander to create the angle. Getting the dimensions exactly right isn’t important as long as the two arms are the same.
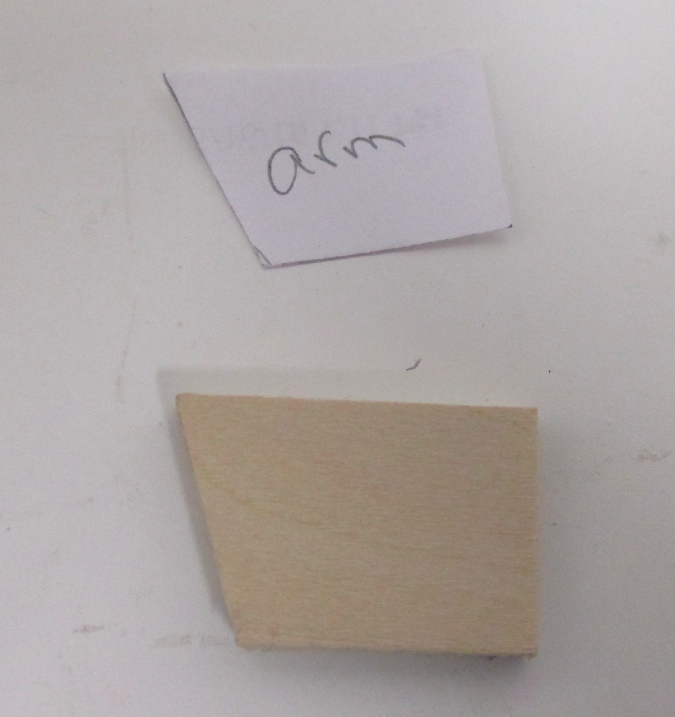
Before you start assembling the frame, make a template of the arm. You’ll need it later.
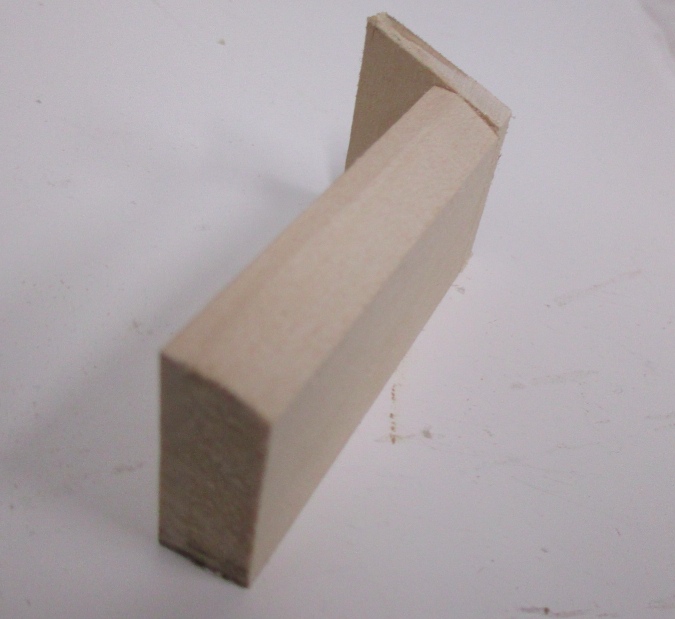
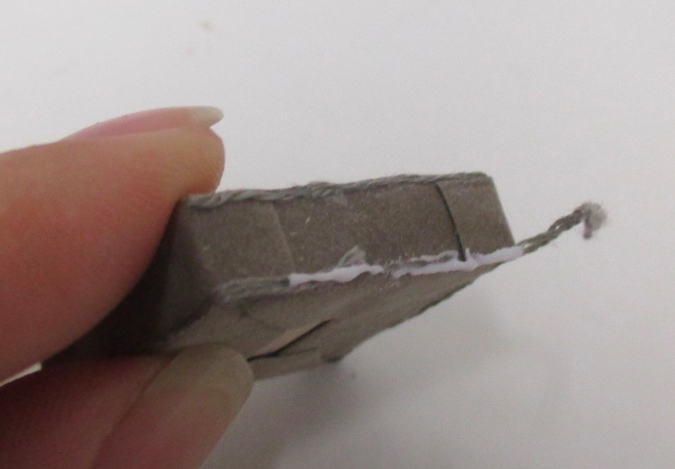
The back edge of the base also needs to be angled. Again, this doesn’t have to be perfect. I shaped it with a belt sander. If you don’t have one, you can wrap a piece of coarse sandpaper around a block of wood and sand the edge at an angle against that.
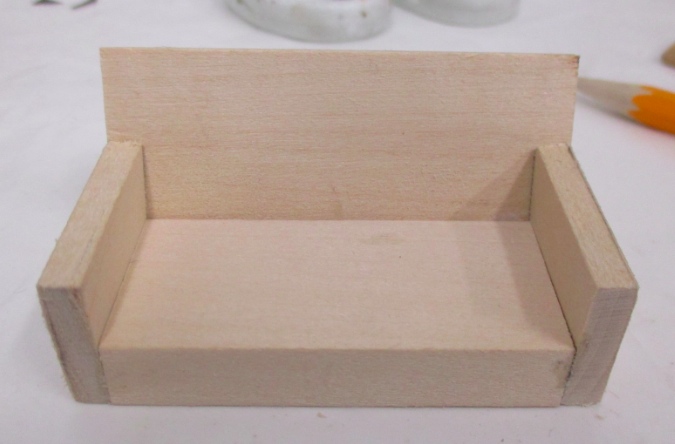
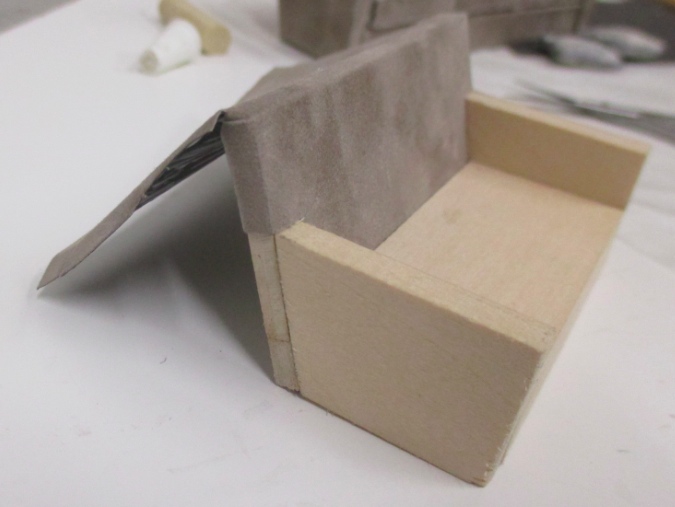
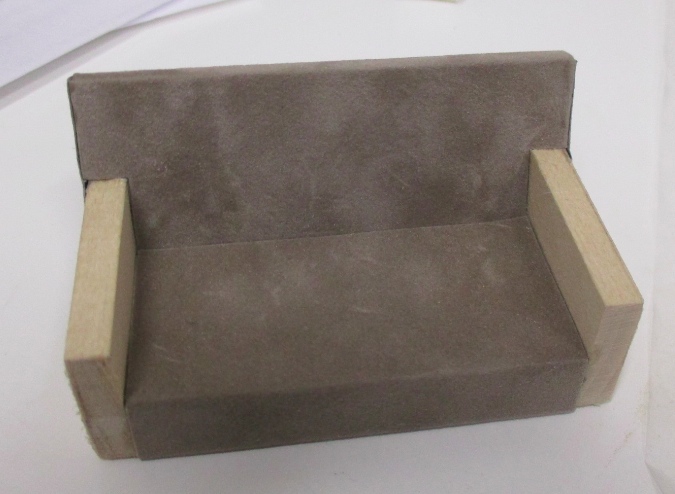
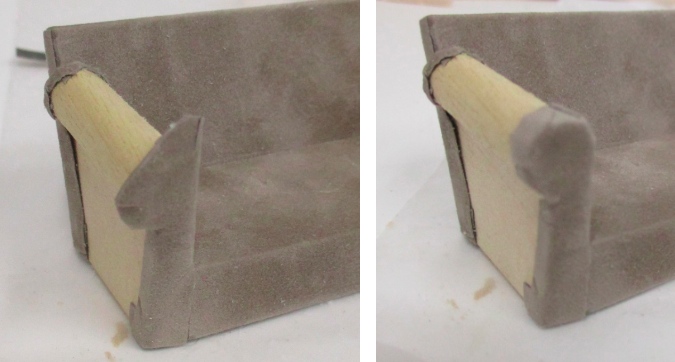
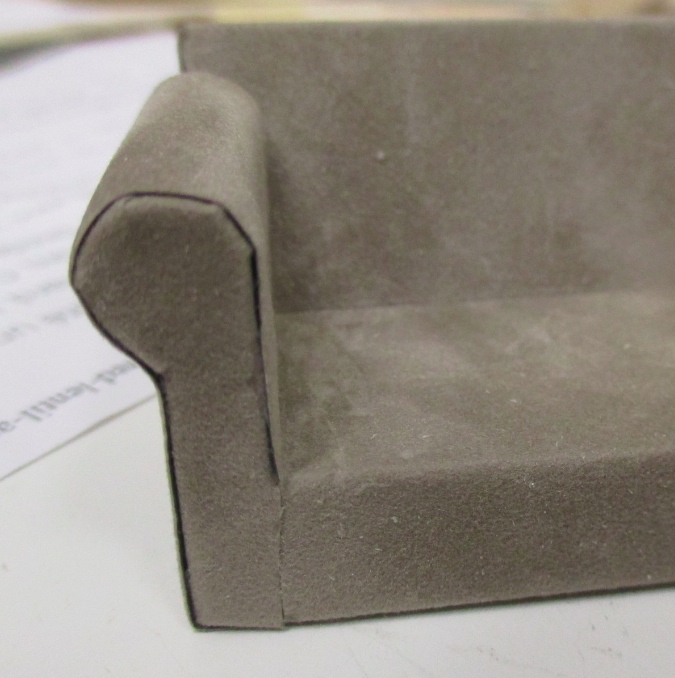
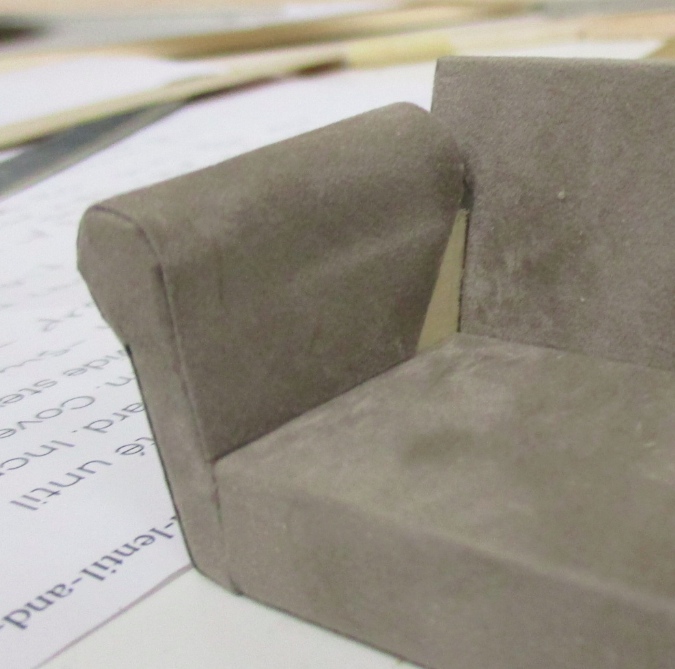
Here’s how the pieces fit together. Do a dry fit before you glue to make sure that the base plus arms are the exact same width as the back. Also make sure the front of the base is flush with the front of the arms; if not, you need to sand the angle at the back some more. When everything fits nicely, glue away.
The angled back prevents a good seal between the back and the base, so I flipped over the frame and glopped glue in the seams underneath.
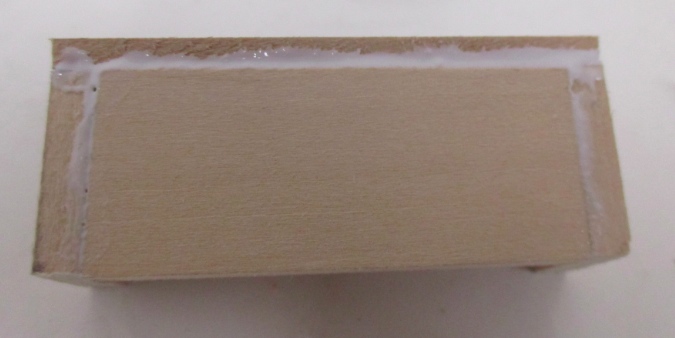
Leave the assembly alone to dry before moving on to the next step.
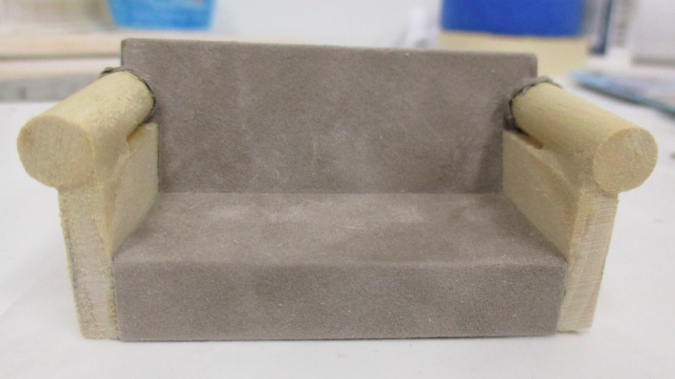
2) Covering the Frame
Here’s the time consuming part: covering the wood with paper. Most of the pieces are covered by cutting a piece of paper slightly larger than you need and folding over the excess so there won’t be wood visible where one piece of paper meets another. This scrapbook paper not only looks incredibly realistic, I think it’s also easier to use than fabric would be because its stiffness and allows for sharp, neat folds.
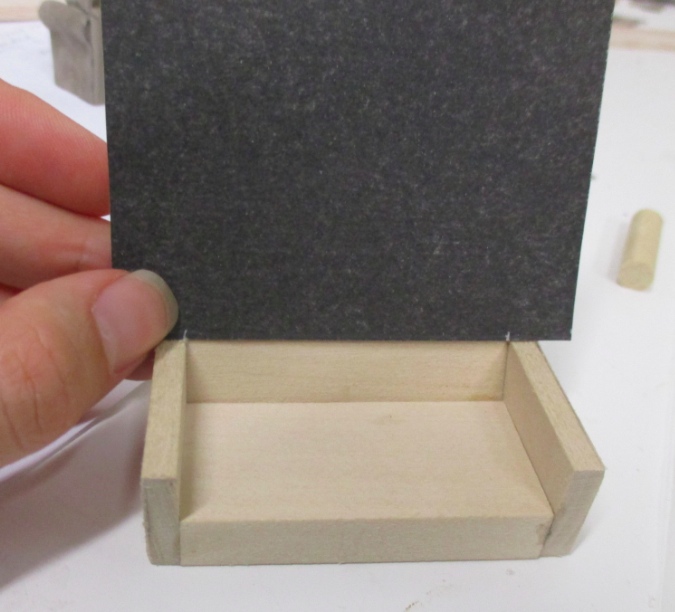
We’ll cover the back first. Cut a piece of paper that’s slightly wider than the arms, and long enough to cover the front of the back, fold over the top edge, cover the back of the back, and wrap slightly around the base. (All of these pieces were eyeballed using the frame as a guide; I’m not going to give dimensions for each one.)
Hold the paper up to the back and mark the inside edge of each arm. (I used a silver pen for these pictures so it’ll show up but you don’t need to get fancy! A pencil works fine, just don’t press too hard or the pencil line might show through to the good side of the paper.)
Using those marks as a guide, cut out enough paper on each side to clear the top of the arm (approx. 3/8″). Hold onto the leftover squares, you’ll have a use for them later!
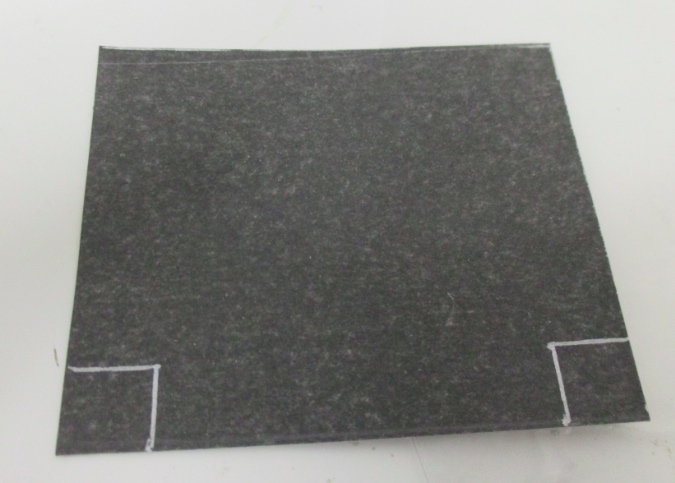
It should look like this.
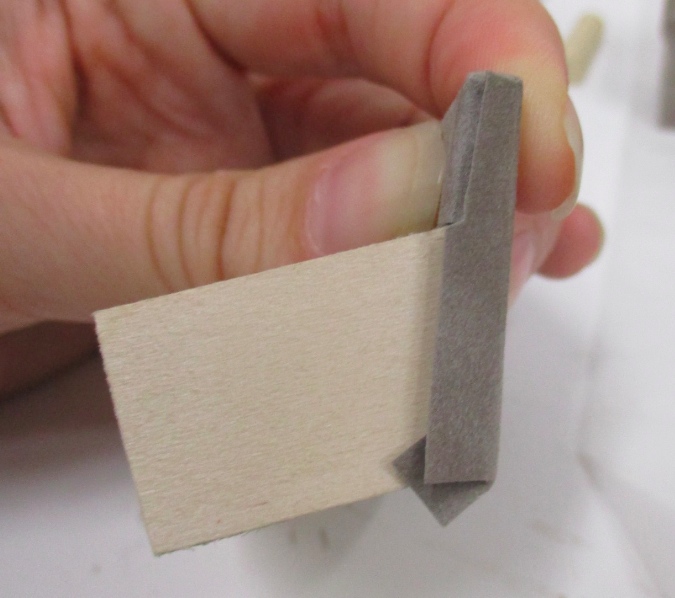
Fold the paper over the top edge of the couch. I started with a loose fold over the wood, then removed the paper and made a sharper fold.
Make another fold where it reaches the base. Fold the excess at the sides and make cuts where necessary to create tabs that can fold over and under each other at the points where one edge of the paper meets another edge.
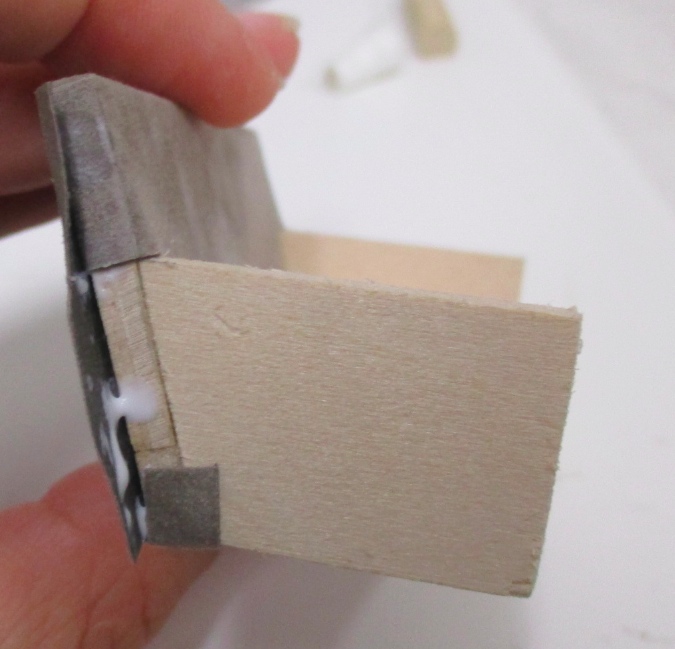
This might be hard to visualize (it’s definitely hard to explain!), so maybe these pictures will help. Here I have a tab attached to the top edge that folds over the side of the back, followed by a tab attached to the front that folds over the first tab, and then the back edge that folds over both of them.
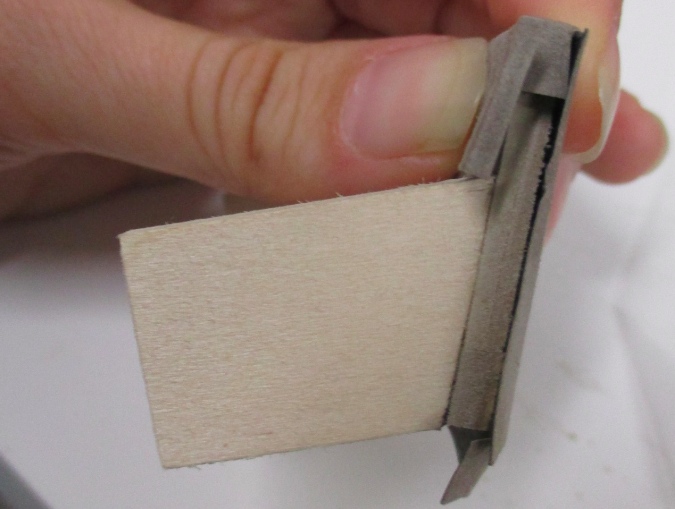
The result is a clean seam where the three edges converge. Figuring out where to cut to form tabs and which to fold under/over the others is something I figured out as I went along.
With all the tabs cut and your plan for folding them figured out, spread glue on the back of the paper. Start by gluing the paper to the front.
Work your way over the top edge, gluing the tabs as you go.
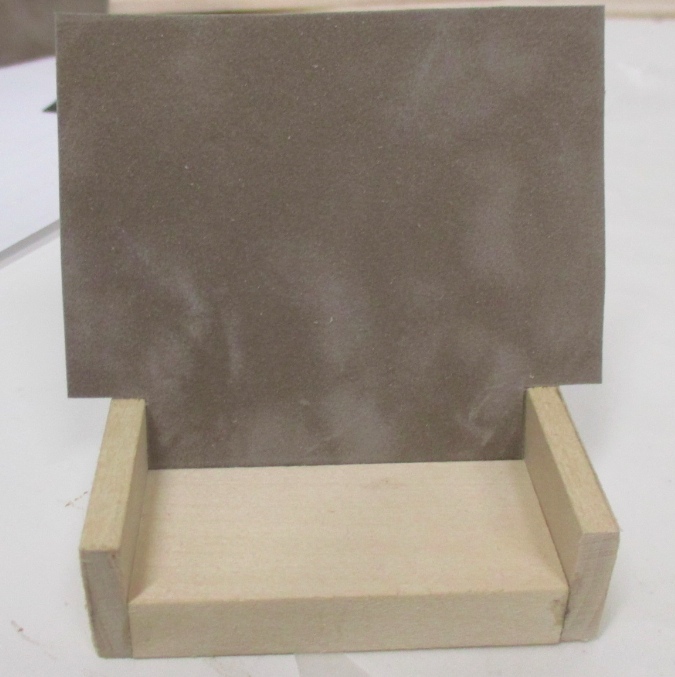
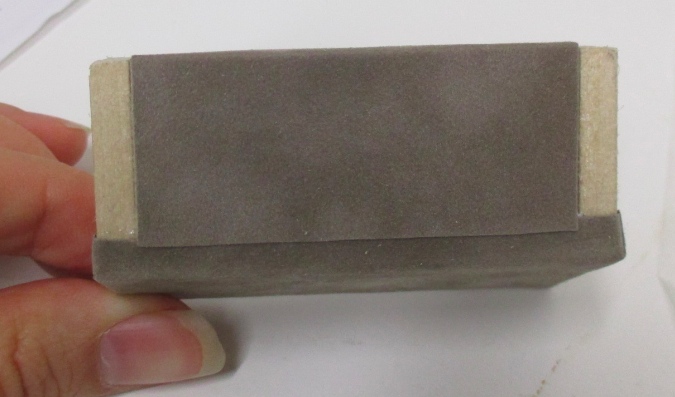
Make sure the paper is clean and tight over the back, then glue the excess under the base.
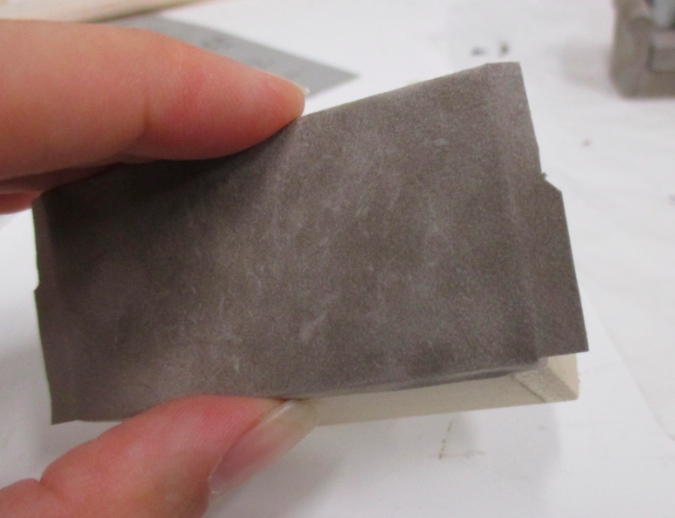
It should look something like this.
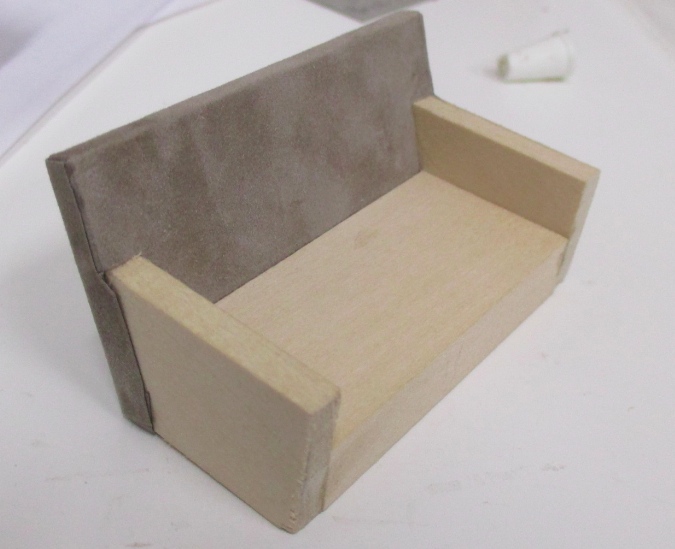
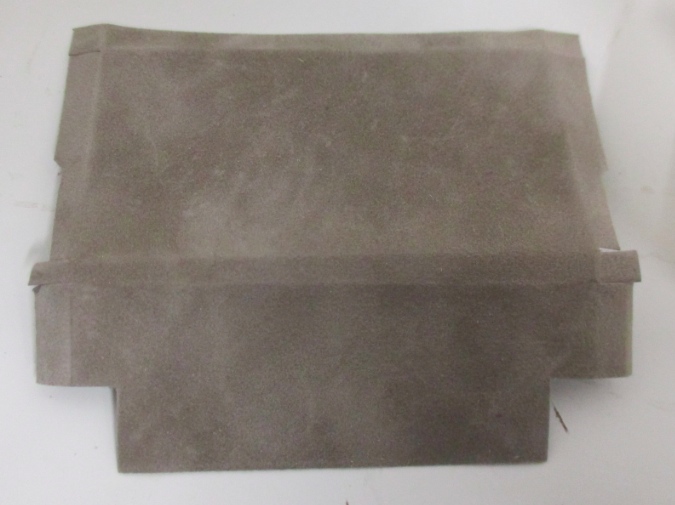
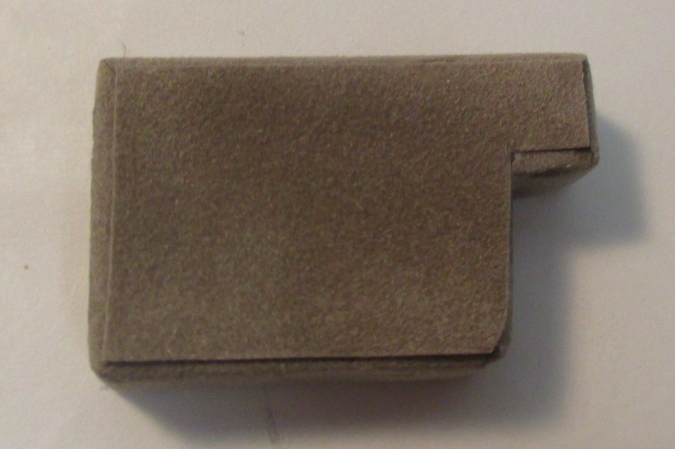
Cover the base next. This one’s easier. Cut a piece exactly the width of the base (2-3/16″ if you’re using my loveseat dimensions), that’s long enough to wrap around the front and underneath the couch.
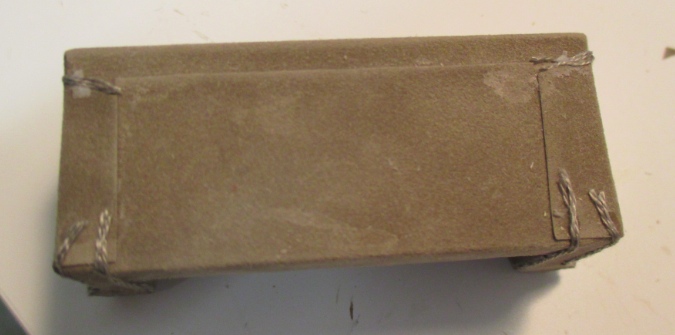
With that piece glued on, the underside of my couch looks like this. It’ll be on the floor and not visible when the couch is done, so you don’t have to cover the entire bottom if you’re trying to conserve paper.
3) Armrests
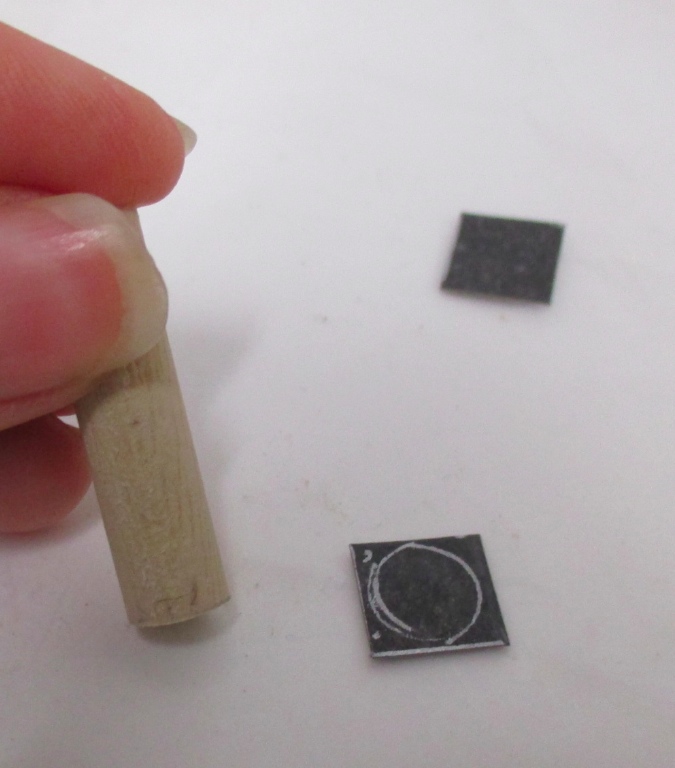
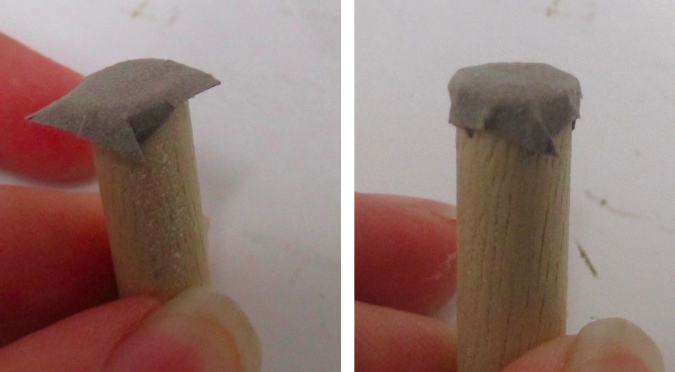
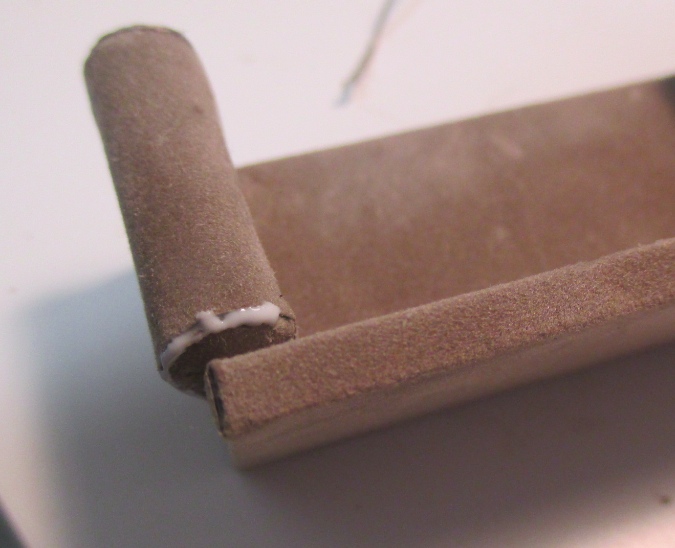
Remember those two little squares you cut out of the first piece of paper? Now’s when you can use them. Before gluing the dowel pieces onto the arms to create the armrests, we want to cover the back edge of the armrest. Place the dowel on the little square and draw around the edge.
Make cuts around the edge of the circle to create tabs. Spread glue on the paper and glue it to the edge of the dowel.
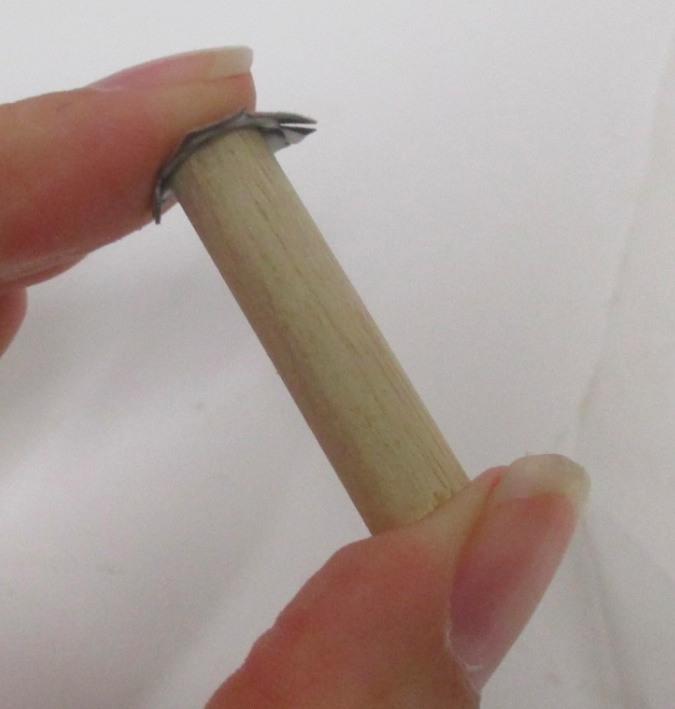
Glue down the tabs, all the way around. This will be covered up later so it’s okay if it’s a little sloppy.
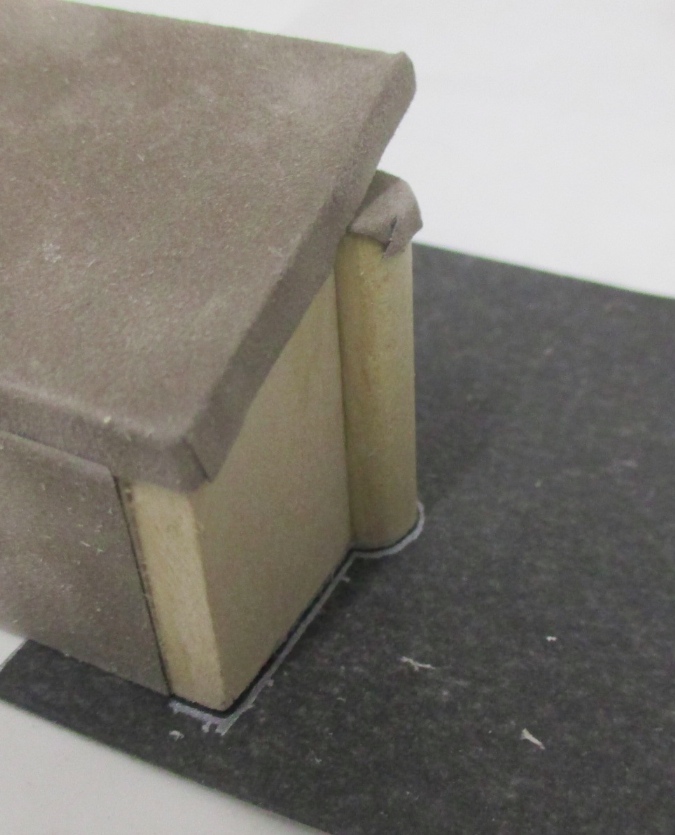
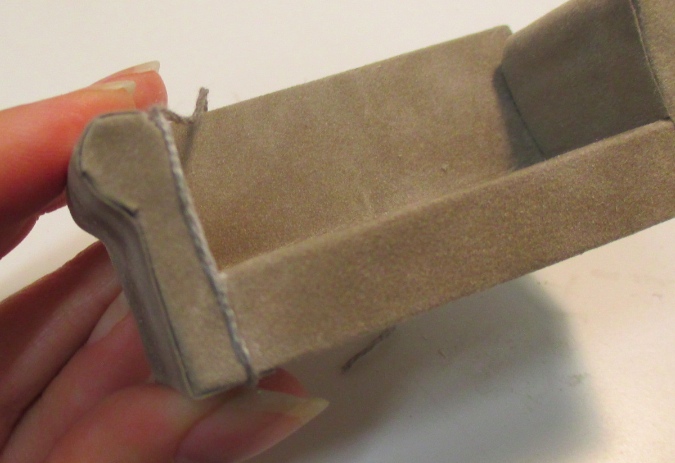
Next spread some glue on the outside edge of the arm. The dowel will be glued on off-center.

Put the dowel (with covered end at the back) on your line of glue. Hold the dowel to keep it off-center and glop some more glue in the crack betweeen the top of the arm and the edge of the dowel.
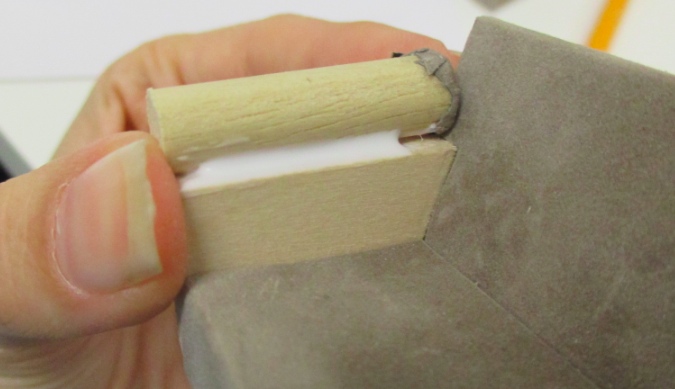
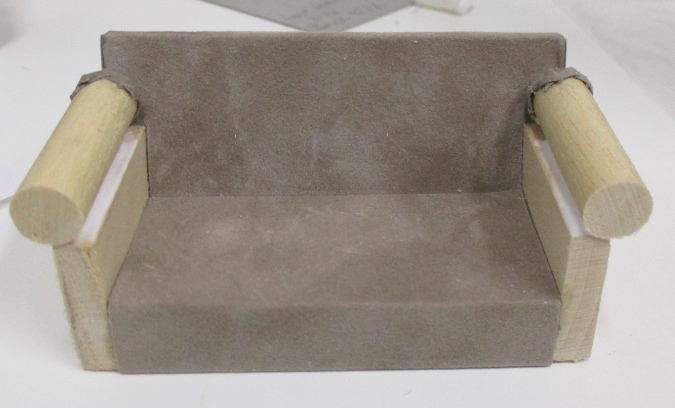
Your two armrests should look like this.
At this point, put the sofa down and WALK AWAY. Seriously. Those armrests need to dry completely before you touch it again. I left mine alone overnight.
(I’m breaking up the armrests into two steps to drive home this point…)
4) Armrests Continued
Once the glue under the armrests is dry, add wood filler to the front edge of each armrest to fill the crack and give it a nice smooth profile.
Don’t go all the way back with the wood filler and risk getting it on the fabric! Just use it at the front, which is most visible. With paper covering the cracks and the cushions in place, you’ll never know they’re there.
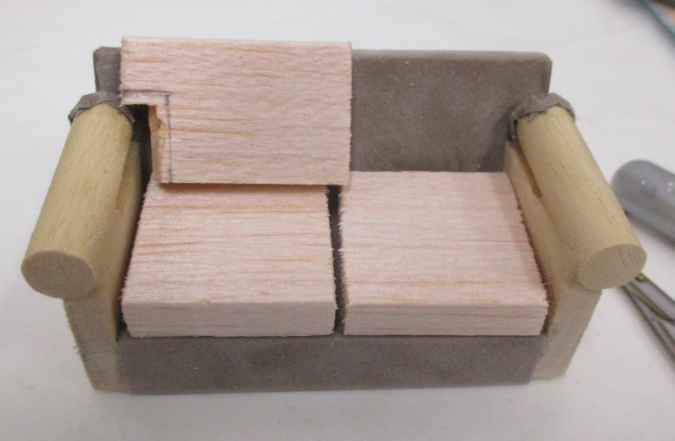
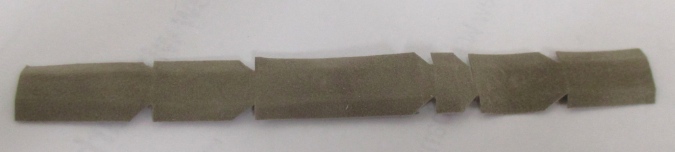
While the wood filler’s drying, you can cut out your cushions. These are made from the 1″ x 1/4″ balsa. For the loveseat, cut the seat cushions 1″ wide and sand them down if needed. There should be a ~3/16″ gap between each cushion (that’ll be smaller once the cushions are covered).
The top cushions should start out around 1-3/8″ wide and 3/4″ tall — cut them to the appropriate width first, then cut off 1/4″ from the bottom. (This is why I like using balsa for these, it cuts soooo easily.) These should also have a 3/16″ gap between them but don’t worry about it too much yet, since you can sand them down later.
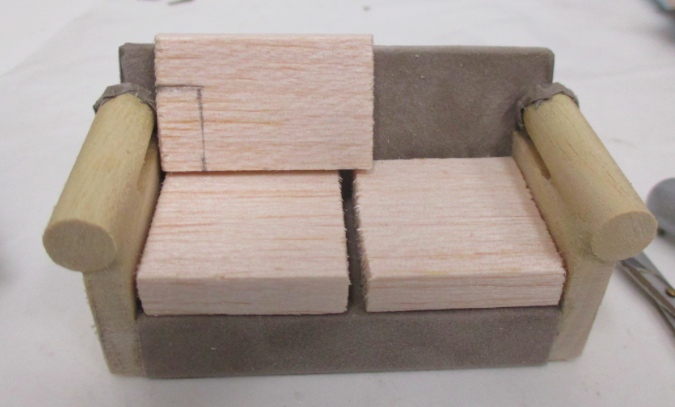
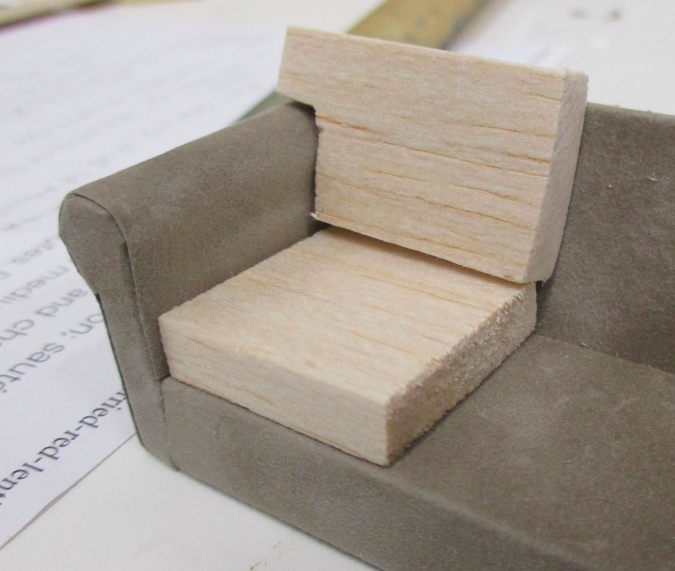
Using the armrest as a guide, draw lines on the top cushions to indicate what needs to be cut out. Roughly cut this out with a utility knife, then sand it until you have the correct fit (there’s a photo a few steps down that shows how it should look).
(If you’re doing a larger couch with three cushions, you still want a 3/16″ gap between each cushion, but I also recommend finishing the left and right cushions first and saving the center cushions until those are totally done. That way, if it’s a tight fit, you can sand down the center cushions before covering them.)
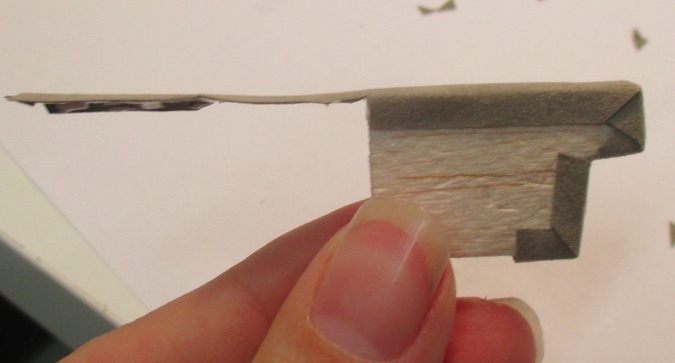
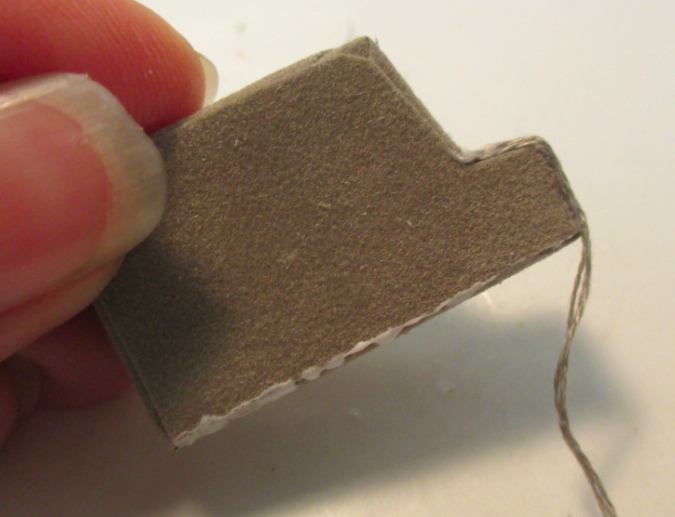
That wood filler should be dry by now. Next we’ll cover the front of the armrest. Lay the couch arm-down on the scrapbook paper and draw a line around it.
It should look like this. The part where the line stops will be flush against the front edge of the couch. The rest should be cut with some excess so you can make some more of those foldy tabs.
Glue that sucker on.
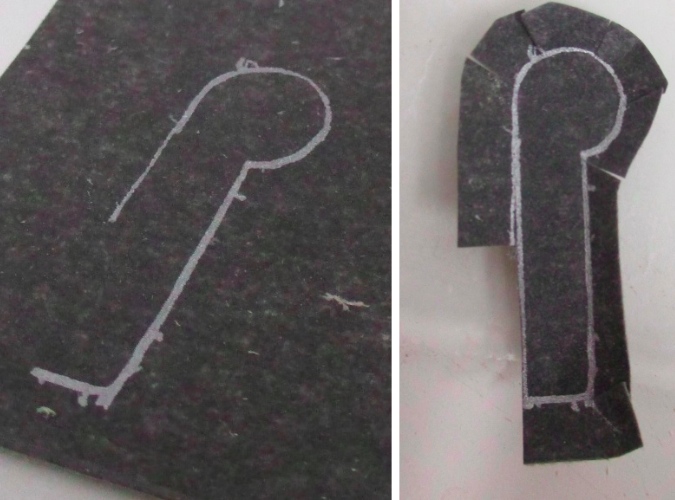
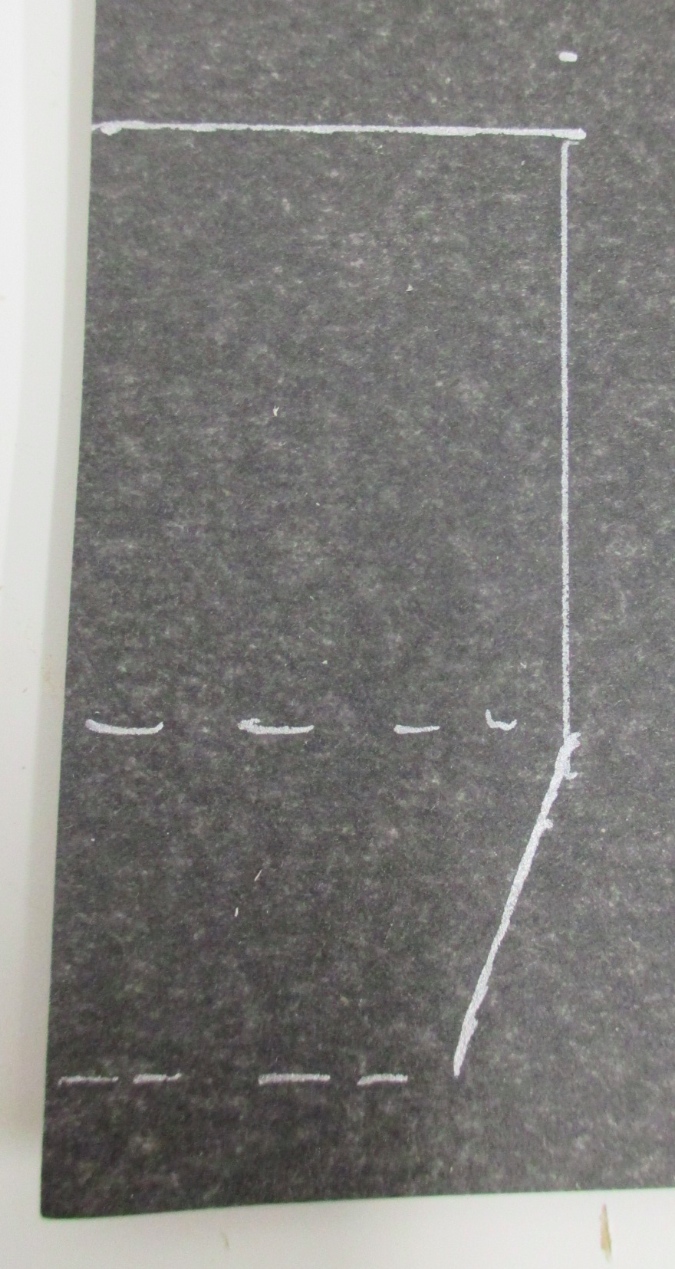
Finally you’ll cover the rest of the armrest. Here’s where the arm template you made earlier comes in handy. Trace the template onto the scrapbook paper with a little excess at the bottom. (That’s the *only* excess on this piece — the rest is going to be flush with the edges of the armrest.) To the top of the template area, add enough to extend over the armrest and meet up with the seat of the couch. (On the paper below, the dotted lines indicate folds. I cut along the solid lines.)
I cut this piece too long intentionally and folded it over the armrest to figure out where it needs to end… easier than trying to calculate the exact length of the armrest.
Trim away any excess until it looks like this.
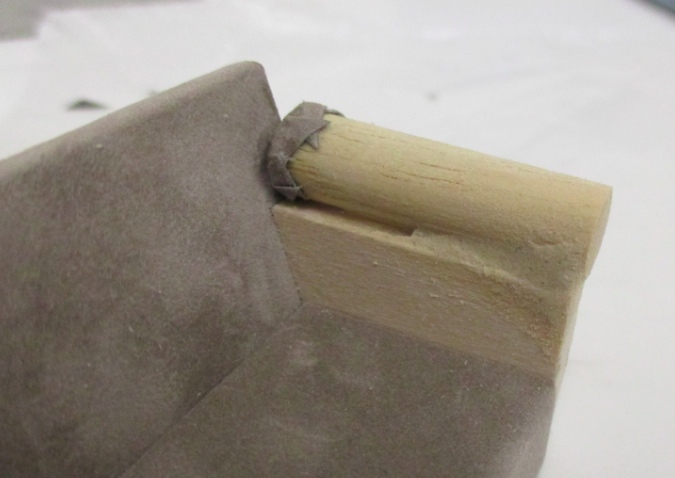
You’ll need to cut it at an angle to account for the angled arm. I cut way too much on this one…
Luckily it’ll be covered up by cushions.
I did a better job on this side.

5) Cushions
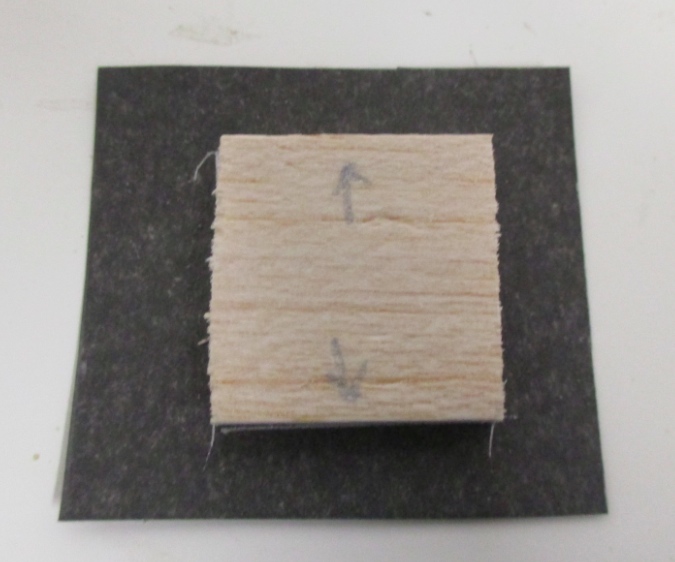
Almost done! Here’s a seat cushion. I drew arrows on it so I could remember which ends face in/out. Cut a piece of paper with enough excess on all sides to fold over the edges.
Time for some crazy origami! I don’t even know how to describe this one. You should have a good idea of how this fold / tab thing works by now. The trick I found after doing a few of these is that if you don’t want any visible seams on the front of your cushion, you should create tabs that are visible on the *sides* of the cushions (which will be hidden when they’re in place). That’s where the arrows come in handy. (They’re still pointing to the front and back of the cushion, even though this picture is rotated 90-degrees from the cushion picture above.)
This follows from the picture above — my thumb is on the front of the cushion. The long tabs fold over the sides of the cushion. Cutting 45-degree angles into the corners of the side flaps helps minimize the bulk underneath the cushion.
With the tabs visible on the sides, the front looks nice and smooth.
And now we pipe! I used 3 strands of 6-strand DMC floss for this. It’s a good thickness, but the downside of separating out the strands is that they want to come untwisted after you’ve removed some of them. Use a toothpick to apply a small line of glue to the top edge of a seat cushion and glue the thread around the edge. If the strands separate, retwist them as you make your way around the cushion.
When the top’s done, repeat on the bottom edge. Just like with the scrapbook paper tabs, you want the tails to meet up on a side and not the front.
The back cushions are done a little differently than the seats. Start by cutting a 1/2″ strip of paper that’s long enough to wrap around the edge of the cushion. I used the paper cutter but it’s not a requirement if you don’t have one.

You want to fold the edges over, then fold the strip at each corner of the cushion, creating tabs so you can neatly glue the strip of paper around the edge of the cushion.
The paper meets up with itself in the lower corner, which will be very hard to see when the cushion’s in place. The 45-degree cutouts in the tabs again help reduce bulk.
Next lay the cushion down on a piece of paper and trace around it.

You’ll end up with something like this. Trim the edges away until it fits cleanly without any paper hanging over the edge, but also without any wood showing.
For these, the piping covers up the seam where the front paper overlaps the edge paper. Start in the “armpit” of the cushion so your threads will meet up in the least visible spot. When you’re finished piping the front, flip over the cushion and do the back.
With that, the cushions are complete! But that couch is looking a bit unfinished…
6) Piping
You can actually do this part before you do the cushions, if you want. I’m just putting it at the end because that’s when I did it and I didn’t want to post the pictures out of order.
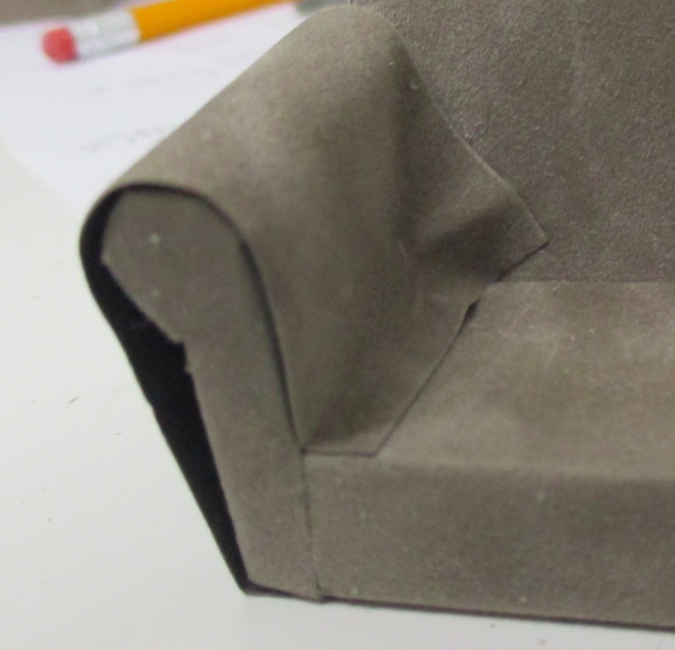
Pipe around the front of the armrest, again using a toothpick to spread the glue and three strands of DMC (or whatever equivalent thread you’re using). The piping covers the seam where the arm paper meets the base paper and hides the points on the round part of the armrest.
On the back armrests, I started the glue line halfway around the hump… any farther around and I would have gotten glue on the couch. With the cushions in you won’t see that it’s only partially piped.
The piping runs down the seam where the paper covering the back and arm meet.
Glue the tails of the thread underneath the couch.
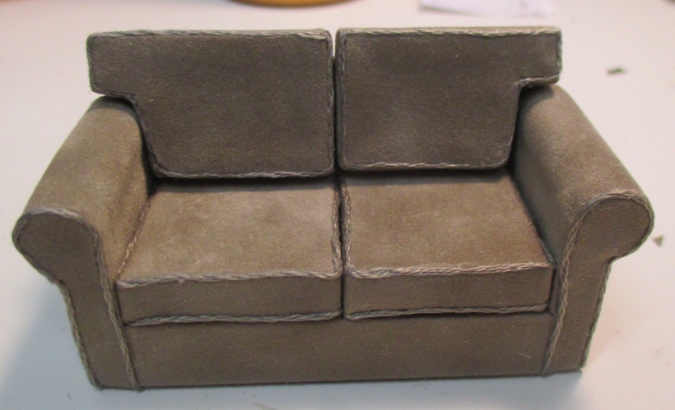
Done! I didn’t glue my cushions in place, but they keep falling over when my hand bumps the couches, so I might.
Here are my two couches with bonus throw pillows. I’m not a big fan of sewing so this might be the one and only time I make these, but they turned out okay. I followed a tutorial from 1 Inch Minis. They’re 3/4″ square and have DMC around the edge (all 6 strands, not 3 like I did on the couch). They’re stuffed with seed beads.
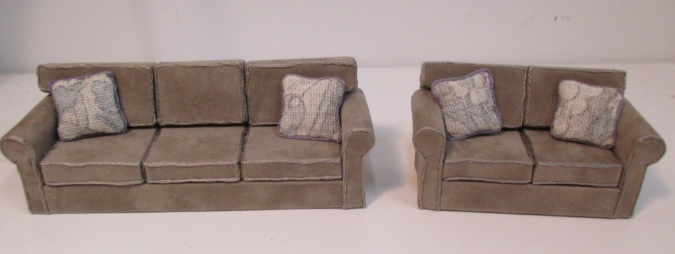
The pillow fabric is from a swatch for the Italian 19th C. Medallion bedding collection I ordered a while ago from Restoration Hardware. This particular design is no longer available, but check out their swatches — a lot are free, and they’re great for mini projects!
Alternate Lengths for Larger Couch
You need the same pieces of wood as for the loveseat, but instead cut them to these lengths:
- Back pieces: 4″
- Base: 3-5/8″
- Arms: 1-1/8″, with one side angled — cut two
- Armrests: 1-1/8″ — cut two
- Seat cushions: 1-1/16″ — cut three
- Back cushions (sides): 1-3/8″ — cut two
- Back cushion (center): 1-1/16″
 Emily is a freelance writer, miniaturist, and adventure game enthusiast.


WOW!!! Those look fantastic. Your descriptions and directions are fabulous Your followers are going to be overwhelmed.
Love,
Dad
Thanks! It’s not as complicated as it seems. I hope some people will try it.
Nice! Will have to try this! I’ve got that same bookcase. Just put it on my blog, Candid Canine.
Thanks for the shout out on your blog! Funny about the bookcase, I assumed it was a scratch build, but I’ve also seen one like it on eBay. Maybe it was originally a kit?